Keyframes
Keyframes are the primary function of Take that allows users to animate camera paths and effect transitions, assigning starting and ending points which then becomes the video sequence once played.

- A keyframe is effectively a point on the timeline at which users set the values for the camera and effects. Adding additional keyframes will then cause the camera and effects to move between these two values as time passes, this is known as “Interpolation”, see the interpolation types for more information.
- There always needs to be at least one keyframe in the timeline, the last keyframe will not allow you to alter its interpolation types. This is because the final keyframe is the end position of the camera, or effect changes, and so has nothing to interpolate to.
- If a user wishes to move an existing keyframe you can simply click and drag it to the new position. This will reorder the keyframes however the users wish.

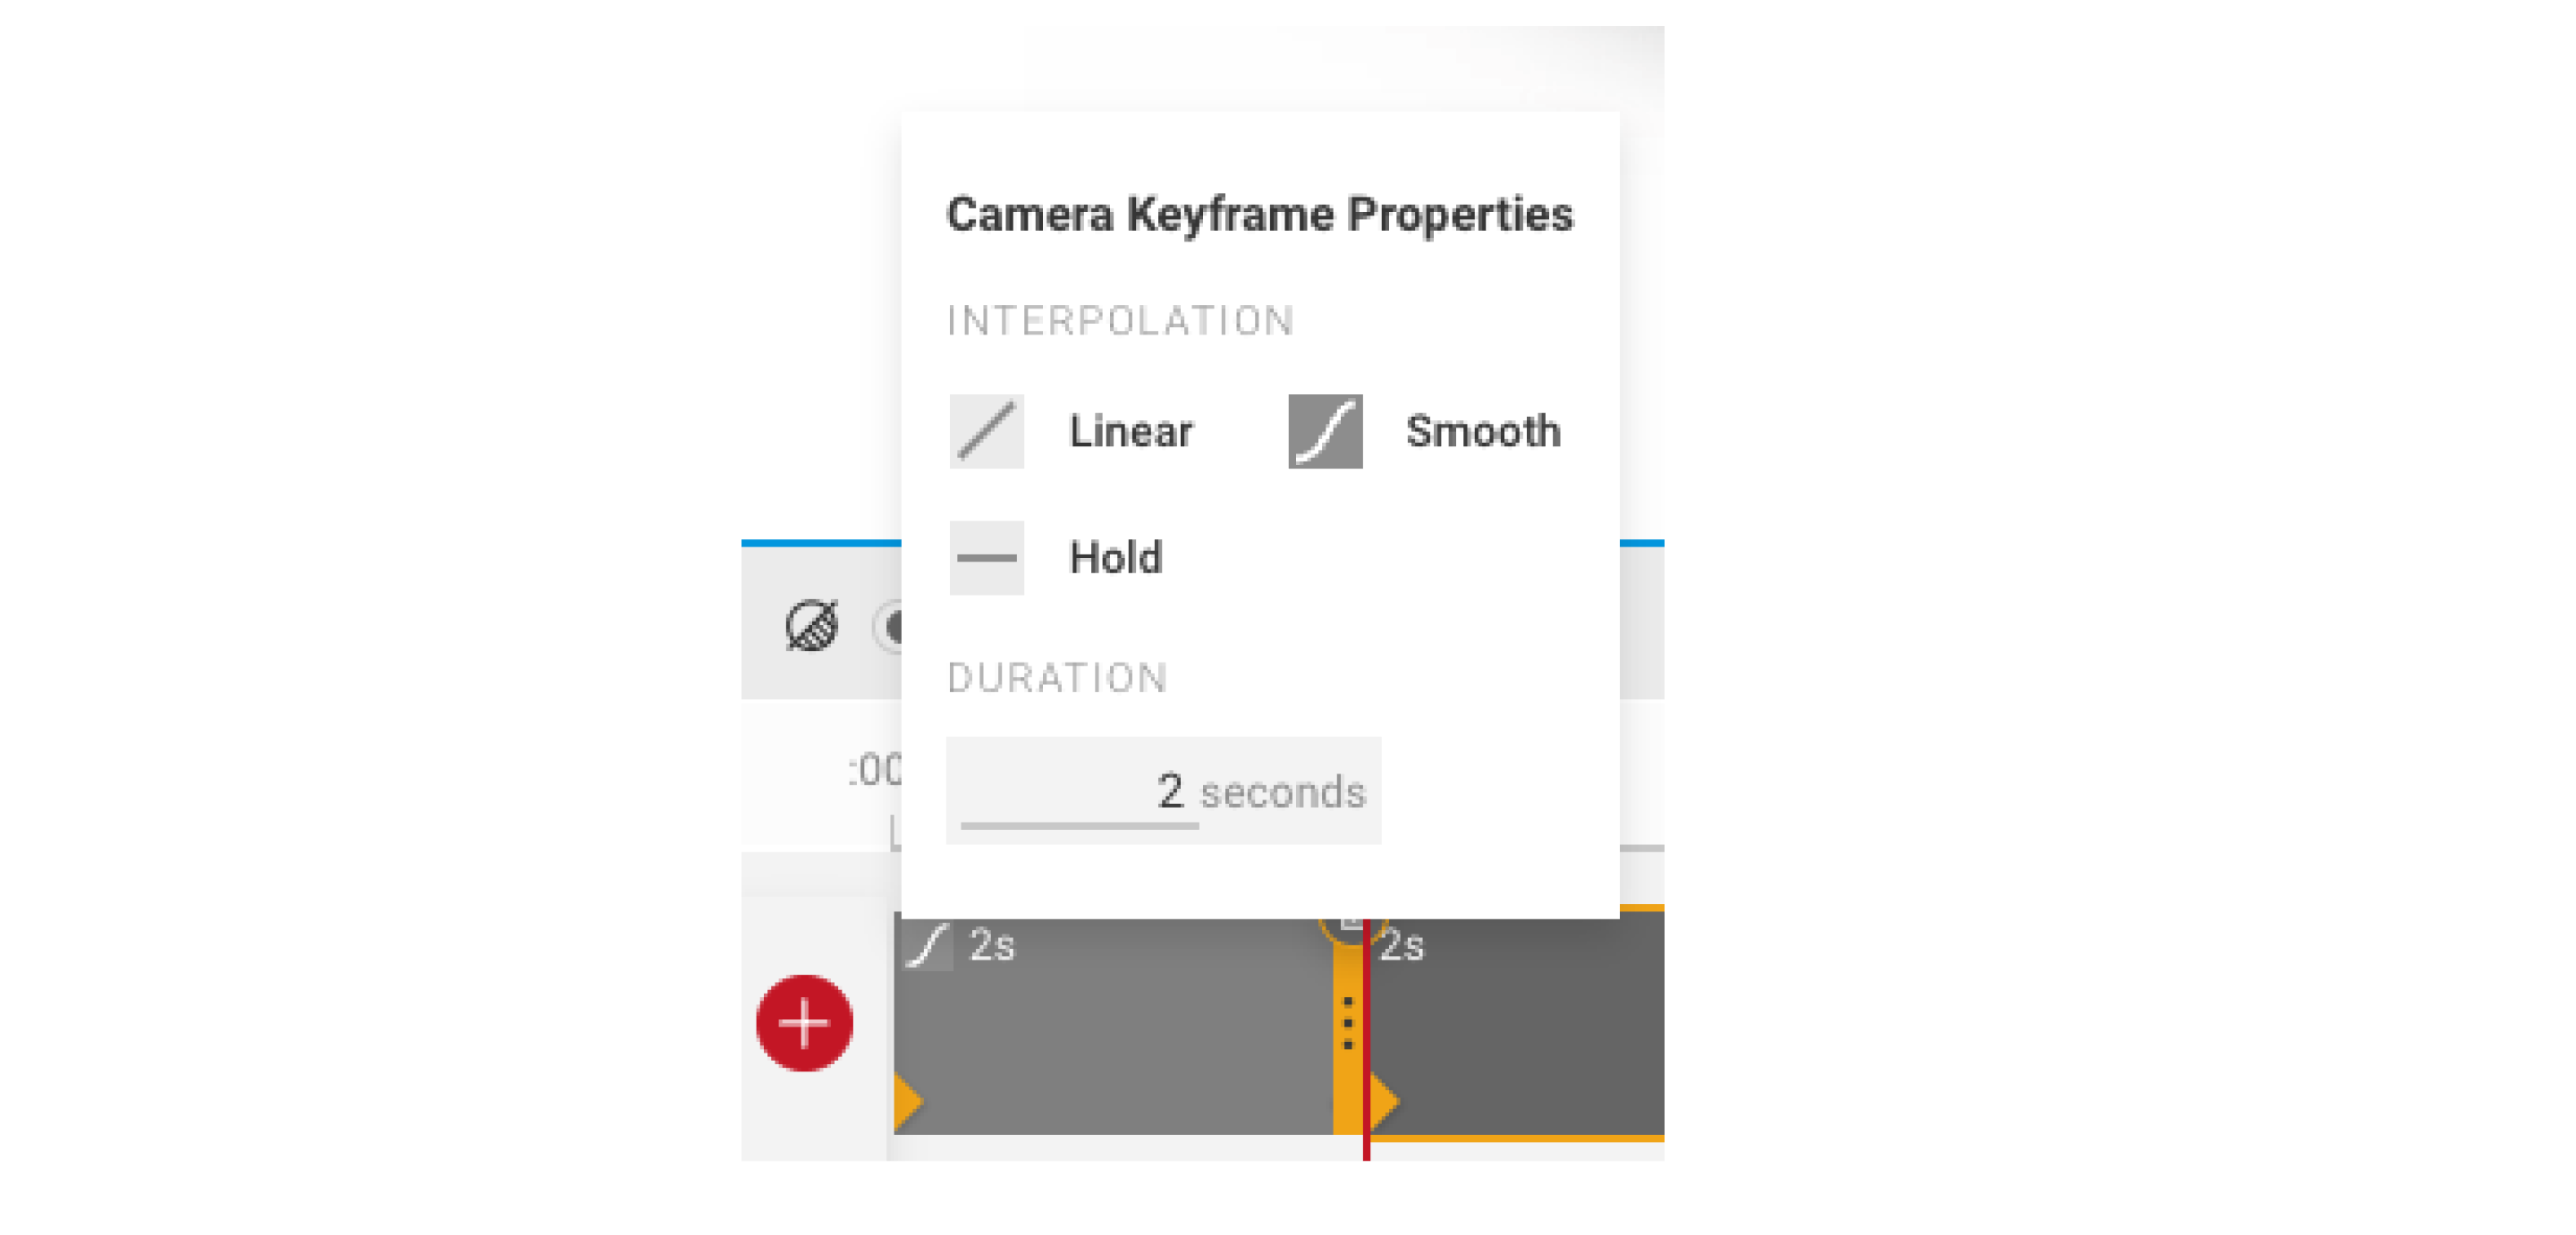
- You can also extend or shorten the time of the keyframe by either selecting the right hand boarder and dragging it to the new position, or you can select the keyframe properties menu in the top corner, and enter a new time value in the “duration” box.
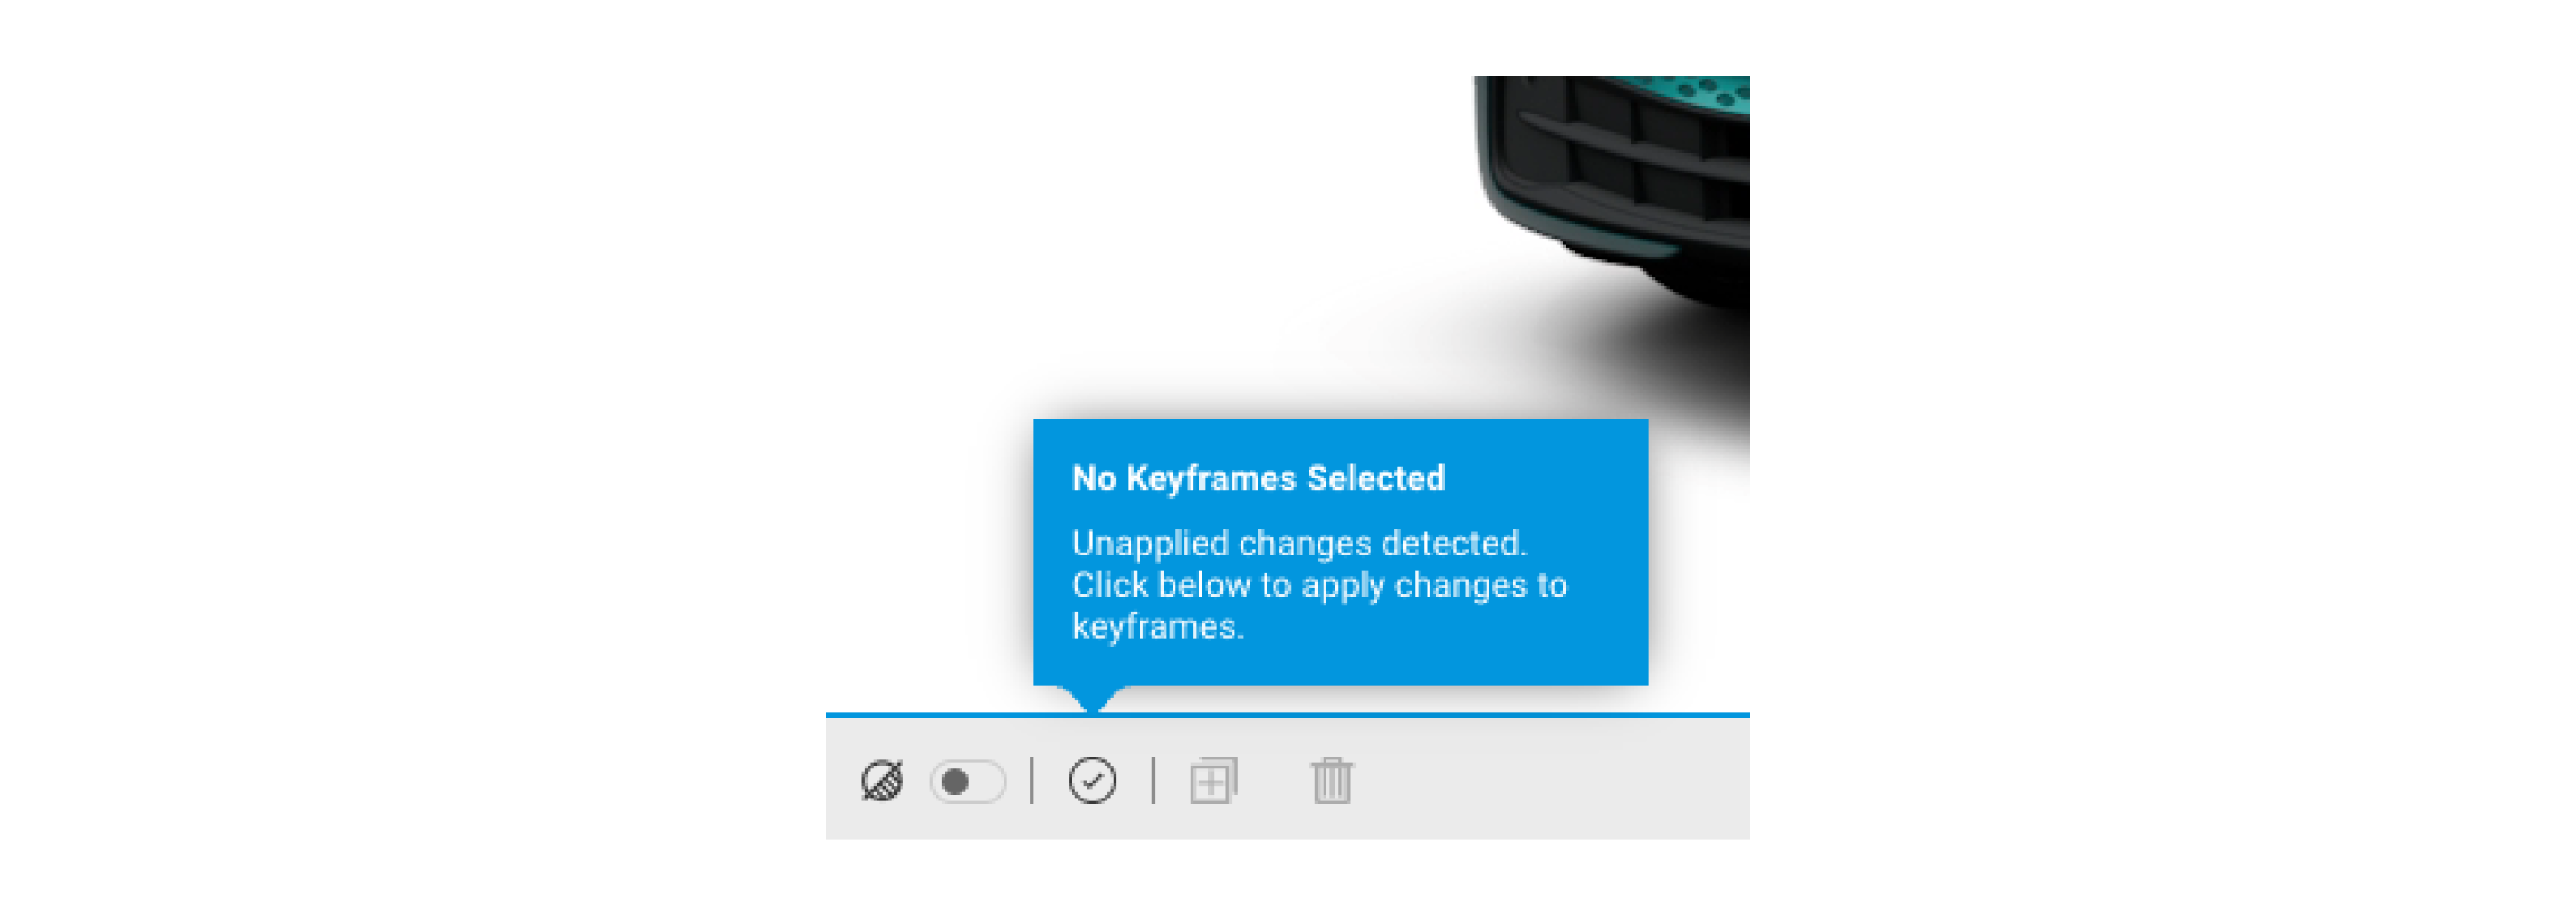
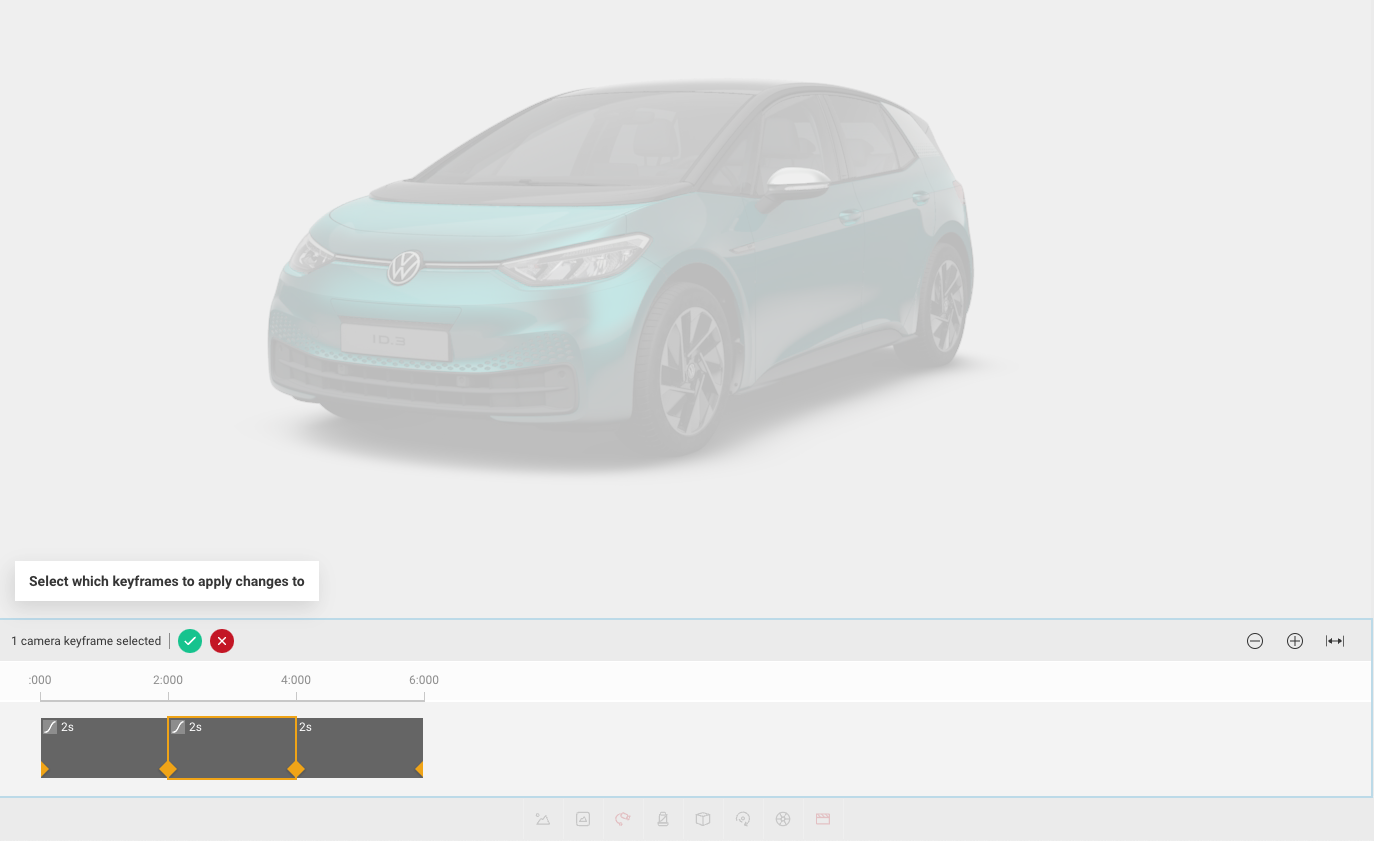
- When editing keyframe values, you should be aware of which keyframe you have selected (highlighted). If you do not have any highlighted then a tooltip will appear, and by clicking the “tick” icon you can choose which keyframe to apply the adjusted values to.
- Users can also select multiple keyframes here if they wish to.
Adding Keyframes
- The first step to creating your new sequence is to add new keyframes. To add a keyframe you need to click the [ + ] button next to the relevant timeline. This will then create a new keyframe at the end of the keyframes you currently have, and the playhead will jump to and highlight this new keyframe. Newly added keyframes will copy the same camera data as the one highlighted prior to selecting “add keyframe”.
- This means that any edits made to the camera positioning after adding a keyframe will automatically edit the new keyframe. Additionally, users can duplicate one or more existing keyframes if they want to exactly copy them.
Deleting Keyframes
- If a user wishes to remove a keyframe they can highlight it and choose the “bin” icon in the top right hand corner. This will delete the keyframe permanently. Users should be aware that as there is no “undo” option within Take, there is no way to recover a keyframe once deleted, and it would need to be remade.
- You can also delete multiple keyframes by multi-selecting them and then selecting the “bin” icon along the top of the sequence editor.
Interpolation Types
Users can select an interpolation type between keyframes. There are 3 different interpolation types:
- Smooth causes a slower and “smoother” transition in and out of keyframes.
- Linear causes the transition to remain at a set pace.
- Hold functions as a camera cut from one keyframe to another.