Configurator Bridge
Implementation of this feature is different for each OEM. For support on specific bridge implementation for your OEM, please contact your account manager.
When the configurator bridge is enabled in SpotLight, any changes made within the configurator are reflected in the SpotLight Viewport. The same model must be selected in both SpotLight and the configurator in order to work correctly.
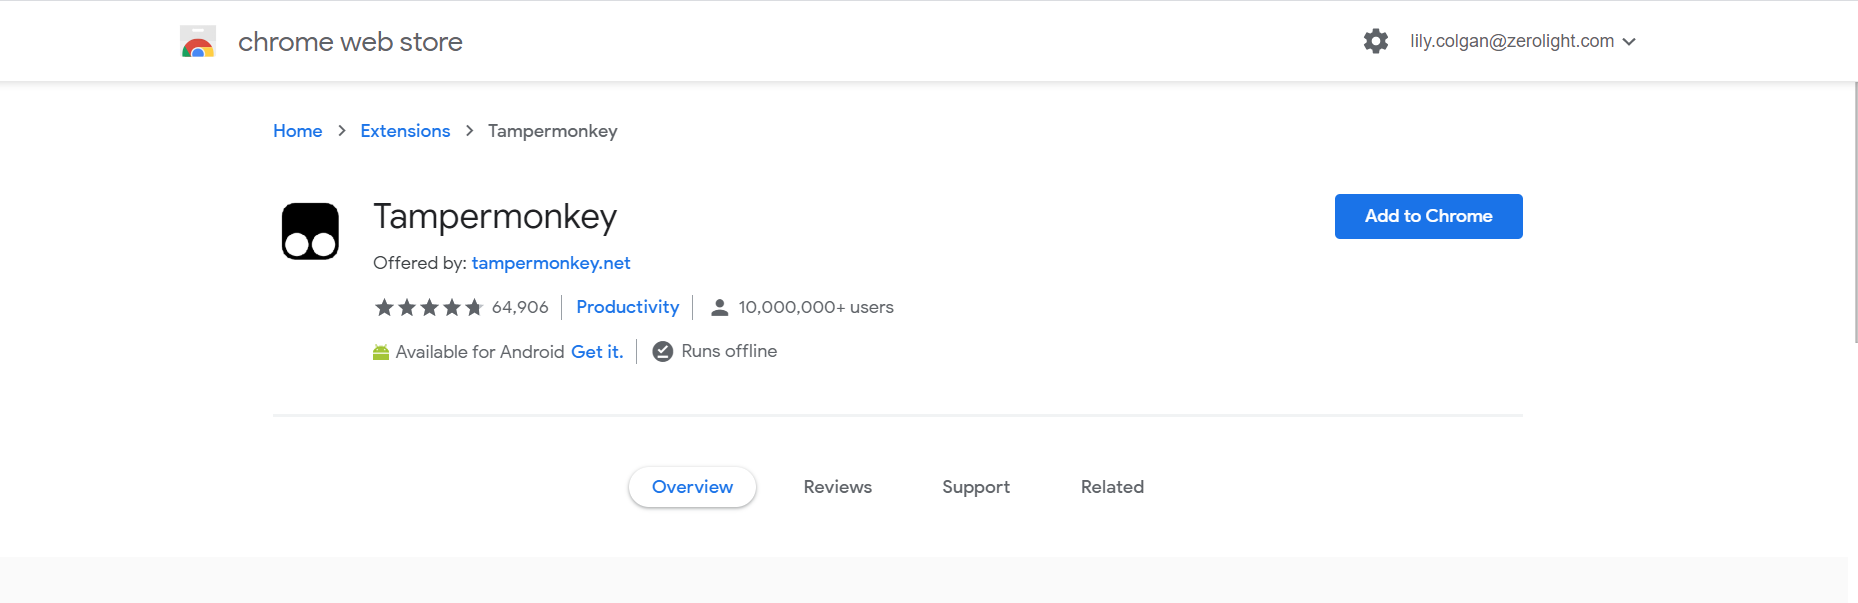
- Install TamperMonkey plugin (available on Chrome and Firefox)
Visit https://www.tampermonkey.net/ and select Download under TamperMonkey Stable.

- You'll be redirected to the web store to install the extension. Select Add to Chrome (if using Chrome)
- Once installed, you'll be redirected to the Successfully Installed page.
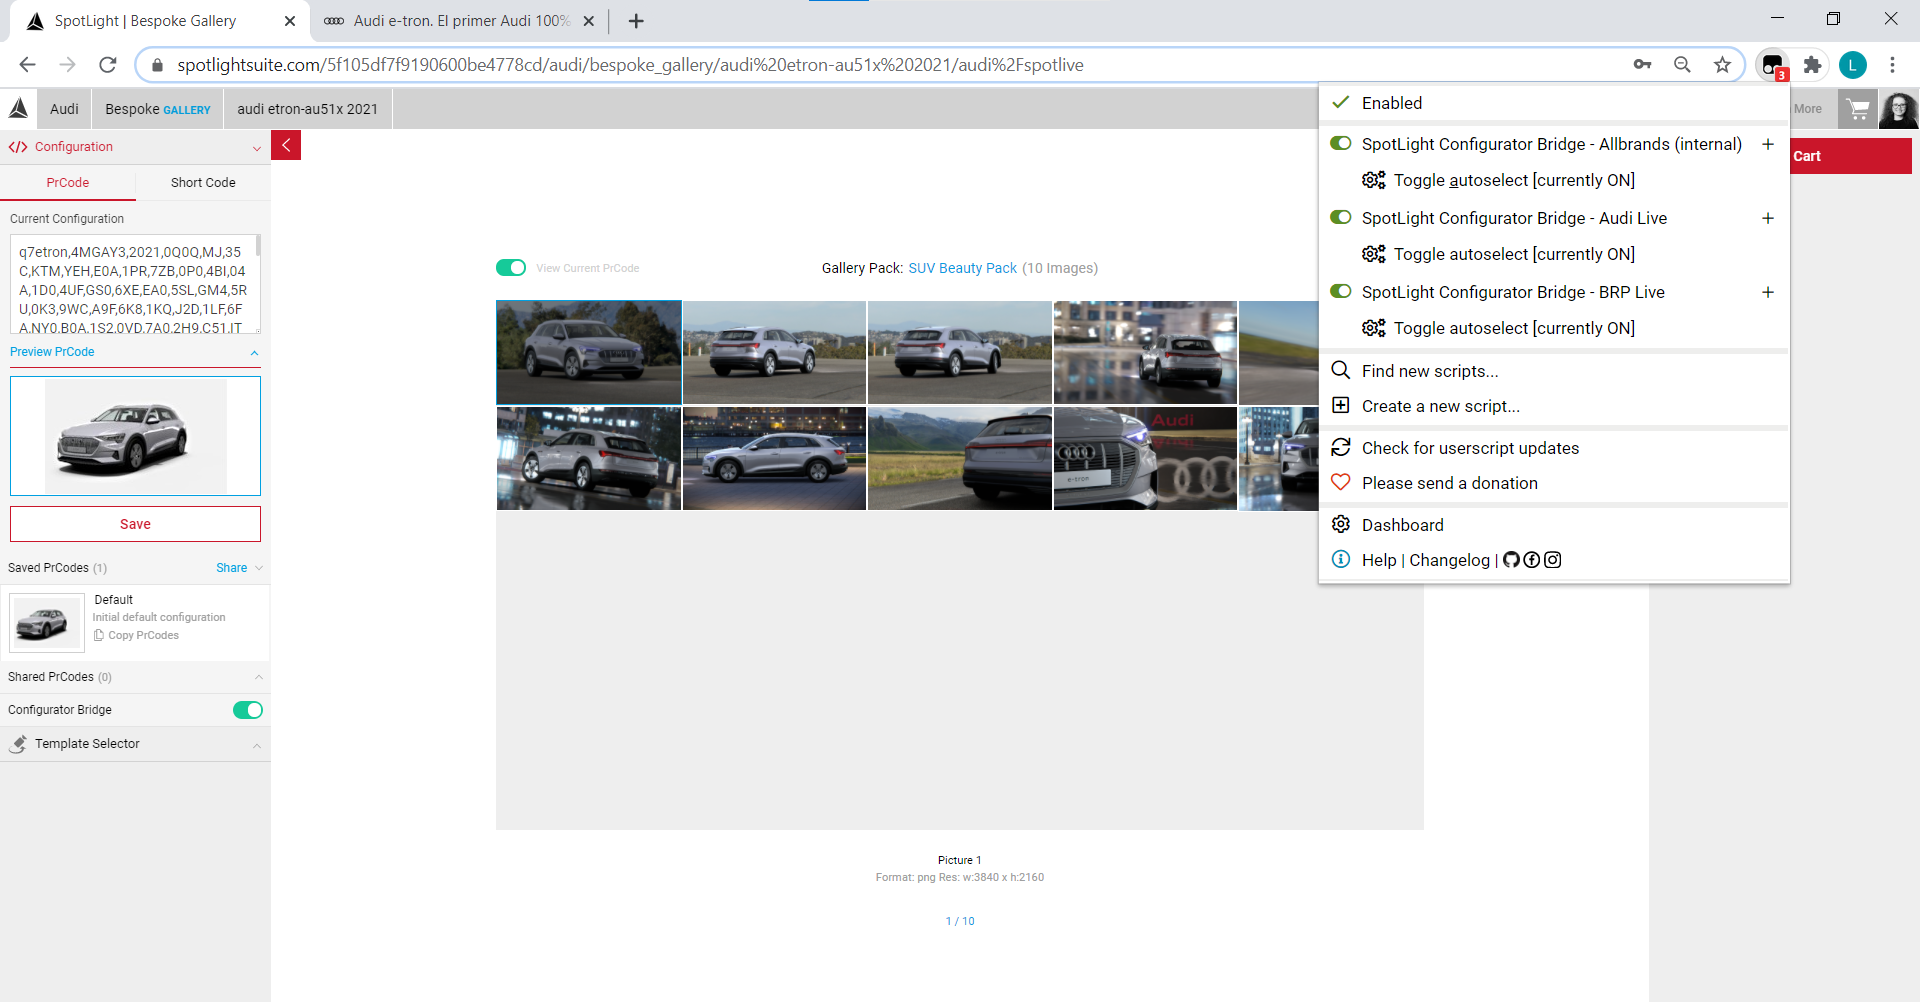
- You will then need to install a script specifically for your OEM. The script allows syncing between the remote configurator and SpotLight and must be enabled for the configurator bridge to work correctly. Please contact your account manager or support for details on how to connect your specific configurator. You may also need to update the script to a newer version from time to time.
- Launch spotlightsuite.com and the configurator in separate tabs of the same browser. Ensure you select the same car model in SpotLight and the configurator.
- Ensure the TamperMonkey scripts are active. There will be an indicator on the plugin icon in your browser. Select the icon, the dropdown menu should reveal the Enabled slider if active.
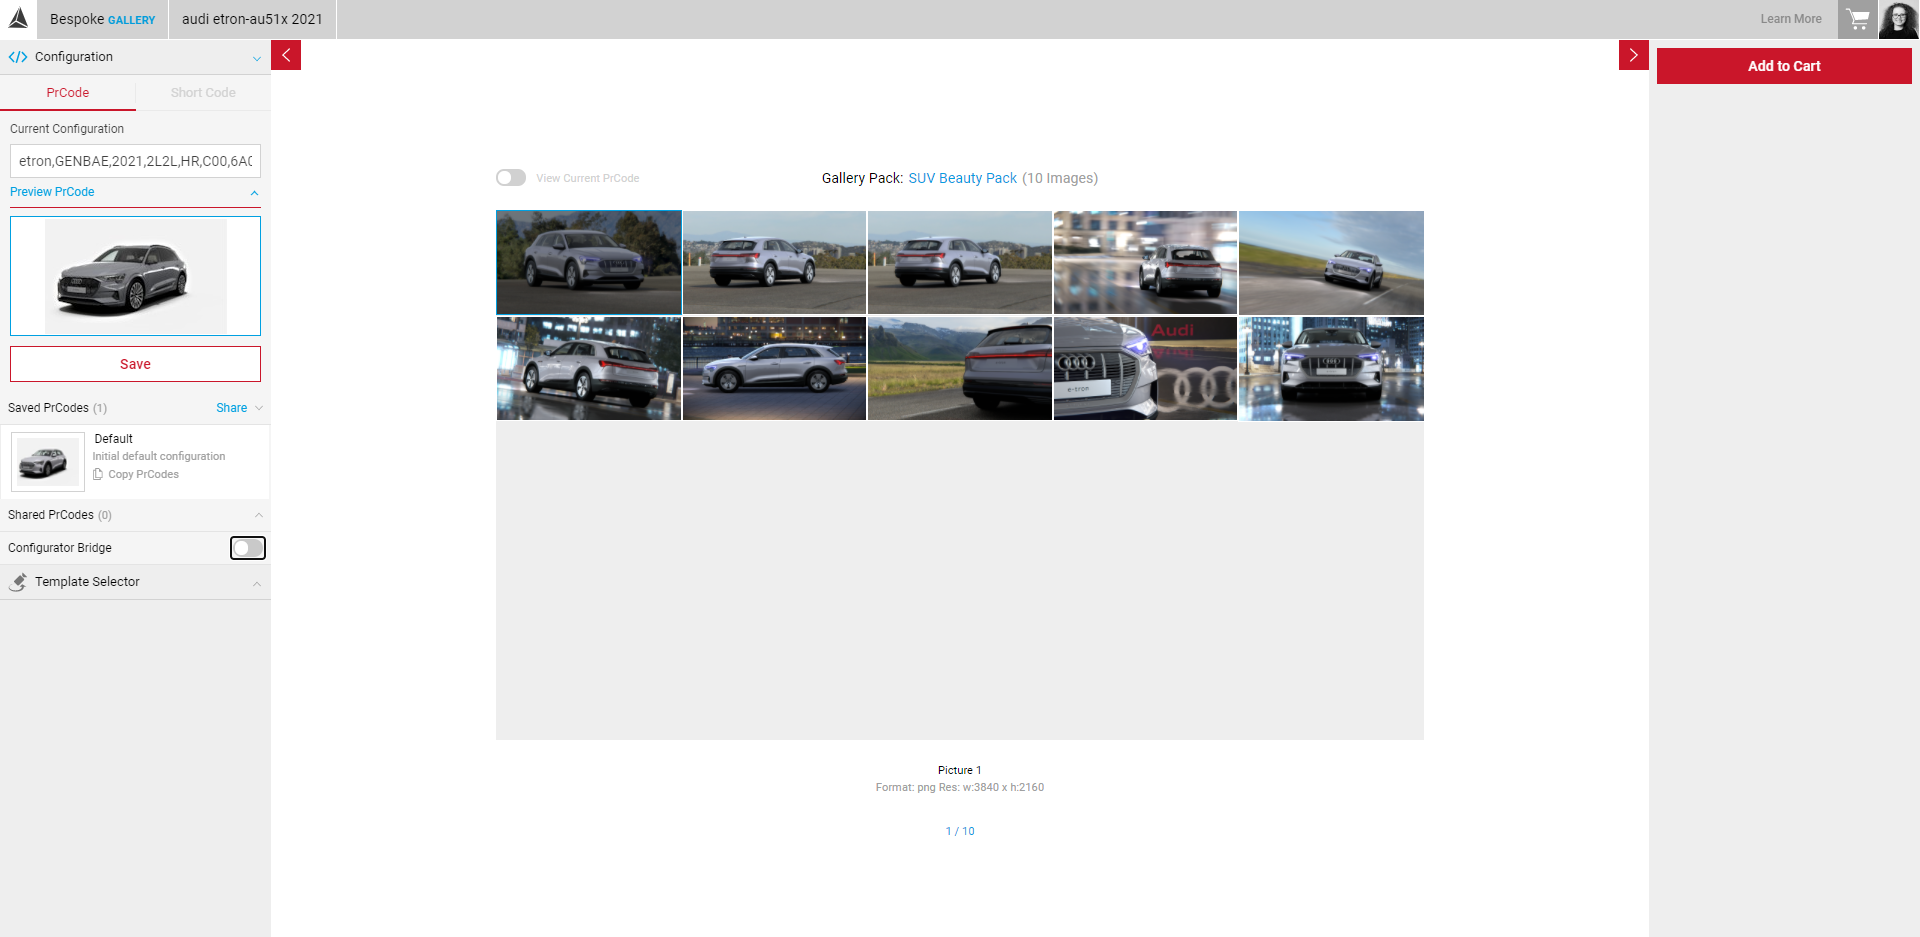
- In SpotLight, select the Configuration tab to reveal the Configurator Bridge slider.
- Enable the slider. This should launch a notification from all detected configurators.
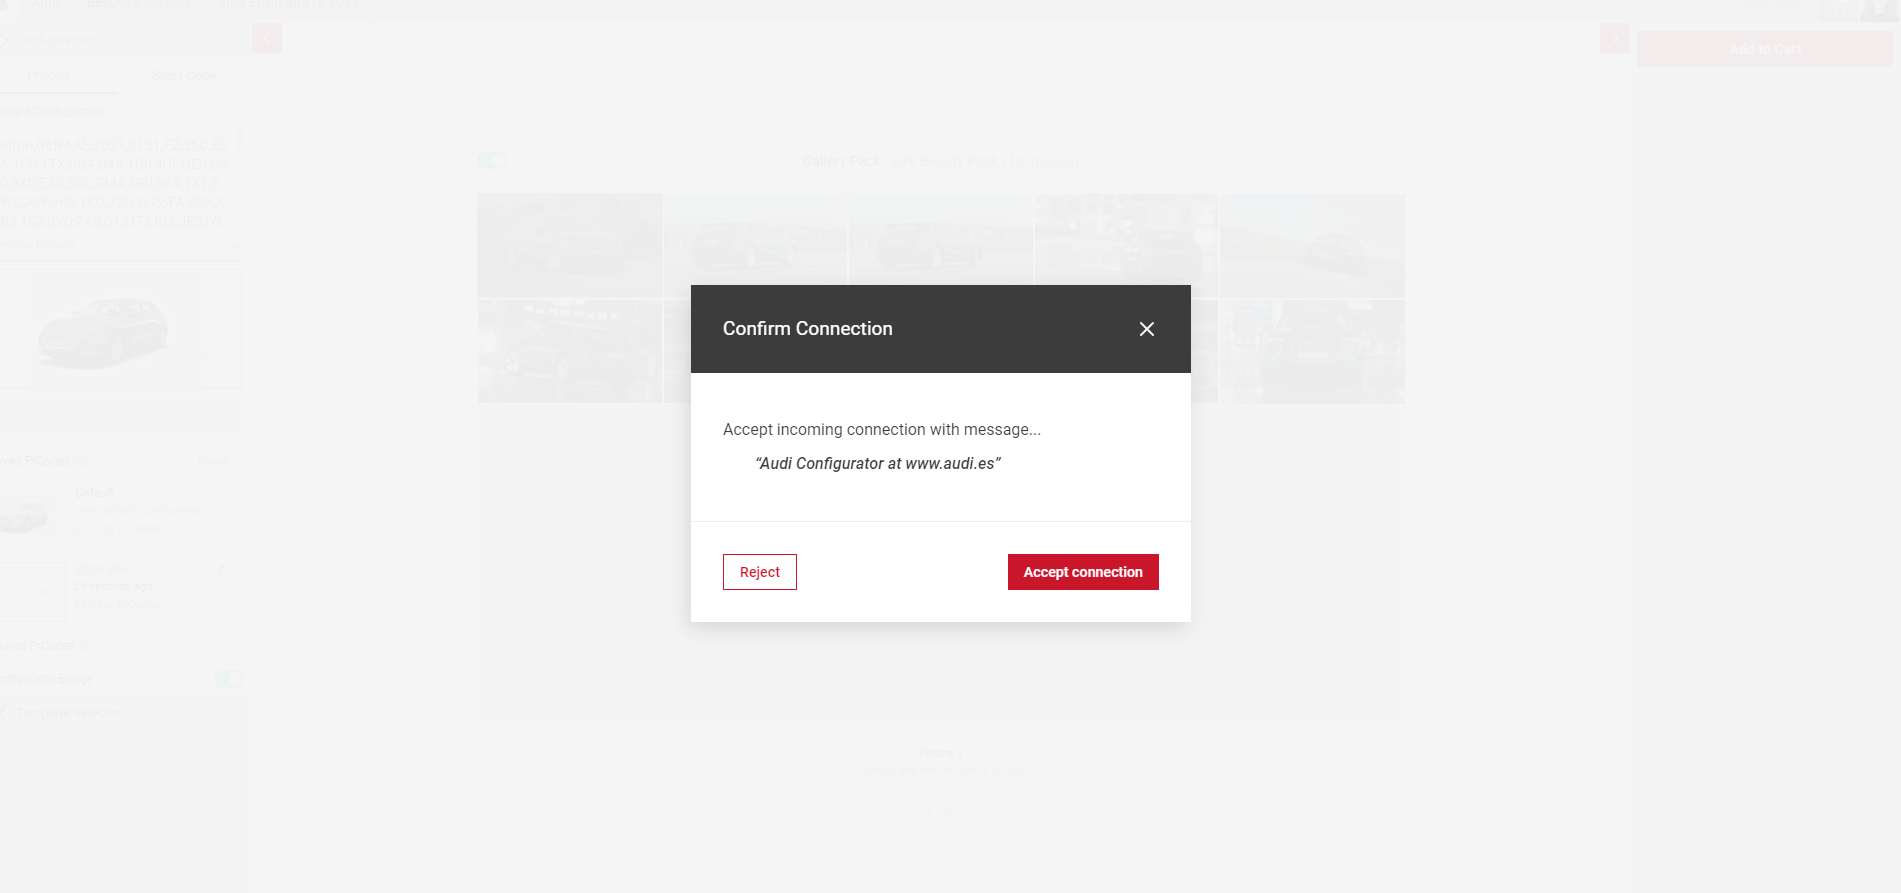
- Select Accept Connection. The Configurator Bridge slider will change to green once activated. If you don't see the message below when you've enabled the slider, check the script is running on both the configurator and SpotLight.
Note: If the message doesn't appear after you've installed a new/updated script, you may have to close SpotLight and the configurator and refresh for the connection to be received.
- Open your configurator, if successful you should see the Connected notification with the SpotLight logo in the top of your screen. Every time you make a new selection you should see the notification change to Syncing briefly.
- In the configurator, you can start creating your configuration. Make selections on exterior colours, interior settings and any others until you're happy with your configuration. Any new selection you make will update in the SpotLight stream automatically.
- You can switch to a different template using the Template Selector panel.
Note: If you remain active on the configurator but no new selection is made, the SpotLight stream could disconnect. After a two minute period of inactivity, the stream will disconnect. There is a warning on screen before the timeout – which prompts you to become active to prevent the disconnection. The two minute timer will restart as soon as the mouse is moved over the screen. Find out more about time-out periods.
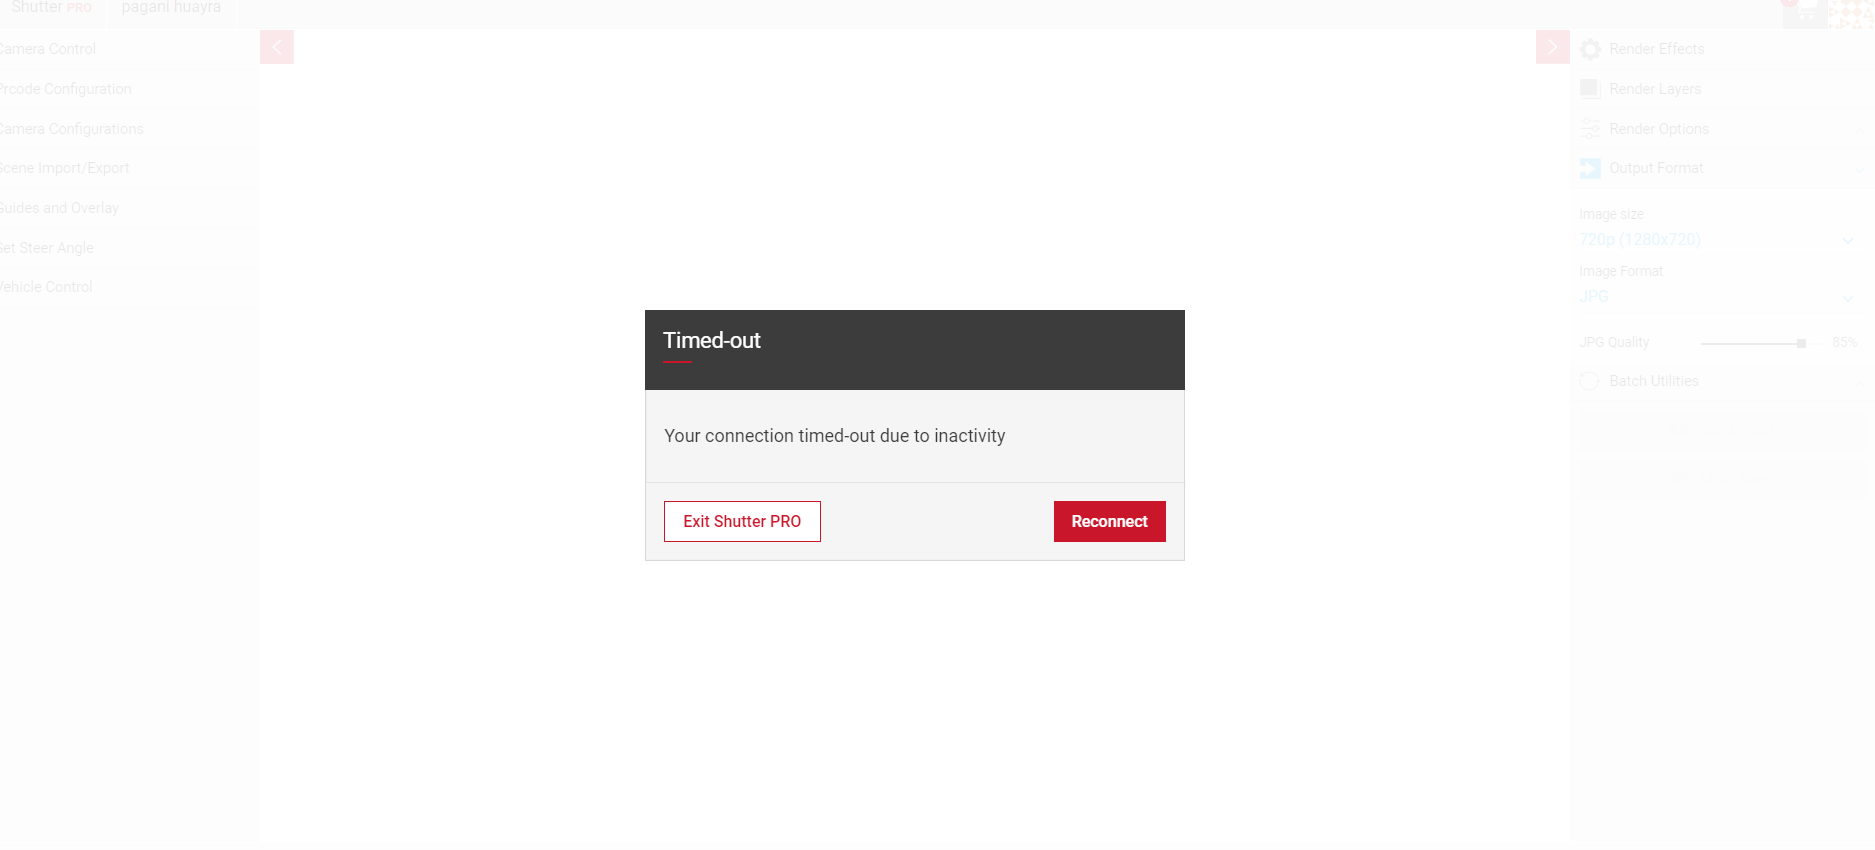
If you select Reconnect the stream will reconnect with the latest configuration selected in the configurator, however you may lose other settings you have configured in SpotLight such as camera position, animations or render effects.
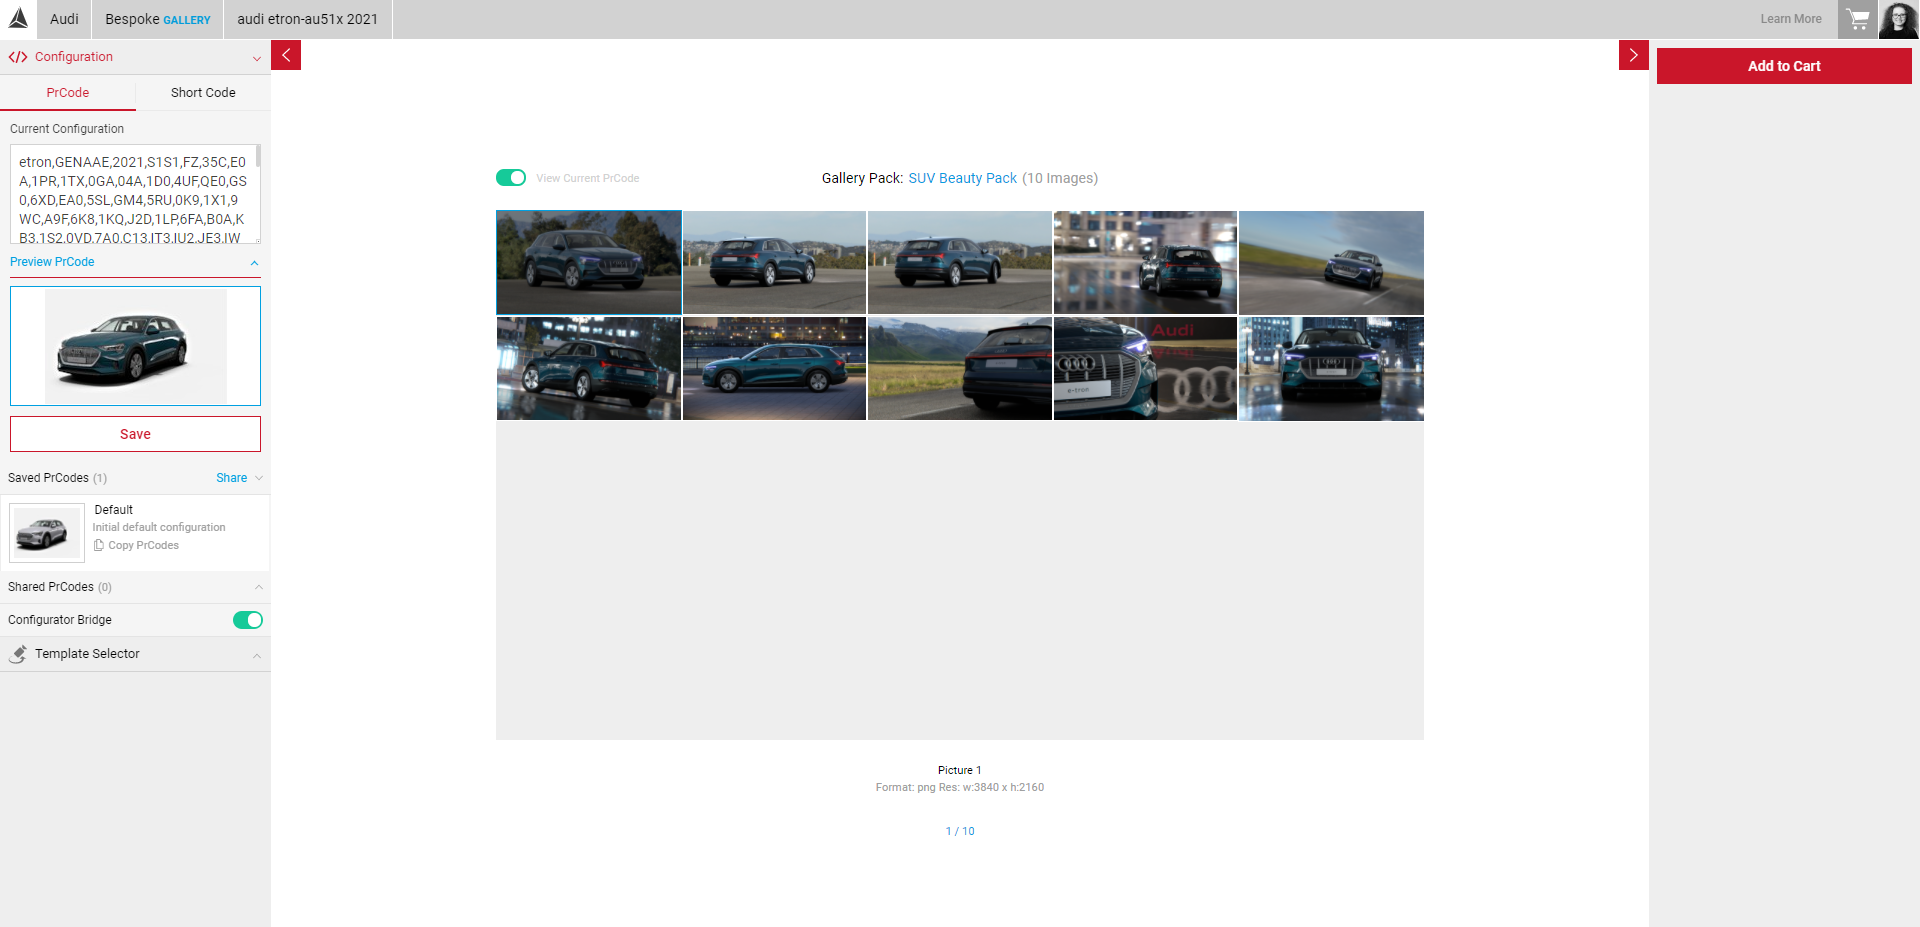
Saving Your Configuration
Once you've made selections you're happy with, you can save and share the configuration with users in your team in SpotLight. When a new configuration is selected, the PR Code string will also update with the relevant codes and the Save button will become active.
- When you're happy with the configuration from the configurator, in SpotLight select the Configuration panel and click Save.
- Your new saved configuration will appear at the bottom of your Saved PrCodes list. Click the edit icon next to the [unnamed] title to change the name.
Sharing Your Configuration
You can also share your saved PrCodes with individual users or teams you're a member of. Click on the dotted icon to reveal the share button.
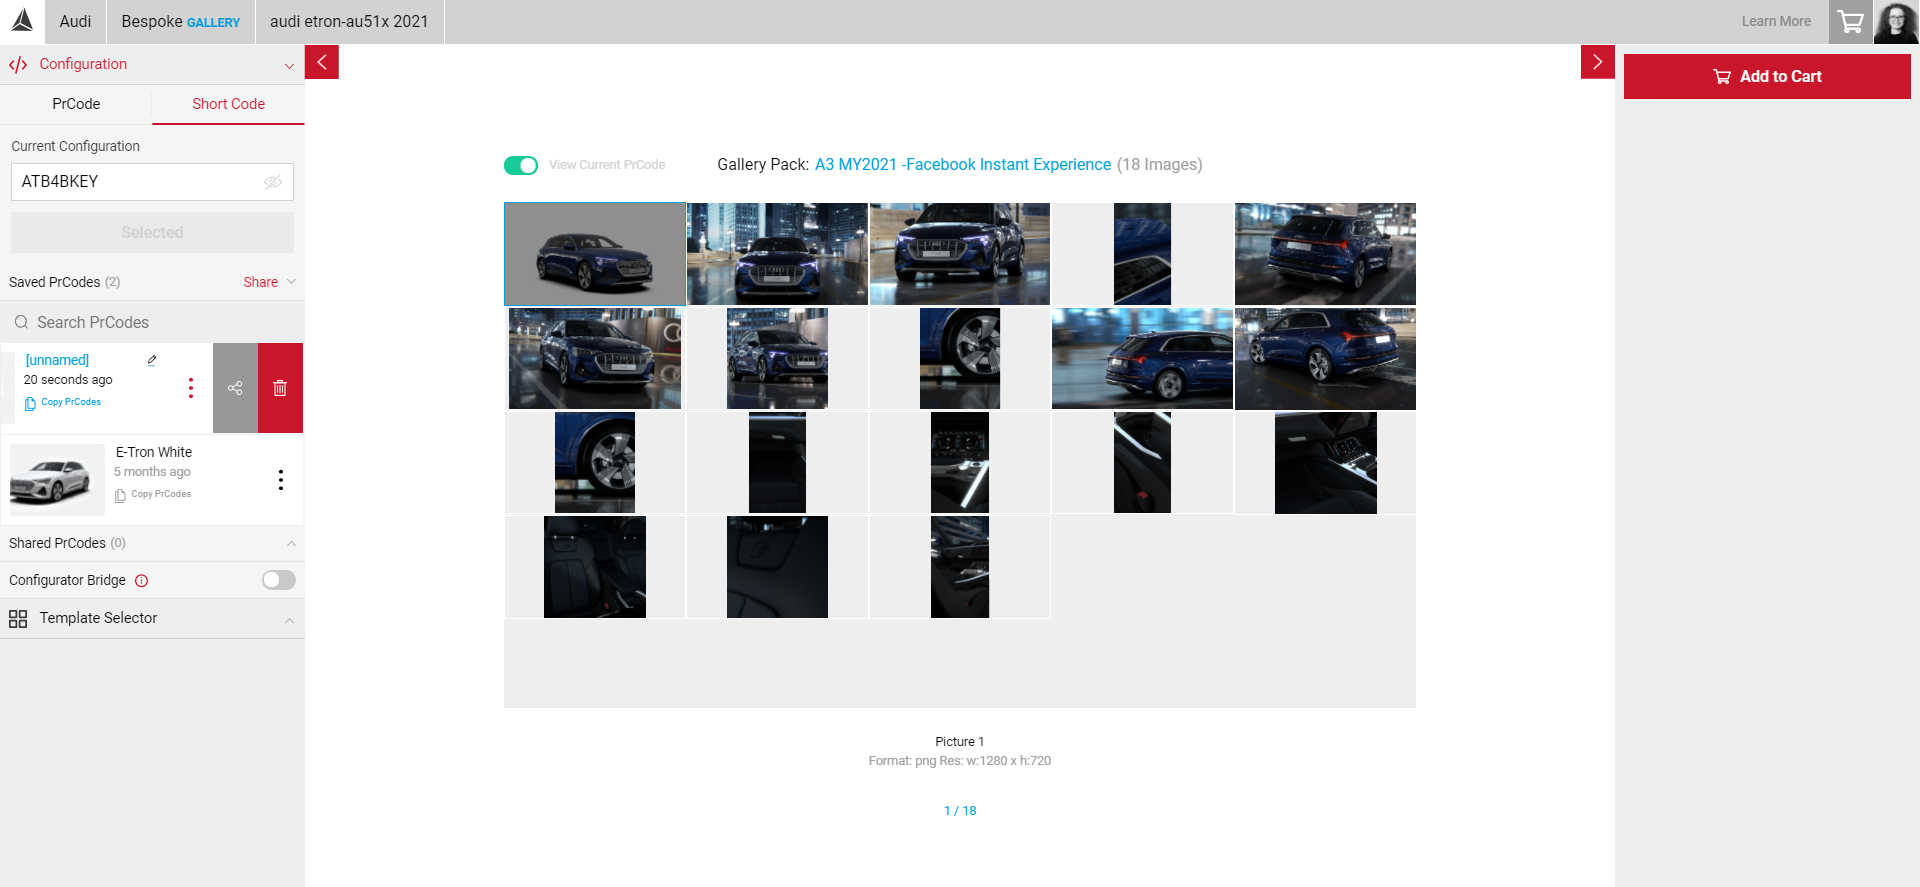
- Click the Share button next to Saved PrCodes. The Share Cameras window will pop out.
- Select the PrCodes you want to share, then select Next. Select which Teams or Users to share your PrCodes with. You can share to all users in a team, or select specific users to share your configurations with. You can select multiple teams and users at one time.
- Click Next to see a confirmation summary of the PrCodes you're sharing.
- The new PrCode will remain in your Saved PrCodes list but will appear under Shared PrCodes for other users in your team.
Your Shared PrCodes list contains PrCodes that have been shared with you, not ones you have shared.
Rendering Your Images
Now you have saved your configuration, you can start export your gallery template. Visit Exporting Your Images to find out more.