Render and Post Processing Effects
Render Effects is an advance post-processing feature in Sphere, which can be used in producing high quality 360 images.
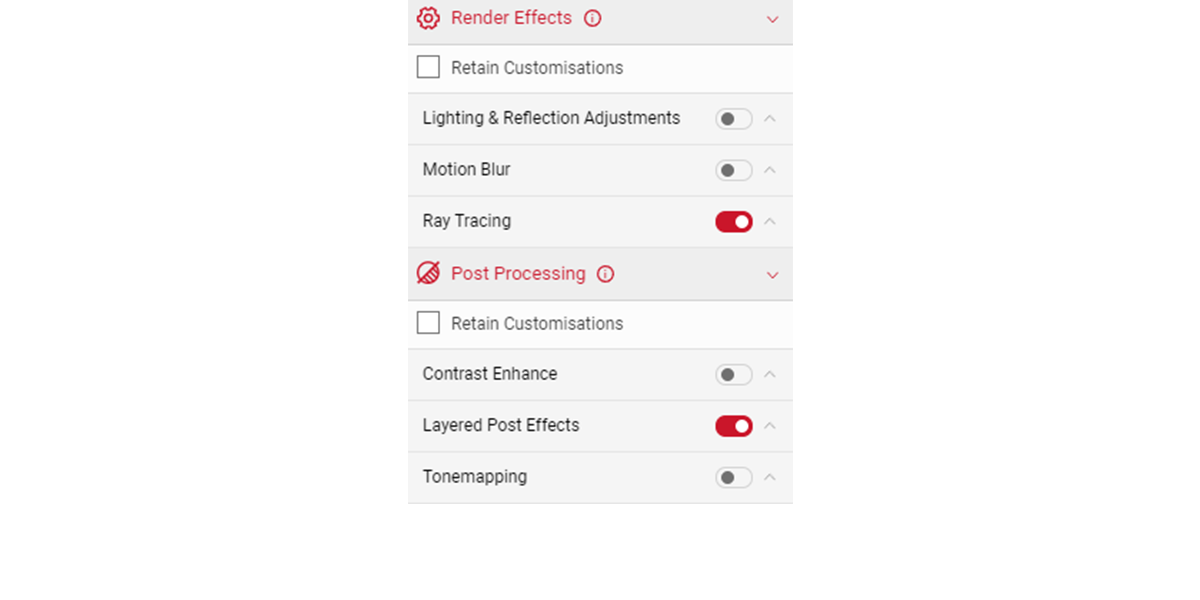
In the Output Menu, click on the Render Effects tab and the drop down menu will show the Render Effects and Post Processing features. It is possible to produce images in Spotlight without using Render Effects, although using Render Effects enhances and adds advanced effects on an image. Render Effects configurations can be transferred to other apps such as Shutter and Sphere, but won’t work on apps like Video and Gallery.
Retain Customisations
Located just under the Render Effects tab, tick this option to prevent from losing your individual render effects feature settings.
- Cameras and environments can have their own default render effects, if Retain Customisations is unselected, your settings may change when you select a new camera or environment.
- If selected, your Render Effects will save. Some cameras don't support some Render Effects, if this is the case the settings will deactivate.
- Flycam will always keep your Render Effects if Retain Customisations is selected or unselected.
Lighting and Reflection Adjustments
Enable the Lighting & Reflection Adjustment feature by clicking on the slider button. The slider button turns red once activated.
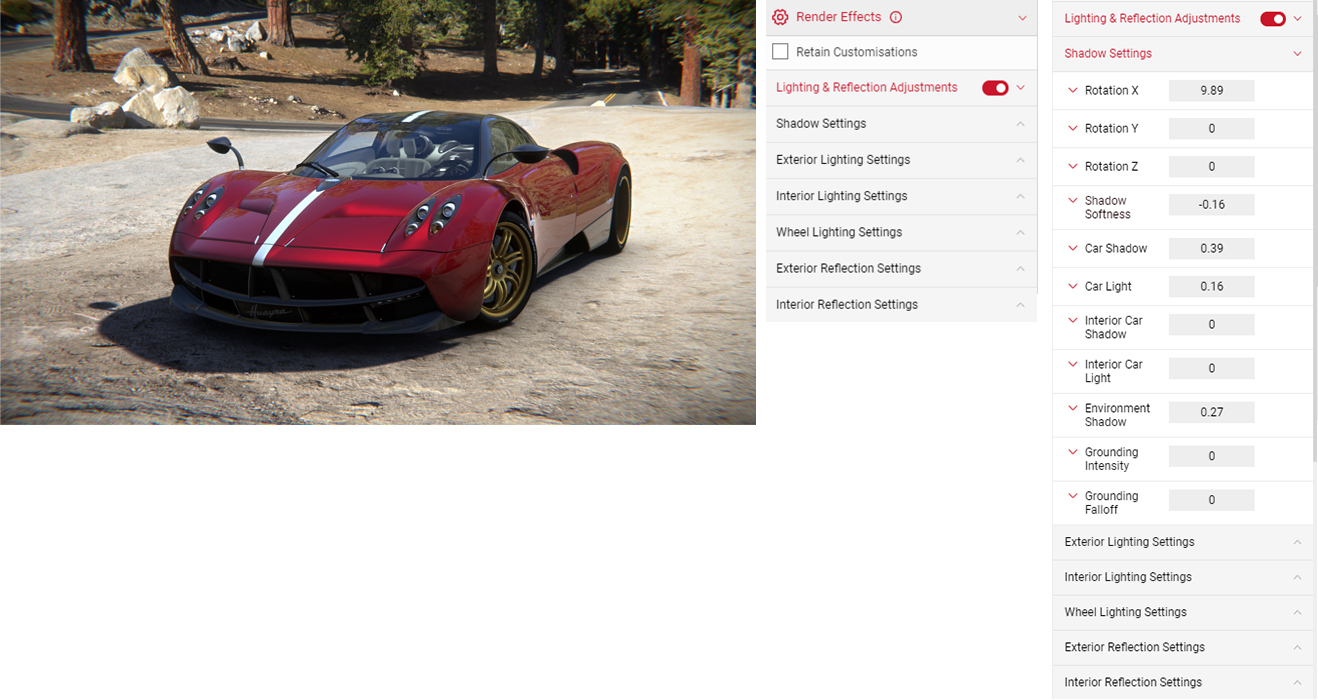
Shadow Settings
- Click on the Shadow Settings panel to reveal more options to adjust the shadow brightness and intensity as well as the direction of the shadow on the X, Y and Z axis. Try to match the direction of the shadows with the light source in the environment. Click on each setting panel to adjust the slider, or enter a value by clicking the number box.
- Shadow Softness adjusts sharpness of the shadow beneath the car. The lower the value, the higher the sharpness of the shadow.
- Car Shadow adjusts the intensity of the shadowed areas of the vehicle exterior. The higher the value, the brighter the shadowed areas will be.
- Car Light adjusts the intensity of the un-shadowed areas on the car. The higher the value, the brighter the un-shadowed areas will be.
- Environment Shadow adjusts the intensity of the shadow being cast by the car. The higher the value, the brighter the shadows will be.
- Grounding Intensity alters the spread and intensity of the darkness directly beneath the vehicle.
- Grounding Falloff slider allows you to make finer adjustments of the spread and intensity of the shadow underneath the car.
Lighting and Reflection Settings
- Click on the Exterior Lighting Settings panel to adjust the brightness, contrast, saturation and direction of the lighting on the exterior of the car.
- You also have the same options available to adjust the Interior Lighting and Wheel Lighting settings separately.
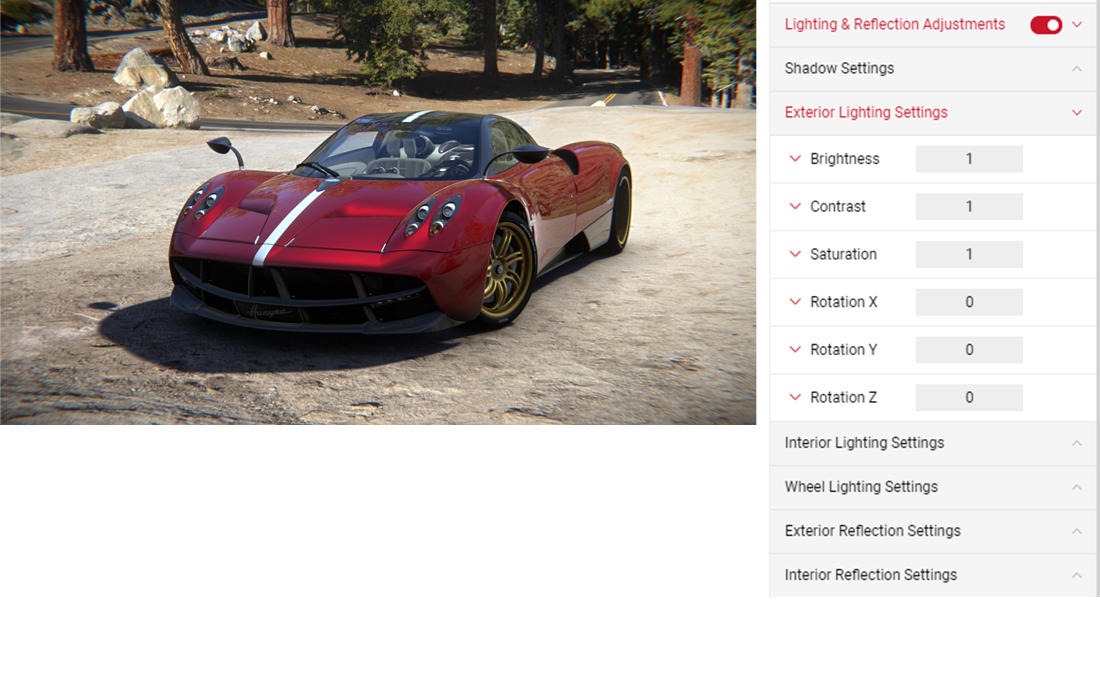
Reflection Settings
- Similar to the Lighting Settings, you can also adjust the direction, brightness, contrast and saturation of the exterior and interior reflections.
- To disable all lighting effects, click on the Lighting & Reflection Adustments panel red slider button, which will switch to grey once deactivated.
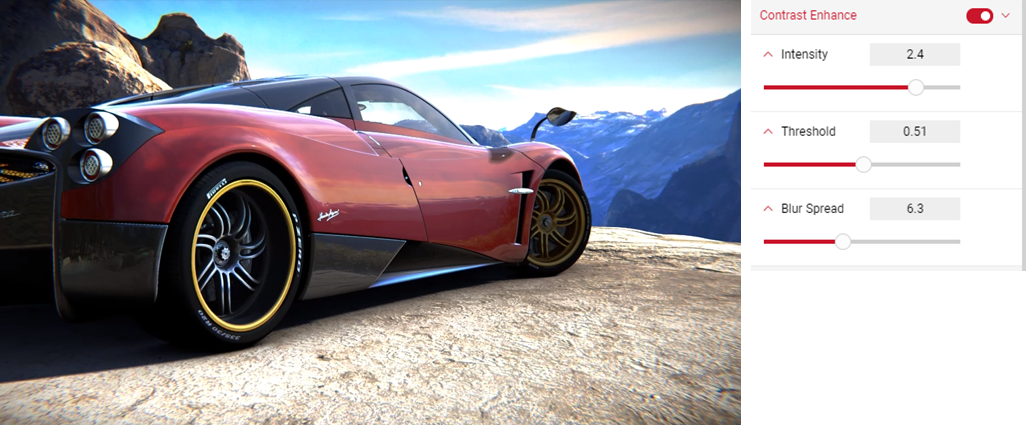
Contrast Enhance
Enable the Contrast Enhance feature to adjust the Intensity, Threshold, and Blur Spread. Click on the slider button on the right to enable Contrast Enhance option. The slider button turns red once enabled.
- Click on each setting panel to reveal each slider. You can also enter an exact value in the number box.
Motion Blur
Create a sense of speed by adding a blur that flows in one direction using the Motion Blur effect. Click on the slider button on the right to enable the Motion Blur option. The slider button turns red once enabled. You can adjust the Environment Speed, Wheel Speed and Blur Sky. This is a visual effect only and doesn't reflect a specific speed.
- Click on each setting panel to reveal the slider or enter an exact value in the number box.
- Environment Speed adjusts the blur of the current environment.
- Wheel Speed adjusts the blur on the wheels only.
- Blur Sky prevents clipping between the sky layer and environment layer elements.

Visit the Dynamic Picture Production Tutorial to learn more on using the Motion Blur and how to create dynamic images.
Tonemapping
Tonemapping is an image processing technique allowing a set of colours to map to another in order to create high dynamic range. Click on the slider button on the right to enable the Tonemapping option. The slider button turns red once activated.
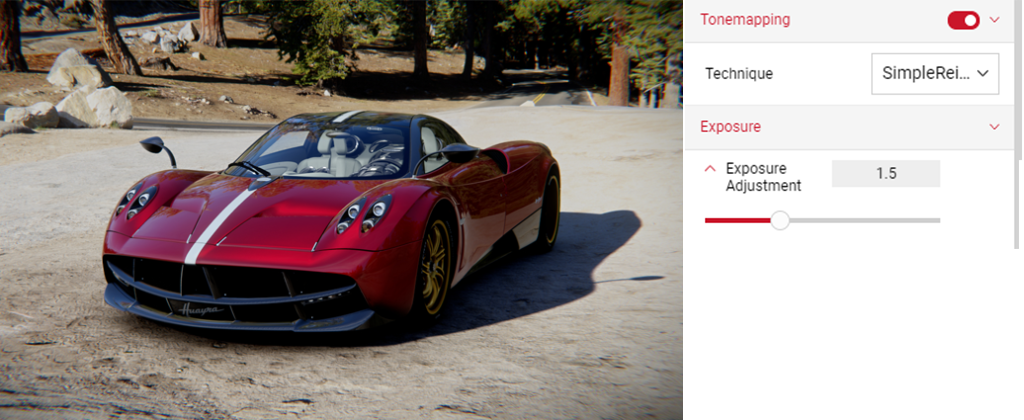
You can choose from a range of Techniques:
- SimpleReinhard - Basic linear exposure driven with a single exposure adjustment value.
- Hable - Similar to SimpleReinhard but has a lower increase at the bottom of the tonemapping curve, meaning darker areas less boosted.
- Photographic - Similar to above, emulates real film.
- OptimizedHejiDawson - Produces a high-contrast tonemapping curve. Usually much more noticeable than the other techniques.
- AdaptiveReinhard - Performs similar basic exposure adjustment to the simpleReinhard, but allows user control to tweak the middle grey point of the tonemapping curve and the top white.

Layered Post Effect
Layered Post Effects removes blurry effects on glass or windows. If selected, the default Depth Of Field type is Standard. There are 3 options that vary in quality.
- Standard is the normal depth of field technique.
- FULL_RES is similar to Standard but less performant with higher quality output as it does another pass.
- FULL_RES_TRANSPARENCY is the highest quality method, it includes 3 passes of depth of field. This setting is particularly useful when producing a shot of transparent materials e.g headlights or glass and produces a nicer looking output.
