Content Tagging
Content tagging allows users to apply tags to any of their saved or shared user content within SpotLight. Tags can be applied to Cameras, Configurations, Scenes and Take projects to give extra structure to user's content and be able to filter easier. For example:
A user wants to see all of their content (Camera’s, Environments etc) that are for use in an urban environment, so they add a tag for “urban” in each asset and then they can search by this tag to see all “urban” content.
Adding Tags
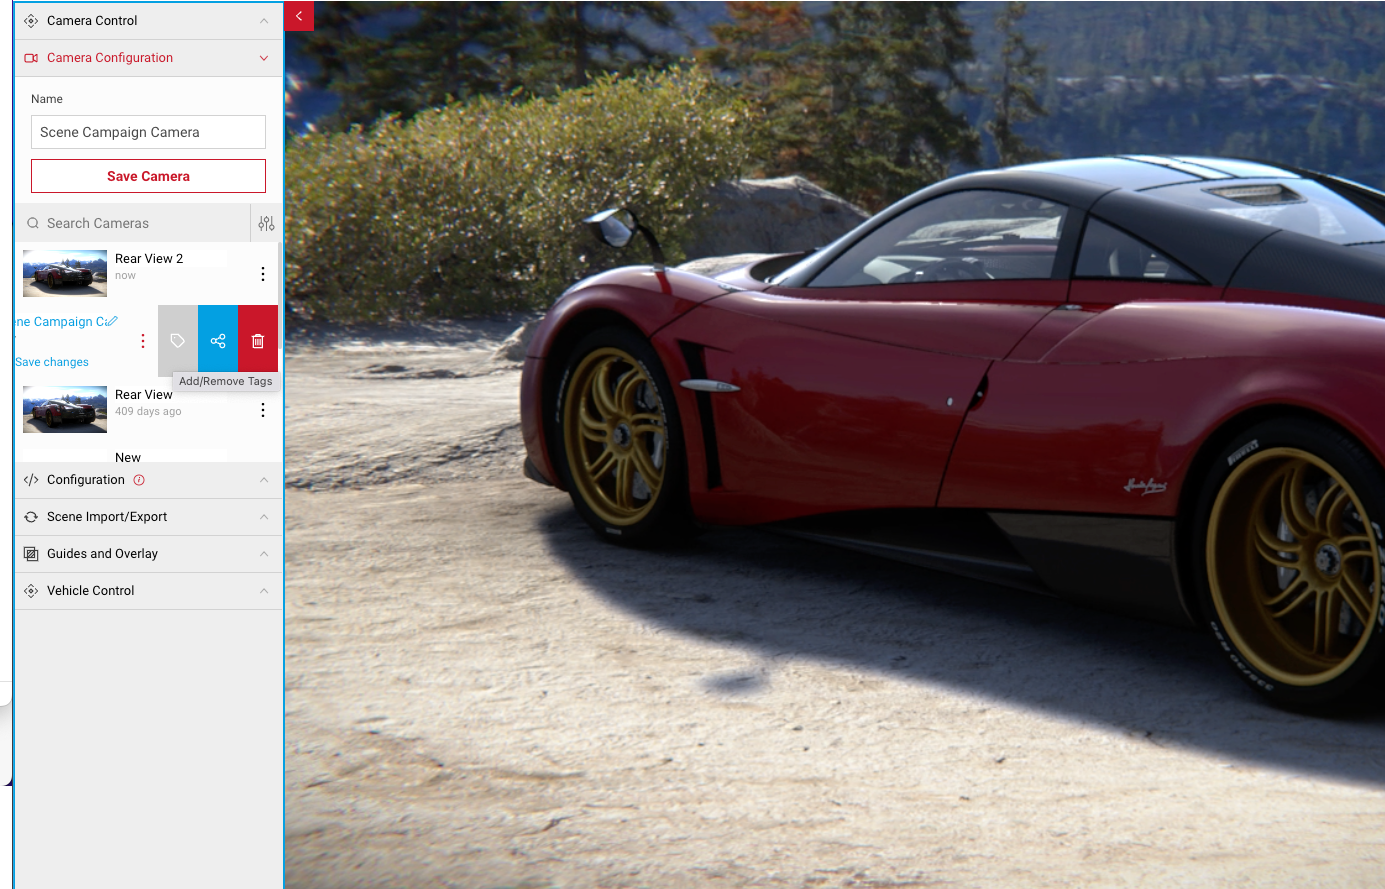
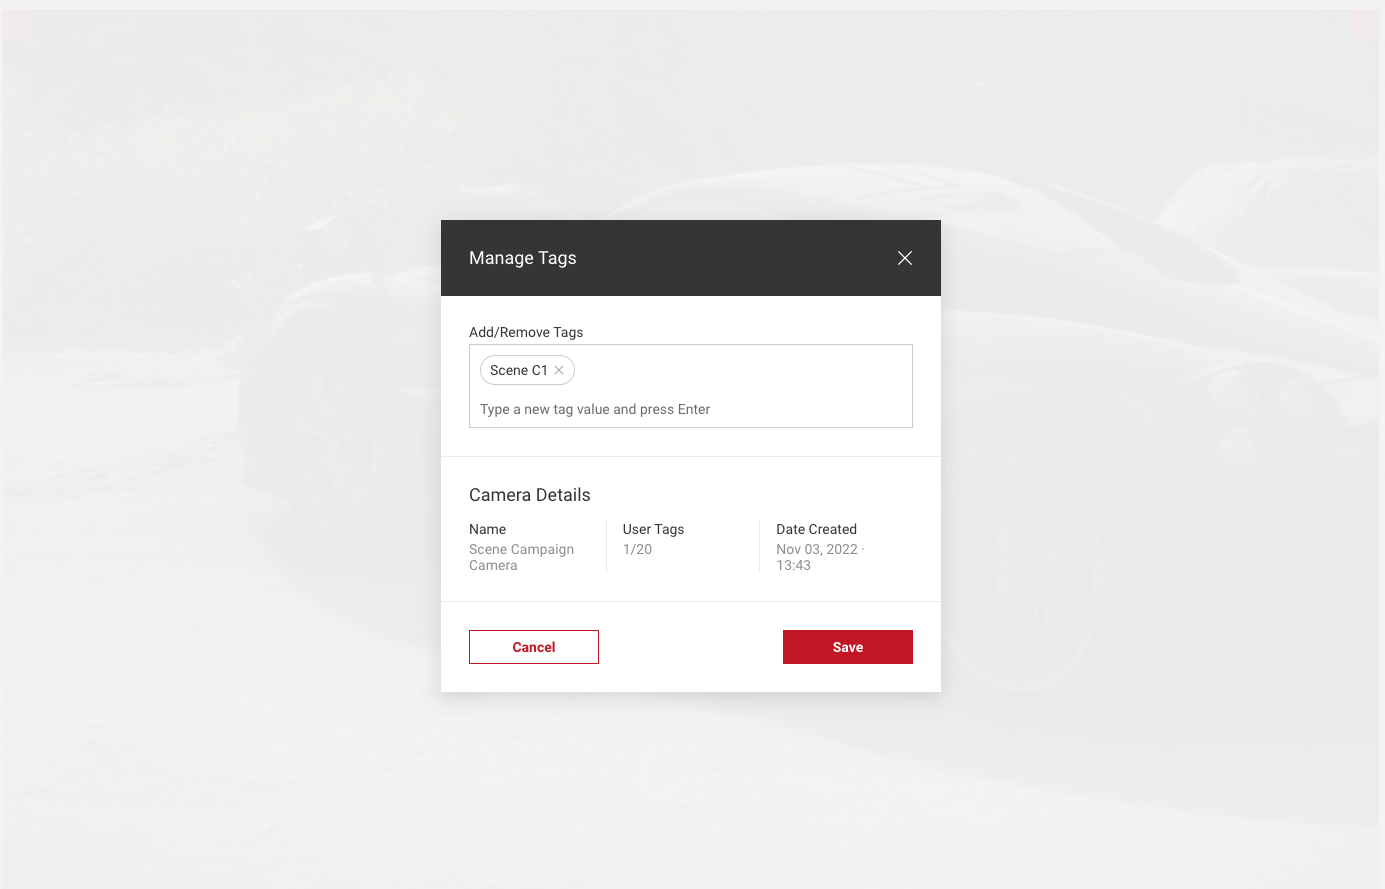
To add a tag, select the dotted icon next on the piece of content you want to apply it to and select the tag icon. In this example, we're adding a tag to a saved camera. Once the modal opens:
- Type the name for the new tag and press enter. You can add up to 20 tags per user content, to add more tags, type the name and press enter. To remove any tags, select the X next to each one.
- Once you're added all your tags, select Save to close the modal.
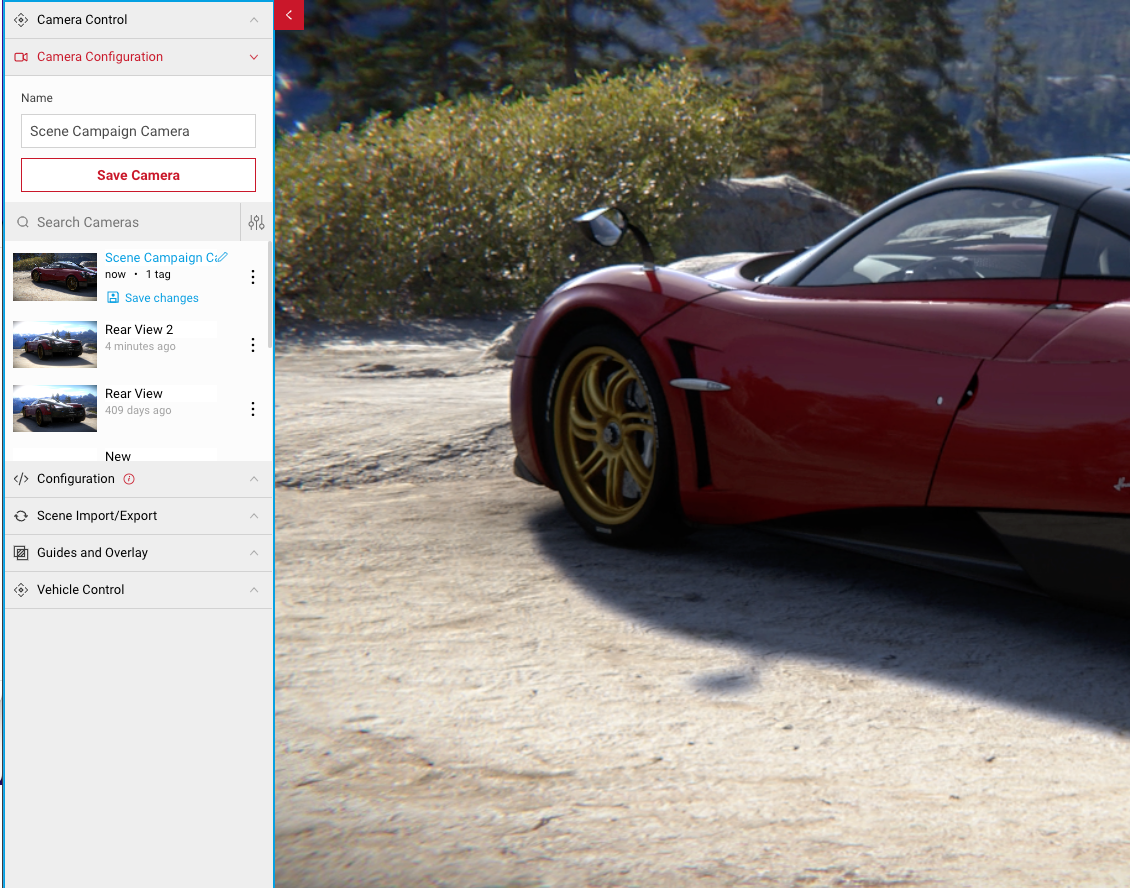
- After applying your tags, you'll see a tag has been applied to your content in your saved list.
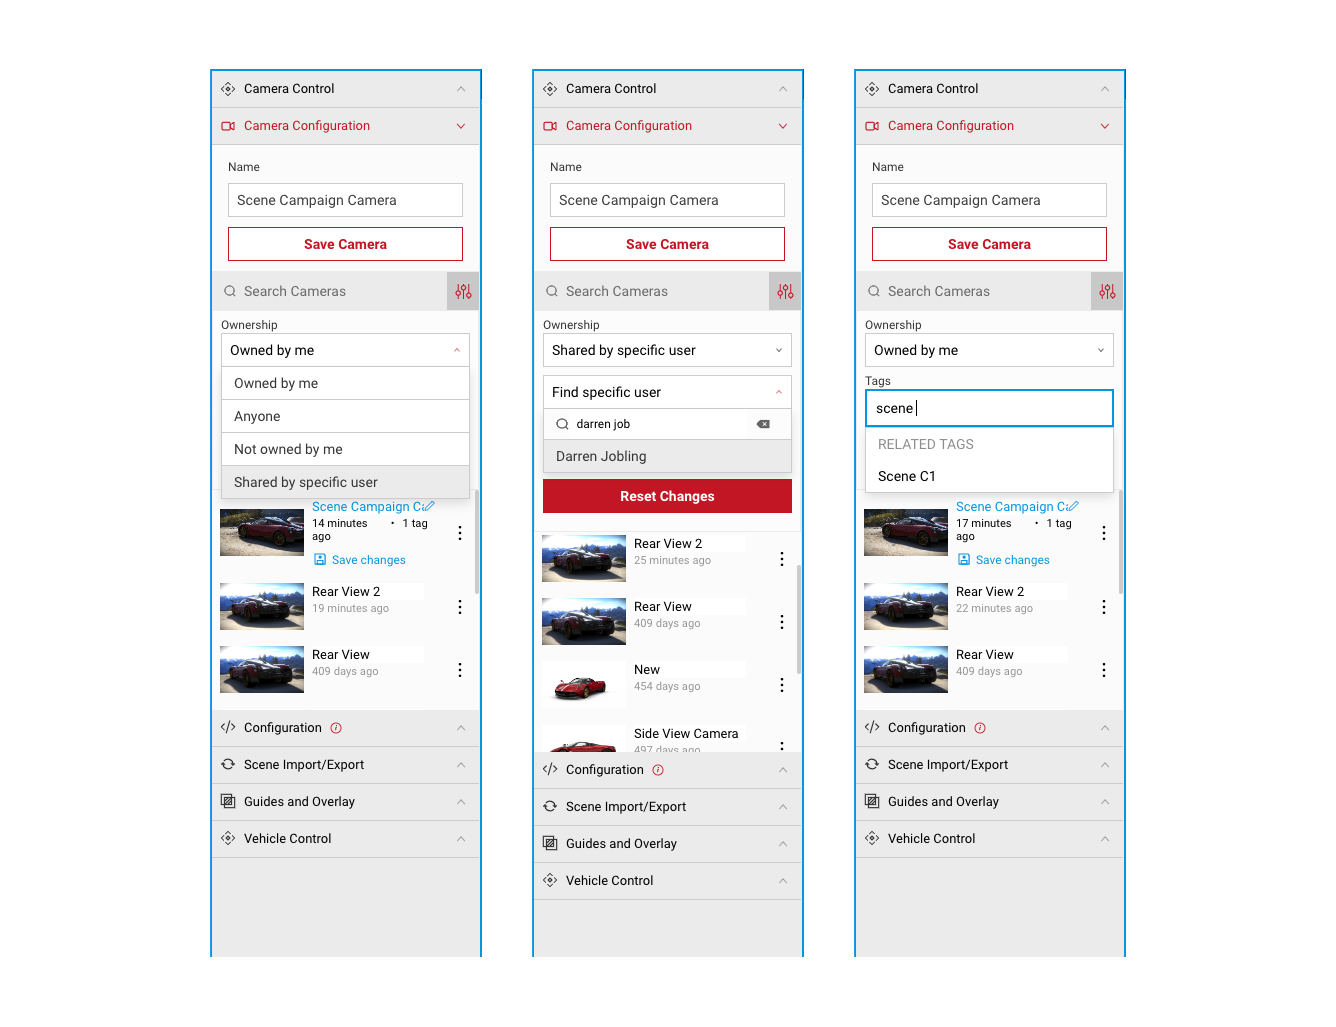
Searching For Content
You can search for content in your saved lists by using the filters. In this example, we're looking at saved cameras.
- Select the Filter icon next to the search bar in your saved content list. This will expand the Tags menu.
- You can search for the name of the tag which will appear in a list as you search. Select from the dropdown filter content based on the tag name.
- Under Ownership, you can choose to view content:
- Owned by you, which is content you've created yourself.
- Owned by Anyone which shows all results.
- Not owned by you which shows content from other users only.
- Shared by specific user which allows you to search for a specific user's shared content. The specific user must be selected from the dropdown after searching. If the user does not appear in the list after searching, the user is not available.