Working with Cameras
Within Shutter Pro, you can select pre-configured camera angles, or enable FlyCam to move the camera around the entire scene. Pre-configured camera angles such as Exterior and Interior Cameras are available in the Controls Menu and are configurable using Camera Controls, located in the Input Menu. You can then save and share your cameras with entire teams you're a member of, or individual users.
FlyCam Camera Control
FlyCam gives you more control so you can move the camera anywhere in the environment, the pre-configured camera angles restrict your position so the car is the main focal point. You can change the camera position and the Field of View.
- Click the FlyCam button in the Controls menu to enable the feature.
- Click and drag the image in the Viewport to adjust the position.
- For finer control, click the red position and rotation arrows (POS & ROT) to adjust the position and angles to Tilt, Turn & Move. You can also enter exact values by clicking the value box.
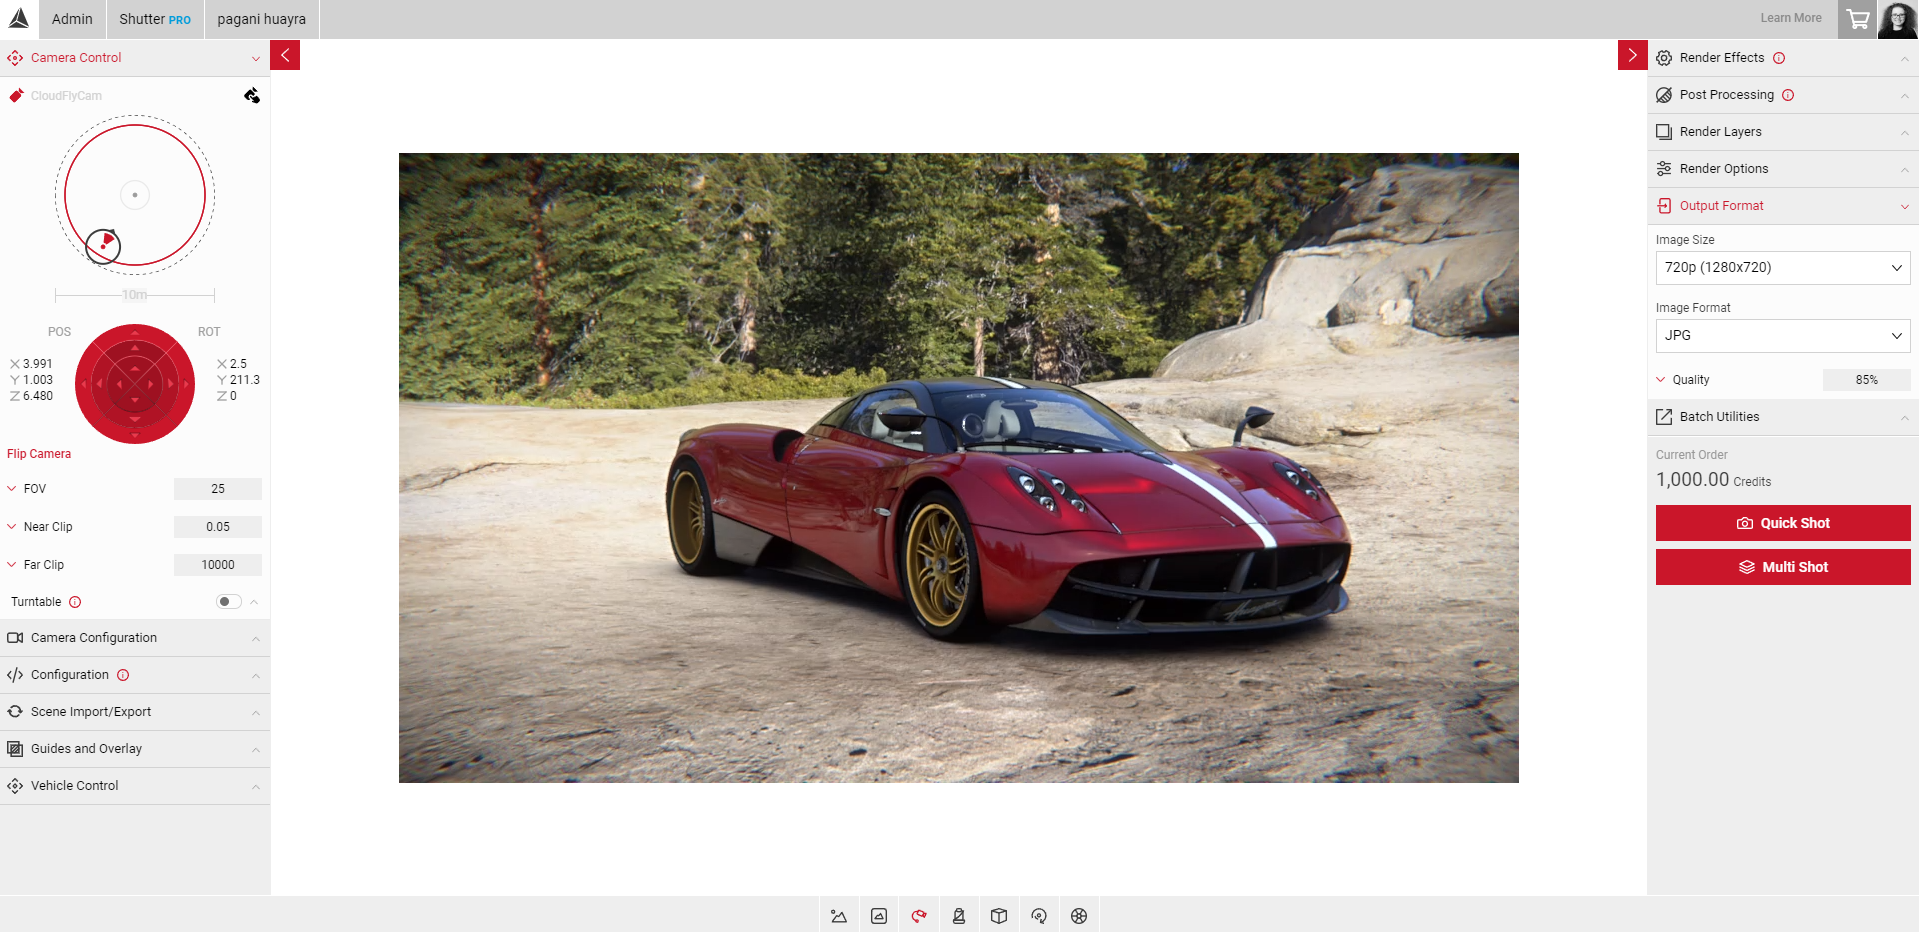
- Under the Camera Control tab, click in the empty space inside the large circle to move the camera position. The Camera Indicator icon will change depending on the position of the camera in the scene.
- Click in an empty space inside of the Camera Indicator icon to change the field of view position (shown below).
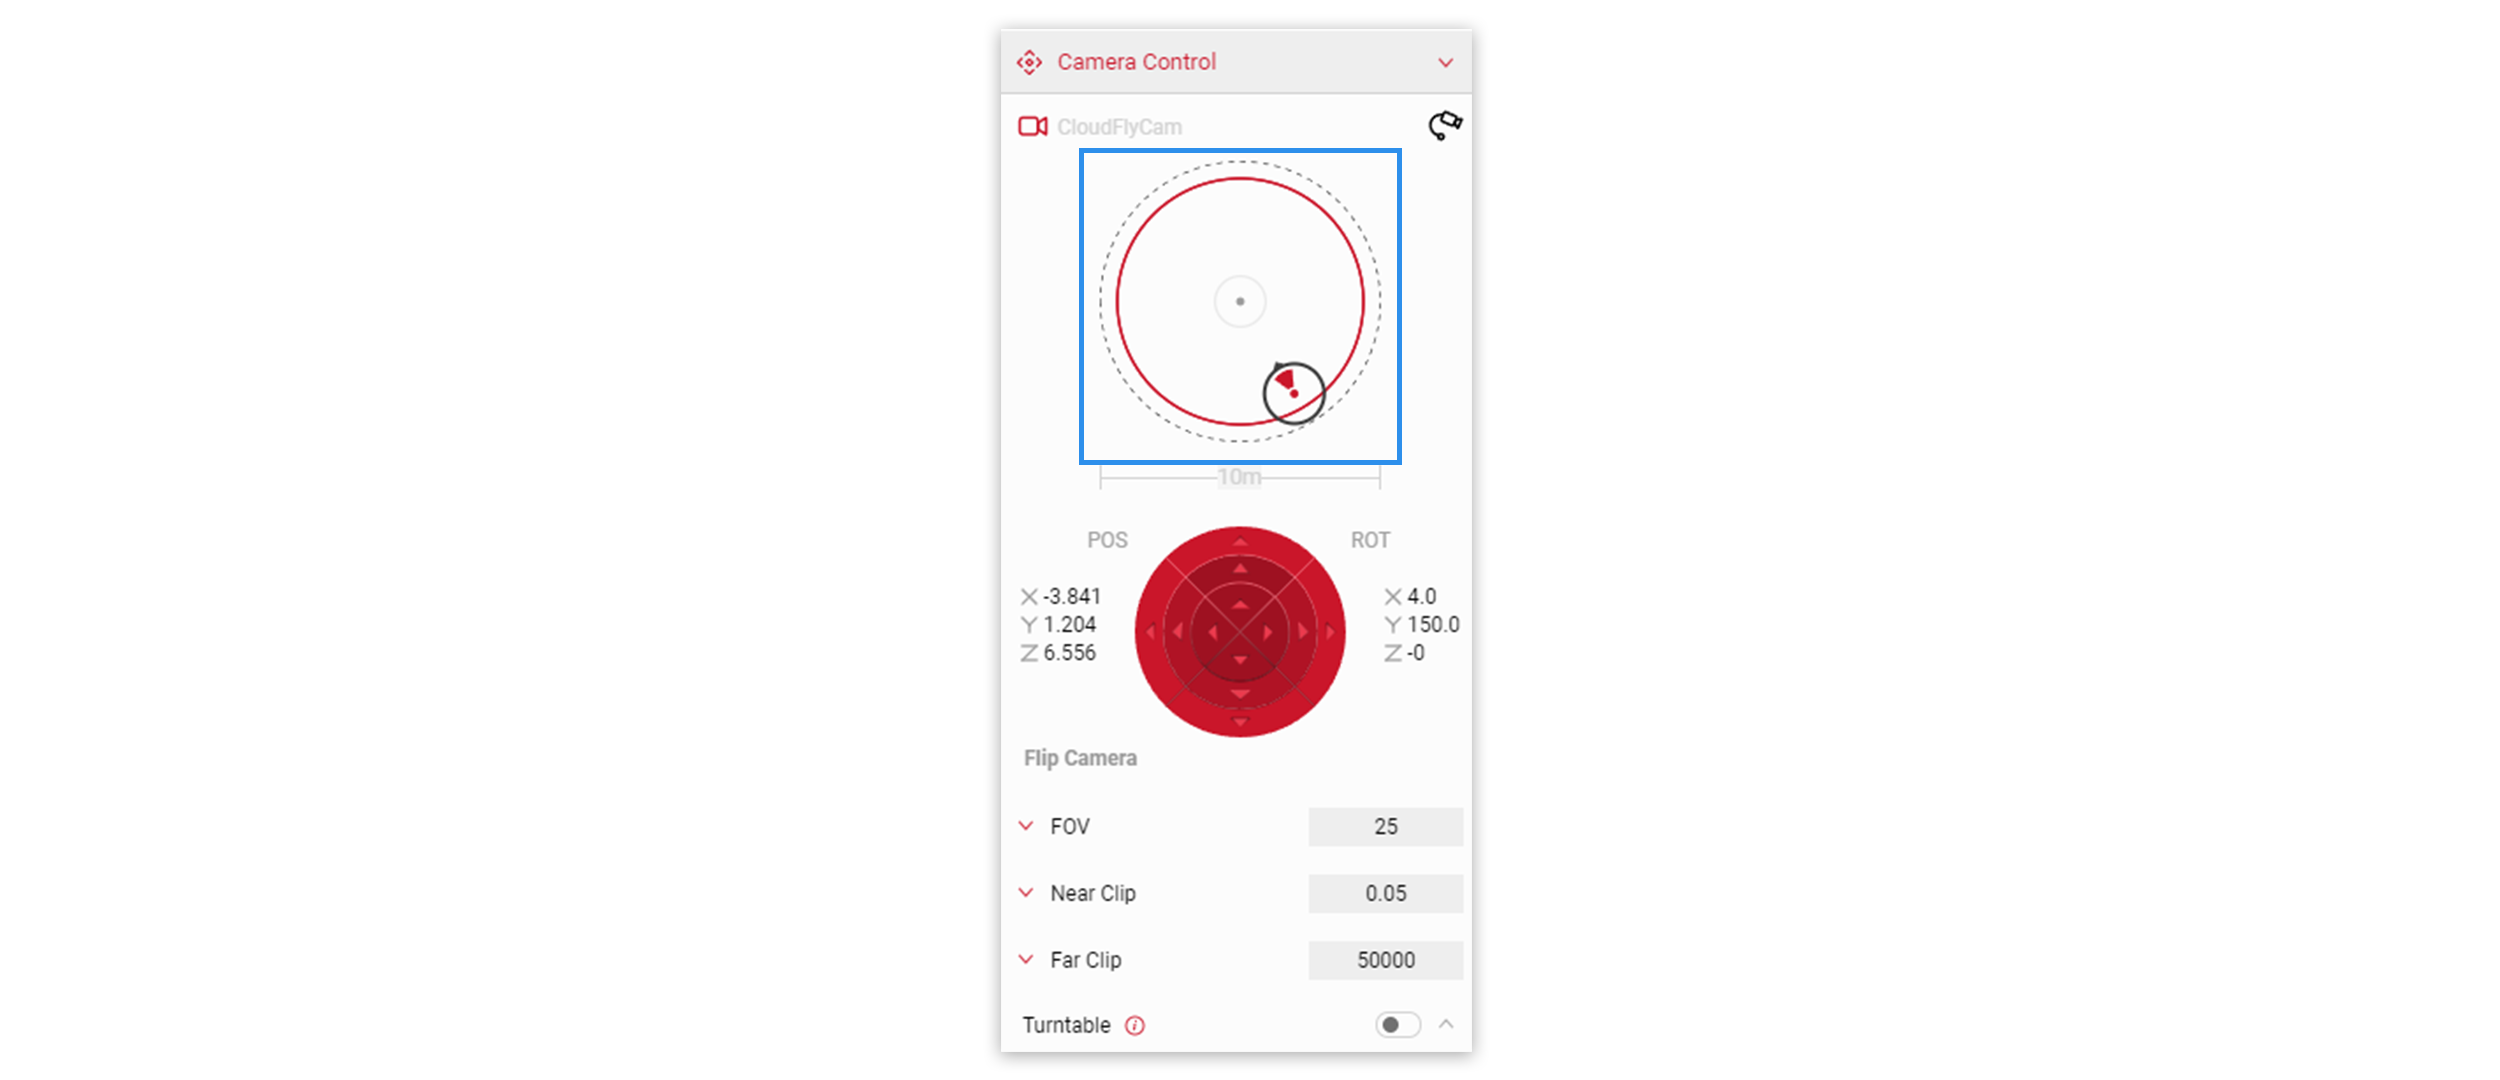
- The distance indicator is also displayed underneath, as the camera moves beyond the distance specified, the indicator will update.
- Use the FOV slider to adjust the width of the Field Of View.
- To disable FlyCam, select the camera icon (shown below) to revert back to GlobalStageCamera. Or you can select another camera configuration from the Exterior or Interior Camera options.

Keyboard Camera Control
To enable the keyboard controls, select FlyCam and click the scene in the viewport. You can also attach an Xbox controller via USB to control the camera.
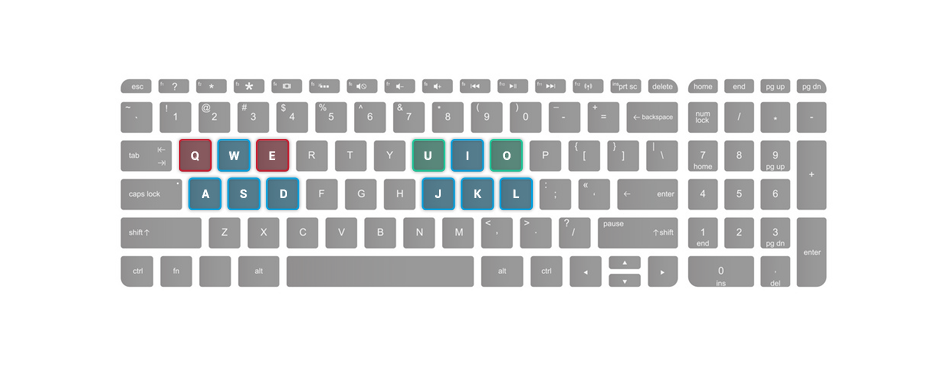
W, A, S, D - Translating of the camera
L, J, K, I - Rotates camera
E (Translates camera up) Q (Translates camera down)
U (Tilts left) O (Tilts right)
Hold down the Left Shift Key when using the keys to make finer adjustments.
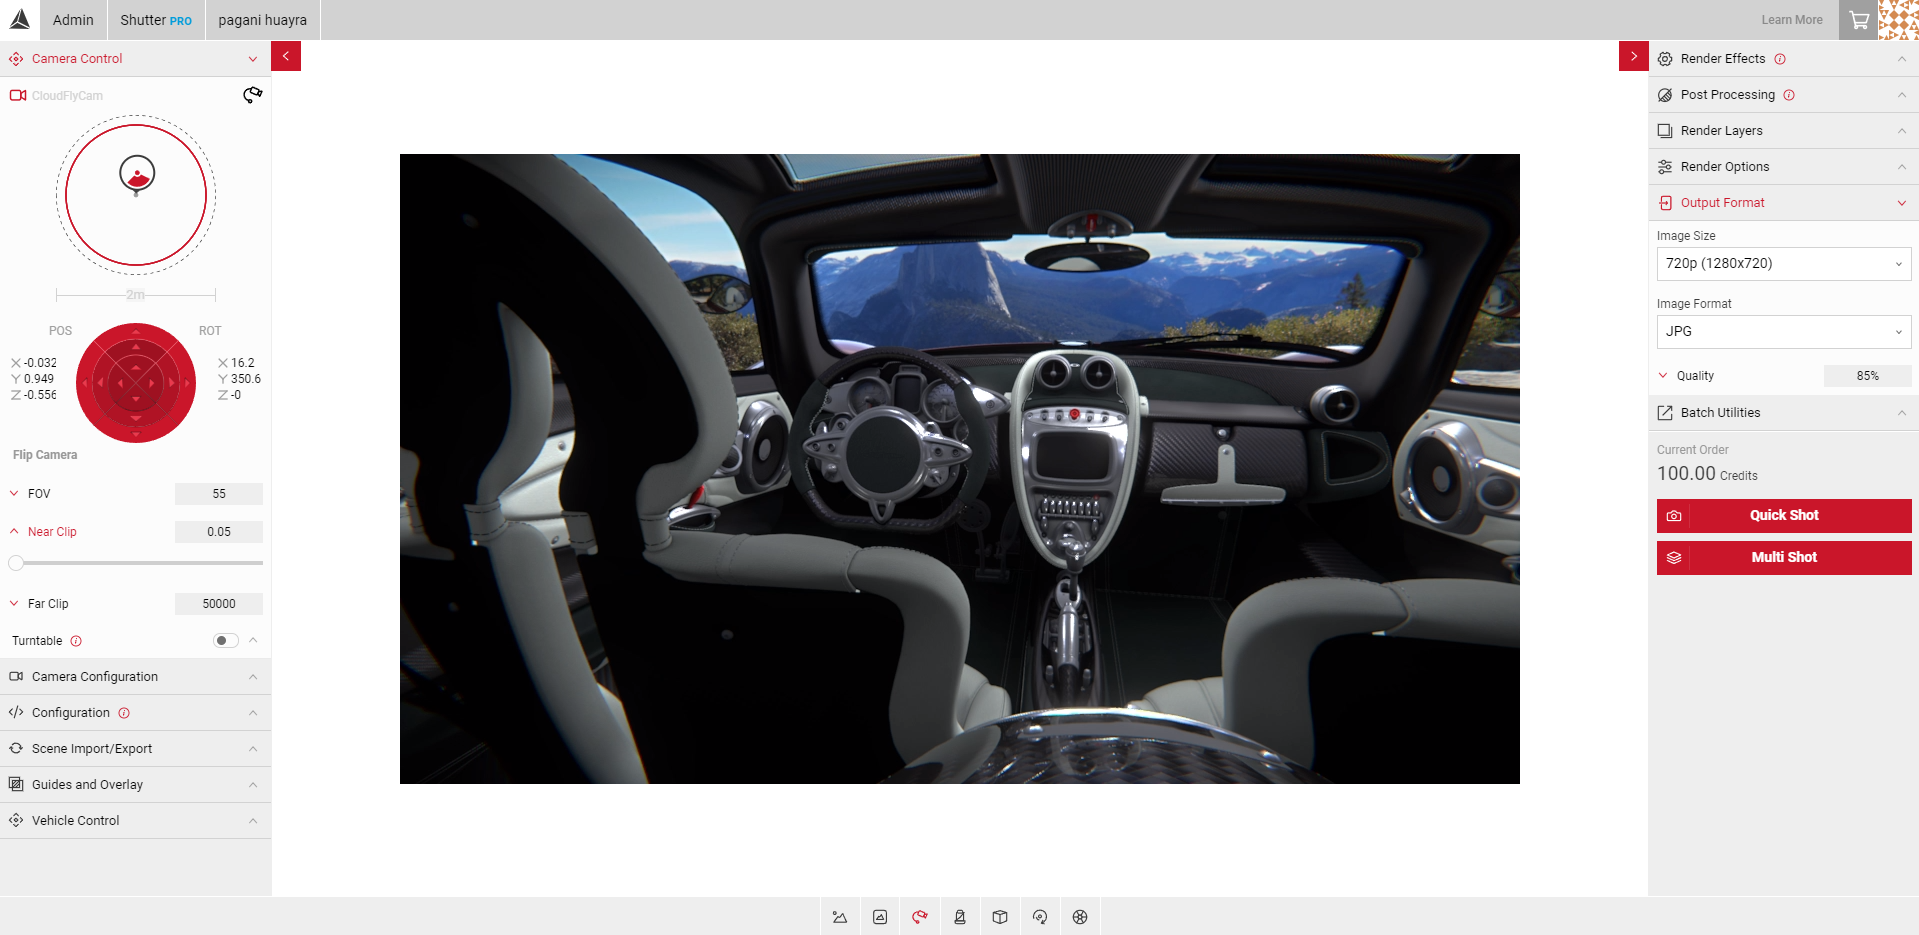
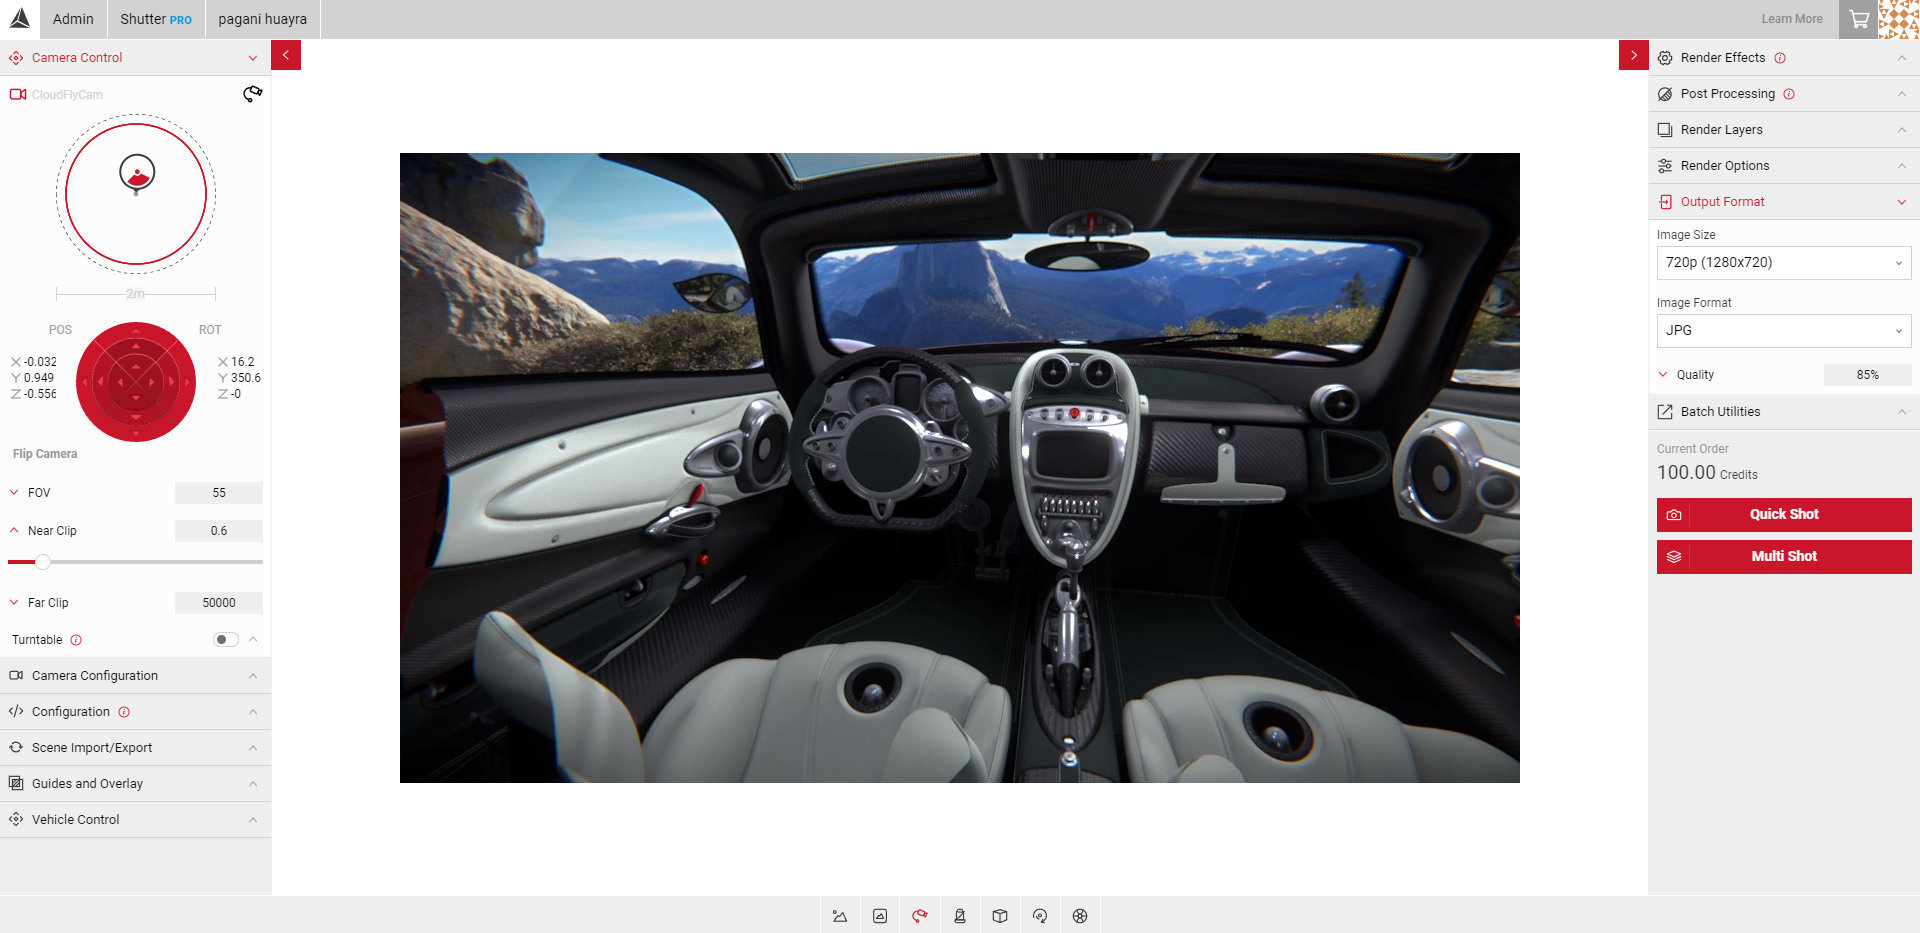
Near Clip
In the Camera Control panel, the Near Clip slider alters the distance from the camera at which things become invisible, the larger the Near Clip value, the objects closer to the camera will become invisible. For example, if an object is closer than the vehicle in the environment and you want to remove it, you can use the Near Clip slider to remove it. You could also use the Near Clip function to slice away a section of the car if you wanted to view the Interior lighting without moving the camera position.
- Move the camera into the position you want.
- Use the Near Clip slider to determine the distance from the car.
- The Viewport will update with the values you enter on the slider.
- The images below show the Viewport before and after the Near Clip value has been applied.
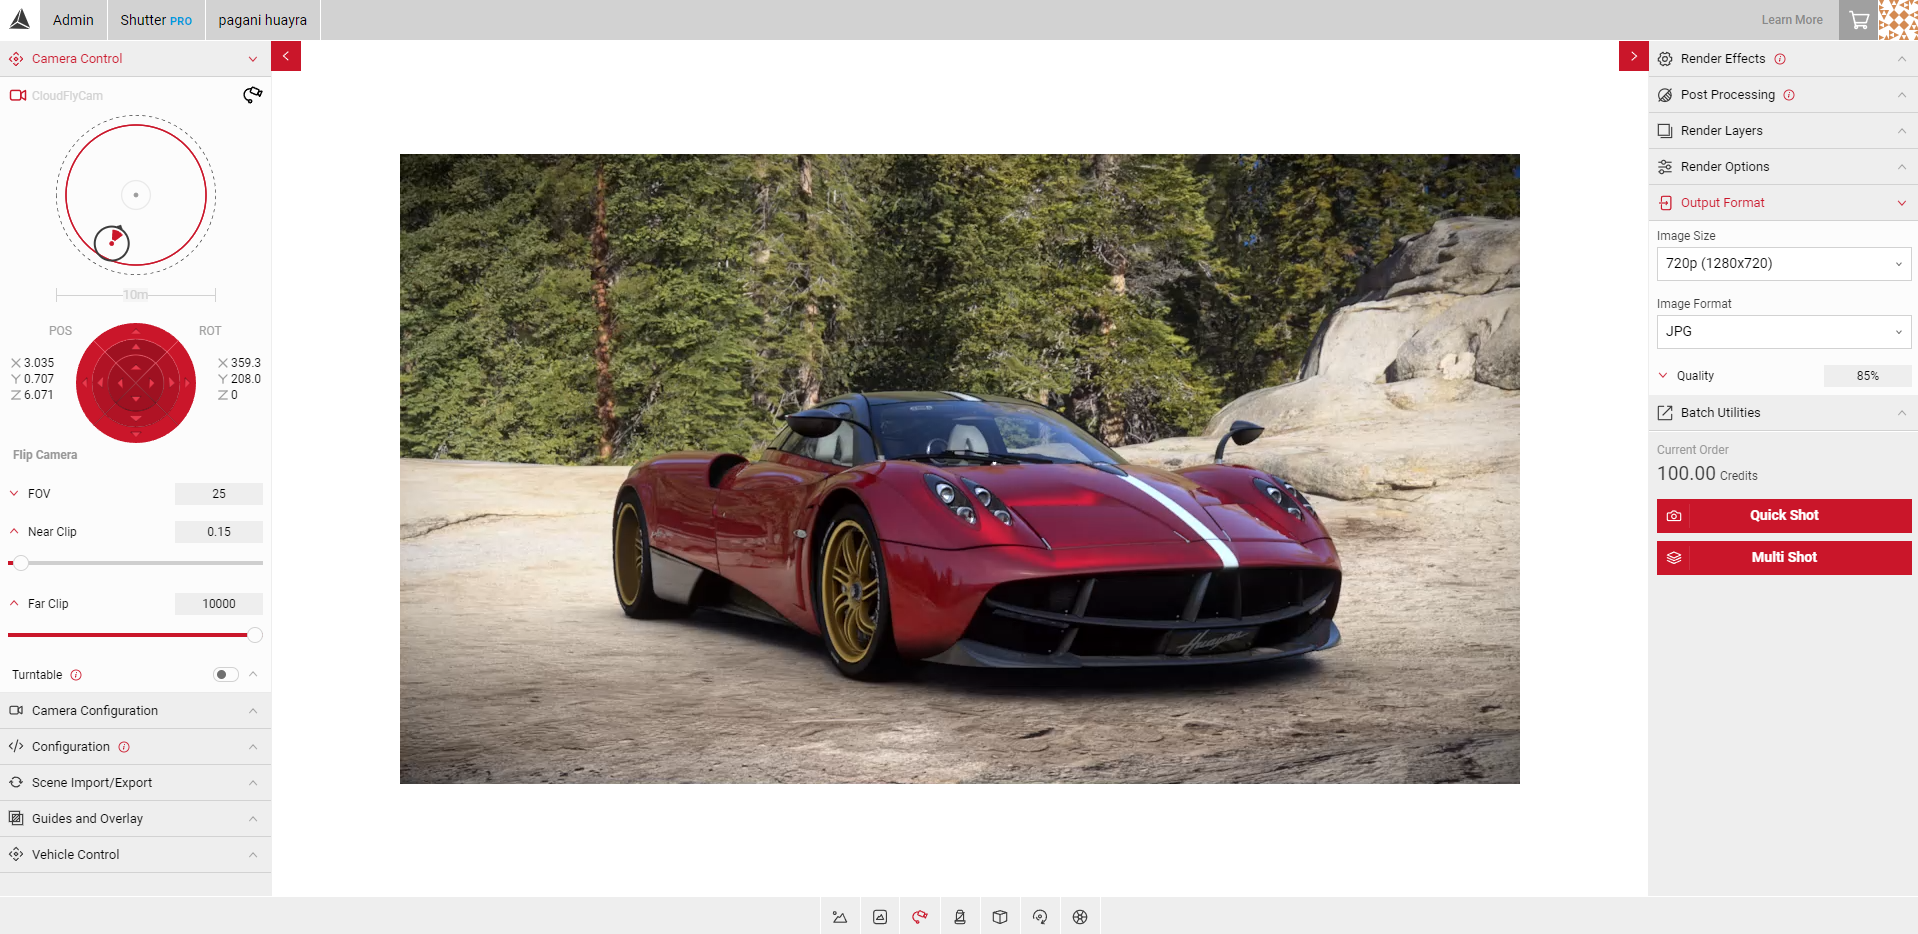
Far Clip
Similar to the Near Clip function, Far Clip allows you to make objects further from the camera invisible. Use the Far Clip slider to specify the distance of the far clip plane from the camera. Any elements beyond the Far Clip plane are excluded from the view. For example, if you want to remove an object from the environment in the distance, you can use the Far Clip slider to remove it. The lower the value, the closer objects will become invisible.
- Select FlyCam and move the camera to the desired position.
- Under the Camera Control tab, adjust the Far Clip slider to the point you want.
- The Viewport will update with which ever values you enter.
- The images below show the environment before and after the Far Clip values have been applied.

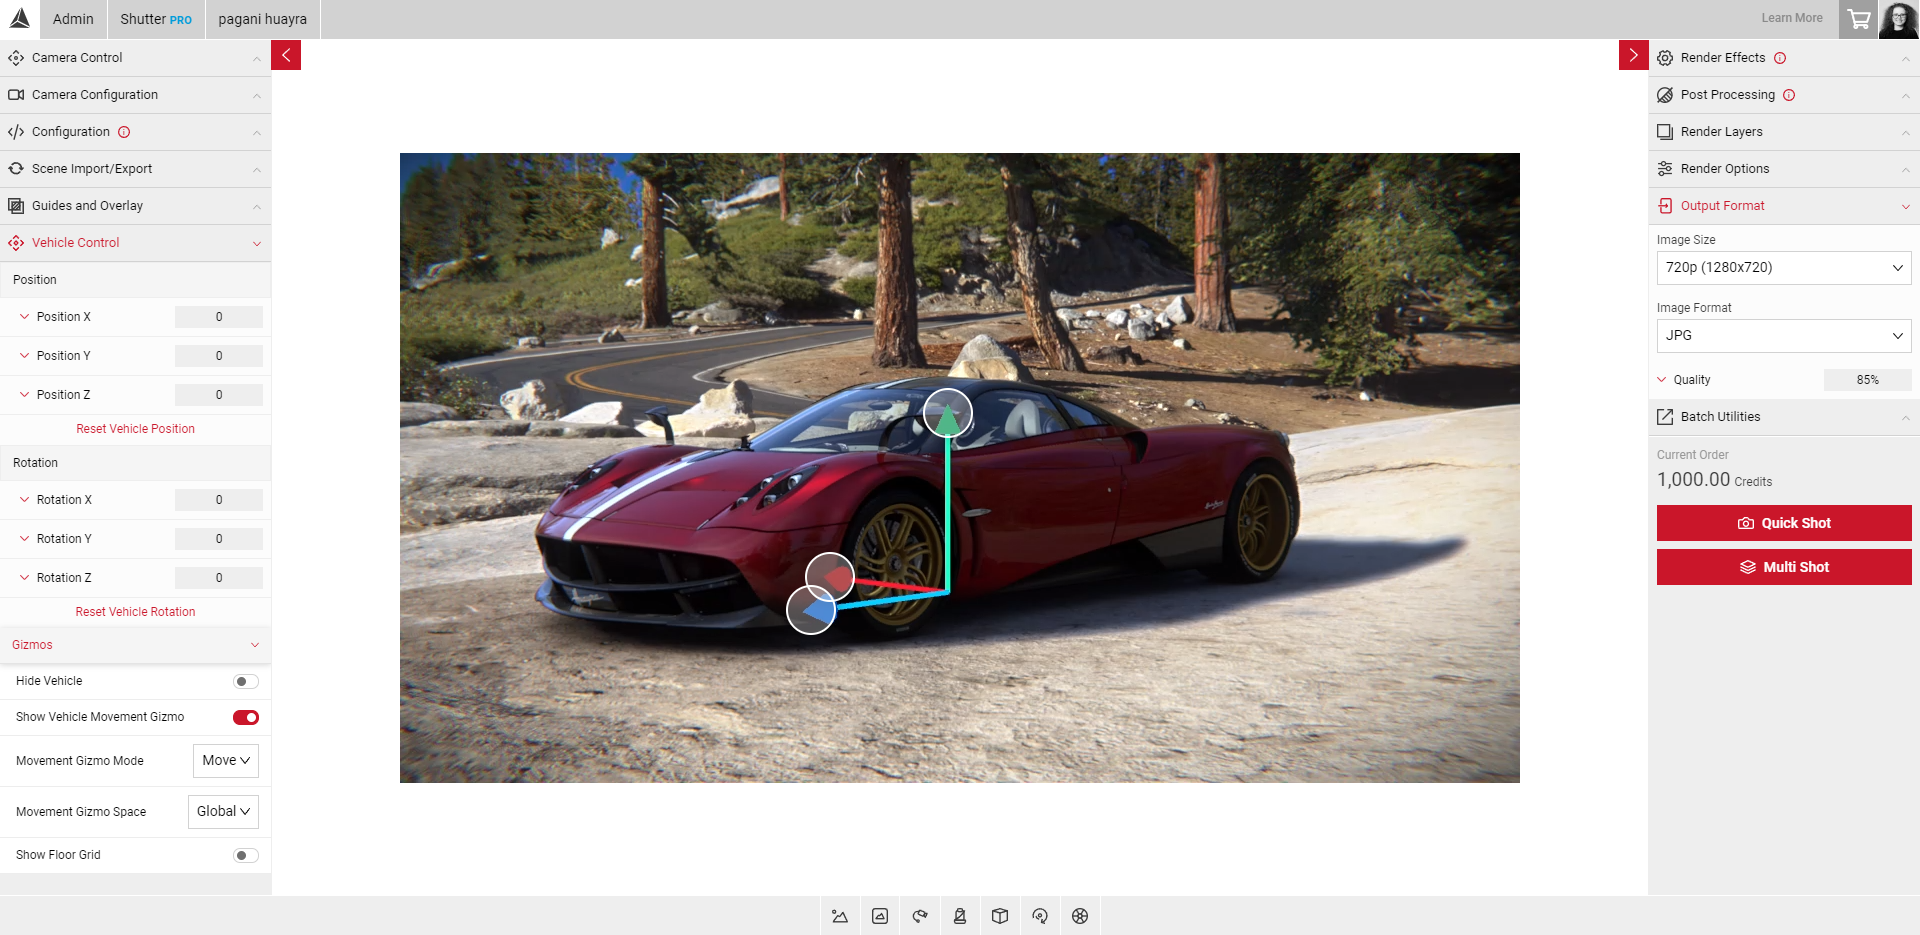
Vehicle Control
Vehicle control changes the position of the car rather than the camera angle. You can use sliders to adjust the position and roation, or use the vehicle gizmos to click and drag the car into position.
- Select the Vehicle Position and Vehicle Rotation panels to reveal the sliders to adjust the values on the X, Y, and Z axis.
- Select the Gizmos panel and select Show Vehicle Movement slider.
- Next to Movement Gizmo, from the dropdown, select Move to change the vehicle position or Rotate to change the vehicle rotation by clicking and dragging the point of each direction.
- Select Reset Vehicle Position in each panel to revert any changes.
Turntable
Turntable is a camera feature in Spotlight that lets you capture multiple images from several pre-defined camera angles.
- Total Steps is the amount of pre-defined angles that will be produced, select each camera in the large circle to view each angle.
- Current Step allows you to move the slider to view other angles.
- Offset Angle allows you to offset each of the pre-defined angles from the centre.
- Start Multi-Shot produces the amount of images produced depending on the amount of Total Steps you choose.
How do I use Turntable?
- Enable FlyCam.
- Click on the Turntable button. The slider button should turn from grey to green.
- Use the Total Steps slider to adjust the number of cameras around the image. You can choose any number of images from 2 - 144.
- Use the Offset Angle slider to adjust the angle of each camera. You can adjust the camera angle up to 89° depending on how many steps are chosen.
- Adjust the Current Step slider to view each camera angle. The Current Step number is dependent on how many Total Steps are enabled.
- Click on Start Multi Shot once you’ve finished.
Visit the Turntable Picture Production tutorial to learn more on the Turntable feature.
Camera Configurations
You can use Camera Configurations to save any cameras you have configured on Shutter Pro. This is especially helpful when you’d like to use the same camera settings for different models/configurations. Saving a camera will only appear in your account, sharing a camera allows it to be accessed by teams and users you select.
Saving Your Camera
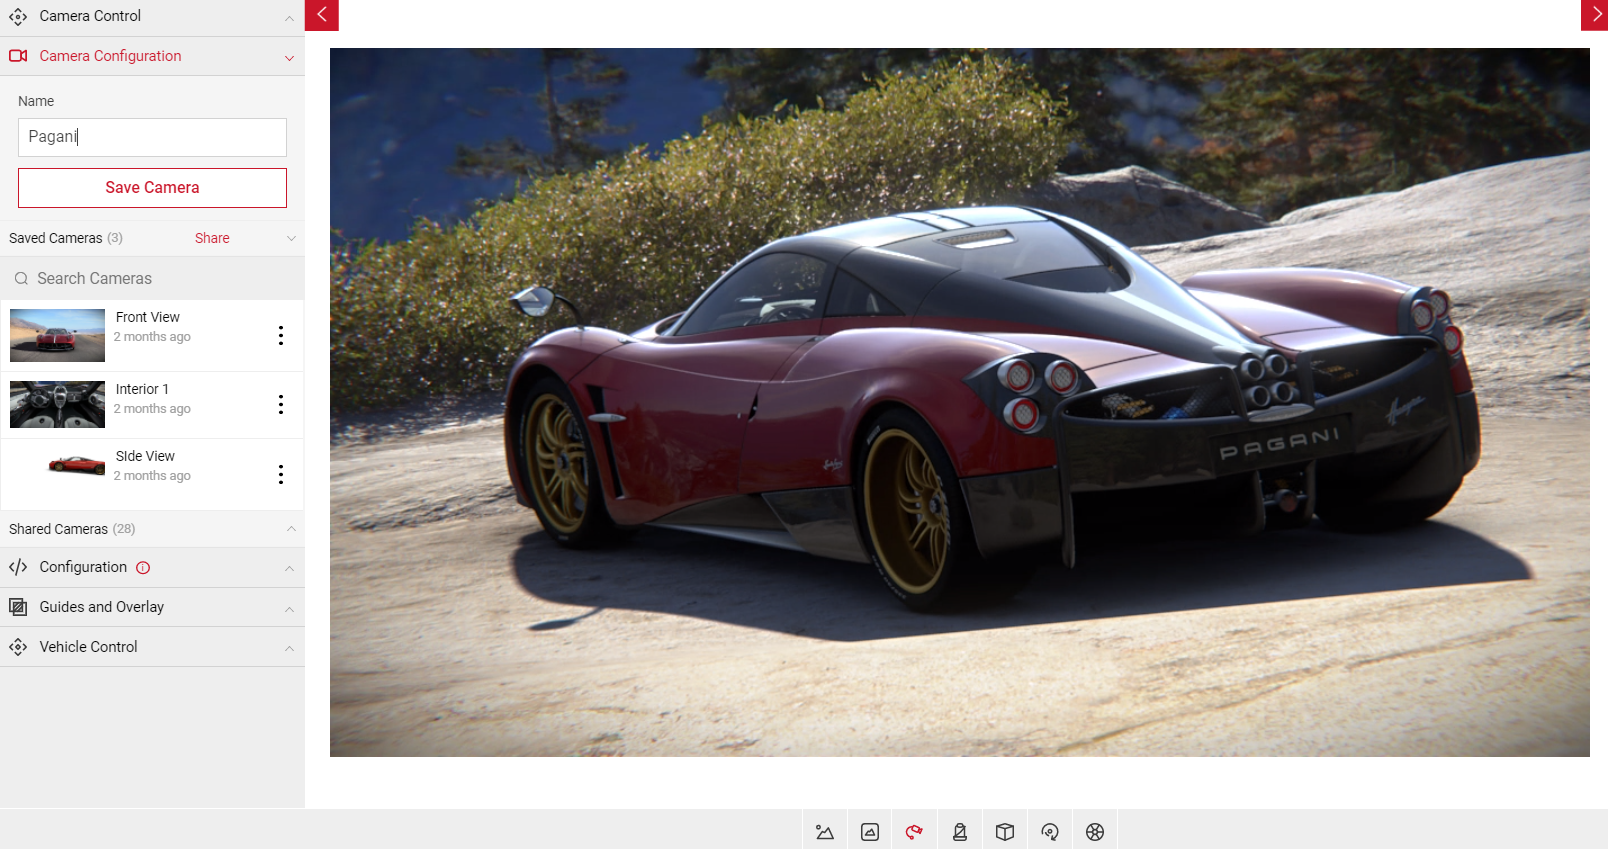
- Configure the camera settings to how you want it by using the Camera Controls. You can also click and drag the car to the angle you want.
- Click on the Camera Configurations tab.
- Type in a name for your camera configuration.
- Click on Save Camera button to save your own camera.
- You can also edit and save any changes you’ve made on a saved camera by clicking on Save Changes. This doesn’t create a new camera configuration but overwrites any changes on the camera.
- To create a new camera with the changes to a saved camera, repeat steps 3 and 4.
Applying Tags
You can also apply up to 20 tags per saved camera to help structure and filter all your saved content.
To Learn more visit content tagging
Sharing Cameras
You can share cameraa with other users and use cameras saved by other users that have been shared with you.
To Learn more visit sharing