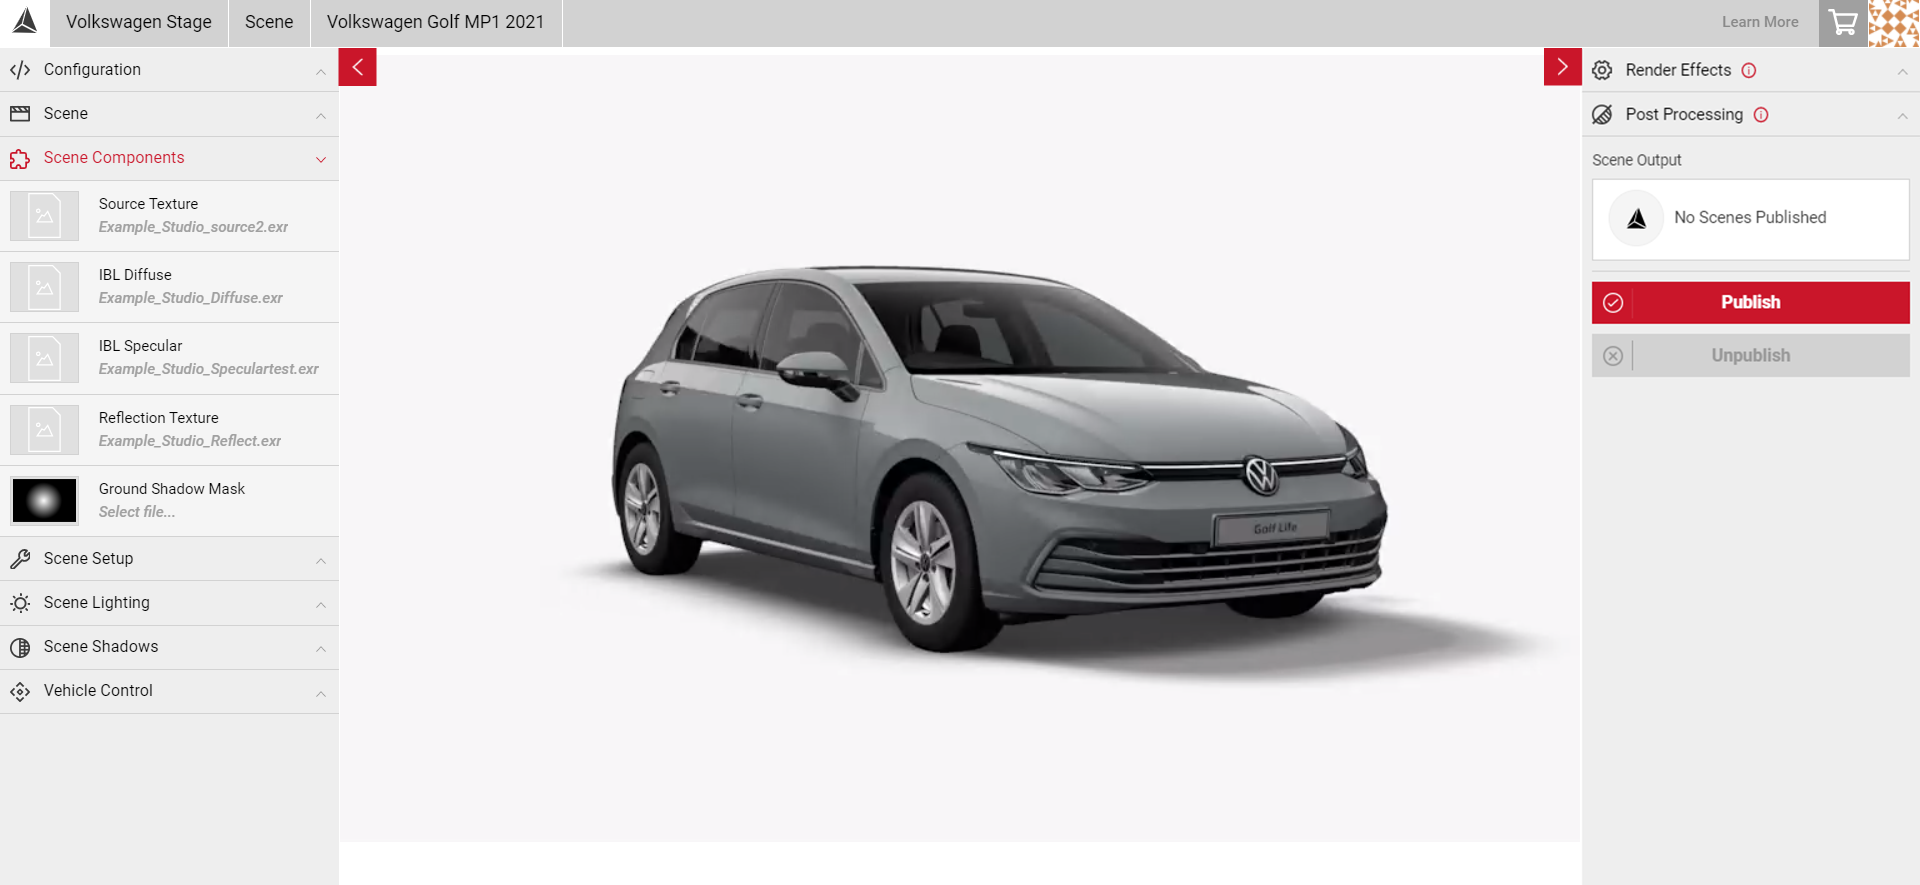
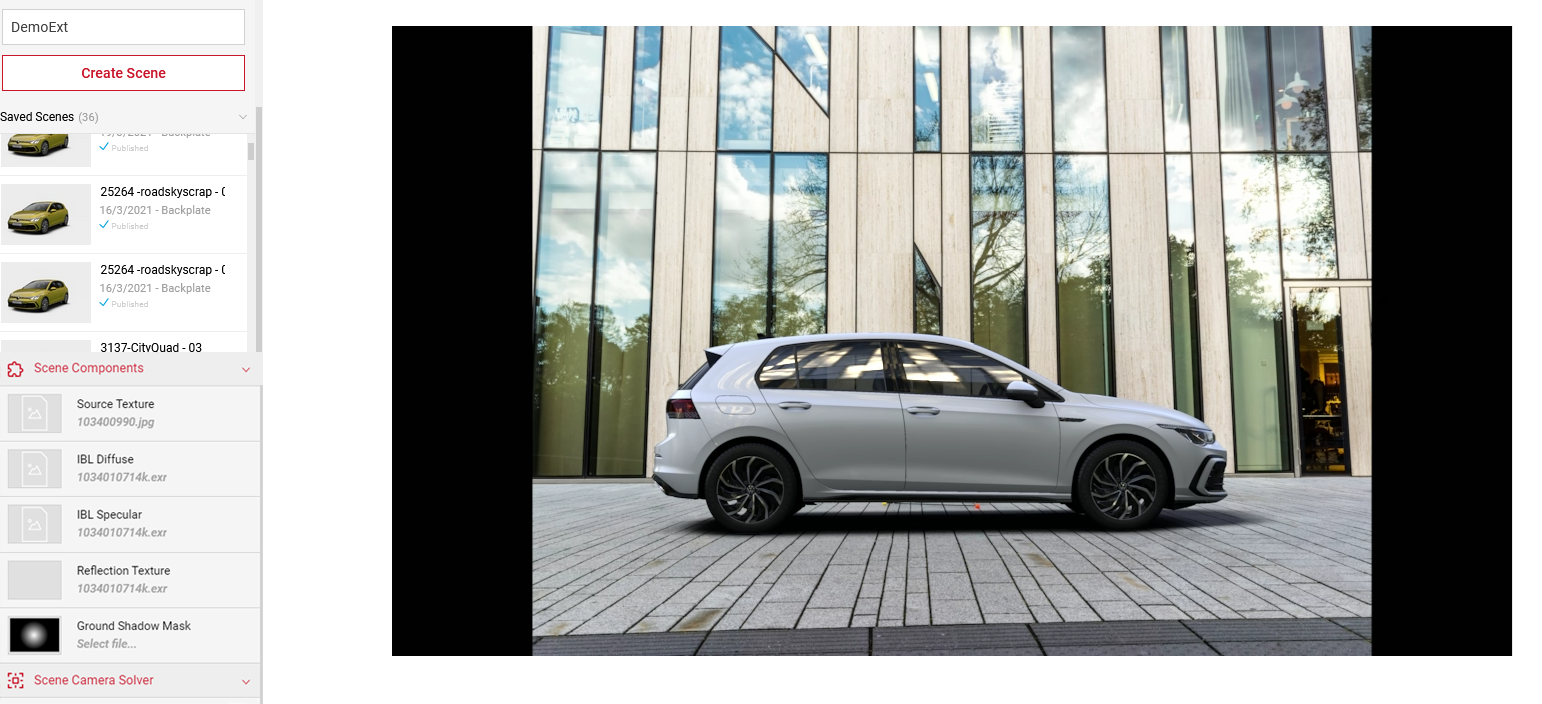
Creating Scene Component Textures
This guide shows how a user can get to a starting point for setting up a car image in Spotlights’ Scene app, it is not intended to cover the entire workflow of creating a Market Ready branding image (i.e. Post Production in Photoshop). It shall only cover the usage of Scene to create the inputs required to create an example environment.
It is recommended you use 32-bit Latitude-Longitudal images for the Diffuse/Specular/Reflection IBLs as these contain the overbright values necessary to properly mimic real life lighting situations on car materials.
Creating a Realistic Environment
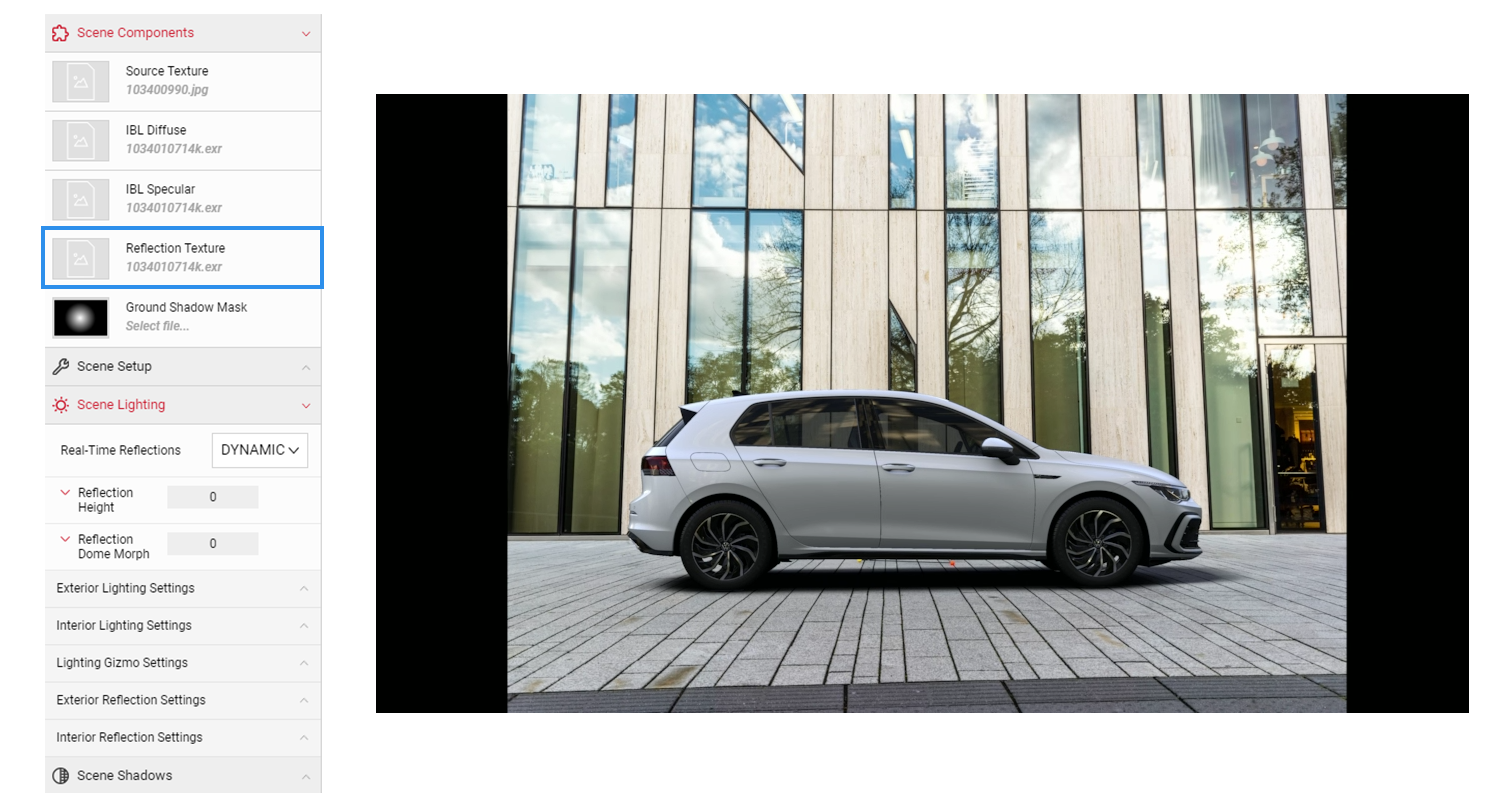
Reflection Texture
- Take the HDR that is supplied for the Scene project.
- In Photoshop, take the 32-Bit image which matches the Dome/Backplate and change its resolution to 4096x2048
- Save this file (e.g. Reflection.exr) and apply it to the Reflection slot under Scene Components in the Scene app.

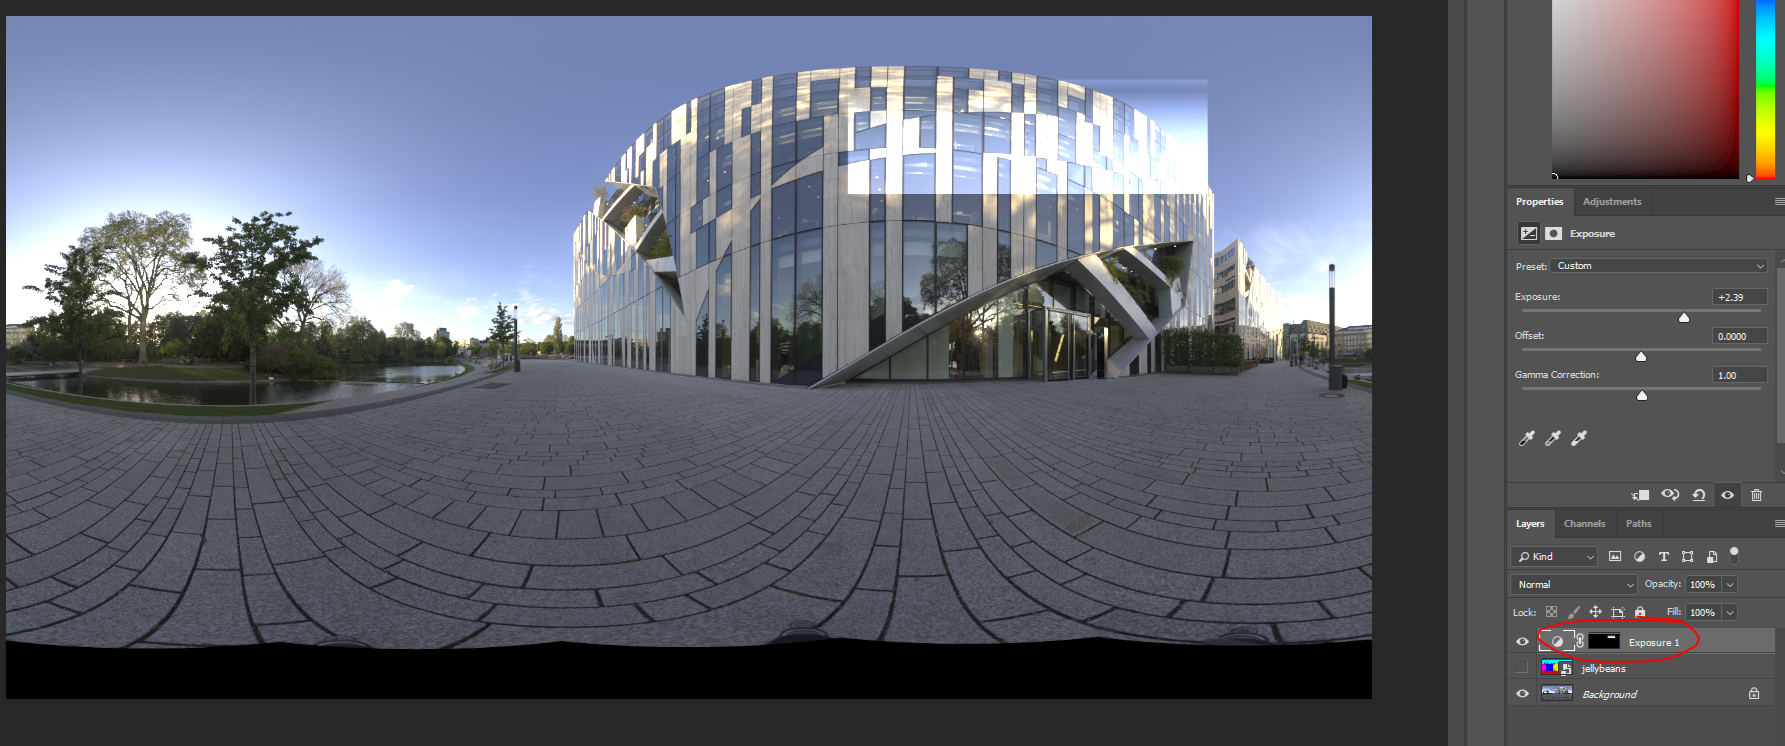
IBL Specular
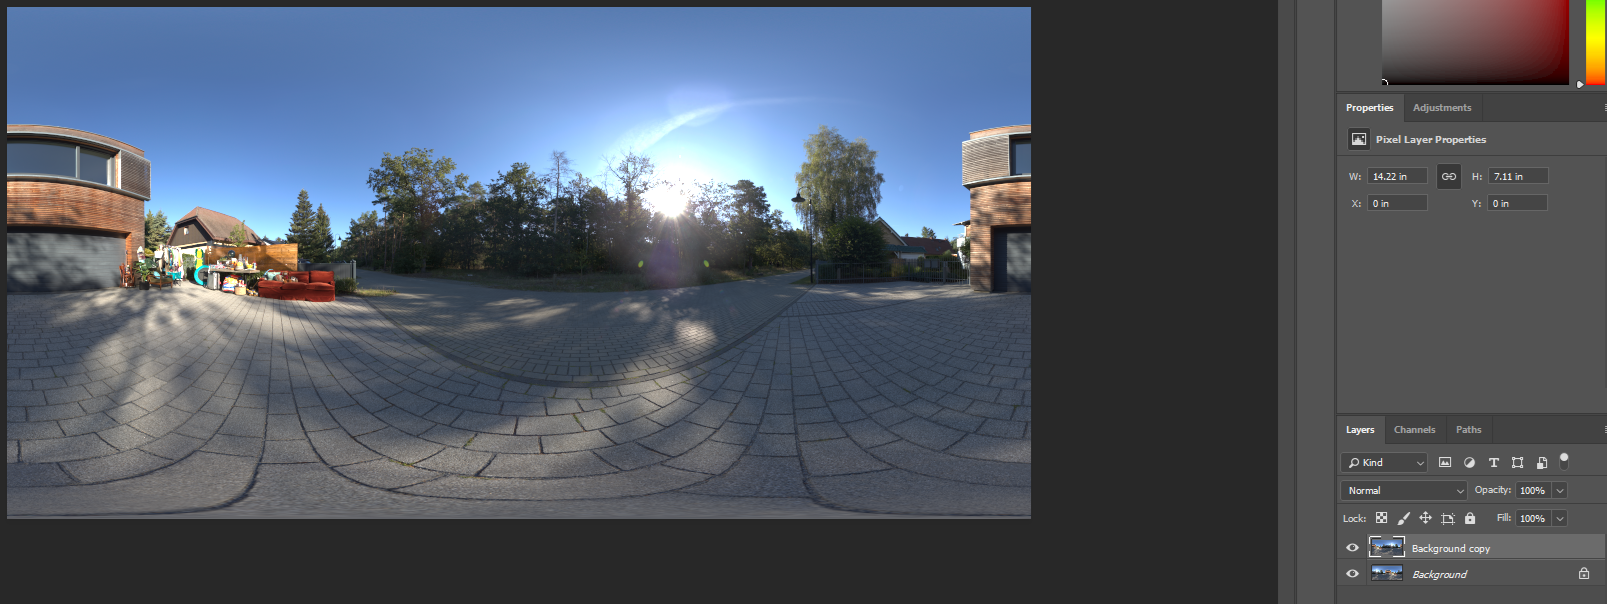
- For the Specular texture, you can use the same image used in the Reflection slot.
- Downsize this image further to 1024x512, and duplicate the Background layer.
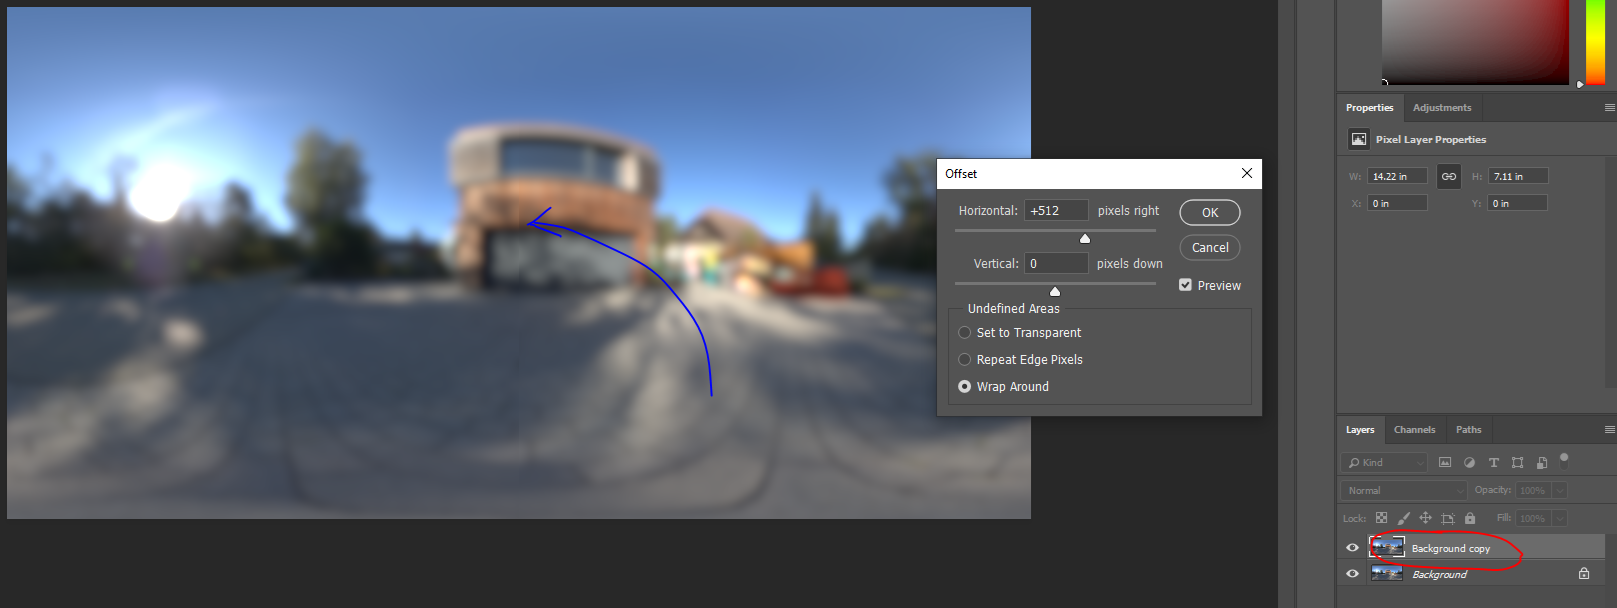
- On the duplicated layer apply a Filter > Other > Offset of 512 horizontally. This should move the image across its seam by 50% of the total image width.
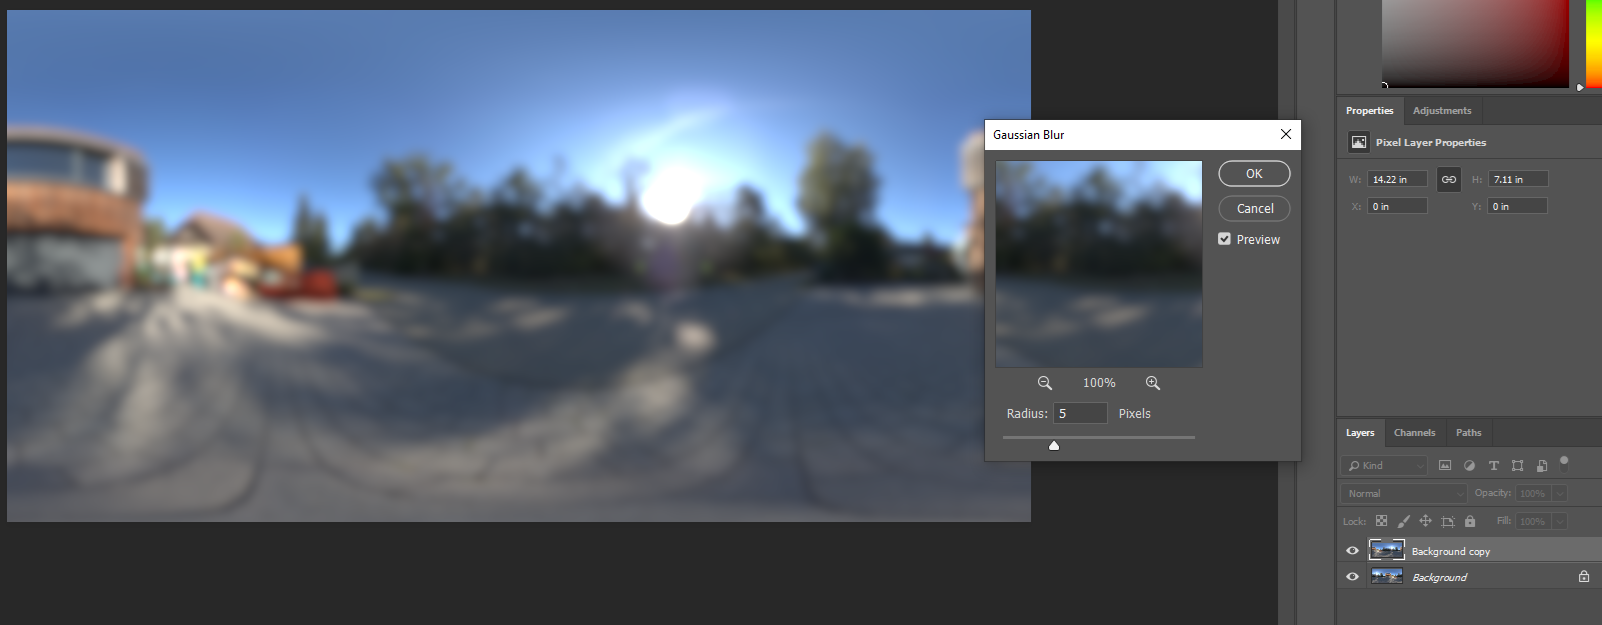
- On the duplicate layer, apply a Gaussian Blur modifier with a Radius of 5 pixels.
- Apply the same Gaussian Blur modifier with a Radius of 5 pixels on the Background layer.
- Apply another offset (Filter > Other> Offset) of 512 pixels to the top layer of the document, this should realign the top and Background layers, however you will notice that the Blur Modifier has created a seam in the centre of the texture.
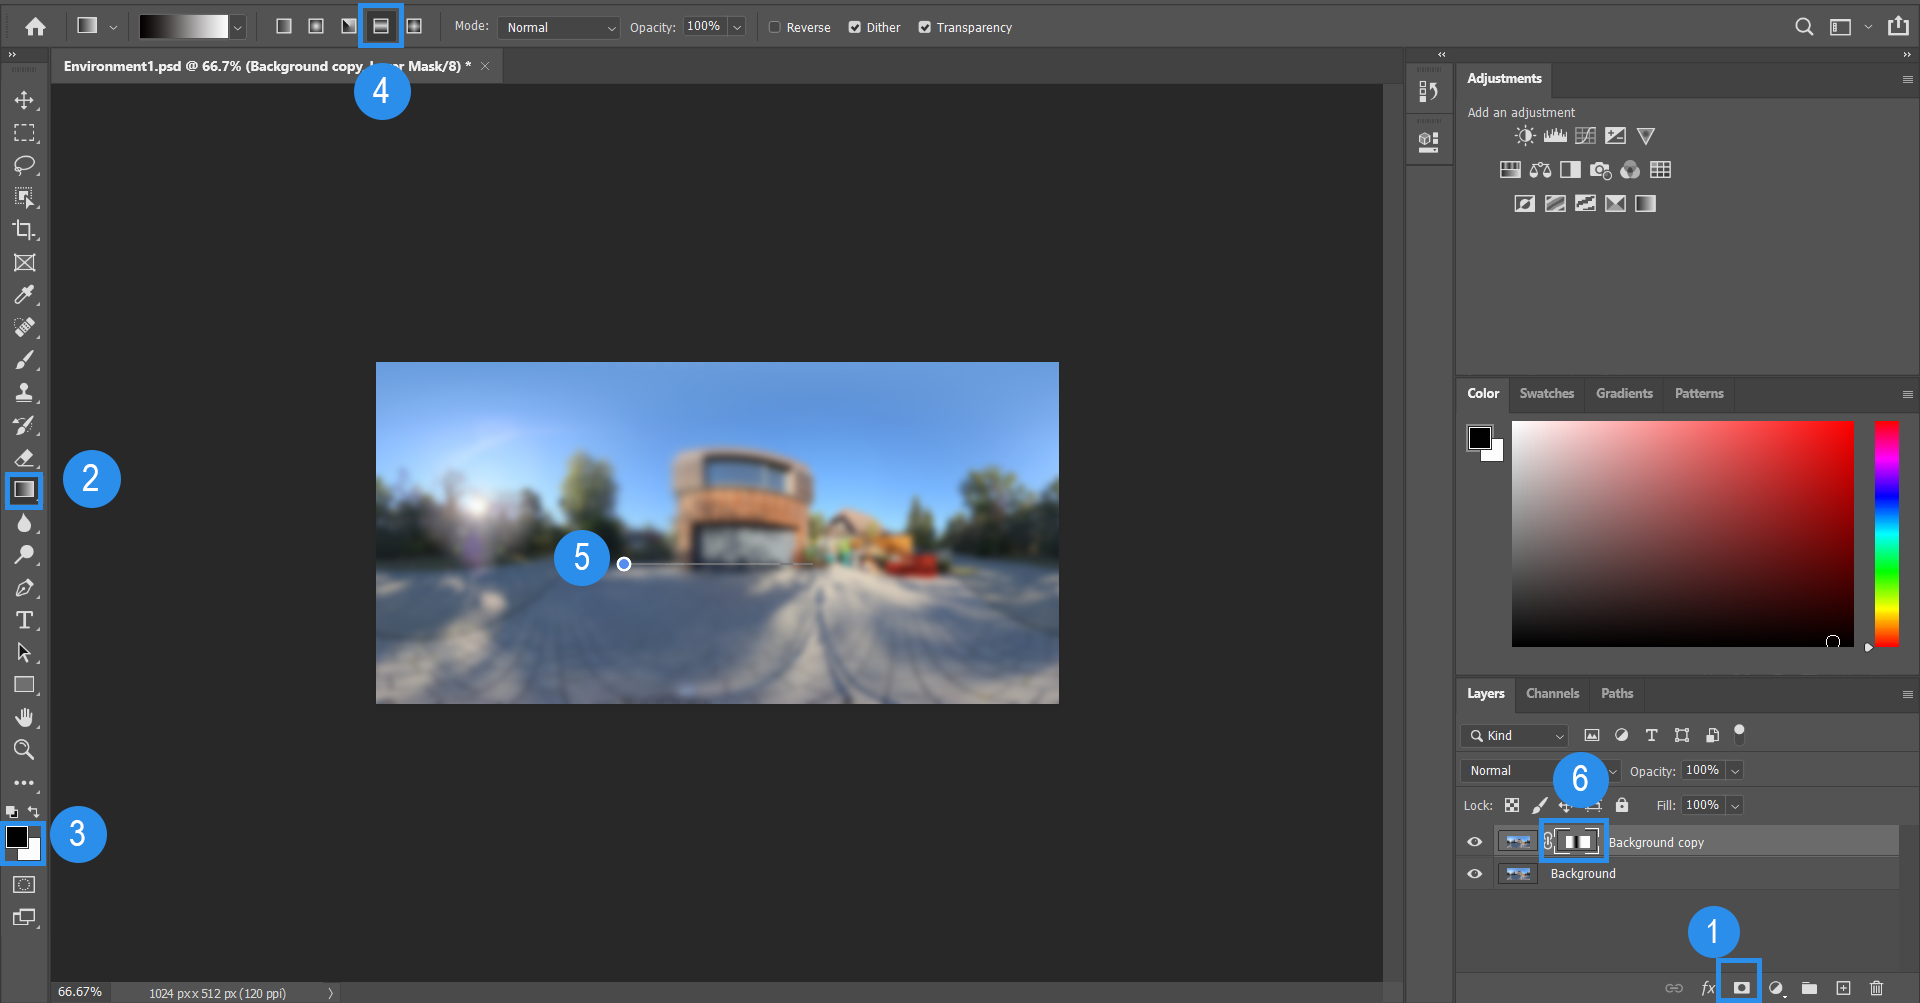
- To fix this, add a layer mask to the top layer and follow the steps in the image to create a gradient in the layer mask like in the preview labelled ‘6’. This should remove the Seam.
1. Click Create Layer Mask
2. Ensure the Gradient tool is selected.
3. Select the Black & White colours.
4. Select Reflected Gradient.
5. Click and drag across the screen to remove the seam.
- Save this file (e.g. Specular.exr) and upload and apply this to the IBL Specular Slot under Scene Components in the Scene app.
IBL Diffuse
- For the Diffuse texture, use the same file used for the reflection and specular textures.
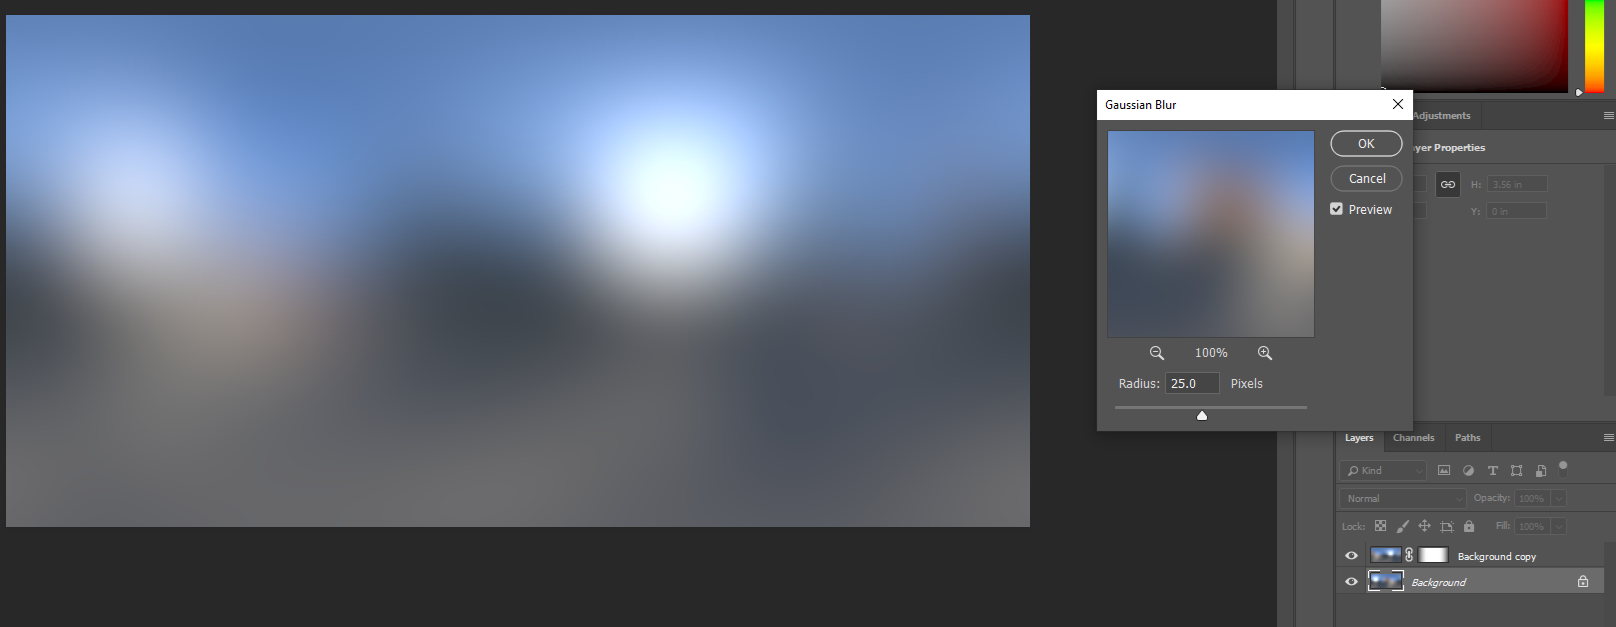
- Decrease the image size again down to 512x256, then apply a Filter > Other > Offset of 256 pixels horizontally to offset the top image by half the total width as below.

- Apply a Filter > Blur > Gaussian Blur of 25 pixels to this Background copy layer and also the Background layer.

- Apply Filter > Other > Offset the Background copy layer by 256 horizontally again to realign the images.

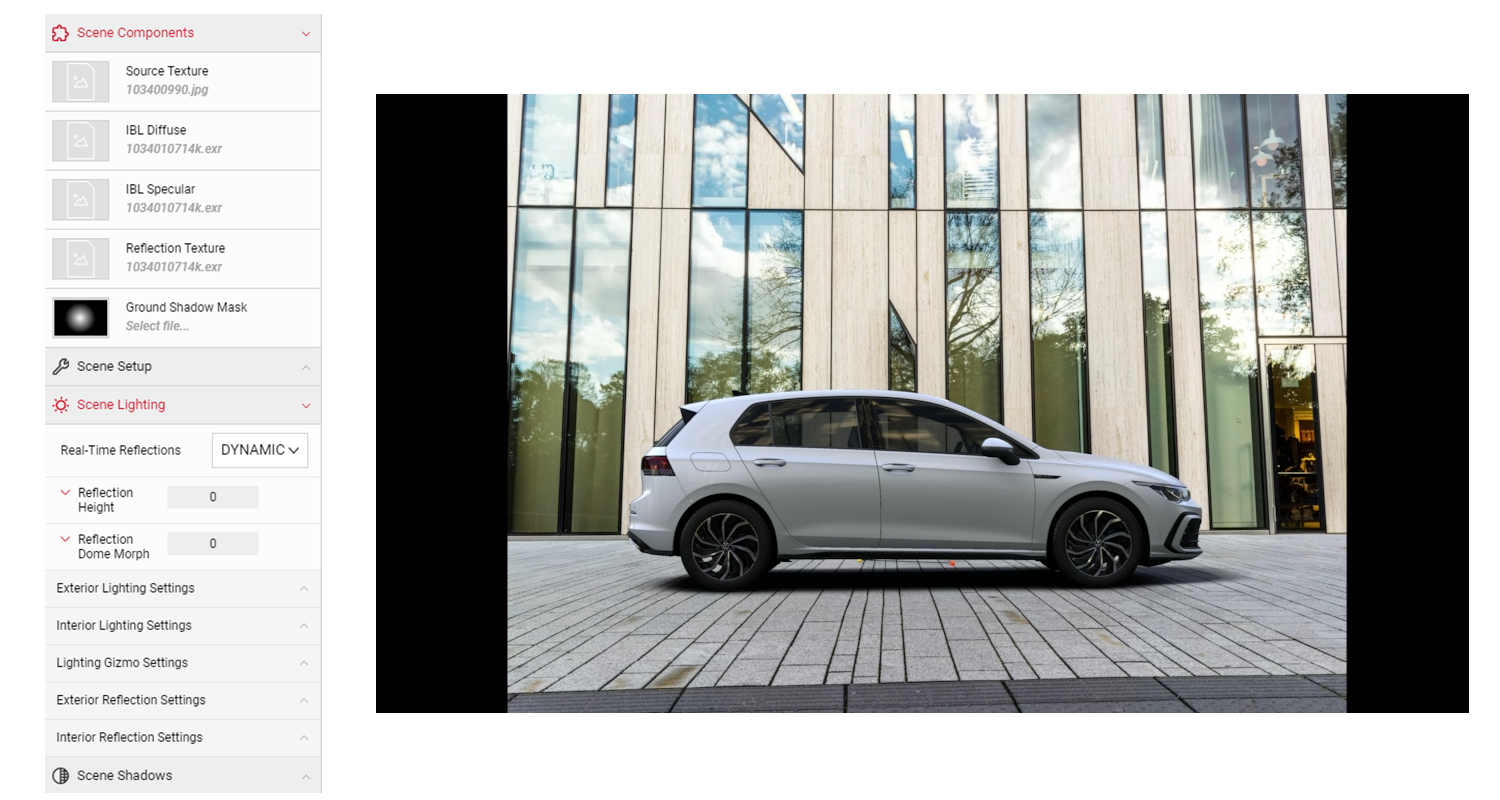
- Save this (e.g. Diffuse.exr) then upload it to the Scene app and apply it under Scene Components to IBL Diffuse slot.
This step completes the basic set up of the Scene app IBLs. It is important to do the Offset Filter in the steps above as not doing so will create a seam in the IBLs like this:
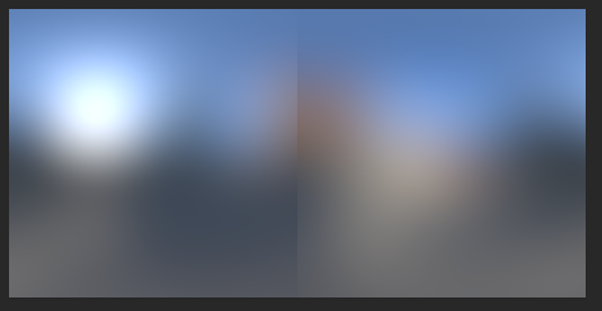
This applied to the IBL Diffuse Slot on the car would cause very visible artifacts, especially on lighter colour car paints.
After following the steps above, you should now have a good base with which to start adjusting the sliders within Scene, you can also edit each of the IBLs in Photoshop to paint in highlights and reapply them to the slots in Scene. It is a good idea to have the Jellybean texture uploaded to your Scene project at all times when adjusting the IBLs in Photoshop as you can use this texture to pinpoint where on the IBL you need to paint in a highlight or shadowed area.
Highlighting Specific Areas
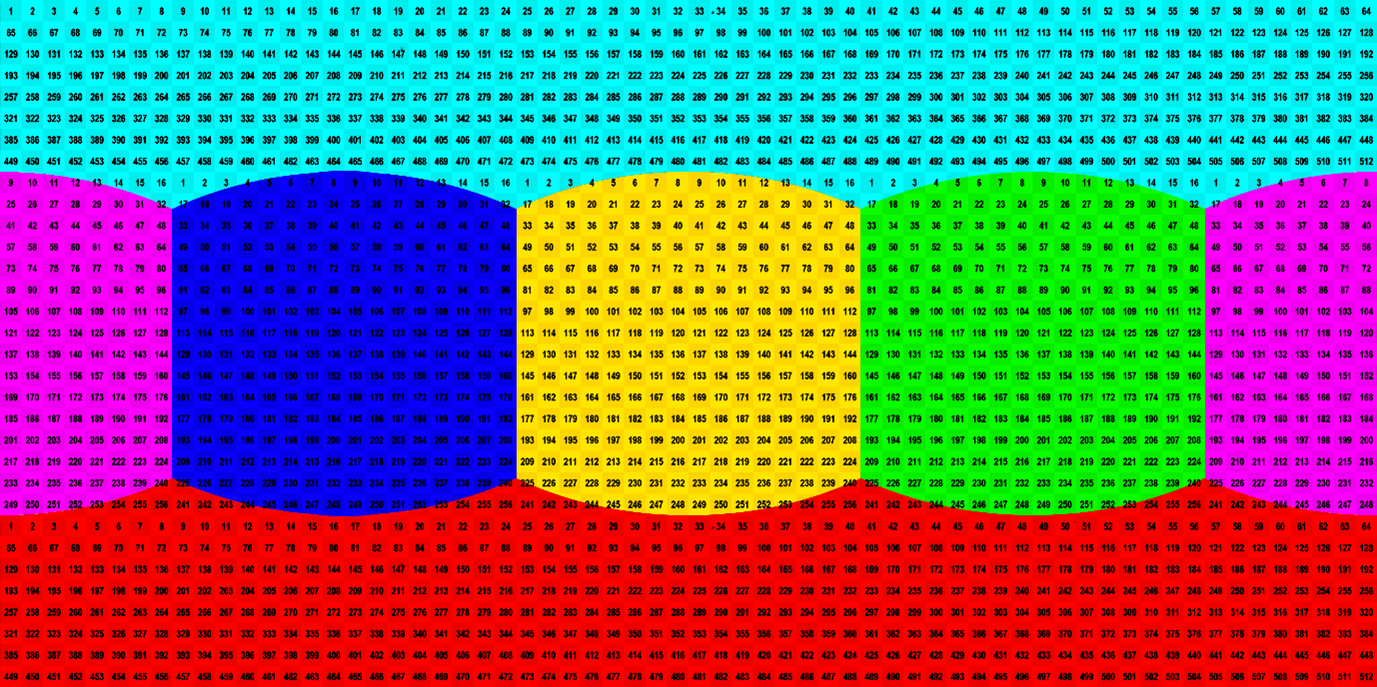
The Jellybean texture is the default environment when you first create a Scene project. as mentioned above, you can apply this texture to the Reflection slot in Scene to pinpoint where on the IBL you need to paint in a highlight or shadowed area. Download the asset below by clicking the button below.
- Apply the Jellybean texture to the Reflection slot in Scene Components.
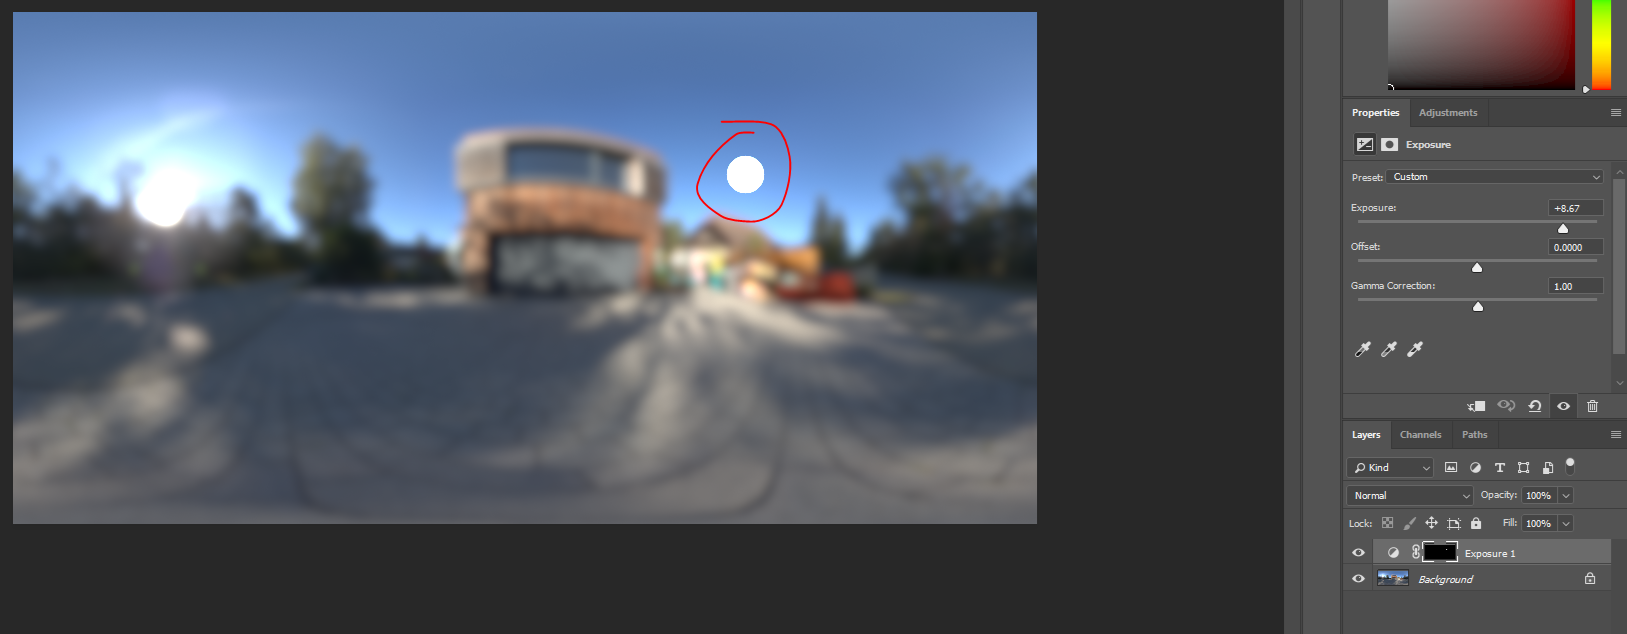
- Adjust the Brightness and Contrast sliders in the Exterior Reflection params settings.
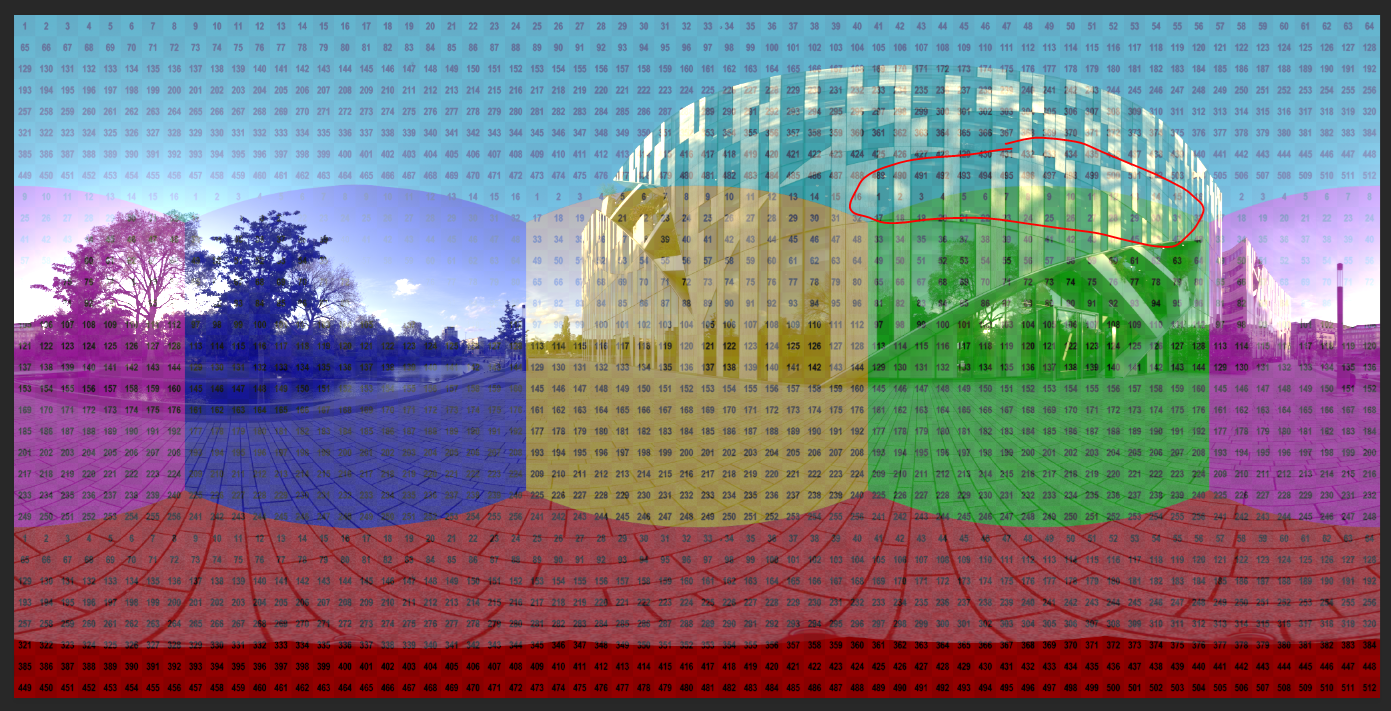
- Take note of the Jellybean texture on the spot you want to highlight. This will be your reference in Photoshop.

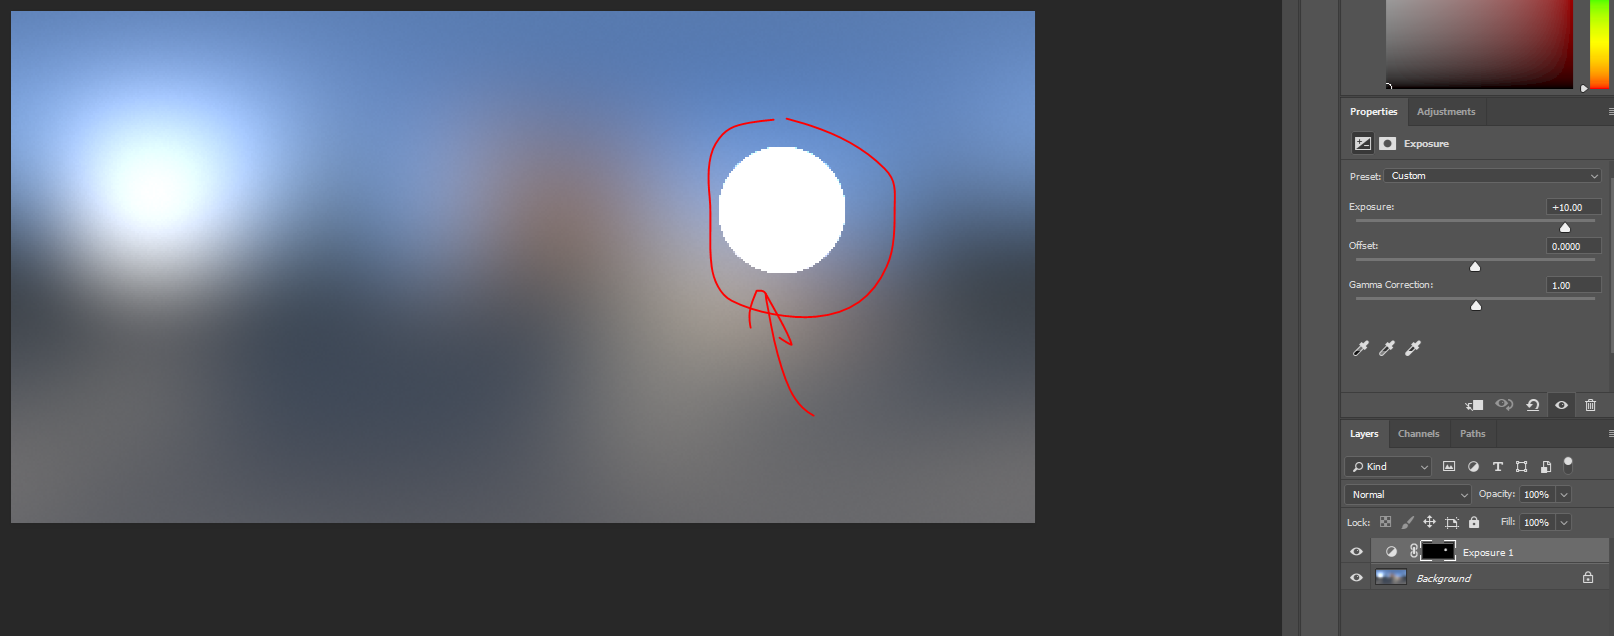
- Now to add in a highlight to the reflection in Photoshop, you can apply the Jellybean texture as a layer over your HDR to find out where the highlight needs to be. You can see in this example it is at the border between the green and blue section of the texture:
- Now, add in a highlight.
- Once you're happy with your image, save the file and add to the Reflection slot in Scene.
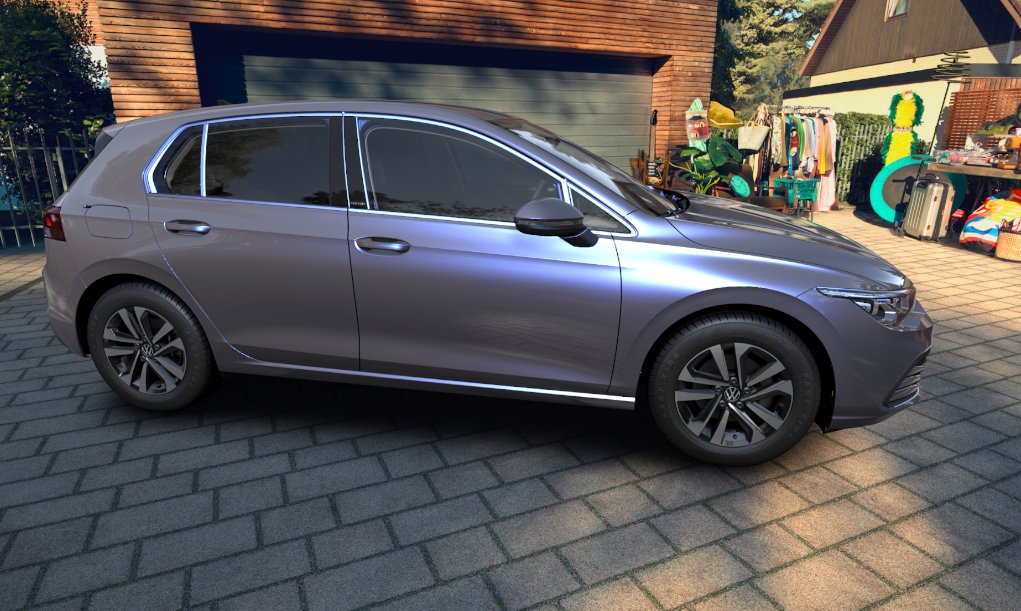
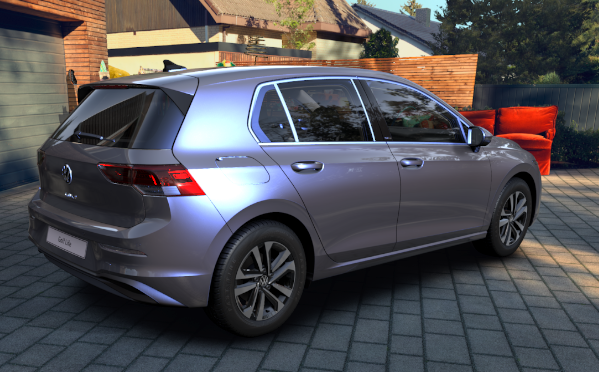
Before:
After:
- If you're happy with your image, continue to adjust the settings in the Scene app. To make finer adjustments to the highlight, edit in Photoshop and reapply the file to the Reflection slot.
Diffuse vs Specular
The difference between the Diffuse and Specular IBL's is that the Diffuse ignores the angle of the camera to the surface of the vehicle, whereas the Specular IBL takes the camera angle into consideration. For example, painting a very bright spot in the diffuse texture would have the following effect:
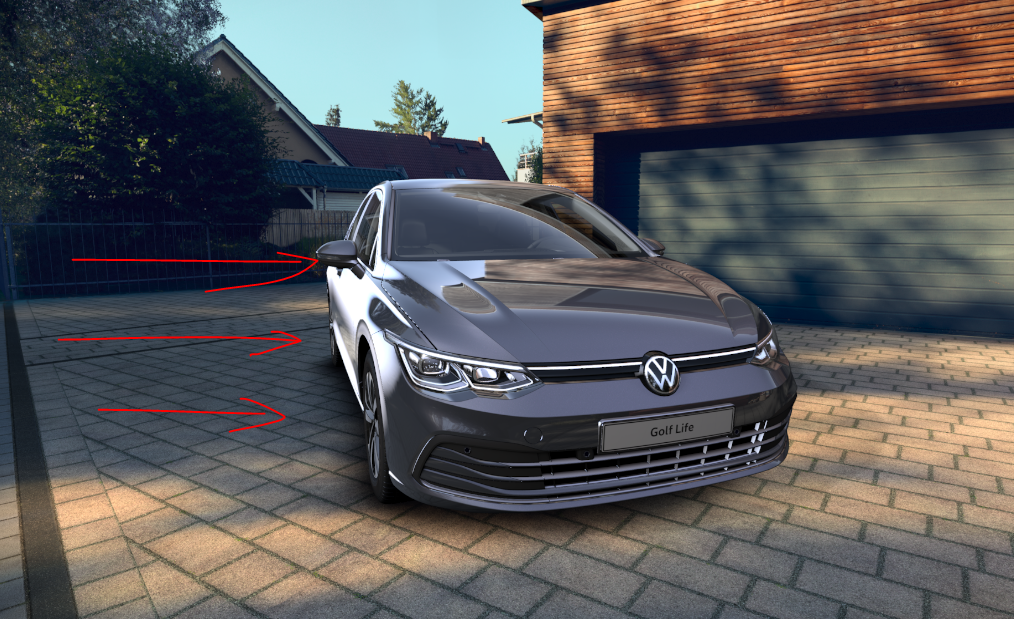
- You can see that this is independent of camera angle.
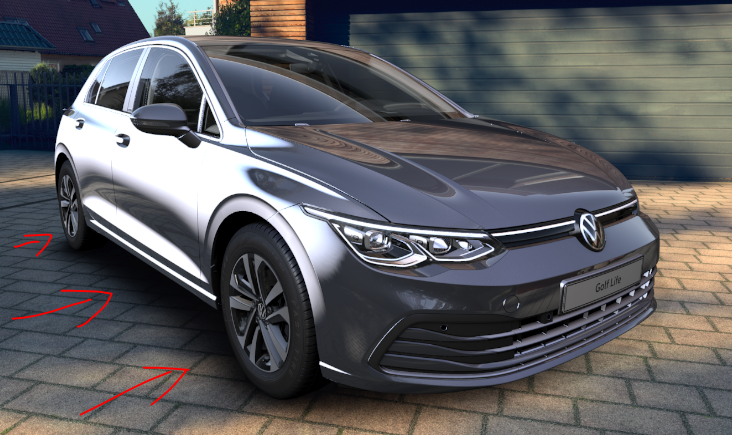
- The Specular IBL however, takes the camera angle into consideration. As with most Physically Based materials, the specular effect becomes stronger as the angle between the light source and the camera angle gets narrower. This means when the angle of view is equal to the angle of the surface viewed, the surface acts like a mirror. For example, if you try adding strong highlights into the specular you can see the effect it has:
Creating a Studio Environment
Creating a studio environment will require a similar process as above.
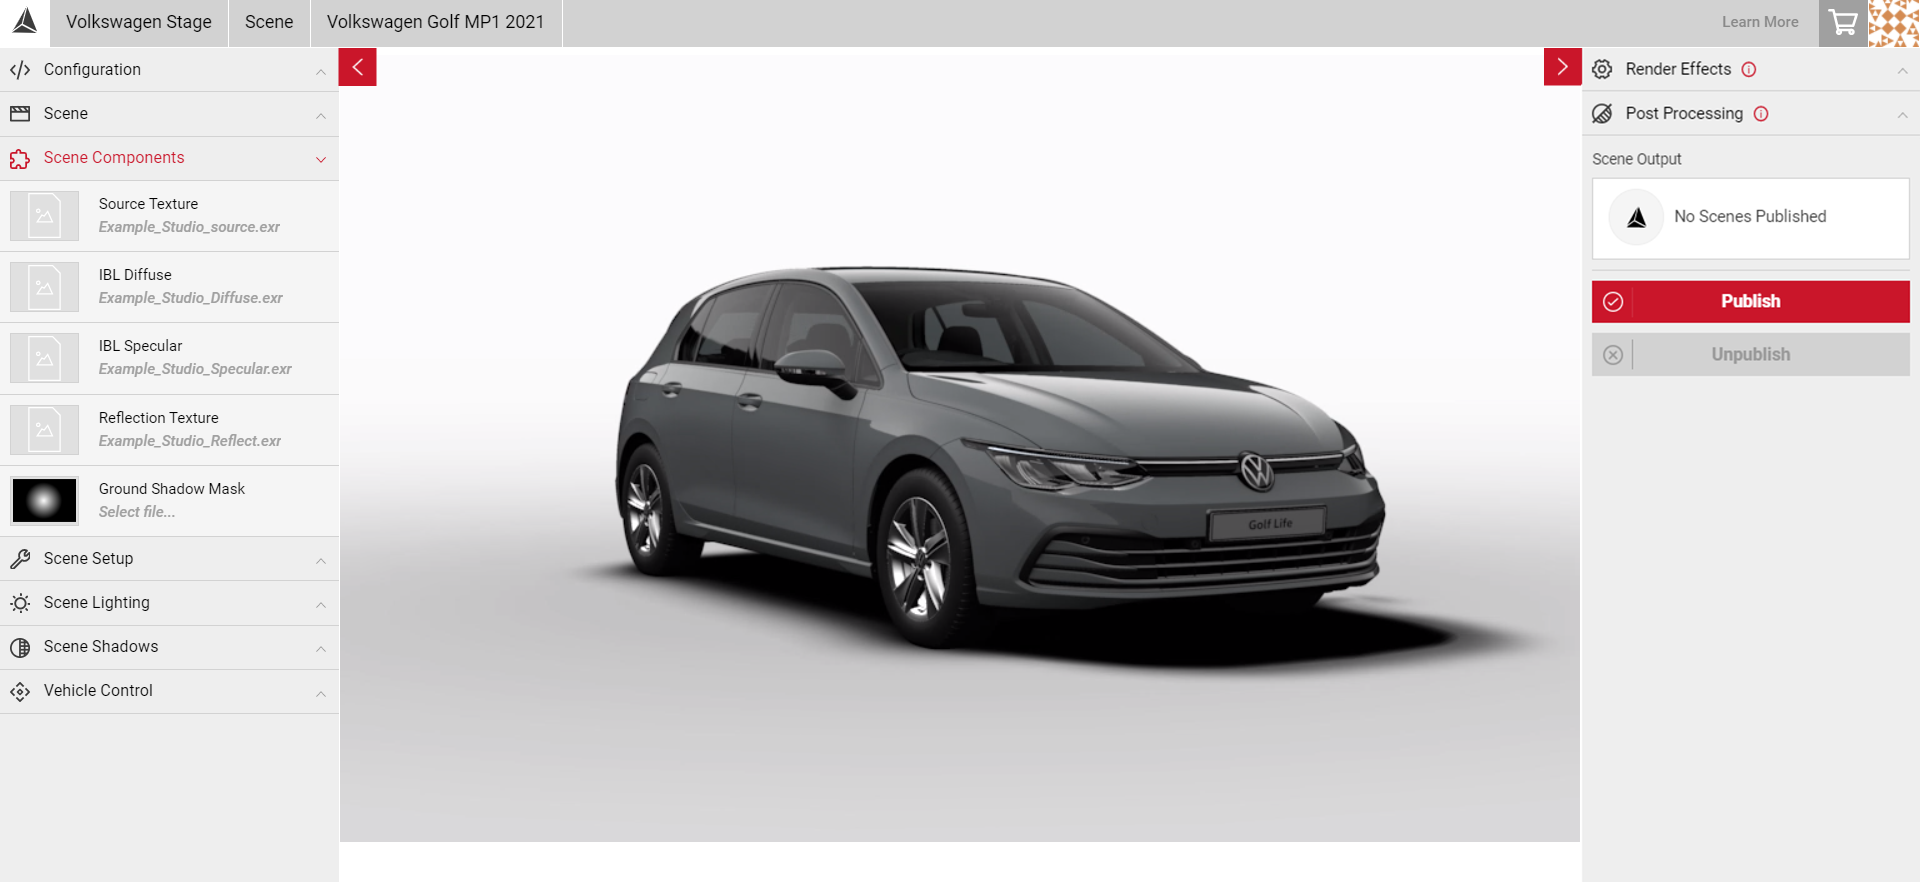
Studio Source Texture
- Ensure the source texture is 32-Bit image. 4096x2048 resolution is recommended.
- Add the texture to the Source Texture slot under Scene Components.
- In this example, the source texture was created in Photoshop using the mask and gradient tool.
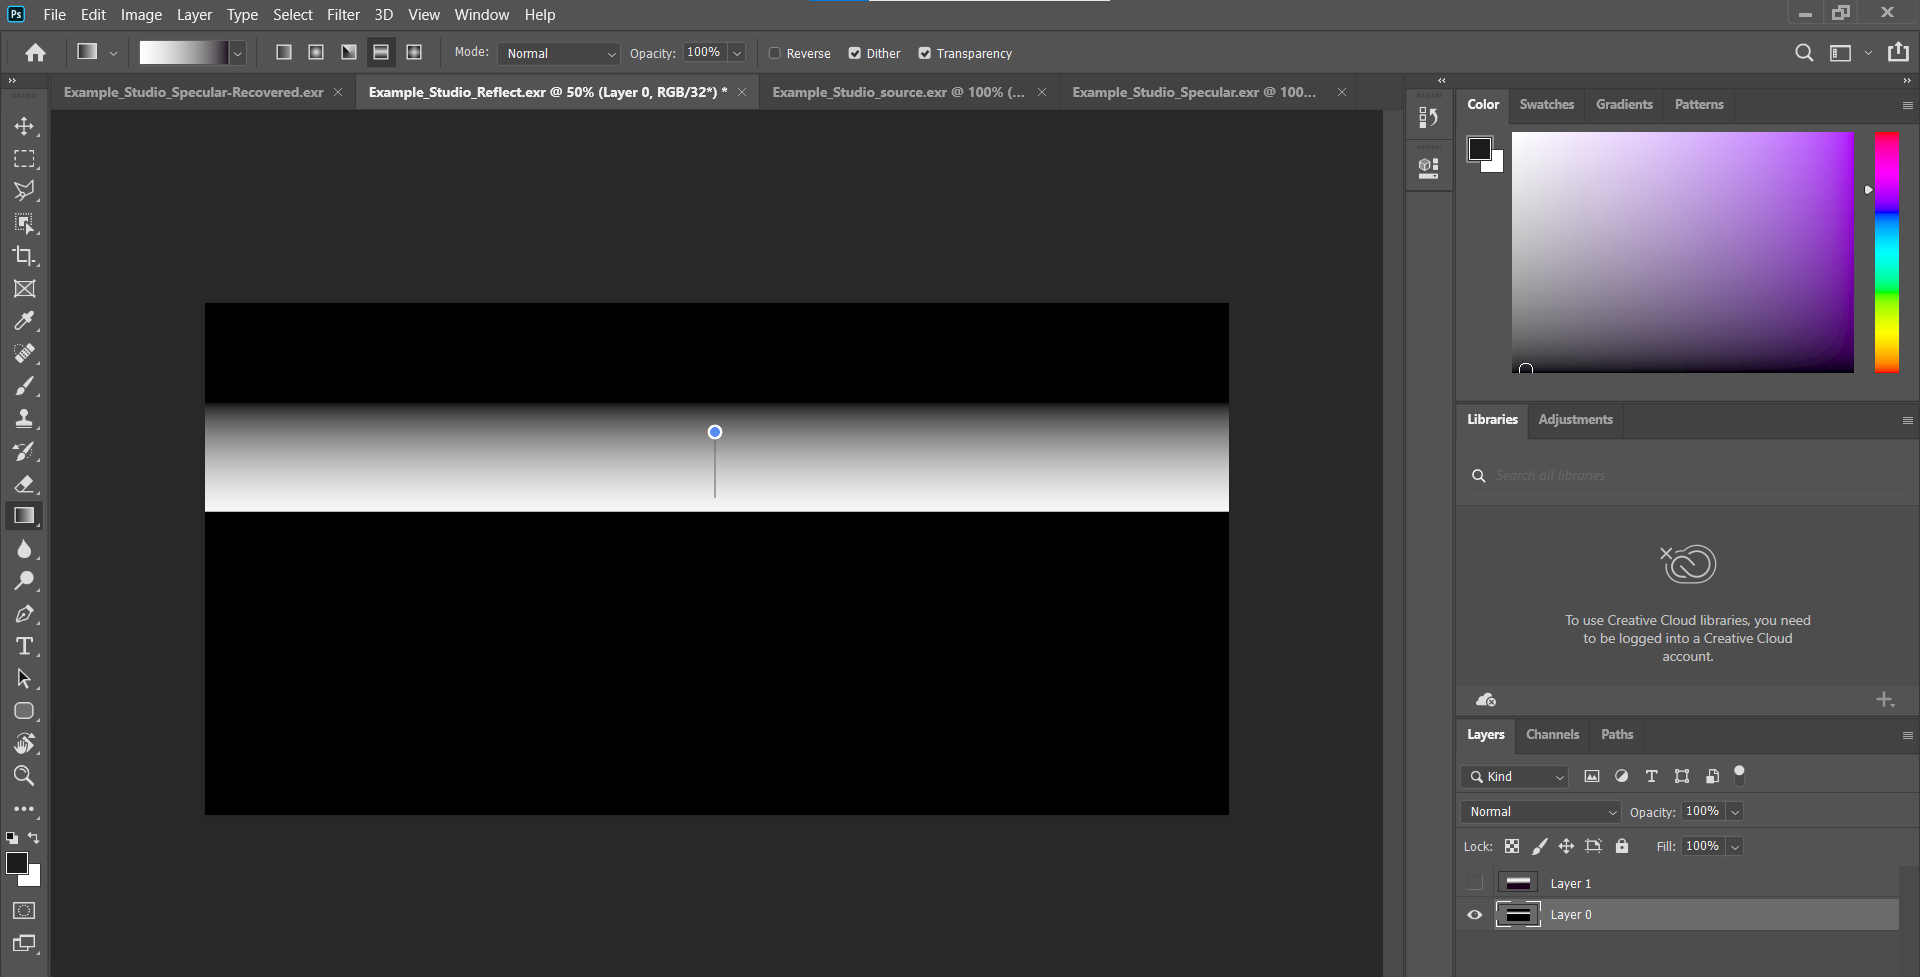
Studio Reflection
- Create 32-Bit image file in Photoshop with a 4096x2048 resolution.
- In this example, the Gradient tool was used to create a highlight across the top of the reflection map.
1. Select the Gradient tool.
2. Select your colours.
3. Select Reflected Gradient.
4. Click and drag across the screen to get the desired position. - You can also use the Jellybean texture for reference to create reflections in specific areas. Upload the Jellybean texture to the Reflection slot as mentioned above, then pinpoint the position to place a highlight or shadow.
- Overlay the Jellybean texture over your reflection texture in Photoshop to create the reflection in the correct position.
- Save this file (e.g. Reflection.exr) and apply it to the Reflection slot under Scene Components in the Scene app.

Studio IBL Diffuse
- For the Diffuse texture, use the same file used for the source texture.
- Decrease the image size down to 512x256.
- Apply a Filter > Blur > Gaussian Blur of 25 pixels.
- Save this file as your IBL Diffuse texture (e.g Diffuse.exr).
- In SpotLight, upload this file to the IBL Diffuse slot in Scene Components.

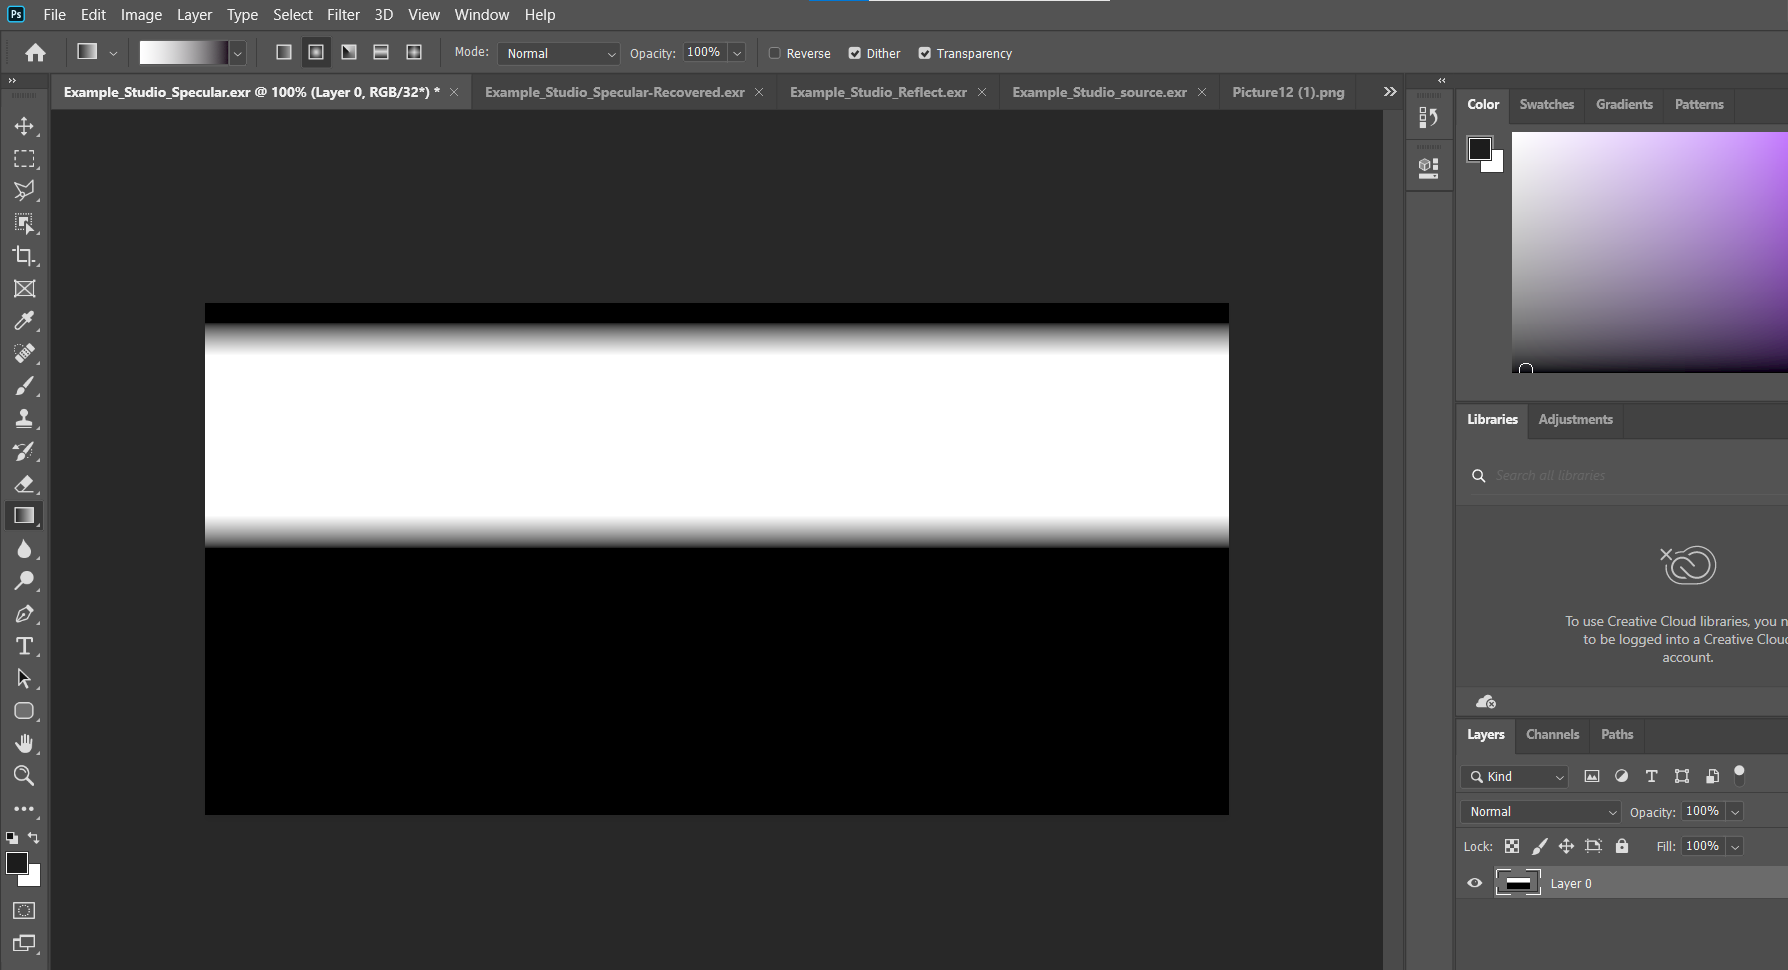
Studio IBL Specular
- For the Specular texture, create a 32-Bit image file with a 1024x512 resolution.
- Select the Gradient tool and click and drag across the screen to create the desired effect and position.
- Save this file (e.g. Specular.exr) and apply this to the IBL Specular Slot under Scene Components in the Scene app.
- Make any adjustments to your textures in Photoshop if required, then reapply them to the Scene Components.
Once you're happy with your scene make finer adjustments using the Scene Lighting and Scene Shadow settings.