Scene Components
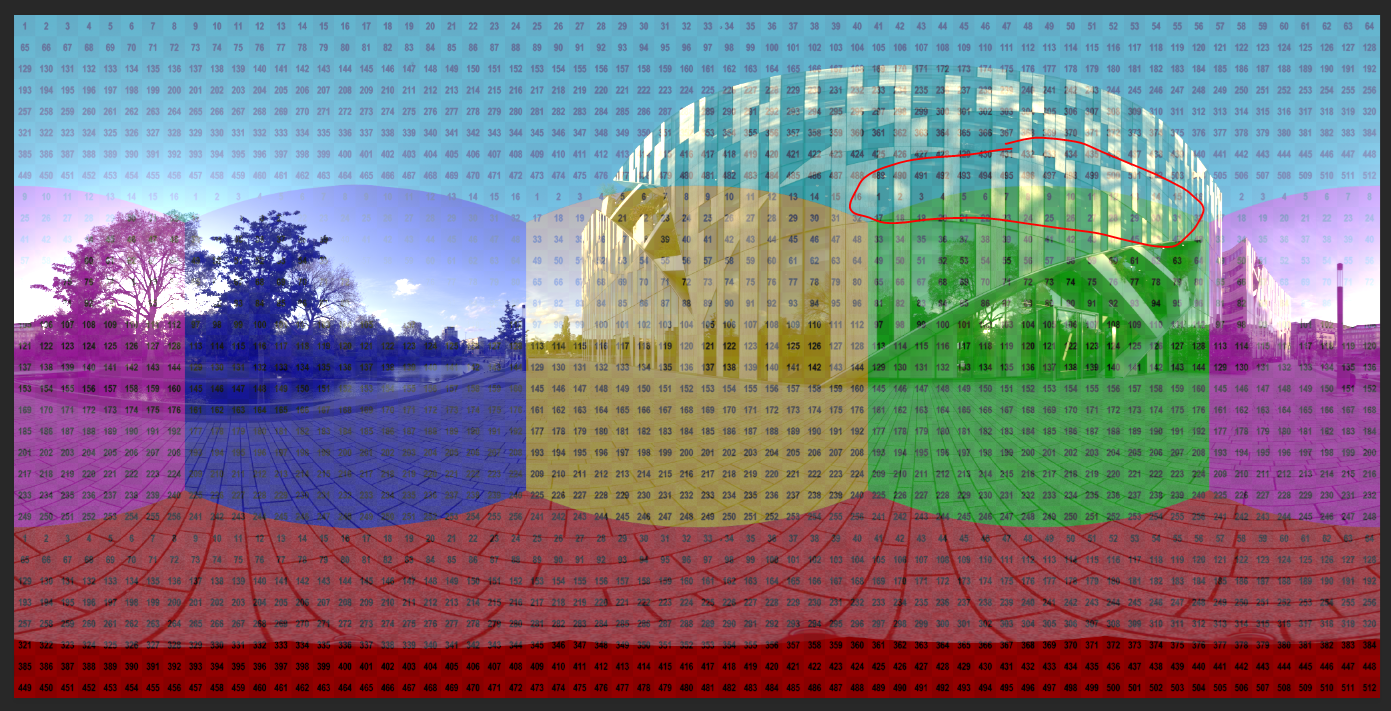
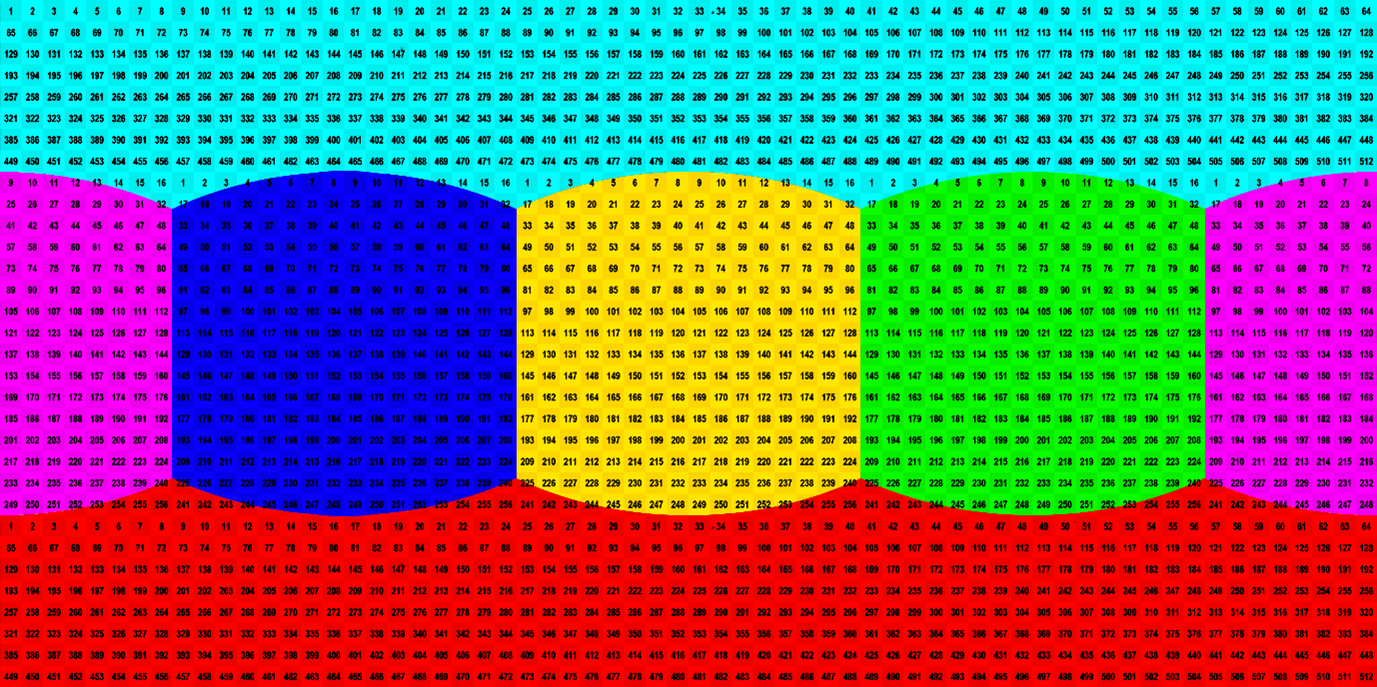
Scene components allows you to upload multiple assets to pre-defined asset slots to apply various textures to your scene. These include a Tonemapped background image (source texture) Reflection, IBL Diffuse, IBL Specular & Grounding Shadow Mask. These textures are then projected onto the JellyBean texture (coloured and numbered background shown below) which is the default environment when you first create a new scene. After uploading your assets:
- For Dome scenes you can then select an Environment Type in the Scene Setup menu, Dome or Sphere which give you additional controls to change the shape/size of the dome.
- For Backplate scenes, you will then be able to set the camera projection lines using the Camera Solver tool.

Asset Slots
- Tonemapped Background
A high quality tonemapped image or HDR that defines your scene. A number of several free assets can be found here https://hdrihaven.com - Reflection, IBL Specular & IBL Diffuse
These assets should be a HDR file that is not tonemapped. Adding a tonemapped HDR to these slots may make the lighting in your scene appear dull in certain areas. You can use the same file for each of these slots, or create additional textures for specific effects. - Ground Shadow Mask
This slot can be left empty. Although you can also create a shadow mask in Photoshop to create the desired look and reapply in Scene Components.
Note: If you are using large, high resolution files it may take several mintutes for the asset to load.
Uploading Your Assets
To upload each of your files, you can select each asset slot under Scene Components to bring up the Asset Manager dialog. Opening the Asset Manager will allow you to see all of your previously uploaded assets, any new files you upload will also be stored.
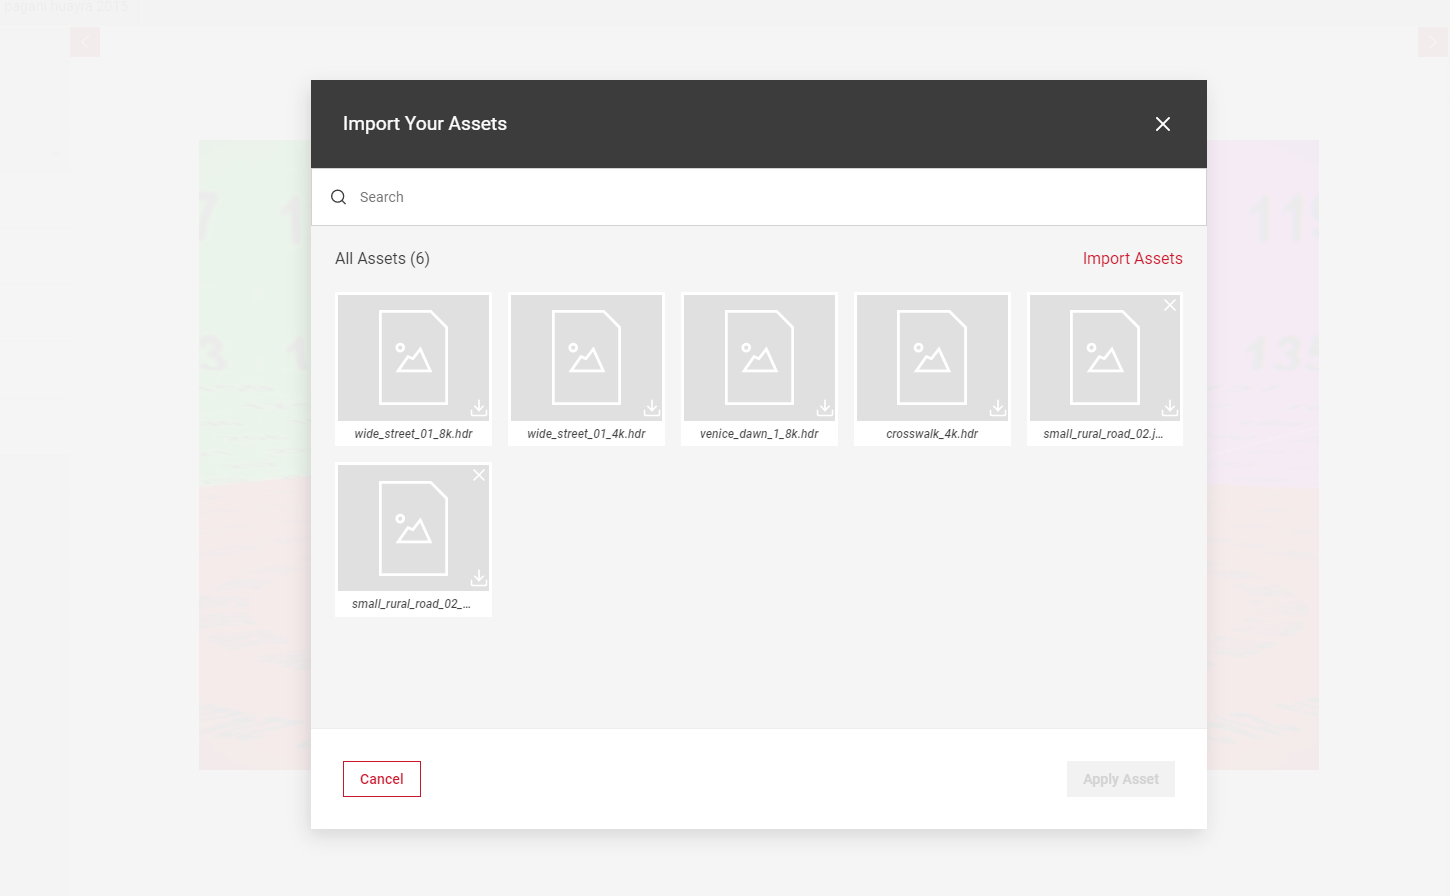
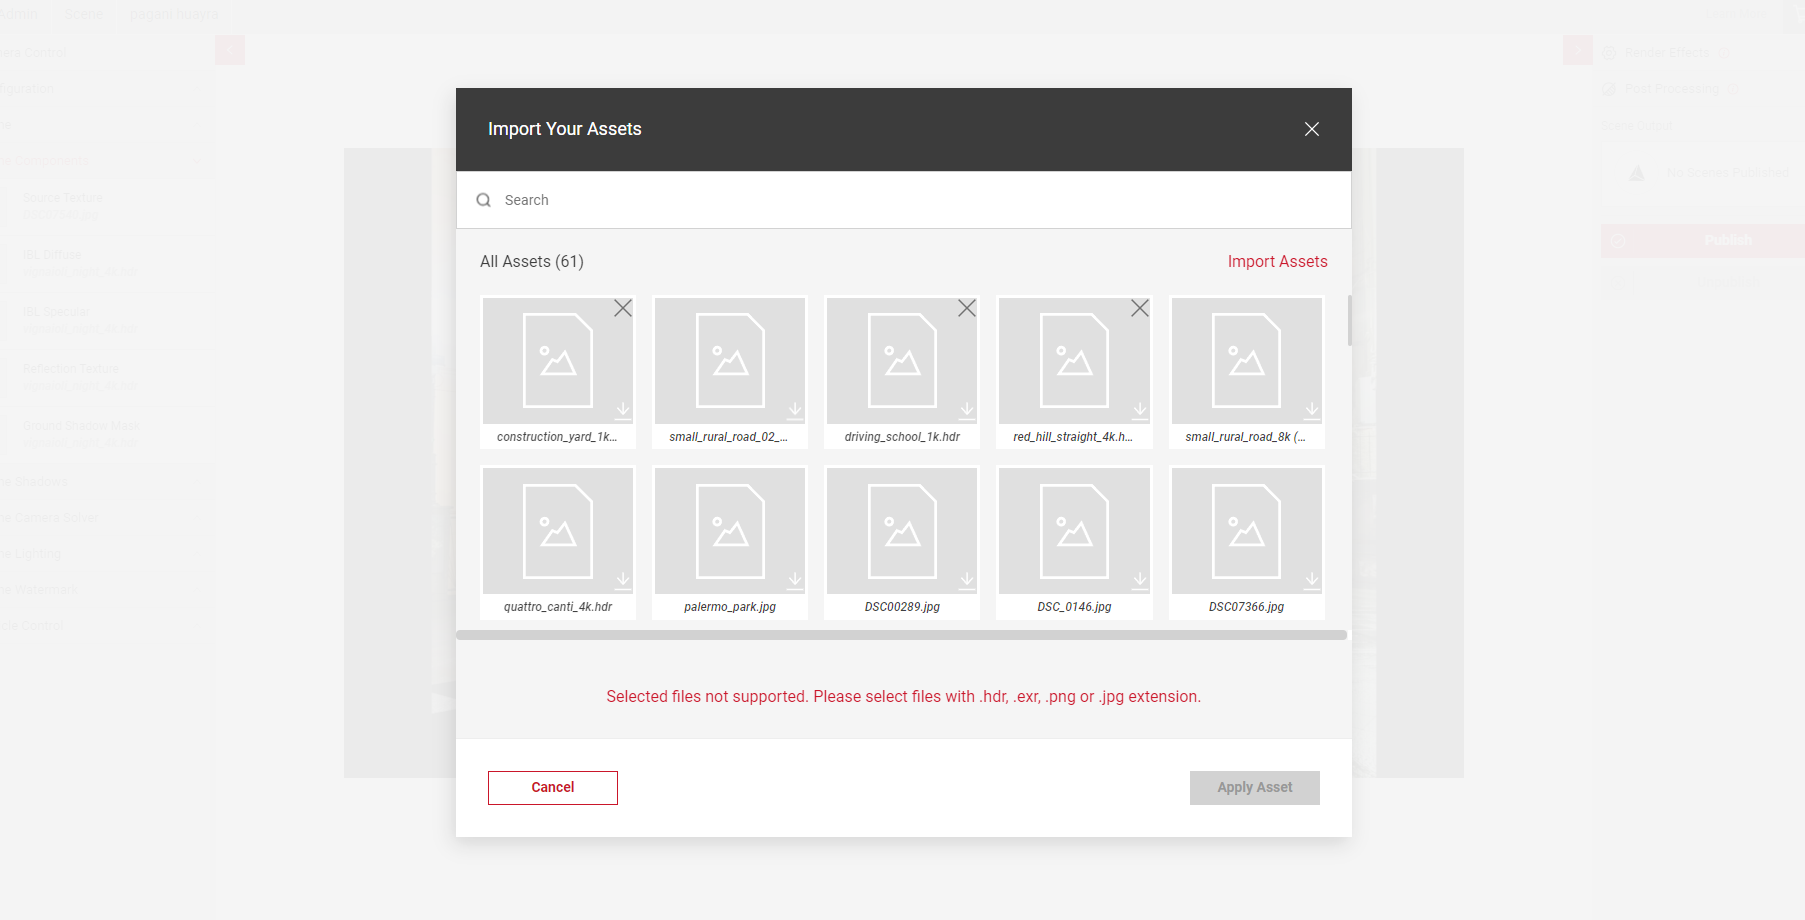
Note: Only .hdr, .exr, .png or .jpg files types are supported. If you upload a file type that is not supported, you will see an error message in the Import Your Assets dialog.
- Select the Source Texture slot to bring up the Asset Manager dialog. All of your previously uploaded files will be shown here.
- Drag and drop your files. All of your files will be displayed under All Assets, and you can download these assets at any time.
- Once you have uploaded your assets, select the appropriate one and click Apply. Select the [ X ] icon next to each component slot to remove the uploaded file.
- To change your image/HDR, select the Source Texture slot again to bring up the Import Assets dialog and select a new asset to apply.
- You can add or remove assets at any point in your Asset Manager. Any assets referenced in a scene cannot be deleted. The scene must be unpublished first, then the asset can be removed.
- Repeat the process for adding the other asset files.
- Once you've finished adding your assets, they will be visible in the scene. You will also see the file name used under each slot.
- To remove any files, click the X on each asset tile.
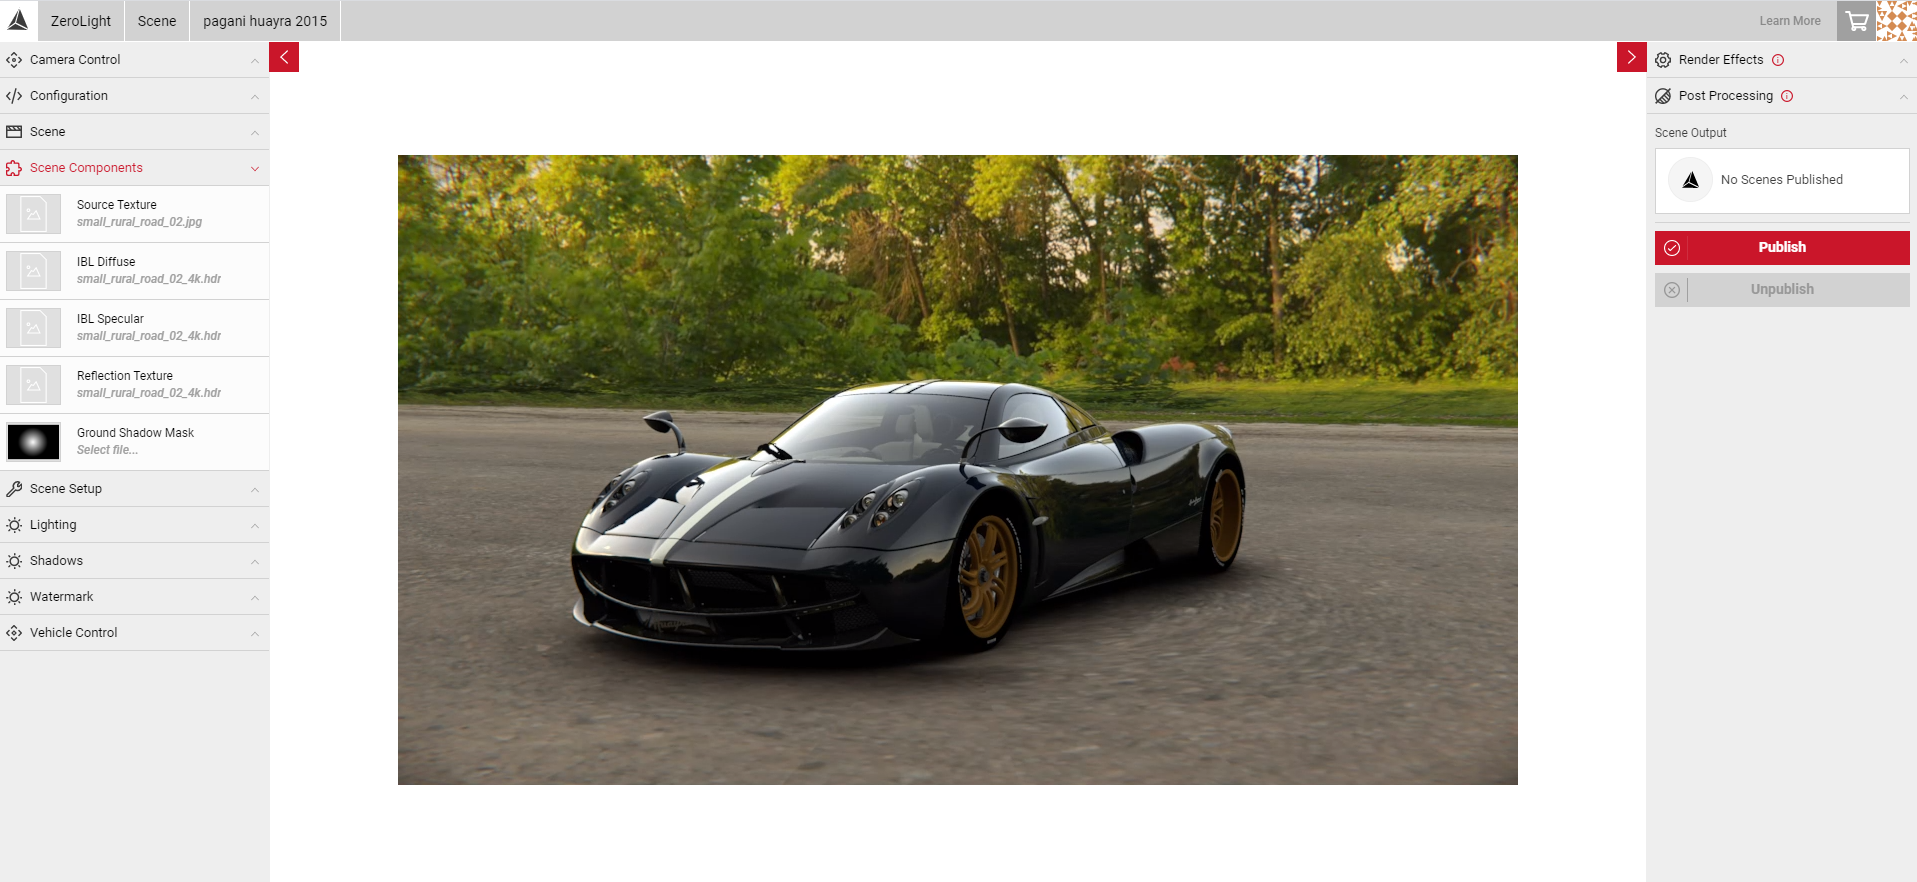
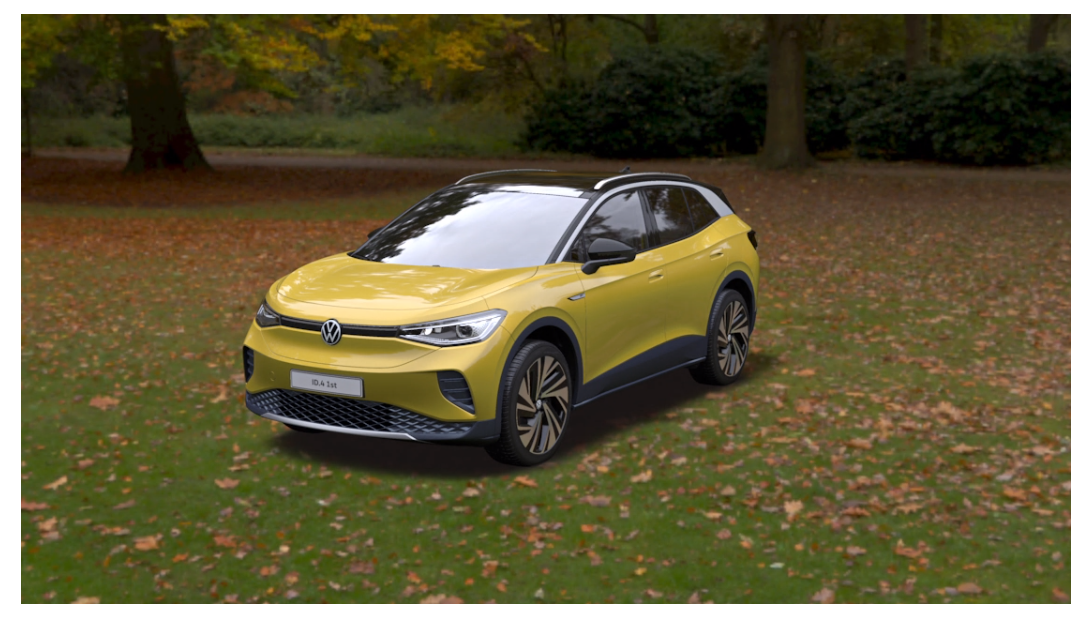
It's important to use a Tonemapped image or HDR for your background slot. Applying the same file used for the Lighting asset may result in a dull looking environment, using a tonemapped image will make the scene appear more vibrant. See the example below, the first image shows a tonemapped background, the second un-tonemapped. Both images have used the same HDR for the lighting and reflections slots.

Once you've uploaded your assets, you can now use Scene Setup tool to choose your environment type and begin building your Scene.
Creating Your Own Textures
To create more realistic reflections and lighting, or specific areas for shadows and highlights, you can create separate textures from your HDR image in third party software such as Photoshop. You can add the Jellybean texture to the Reflection slot to pinpoint specific areas to add lighting or reflections to, and overlay this over your environment image in Photoshop. Jellybean Texture is the default texture when you first create a scene in the scene app. It can be used as an overlay in Photoshop to pinpoint specific areas to add reflections or lighting.
- Download the asset below by clicking the button below.

Find out more about Creating Scene Component Textures textures in Photoshop