Scene Shadows
Scene shadows allows you to adjust the colour, intensity and direction of shadows on the vehicle to create a realistic scene. You can edit the exterior and interior settings of the vehicle with additional options to alter the intensity and colour of the grounding shadow. Before changing any of the shadow settings, it is good practice to ensure you are happy with your scene setup and vehicle position.
Note: The vehicle is not specific to the Scene project and is not saved per Scene. All the same settings will be saved each time a different vehicle is selected, but vehicle position, shadows and lighting may appear differently.
- Firstly, select your Ground Colour. This colour resembles the area in which the car shadow is being cast on the ground. Try to match the colour with other shadows in your scene to create more realistic shadows.
- You can also adjust the Opacity slider within the colour picker box to get the desired effect.
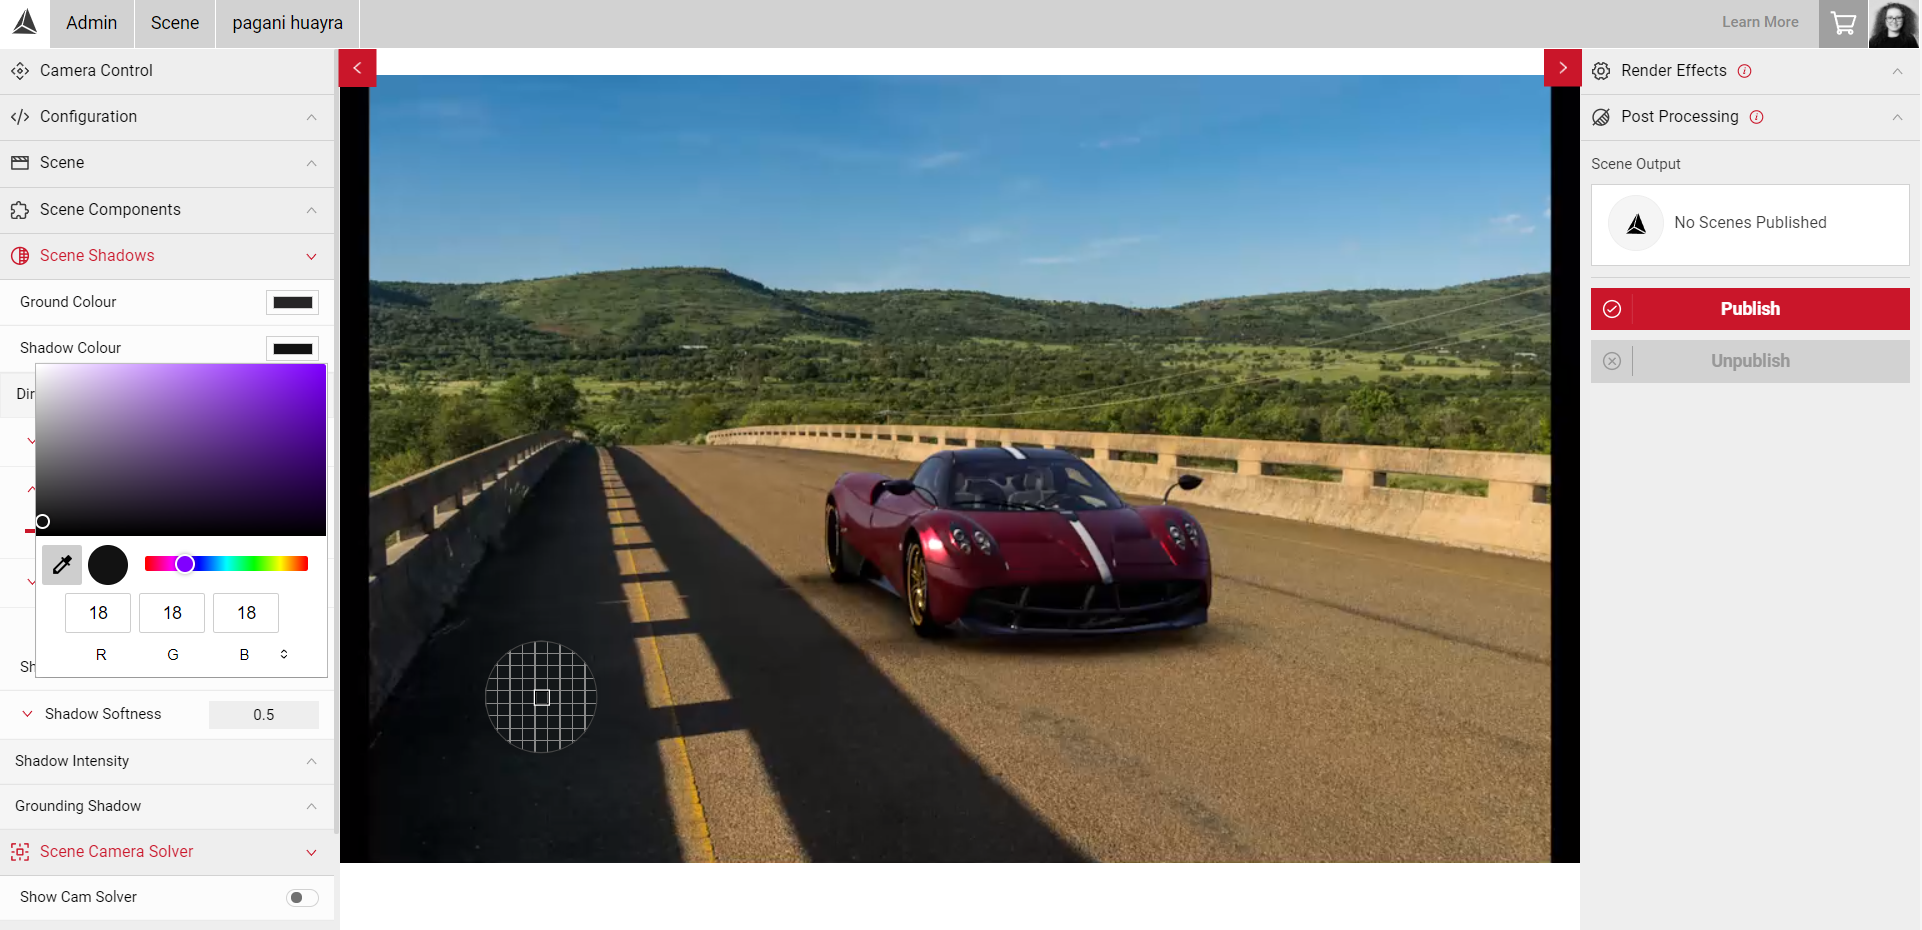
- Select your Shadow Colour. This is the shadow usually a shade of grey, but you should aim to match the colour with other shadows in your scene.
Use the colour picker to select colours from your scene. Select the eye-dropper icon and move the cursor around to select your colour.

- Select the Show Shadow Direction slider to enable the gizmo in the stream. Try to match your shadows with direction of the sun/light source in your project.
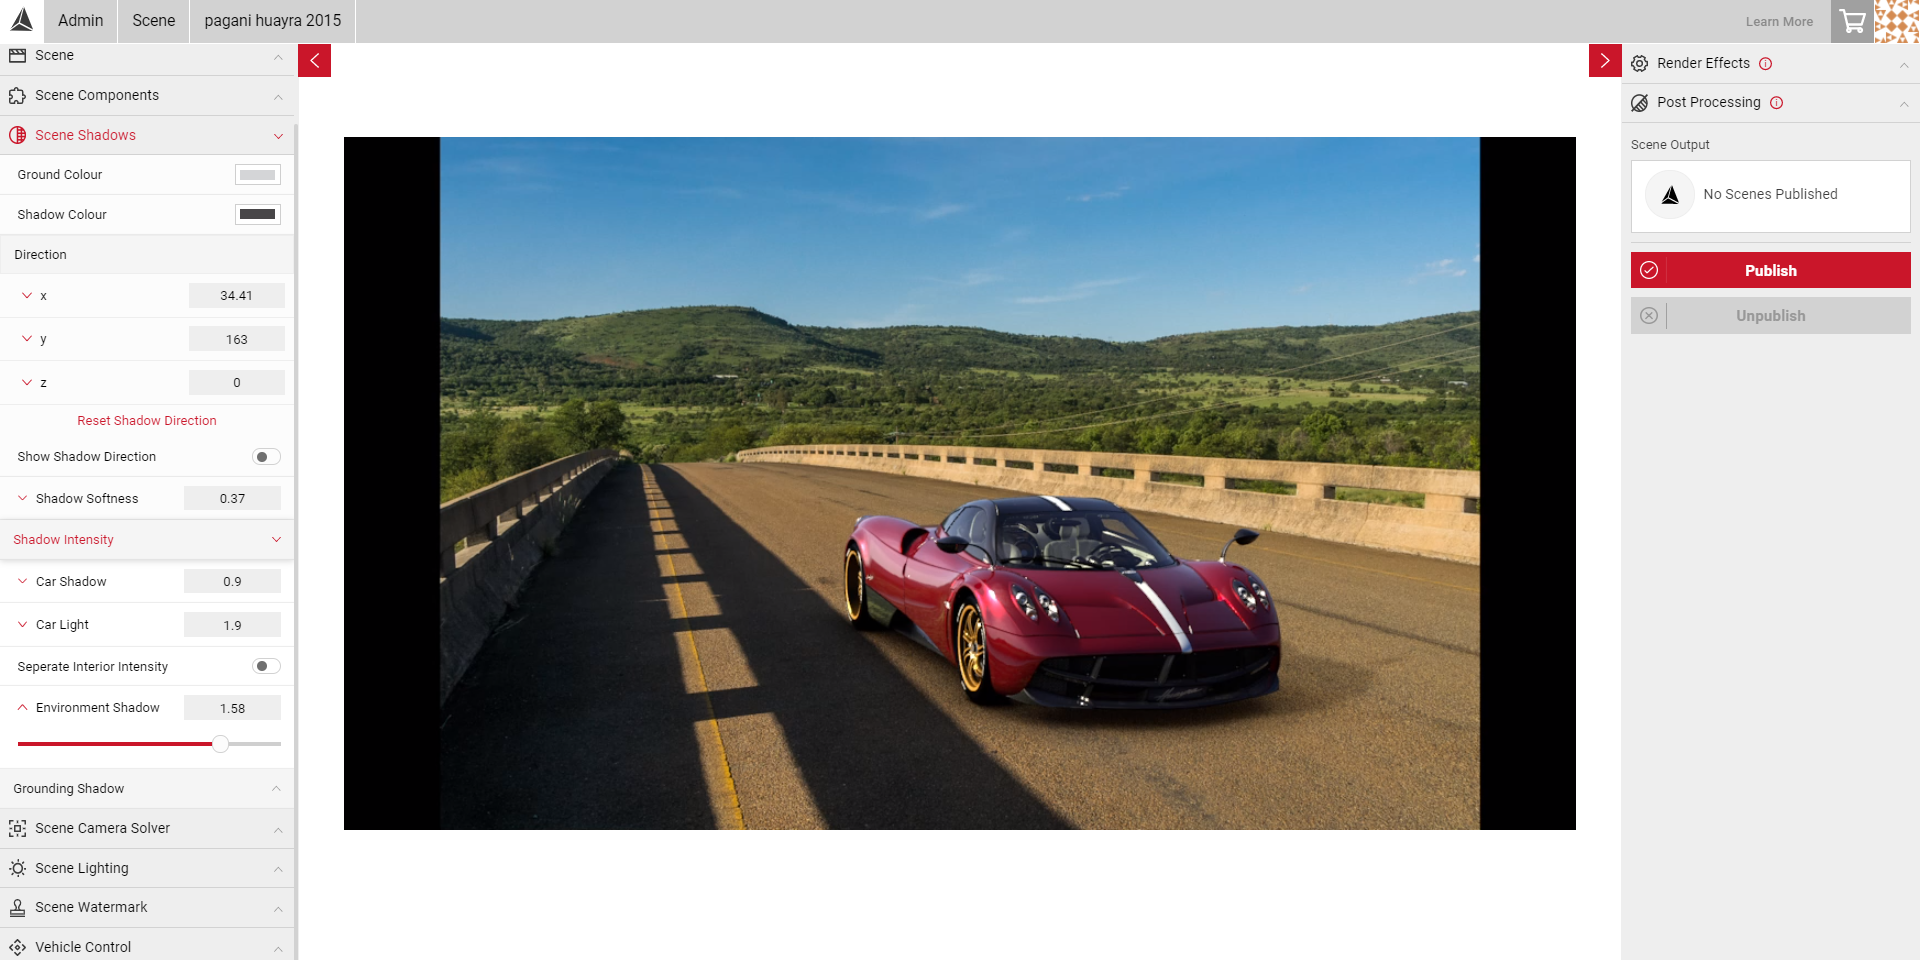
- As you move around the scene the gizmo will adjust position. In the example below, we can see the sun would be to the left of the scene, but the gizmo shows the shadows are being cast from the wrong direction. To solve this, we can change the shadow direction on the Y axis using the Direction sliders.

- In the Direction fields, enter values for the X, Y and Z axis to get the correct position of the shadow, or click on the axis panel to reveal the sliders. In this example, the values on the Y axis were adjusted to give the appearance the sunlight is coming from the left of the scene.
- Next, adjust the Shadow Softness. This adjusts sharpness of the shadow beneath the car. The lower the value, the higher the sharpness of the shadow. Move the slider to the right to increase the softness, move the slider to the left to make the shadow more intense.

- Under the Shadow Intensity sub menu, you have additional options to alter the exterior and interior shadows.
- Car Shadow adjusts the intensity of the shadowed areas of the vehicle exterior. The higher the value, the brighter the shadowed areas will be.
- Car Light adjusts the intensity of the un-shadowed areas on the car. The higher the value, the brighter the un-shadowed areas will be.

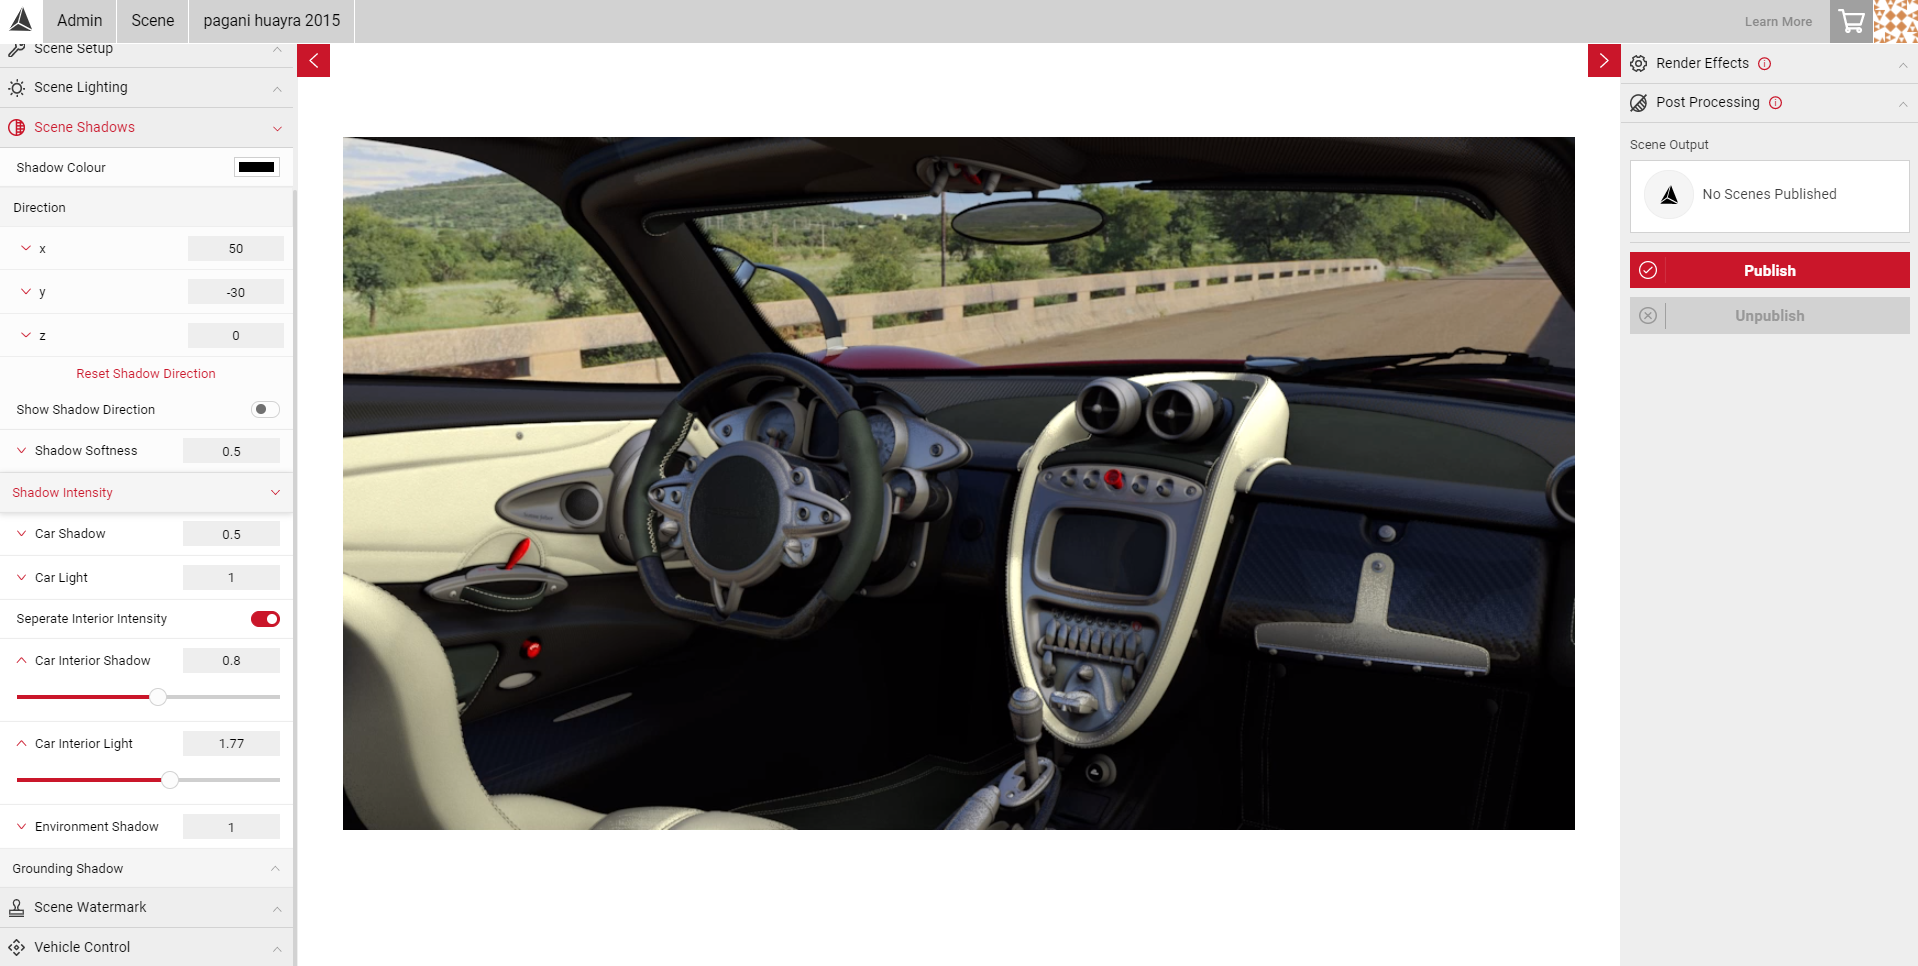
- Enable the Separate Interior slider to expand the interior options. You can then alter the Car Shadow and Car Light for the interior.
- To view the interior lighting, enable FlyCam in the Camera Control panel to move the camera inside the vehicle to view the interior shadows changes.
Note: The Camera Control tools are only available for Dome environments, not Backplates.
- Environment Shadow adjusts the shadow intensity of the shadow being cast by the car. The higher the value, the brighter the shadows will be. The images below show the Environment Shadow with a low value, and high value.

- In the Grounding Shadow sub menu, you can edit the colour, intensity and falloff of the shadow beneath the vehicle. The grounding shadow is the natural darkness underneath the car.
- Select the Grounding Shadow Colour to match with other shadows in your scene.
- Adjust the Grounding Shadow Intensity slider to alter spread and intensity of the darkness directly beneath the vehicle. The higher the value, the larger the spread of the shadow will be.
- The Grounding Shadow Falloff slider allows you to make finer adjustments of the spread and intensity of the shadow underneath the car. The lower the value, the larger the spread of the grounding shadow.

Visit the Backplate Tutorial to learn more on adjusting your shadow settings