Creating Your Scene
Within the Scene App, users can build custom background environments for their vehicles using their own HDR files. These environments can then be published and shared with other users in your team for generating images in SpotLight’s Shutter Pro App. Scene allows you to create backplate or dome environments, with a wide range of tools and gizmos to create specific shadow, lighting, or post processing effects. There are two scene types you can create, Domes and Backplates.
Domes
A Dome allows you to create a 3D scene. Within a dome, you can choose between 2 Environment Types in the Scene Setup controls.
- Sphere Environment Types allow you to move freely around the 3D space with the vehicle in no fixed position.
- Dome Environment Type gives you additional controls to alter the shape and size of the dome and the vehicle remains fixed to the floor, unless altered by the vehicle controls.
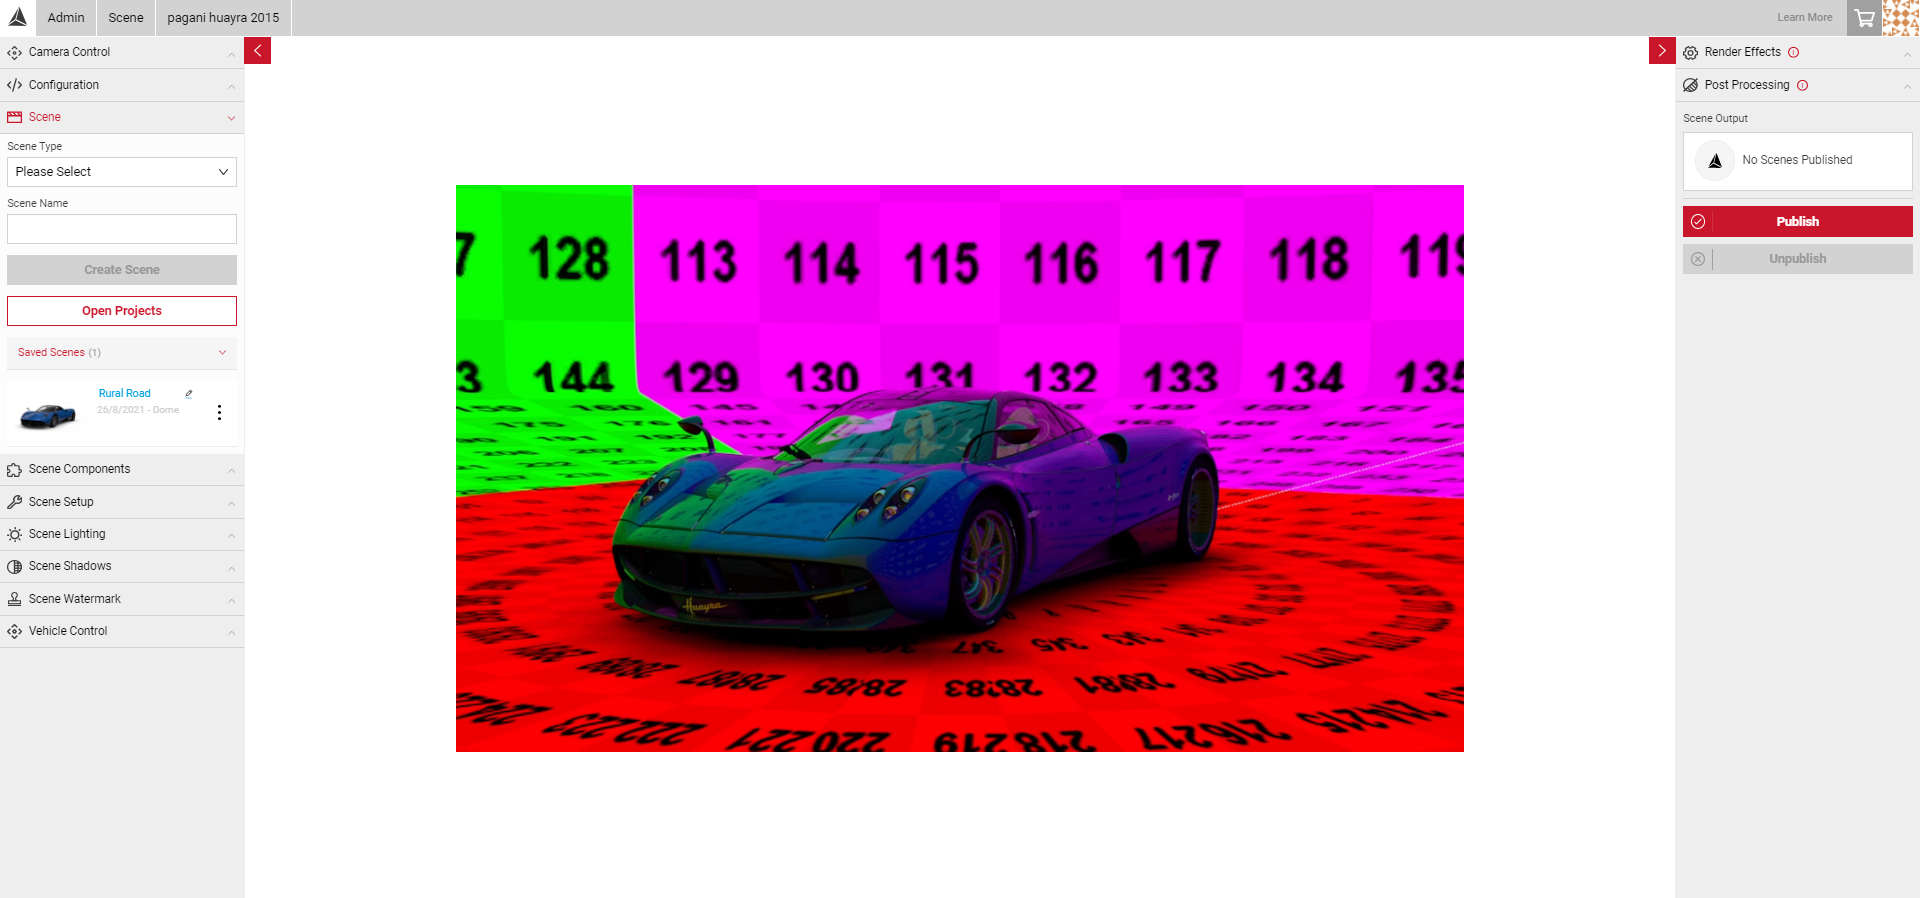
- Once created, the default Jellybean texture will load. This is the default coloured & numbered background the HDR is projected onto.
To learn how to create a Sphere, visit the Sphere Envrionment Creation tutorial.
To learn how to create a Dome, visit the Morphable Dome tutorial.
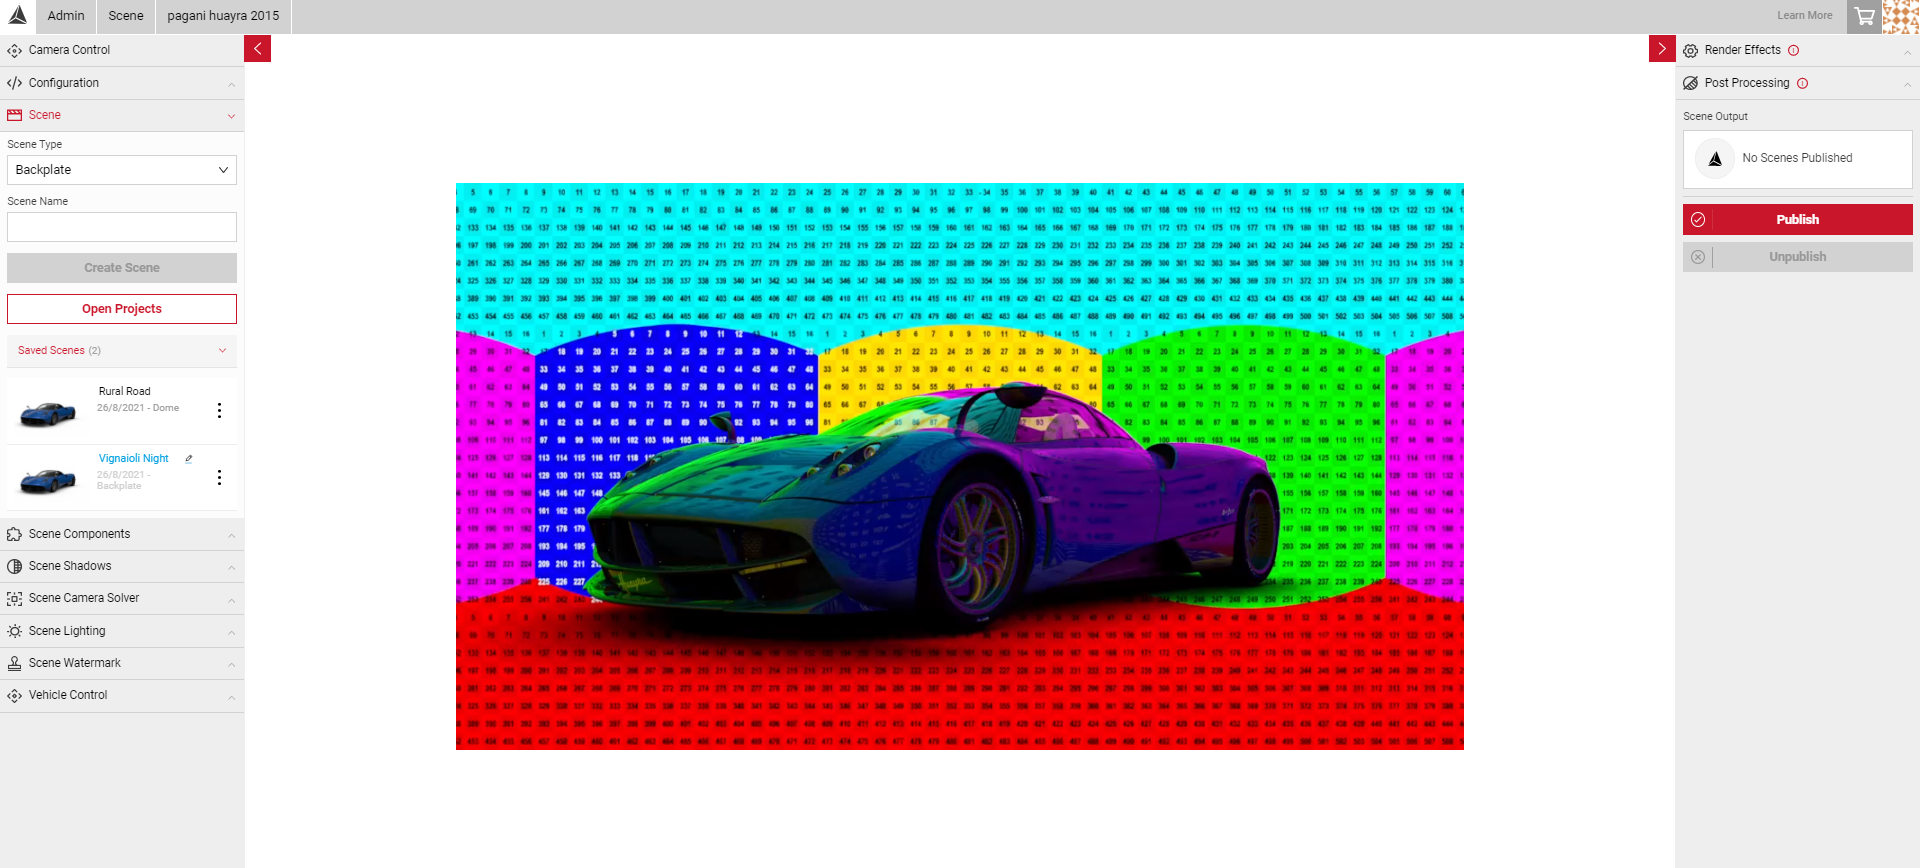
Backplates
Allows users to create a 2D background from a high quality tonemapped image, and lighting HDR file. Once created, the default Jellybean texture will load. Unlike Domes, the default Backplate texture is a flat image. Users can use the Camera Solver components to set the camera projection lines, so the vehicle can be placed in the correct position.
Creating a New Scene
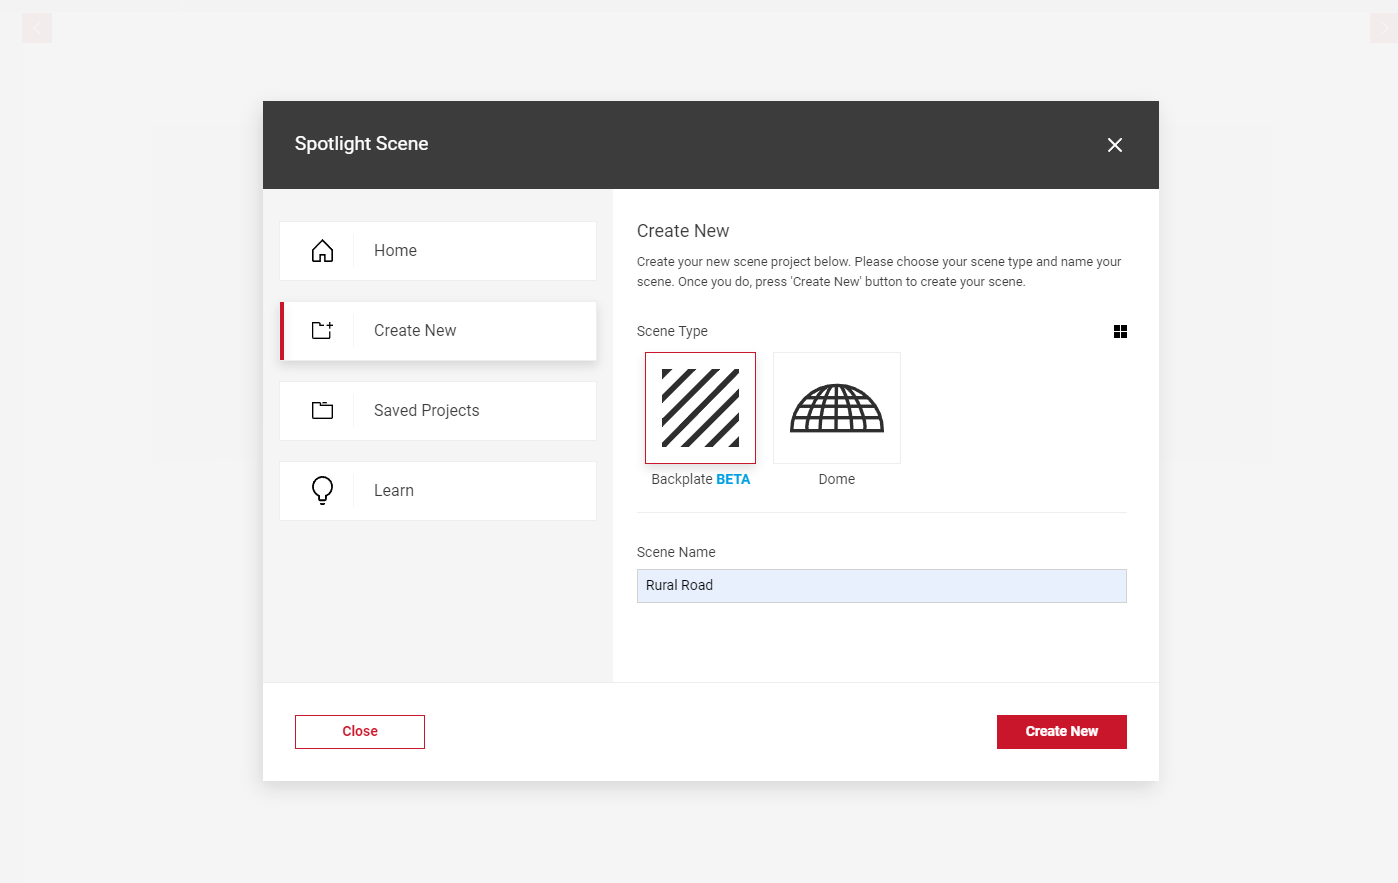
When you launch the Scene app, you will be presented with the Open Projects modal.
- Click on the Create New tab.
- Select your Scene Type and enter your Scene Name.
- Click Create New. The name of your scene will appear in the Saved Scenes list and the viewport will generate with the default Jelly Bean texture.
- You can also create a scene by selecting the Scene panel in the Input menu.
- From the dropdown, select Dome or Backplate.
- Enter the name of your Scene and select Create Scene.
- The name of your scene will appear in the Saved Scenes list and the viewport will generate with the default Jelly Bean texture.
- You can now begin to upload your Scene Components and start your scene configuration.
Learn more on Scene Components and uploading your assets.
Recommended Workflow
Domes & Spheres:
1. Apply all of your assets in Scene Components
2. In Scene Setup, select a Dome or Sphere environment type.
3. Solve any warped geometry in Scene Setup.
4. Use the Vehicle Controls to place the vehicle in a suitable position for configuring lighing and shadows.
5. Set up your Scene Lighting and Scene Shadows.
Backplates:
1. Apply all of your assets in Scene Components
2. Enable Camera Solver and set up your VP projection lines.
3. Switch axis to change the polarity to get the correct orientation of the vehicle.
4. Move the world origin point to a suitable height and position.
5. Use the Vehicle Controls to place the vehicle in the correct position.
6. Set up your Scene Lighting and Scene Shadows.
Recommended Asset Specification
The specification below is for the use of images inside Scene app for generating dome environments. We would always advise meeting this specification, lower resolution images might work for certain use cases, but could look poor when used in high-resolution renders.
Domes & Spheres:
Tonemapped Image: 8K to 32K pixel width, JPEG, tone mapped sRGB colour space (AbobeRGB, eciv2 and AppleRGB also supported)
IBL Specular/Diffuse and reflection: 1K to 4K pixel width, HDR (EXR works but HDR’s are smaller), HDR data in linear space
Backplates:
Source Texture: 4K to 16K pixel dimensions (16K because that’s the max image size in SpotLight), JPEG, tone mapped sRGB colour space (AbobeRGB, eciv2 and AppleRGB also supported)
Other components: 1K to 4K pixel width, HDR (EXR works but HDR’s are smaller), HDR data in linear space
Note: If you want to use post effects on the background, for example bloom, you may want the backplate or dome texture to be a HDR image, but you’ll want to apply some sort of tone mapping first. (Linear HDR images don’t look great, they need some colour grading).
Note: The IBL and reflections get scaled to 512 per face, so no need to have a bigger source image.