Tutorial Time: 10 mins

- Using PrCodes
- Saving Configurations
- Changing Environment
- Using Render Options
- Using 16K Output
What You Will Learn
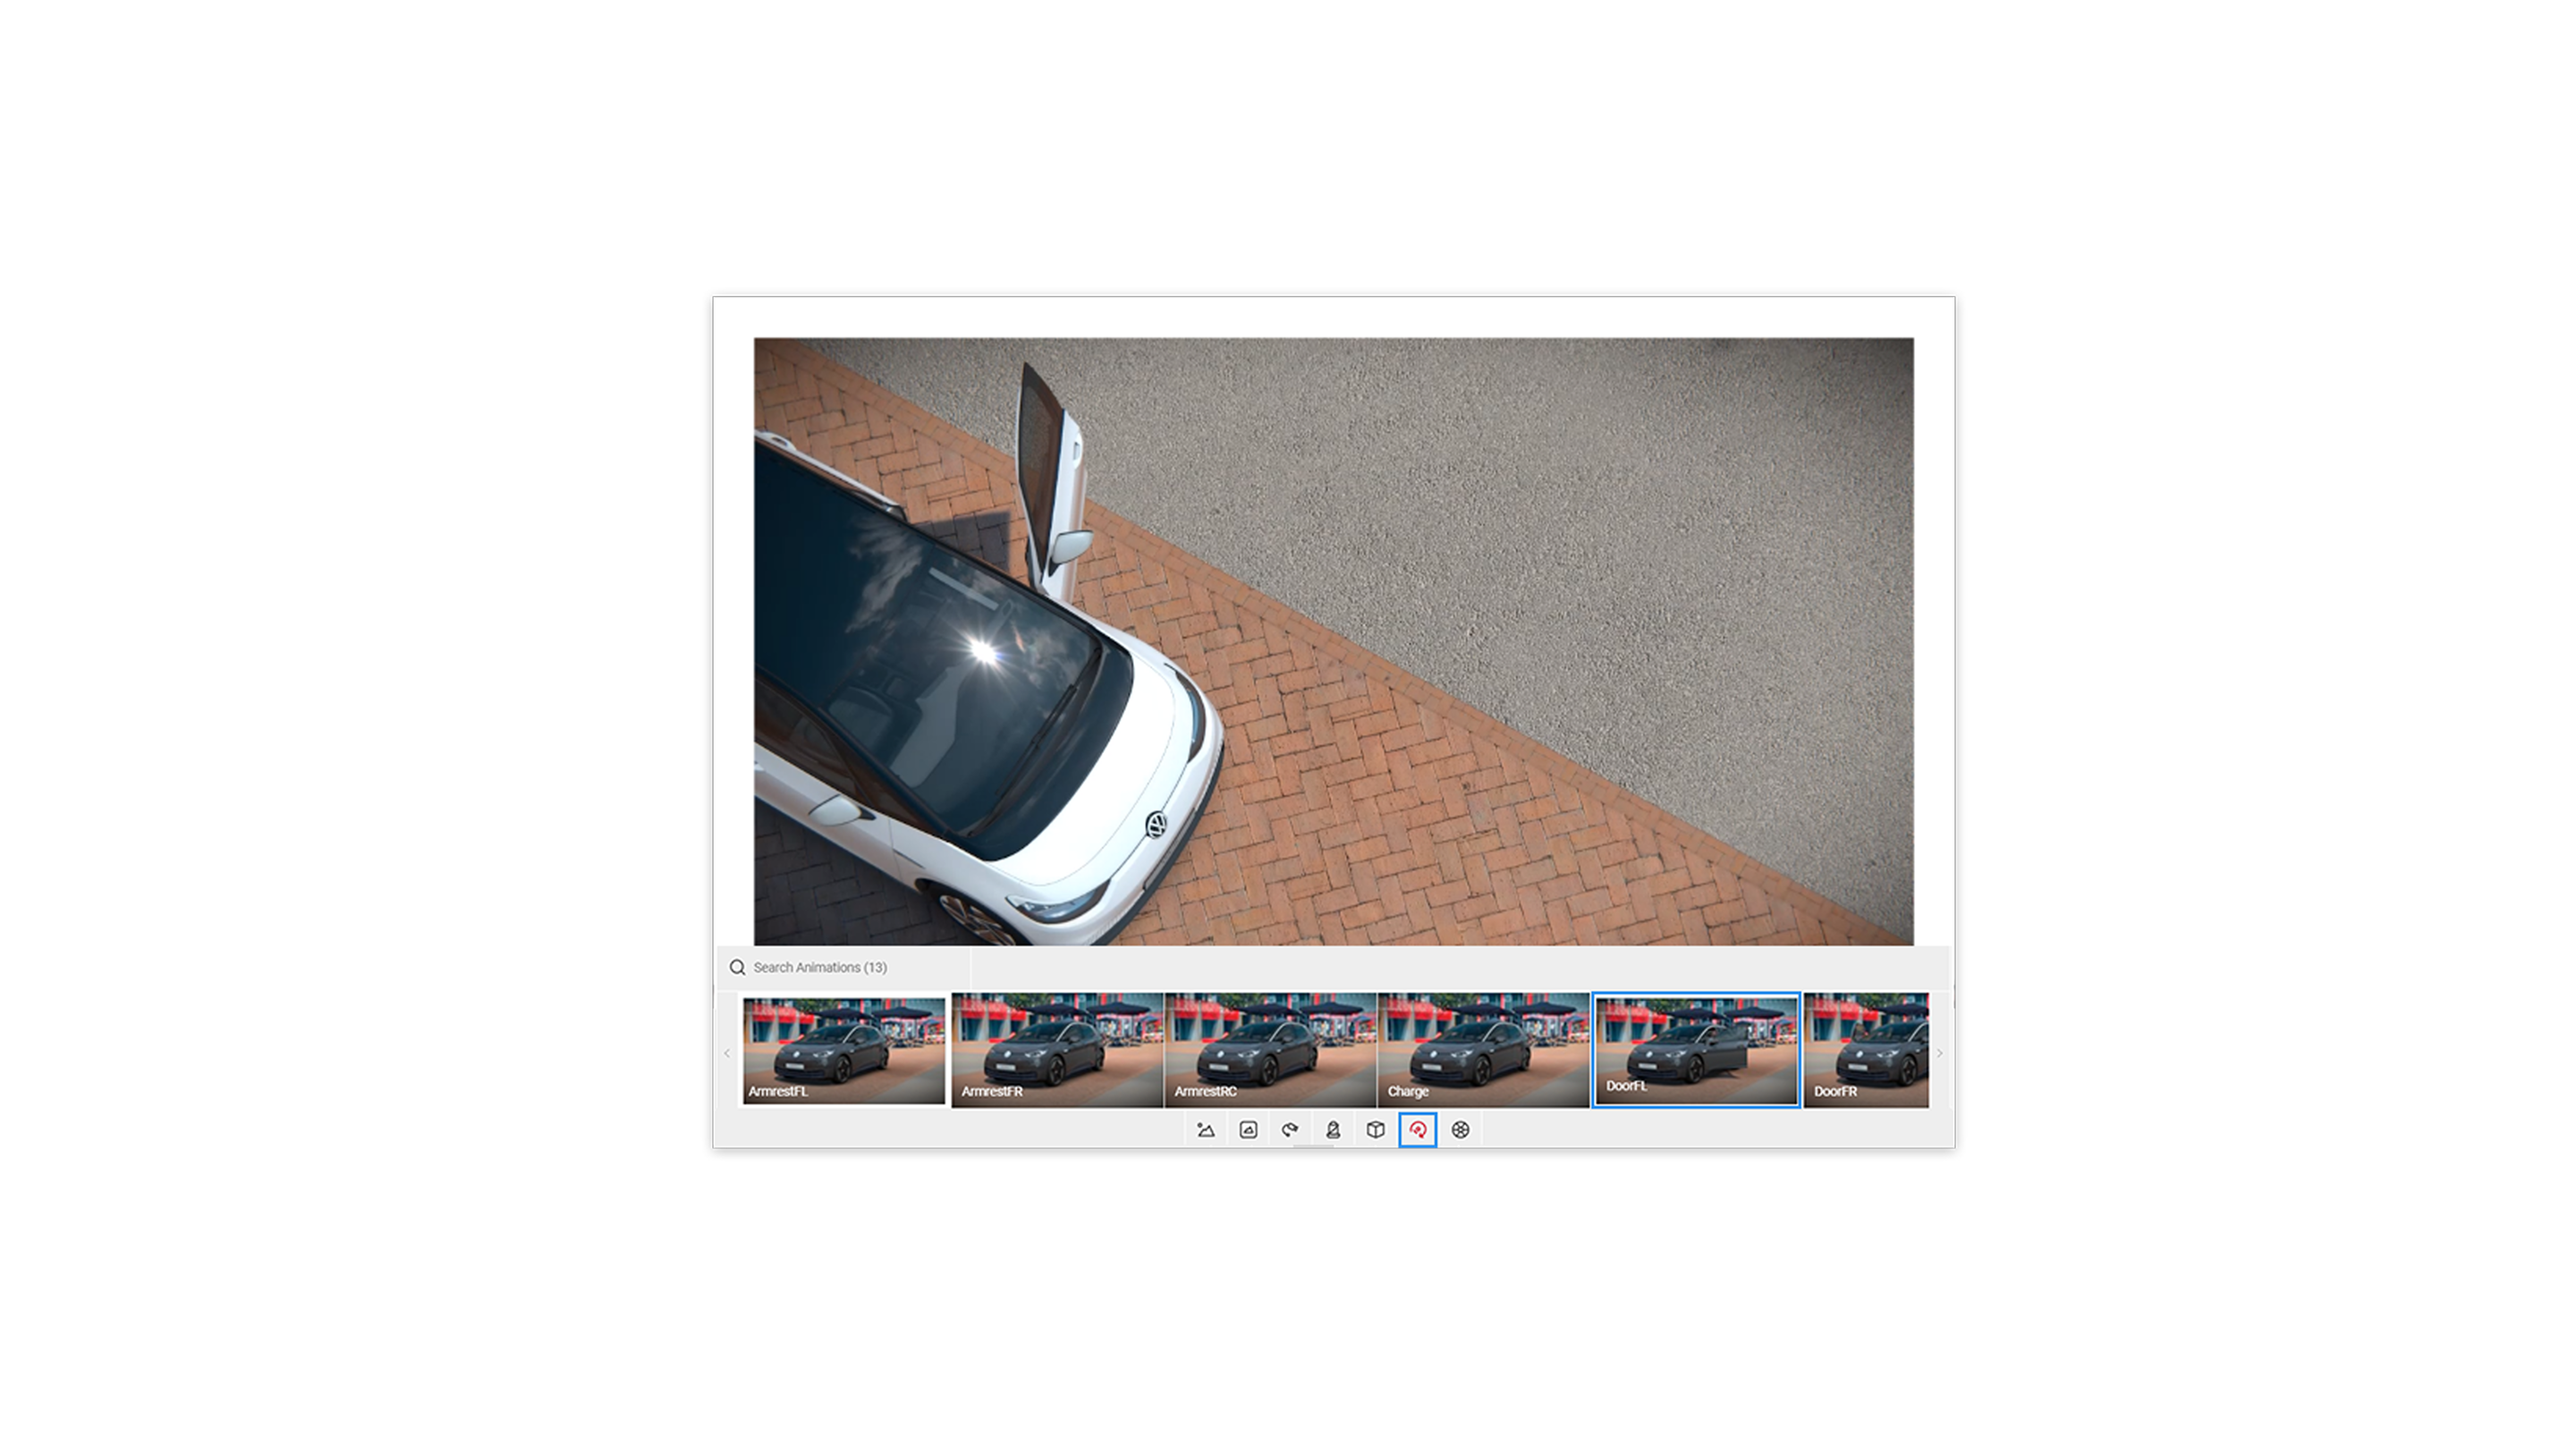
We will create two 16K pictures to be used in a printed magazine feature showcasing the ID.3 car. We will learn how to use the flycam to setup the car position to meet the brief the client has provided. They have requested a top down car picture with the driver side door open, along with a picture showcasing the back of the ID.3. Both in urban environments. We will output using 16K for maximum print resolution quality.
Method
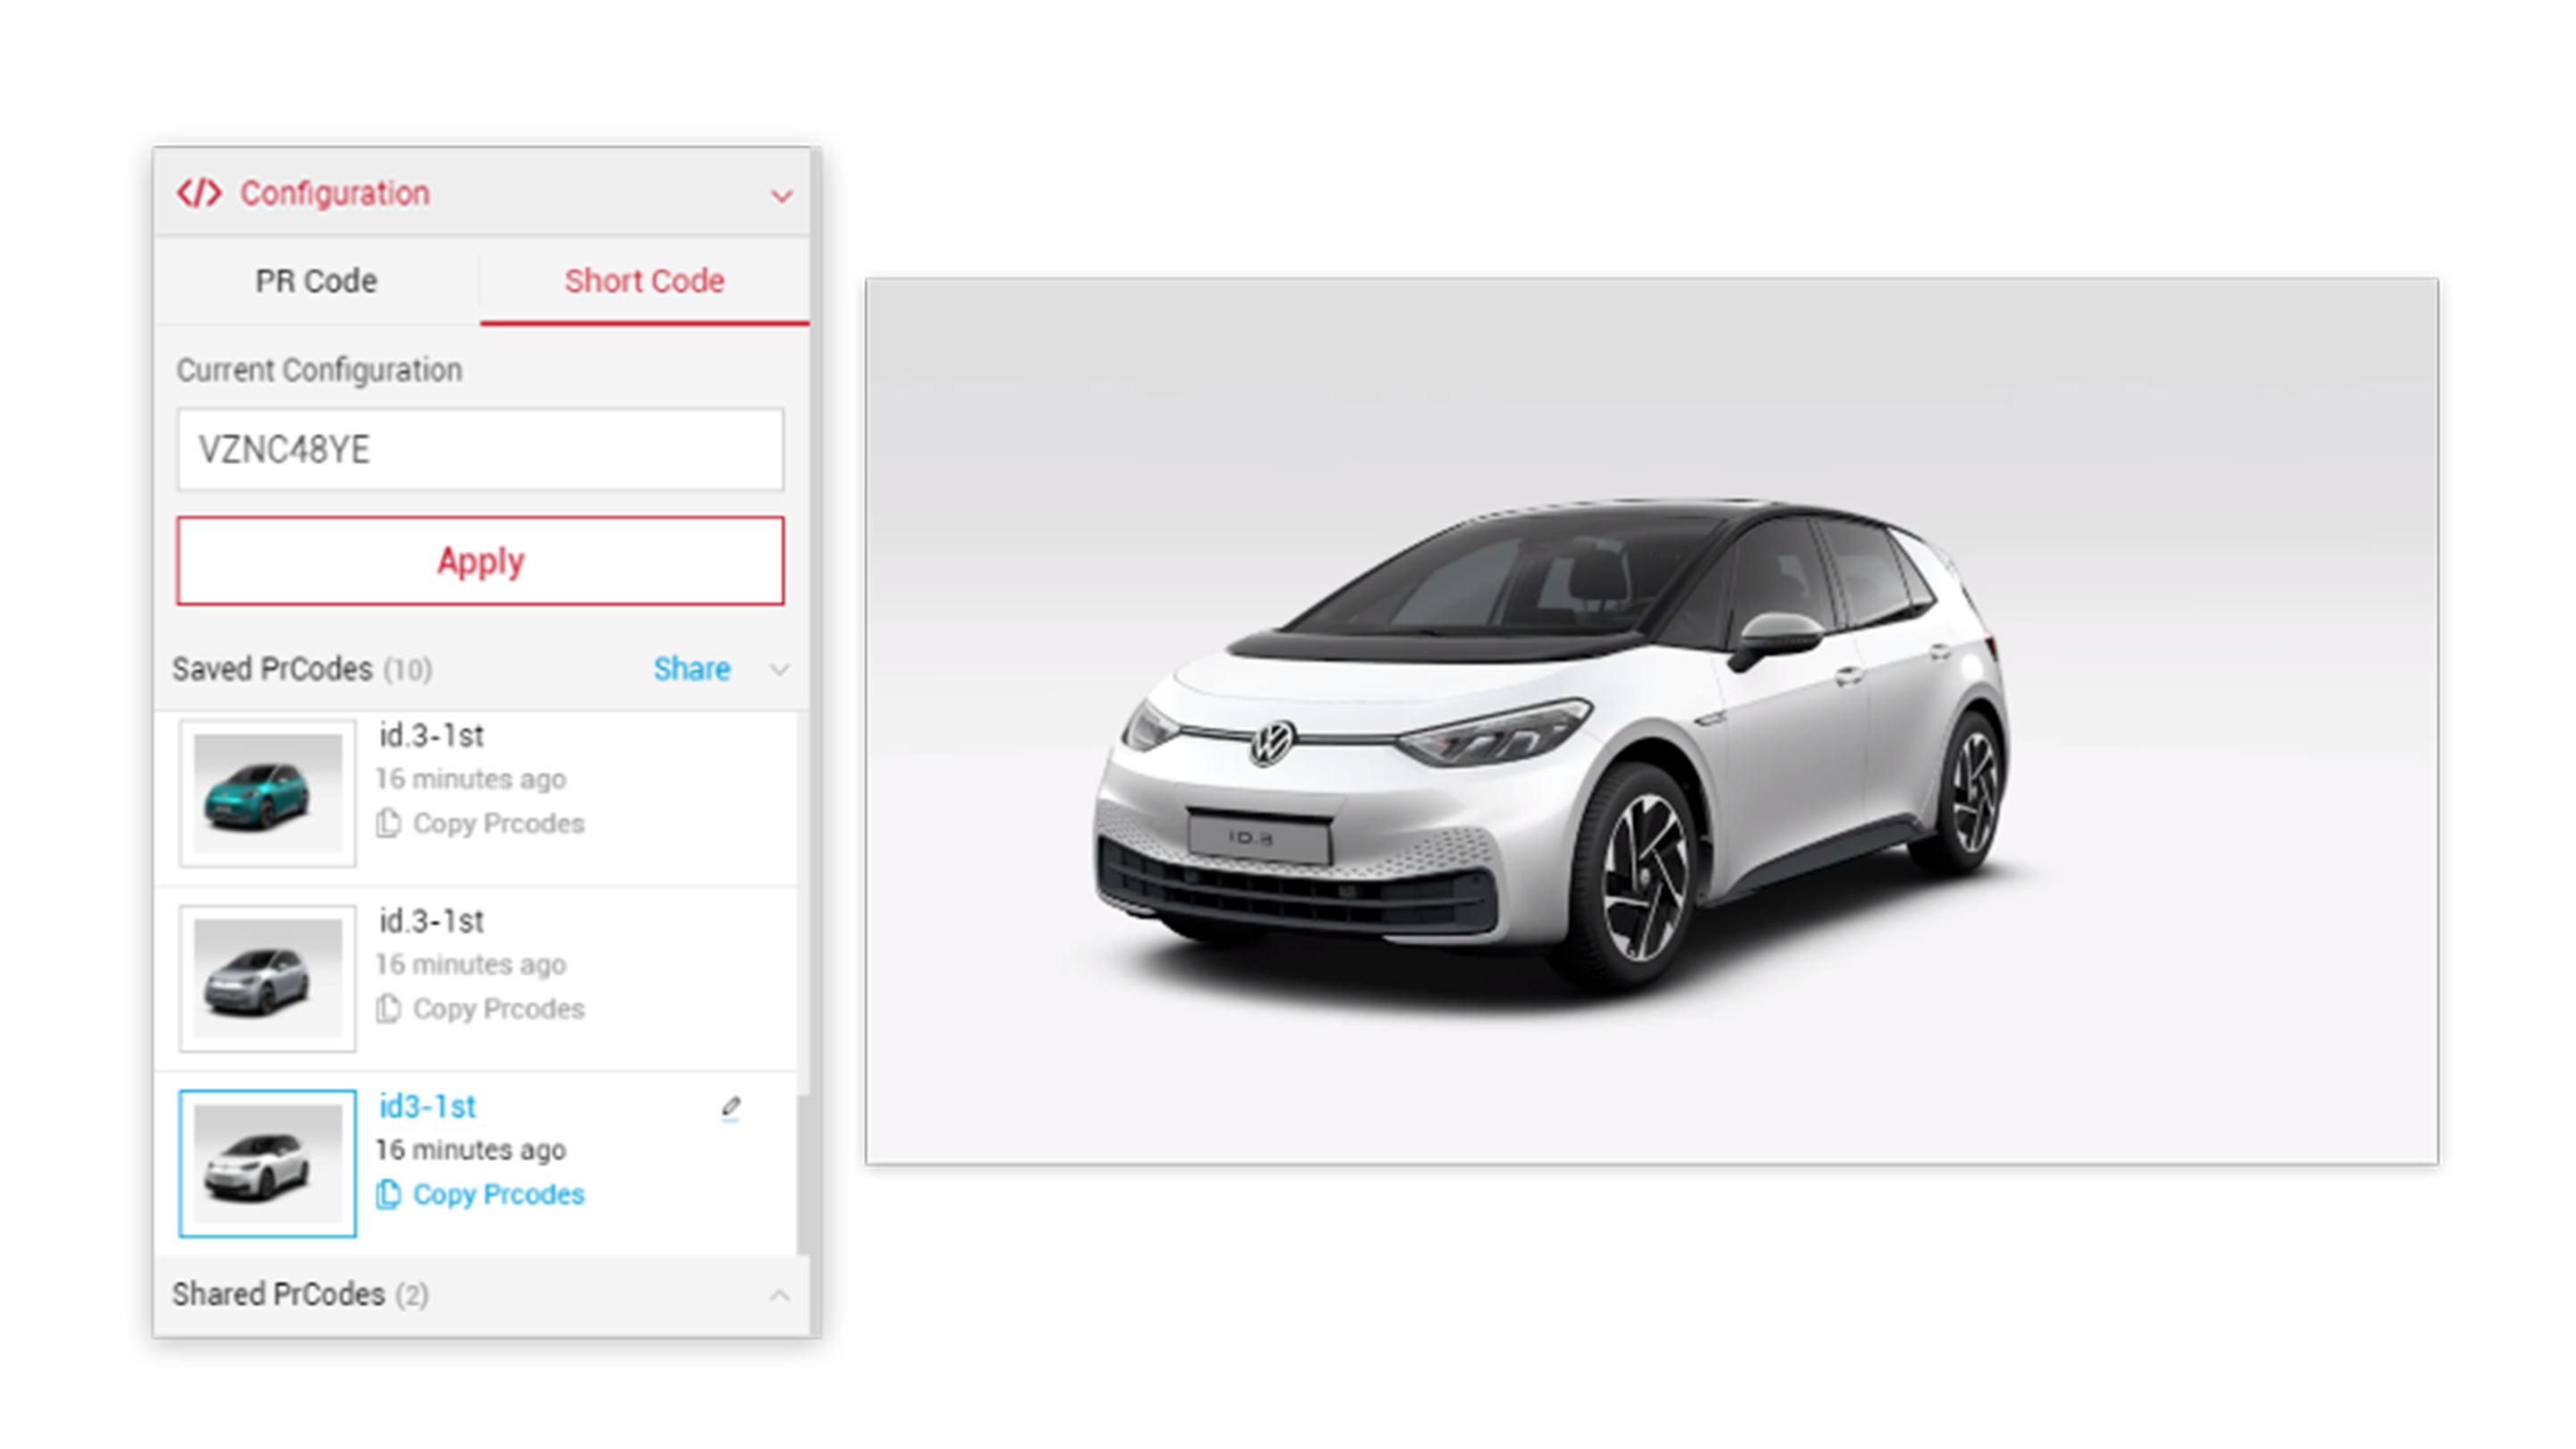
1 Copy and Paste your PrCodes into the Configuration tab. Click on Apply and the car will change to your own configuration. Make sure to the click the Save Configuration button so you have it stored in the Saved PrCodes menu. vznc48ye
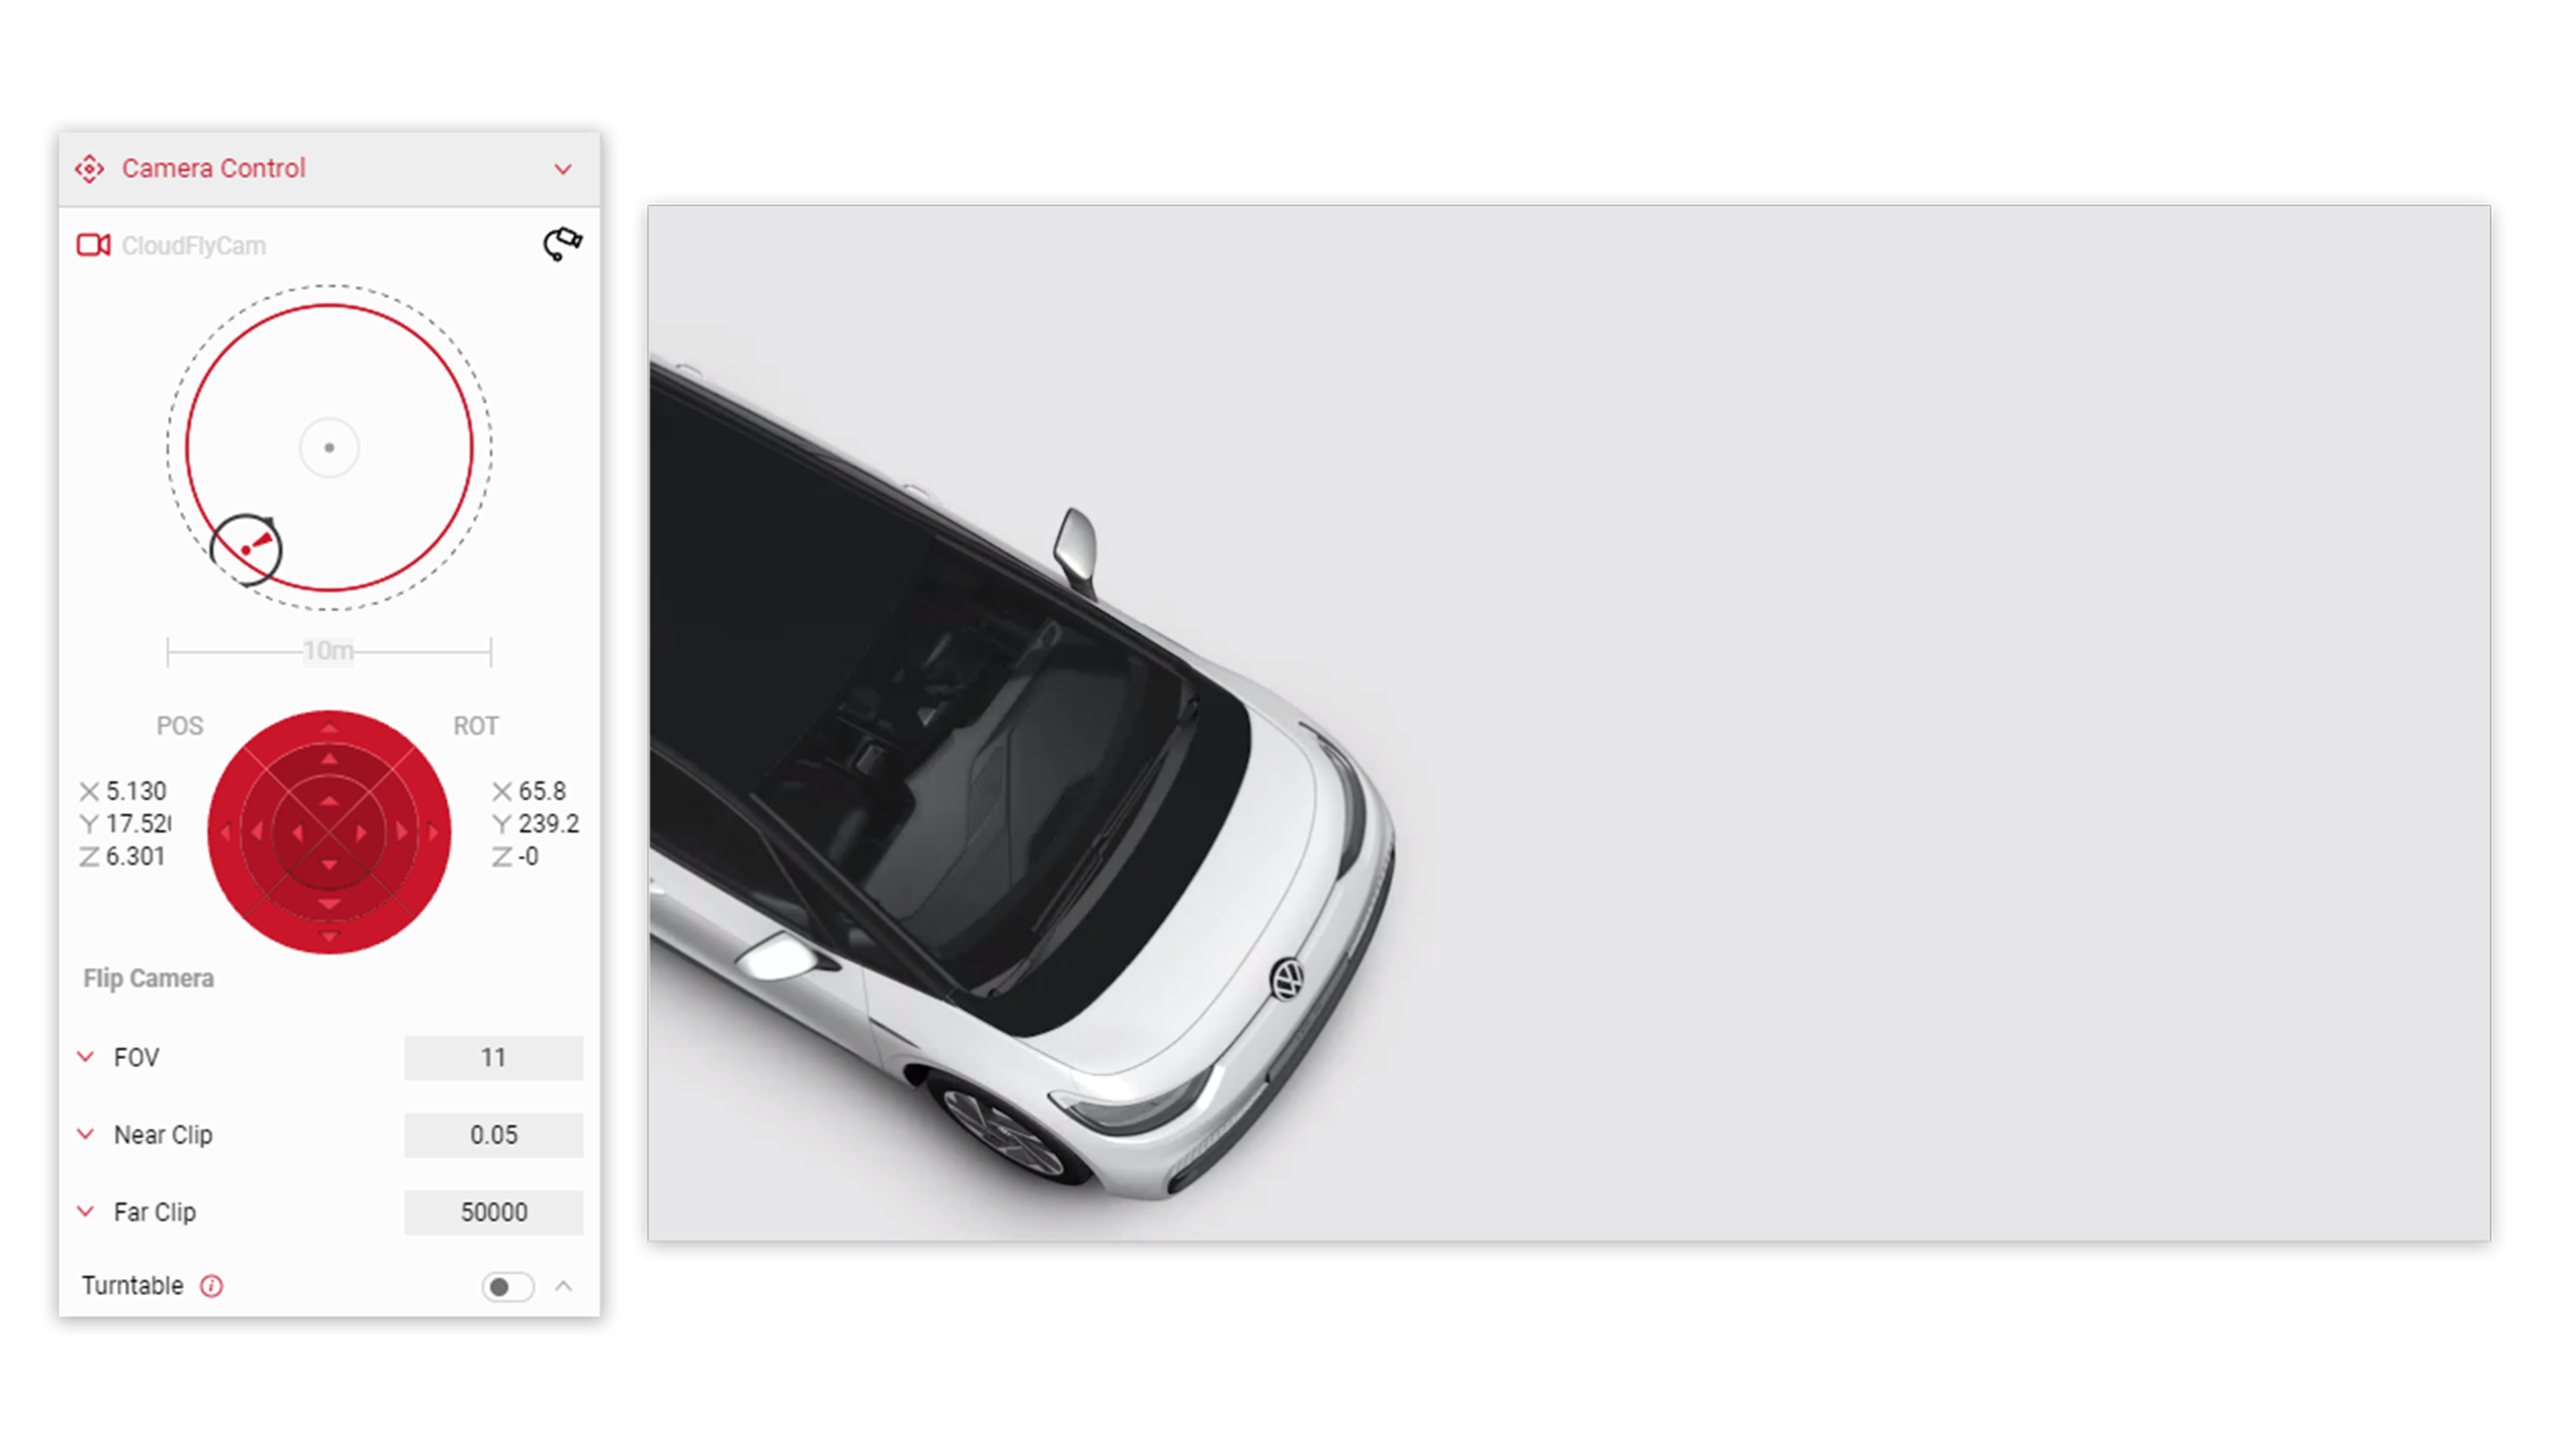
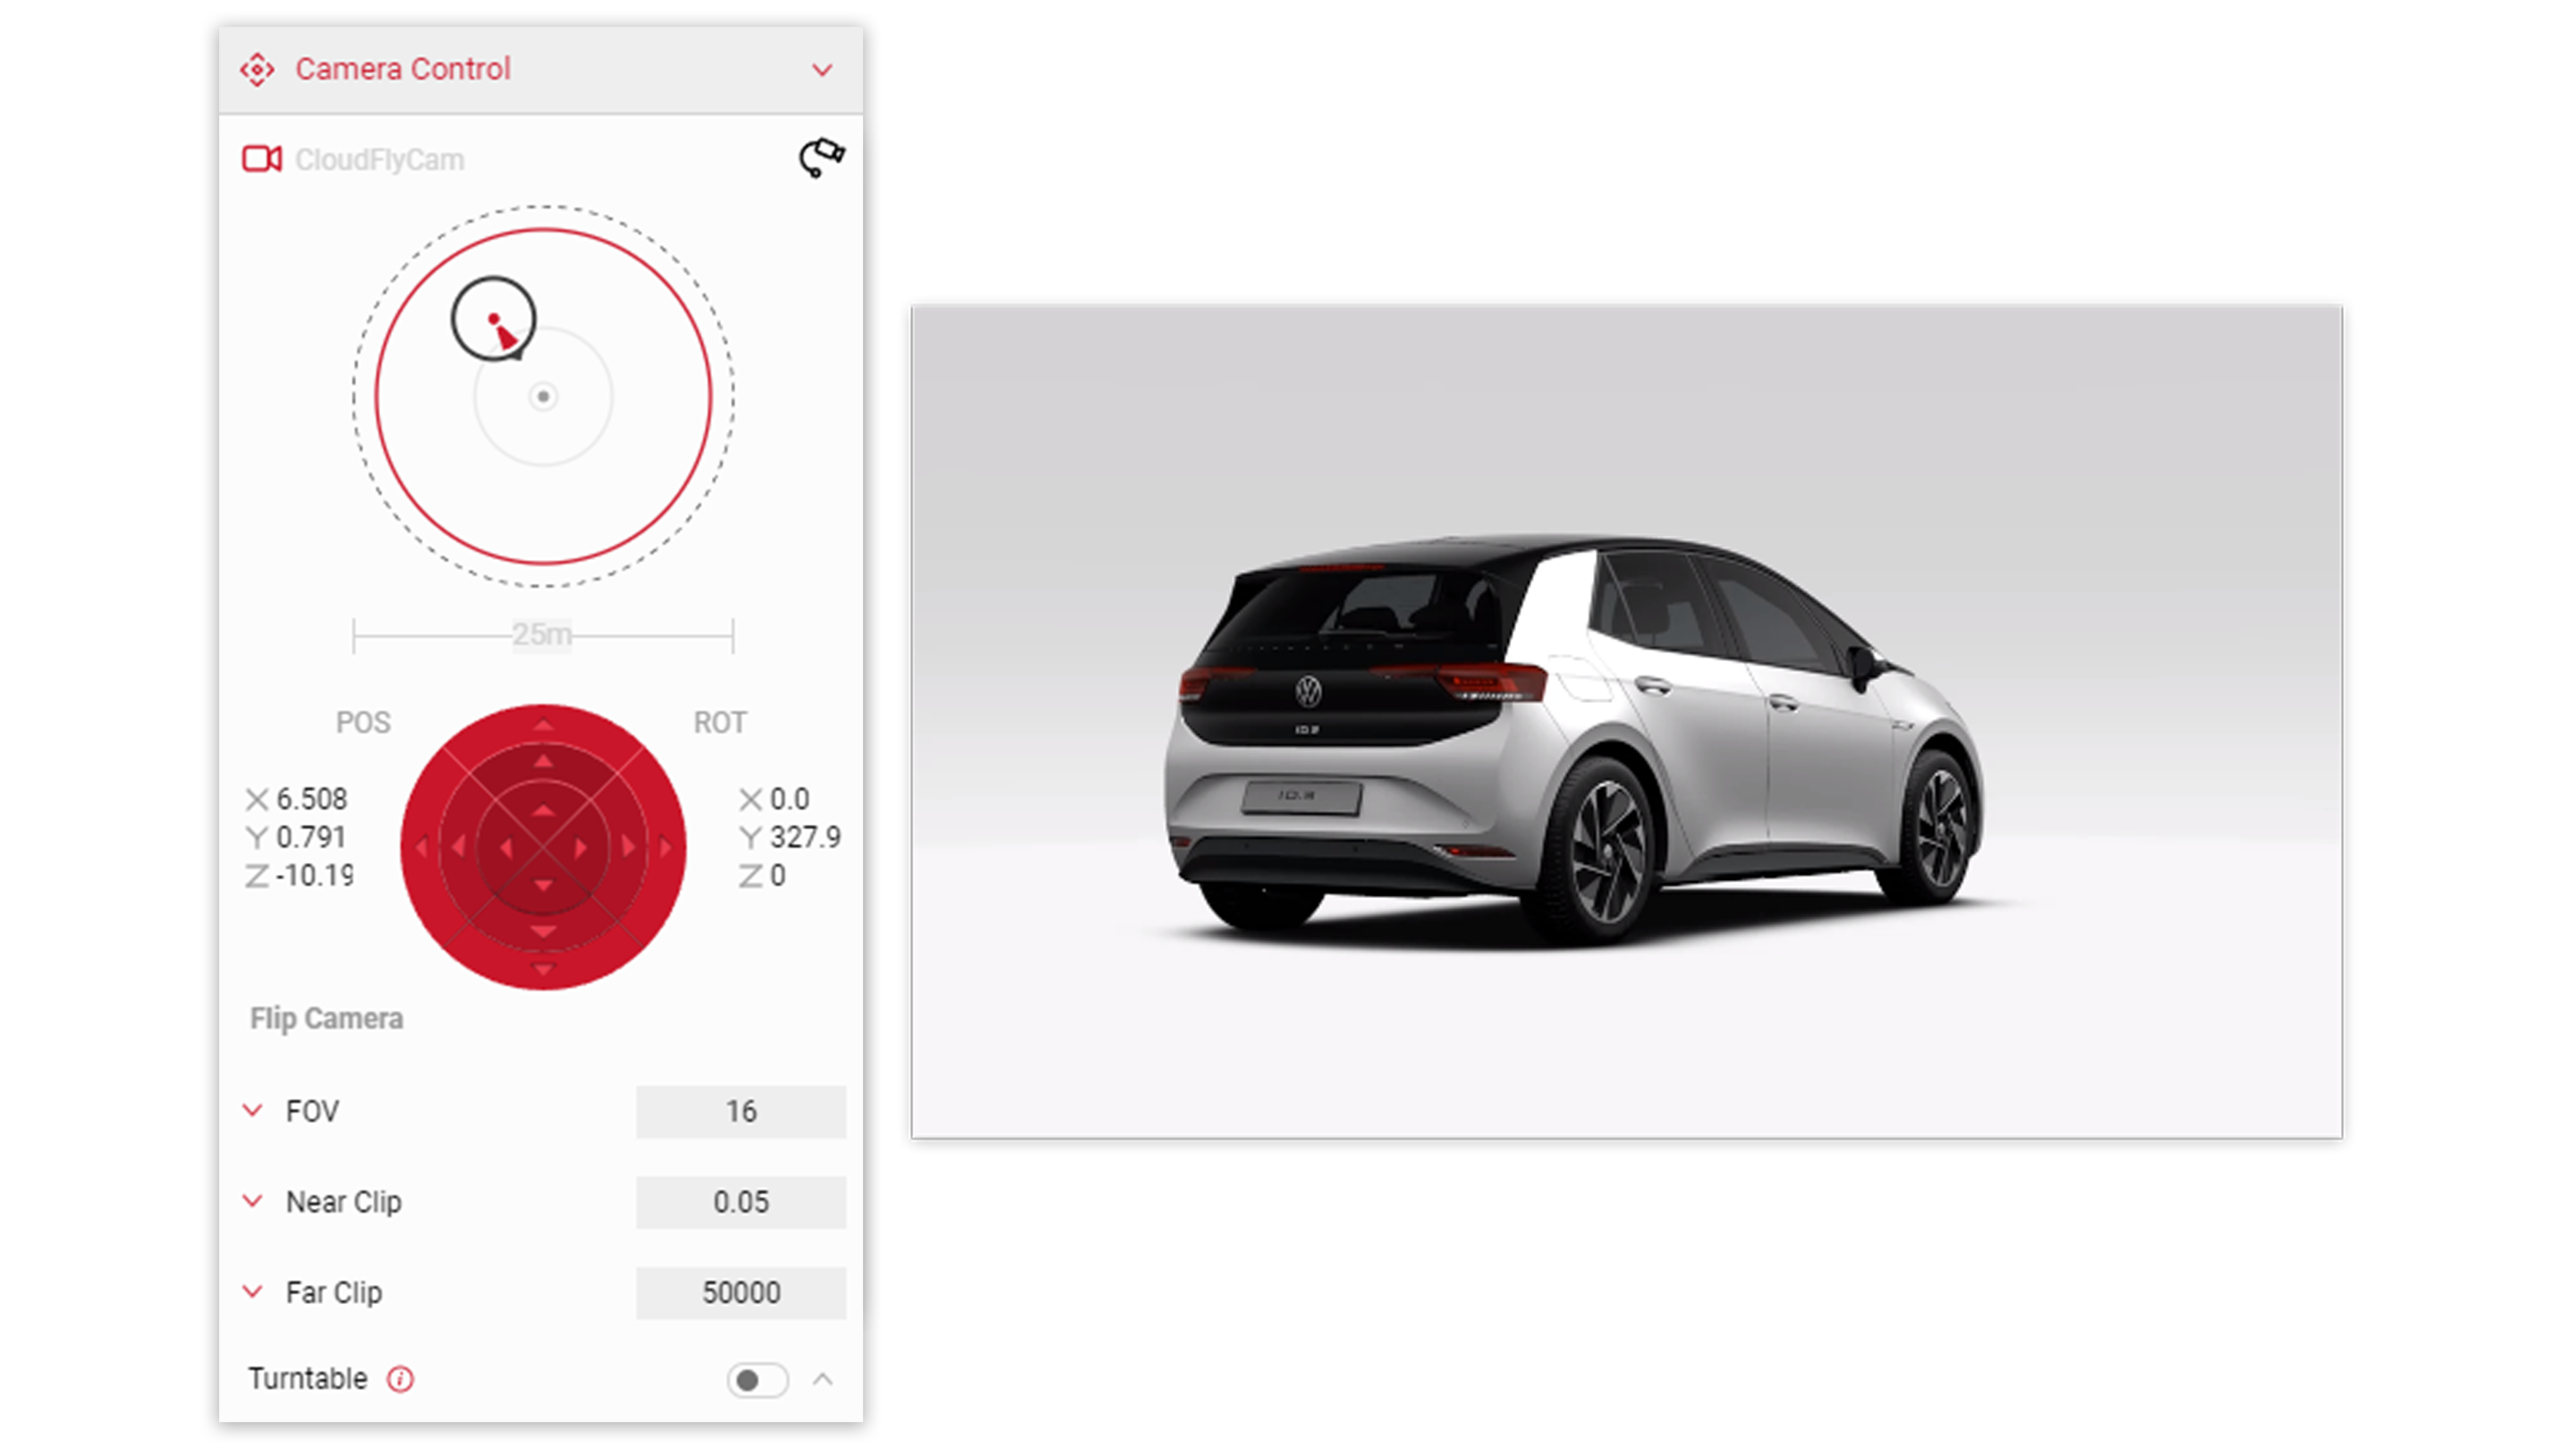
2 To set the position of the car, enter the FlyCam mode via the icon in the Controls menu or within the Input menu select the Camera Control. Use the controls to move the car within the Viewport to create the top down angle.
Tutorial Tip
Use the keyboard inputs to help position the car: W, A, S, D - Translating of the camera L, J, K, I - Rotates camera E - Translates camera up Q - Translates camera down U - Tilts left) O - Tilts right SHIFT - Holding ‘Left Shift’ will slow down camera movement.
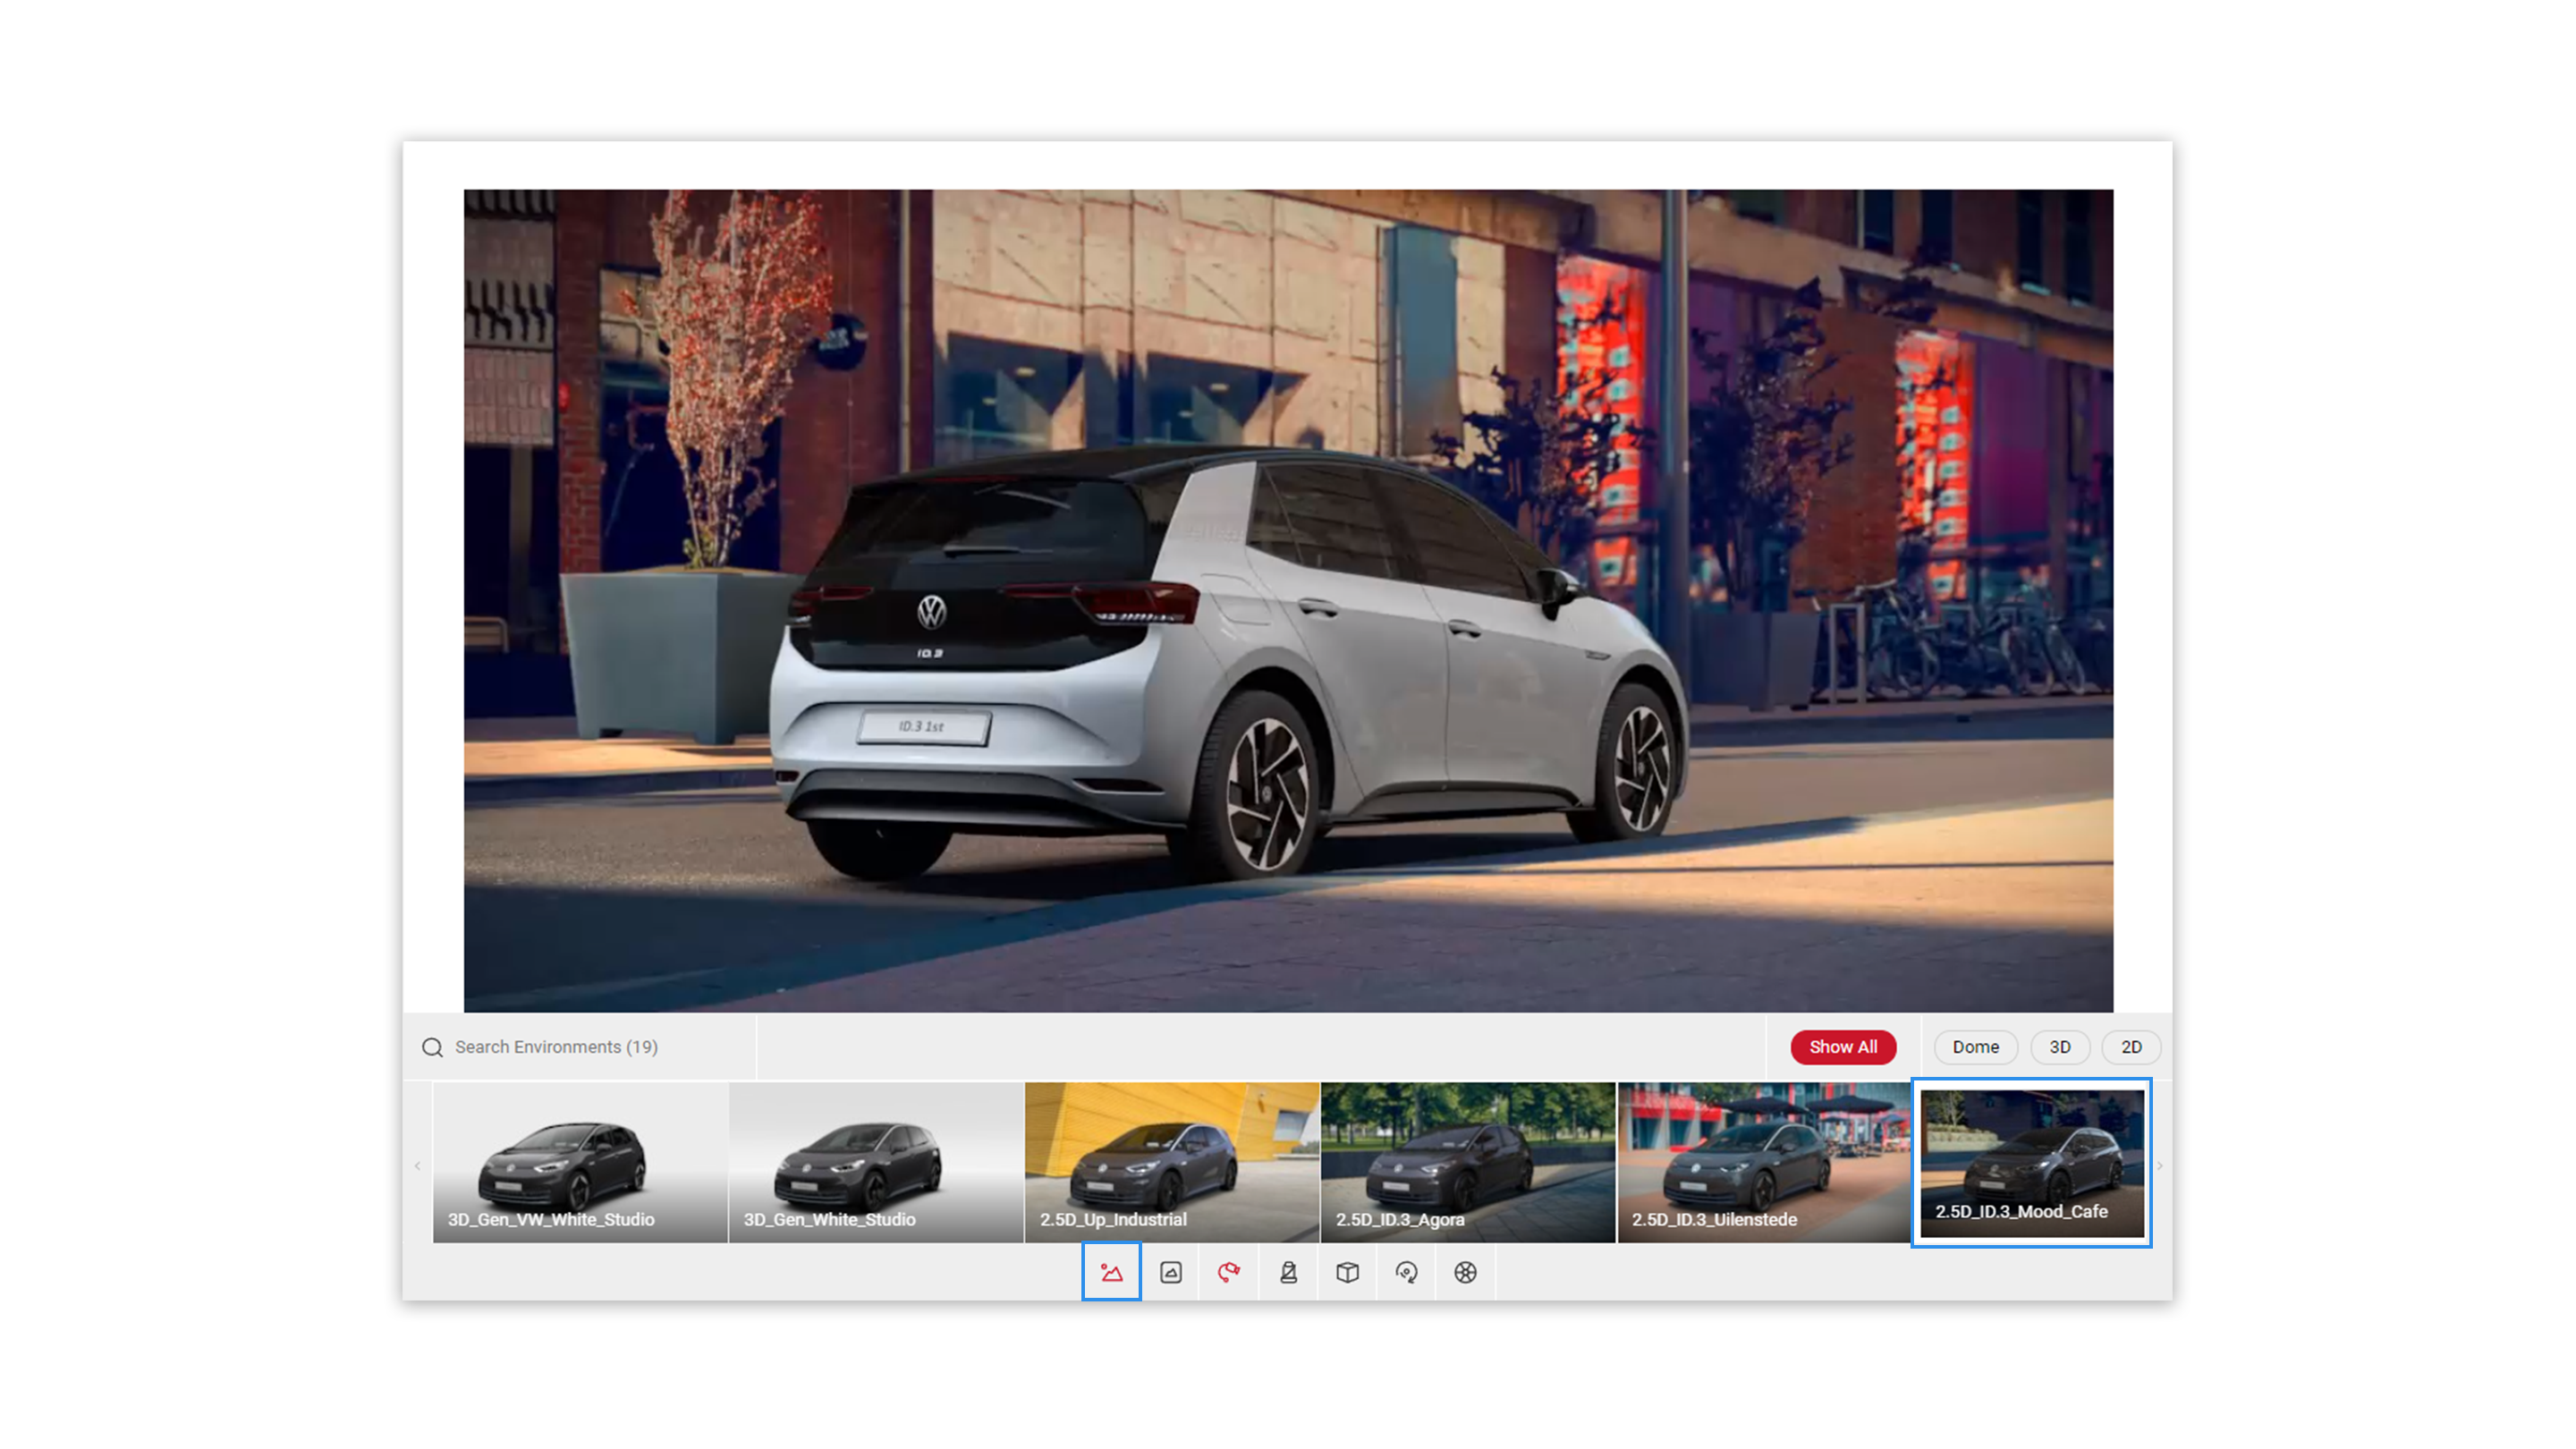
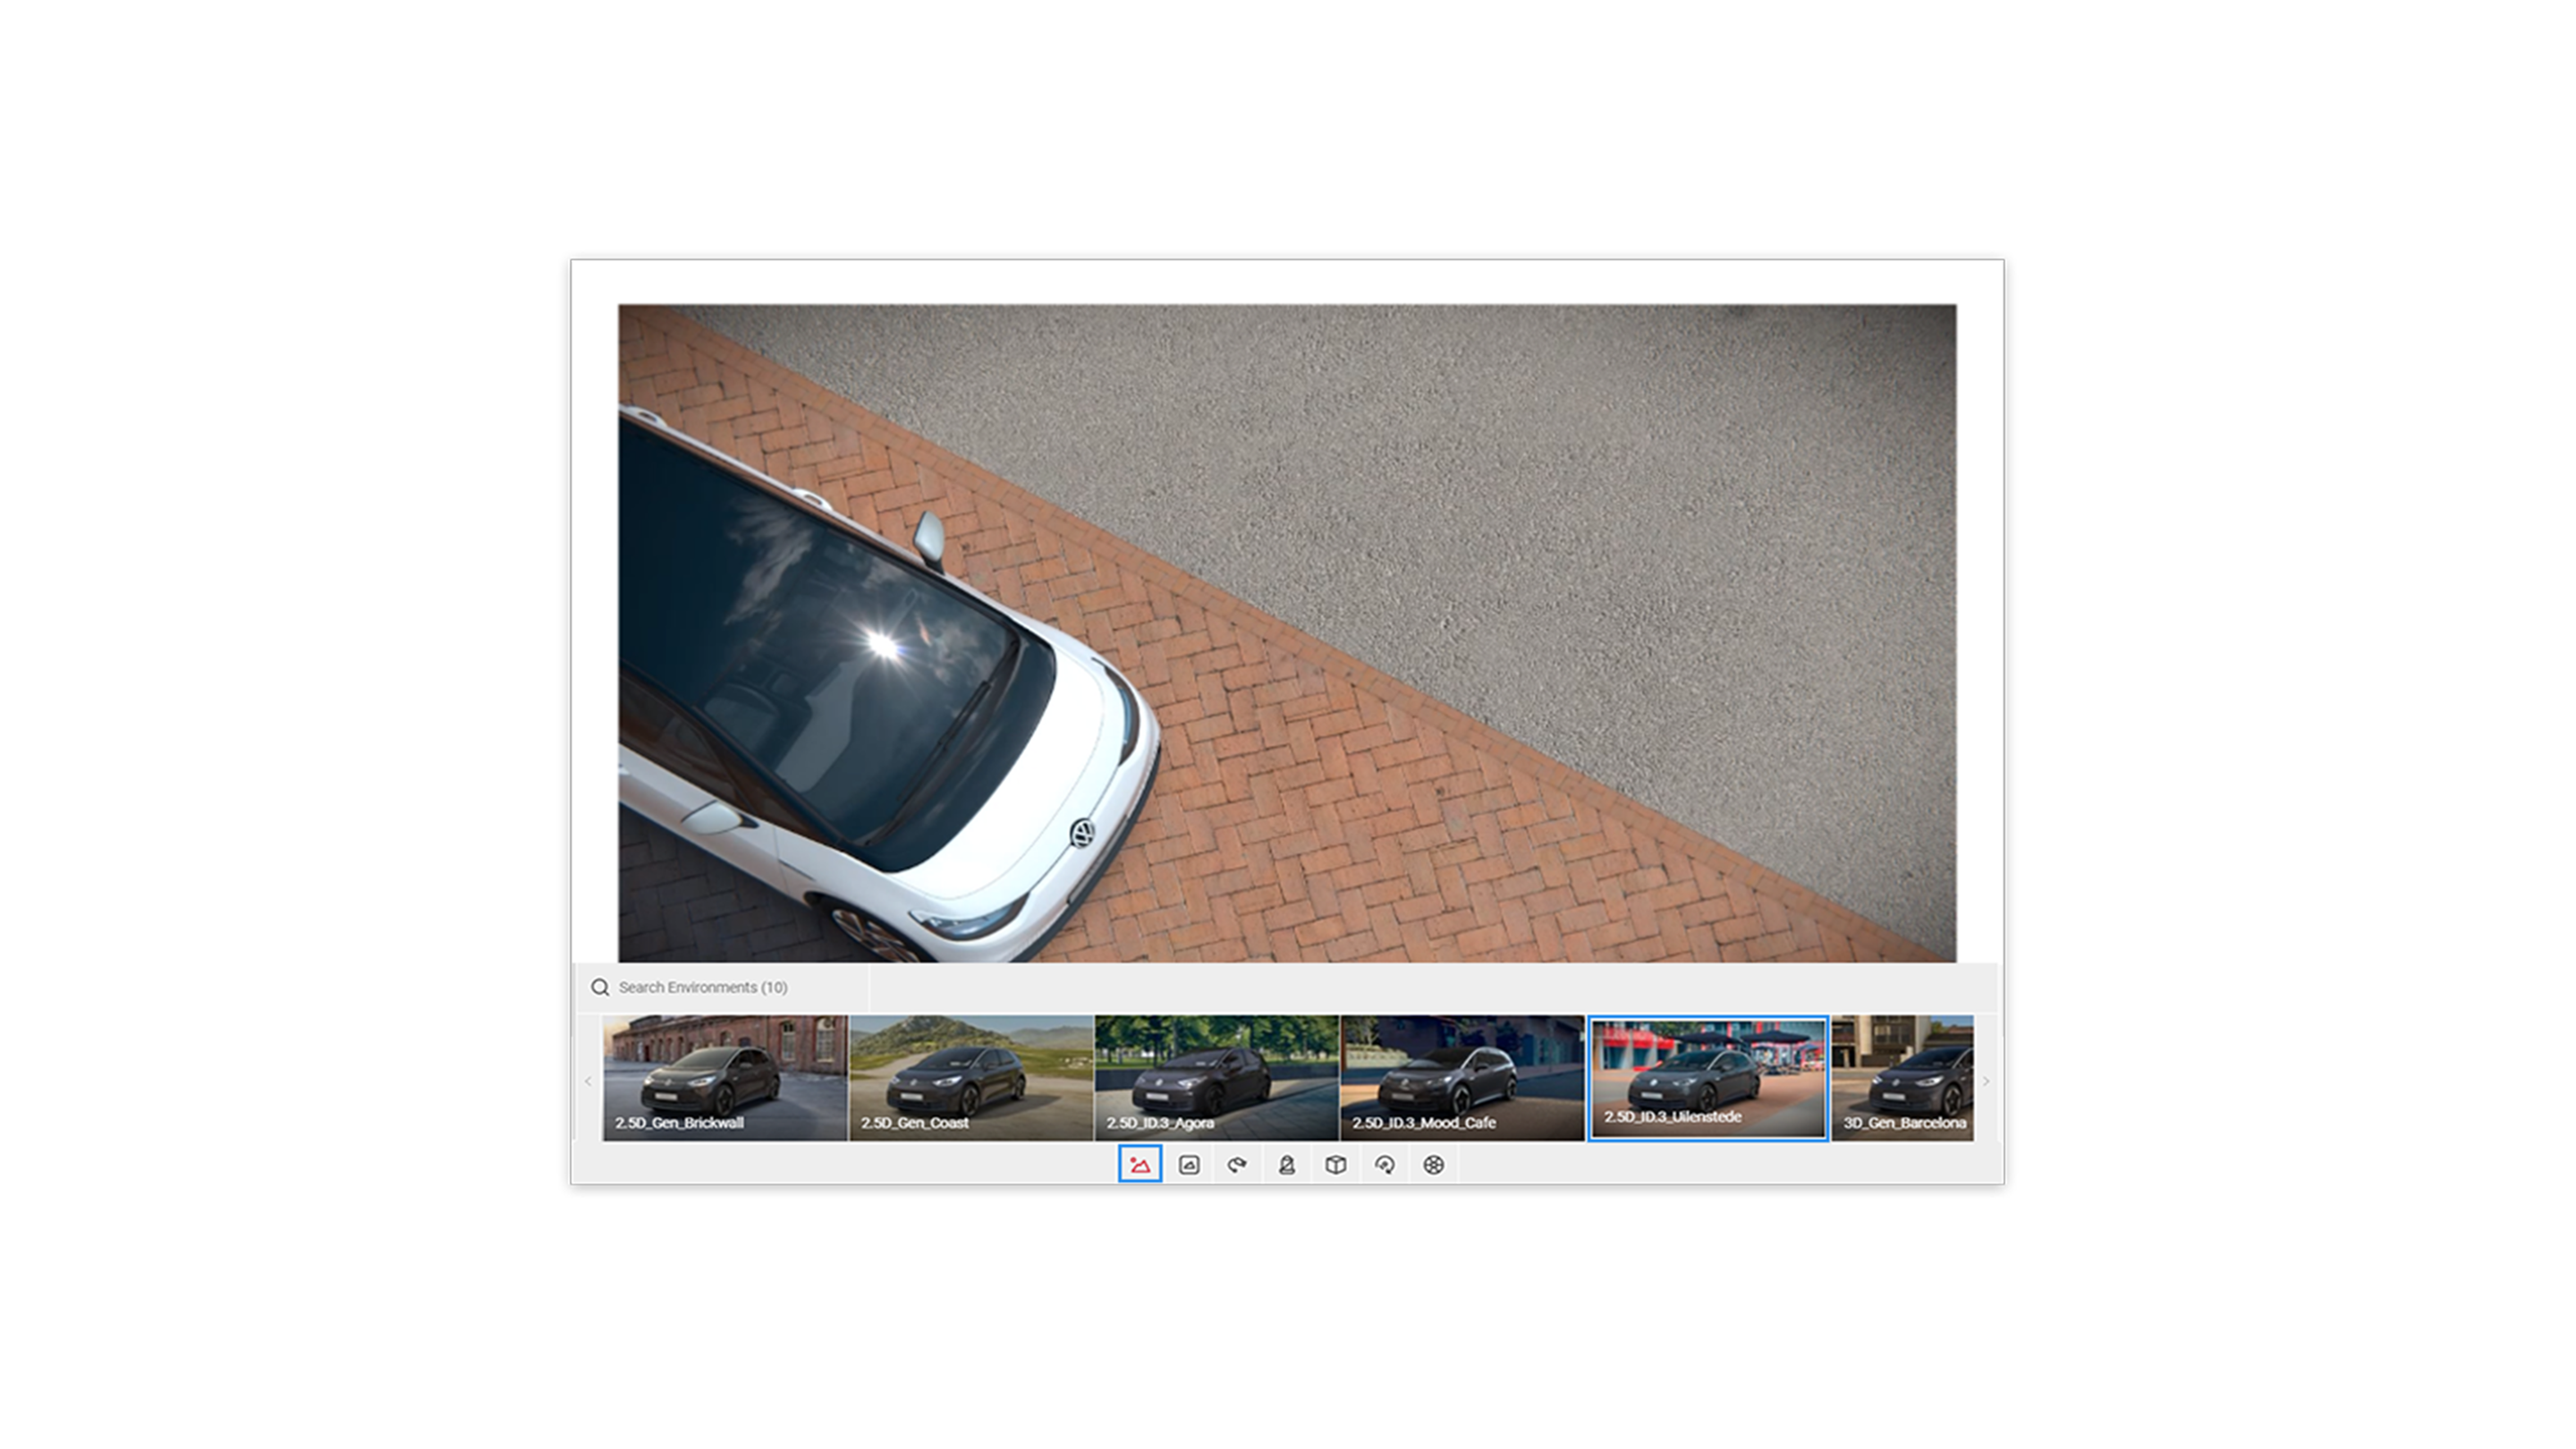
3 In the Controls menu, we will now select the Environment icon and choose the appropriate environment for the picture creation (Uilenstede environment).
4 In the Controls menu, we will now select the animations icon and we will select the animation from the animations options the DoorFL feature. This will trigger the animation to open the driver side door.
5 Now we have the picture and composition ready. We can generate a 16K version via the Output Format settings within the Output Menu. From the Image Size dropdown menu select 16K. From the Image Format choose PNG. Click the Quick Shot button.

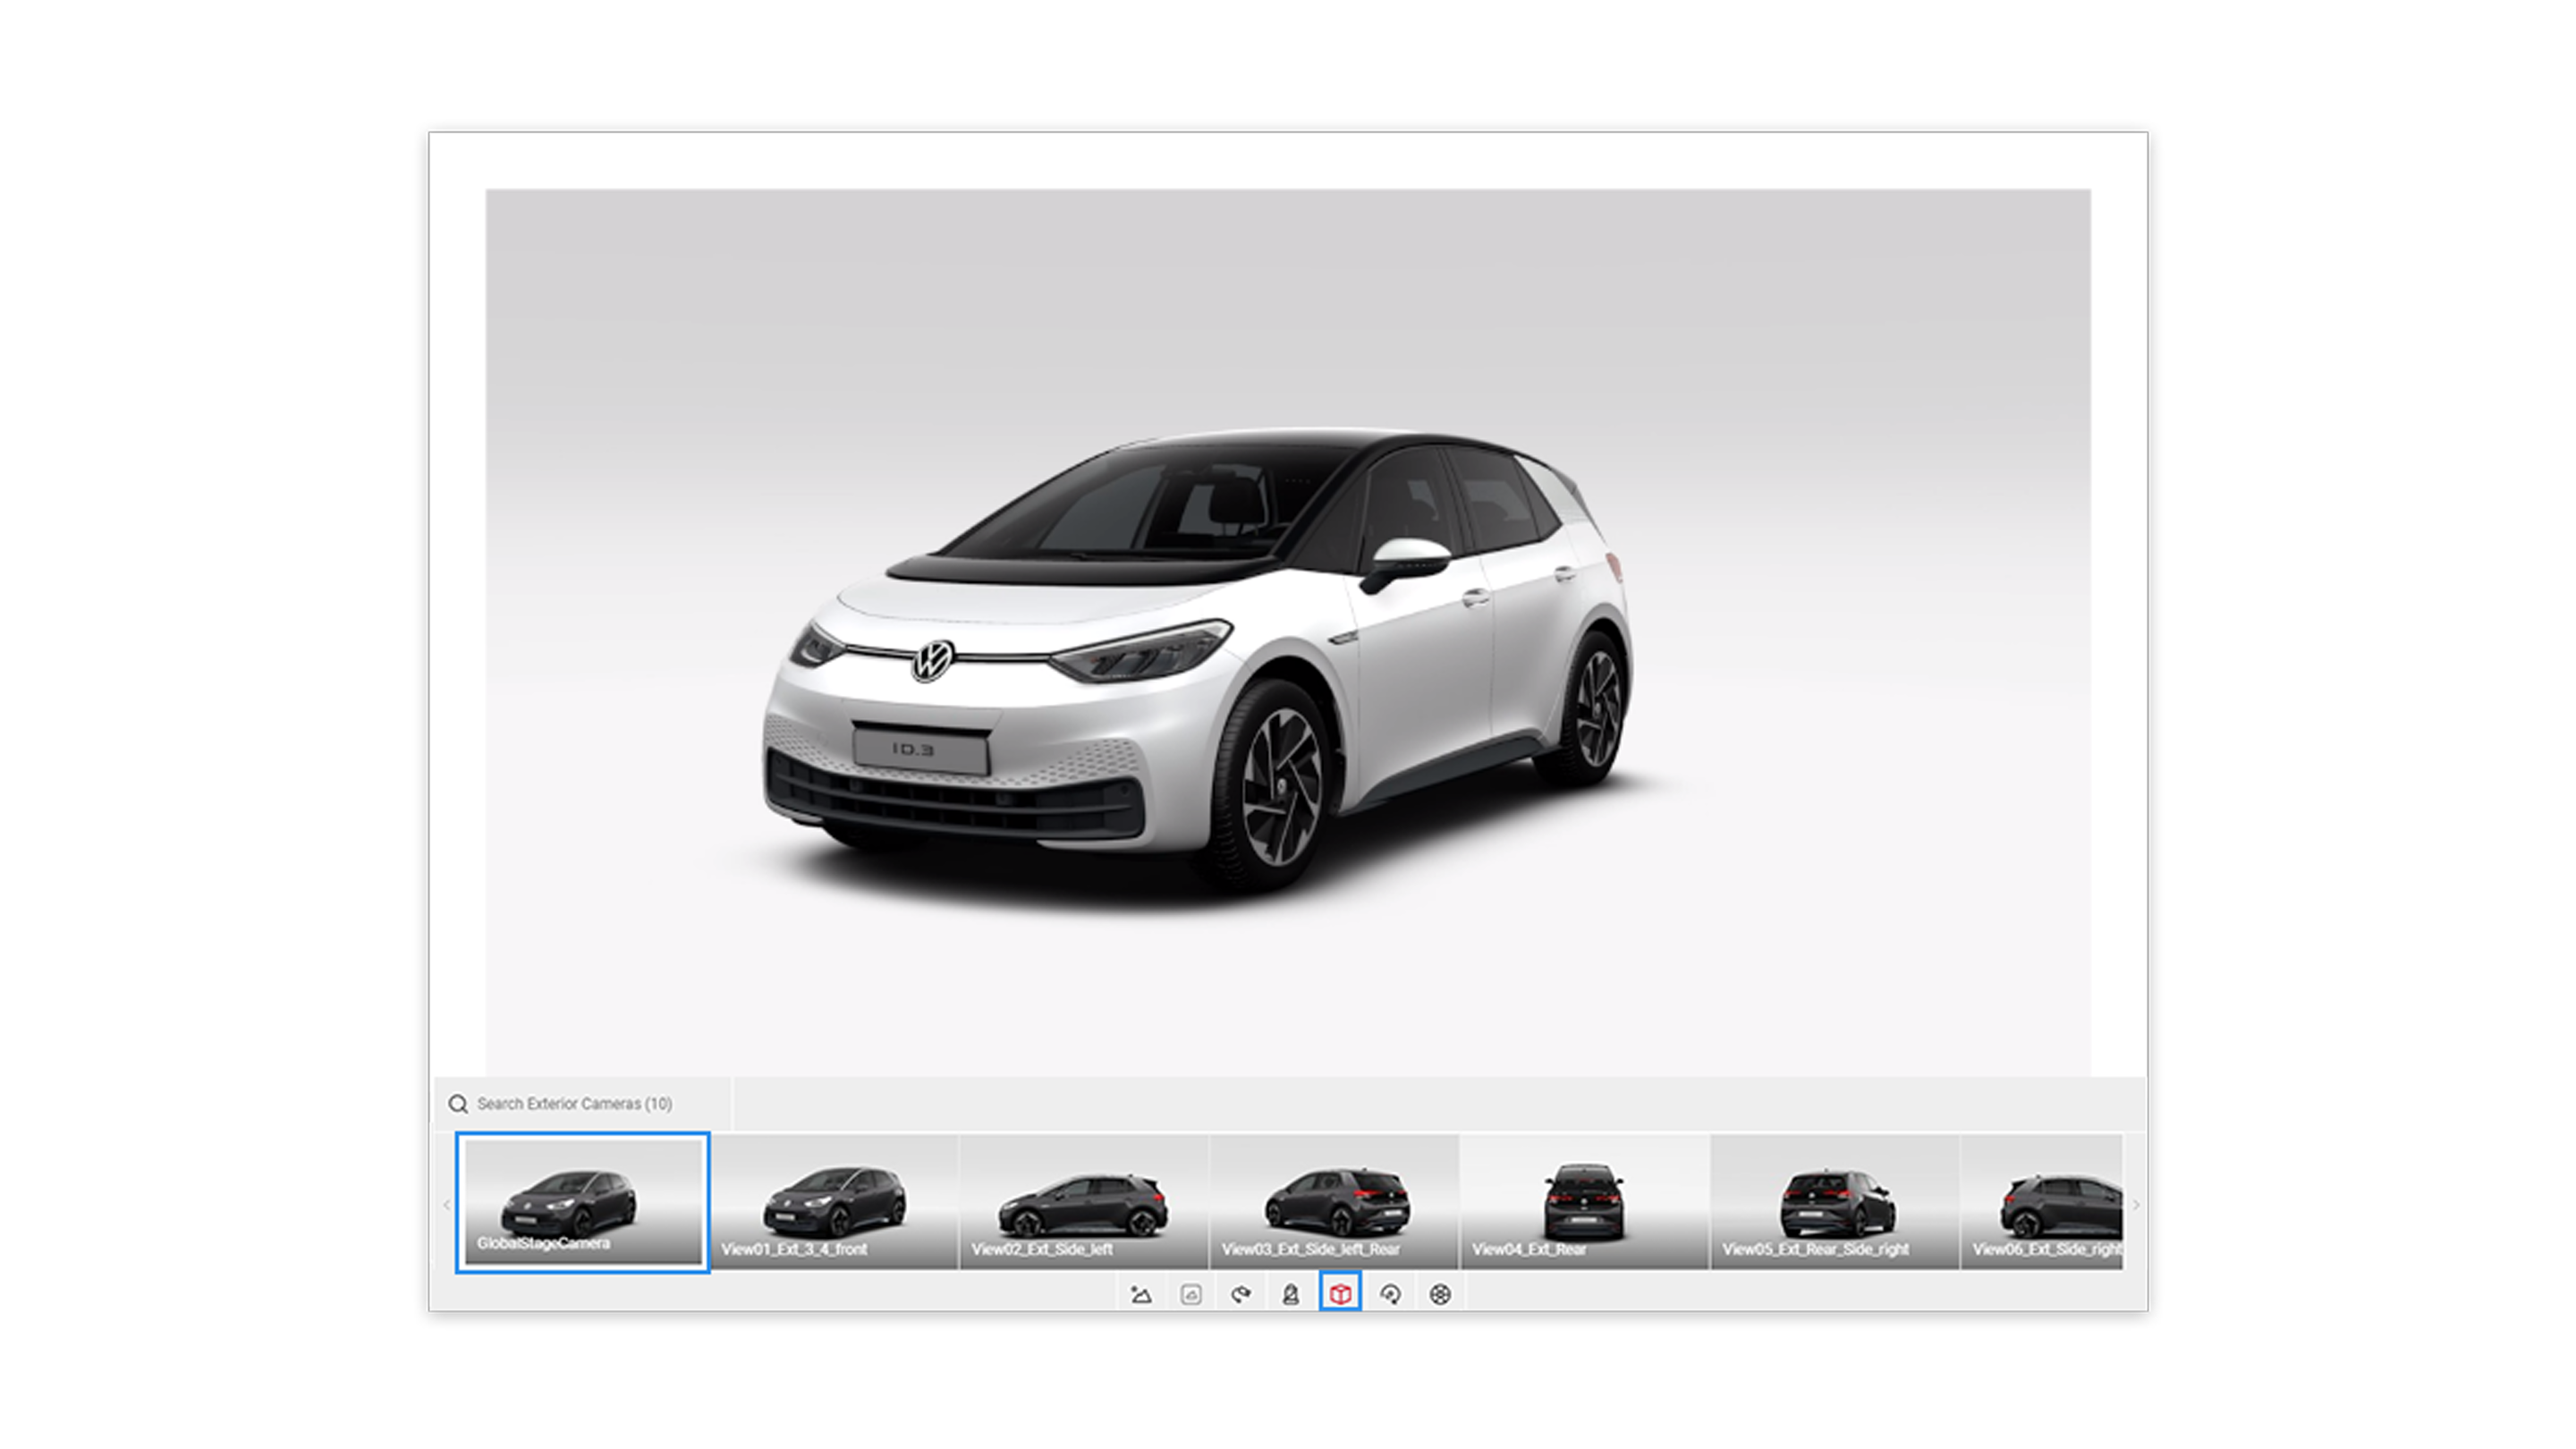
6 Now we can begin to build the composition of our second picture. We will use the same Configuration, so in the Controls Menu, click on the Exterior Cameras icon and choose the GlobalStageCamera to reset the vehicle position.
7 As we did in the previous steps, let us begin to set the angle of the second car by using the methods we have learned, using the FlyCam mode, keyboard and mouse controls.
8 In the Controls menu, we will now select the environment icon and choose a different environment for the second car picture creation (MoodCafe environment).