
Tutorial Time: 10 mins

- Creating a Backplate
- Using Scene Components
- Using Camera Solver
- Scene Lighting & Shadows
- Publishing a Backplate
What you will learn
Using the Scene app we will learn how to create a Backplate environment we can publish in Shutter Pro and create picture content for usage across a global campaign. We will learn how to use the Camera Solver feature and work with the lighting and shadow menu options to help setup the car within the Scene. We can publish this in Shutter Pro and begin creating our campaign content.
1
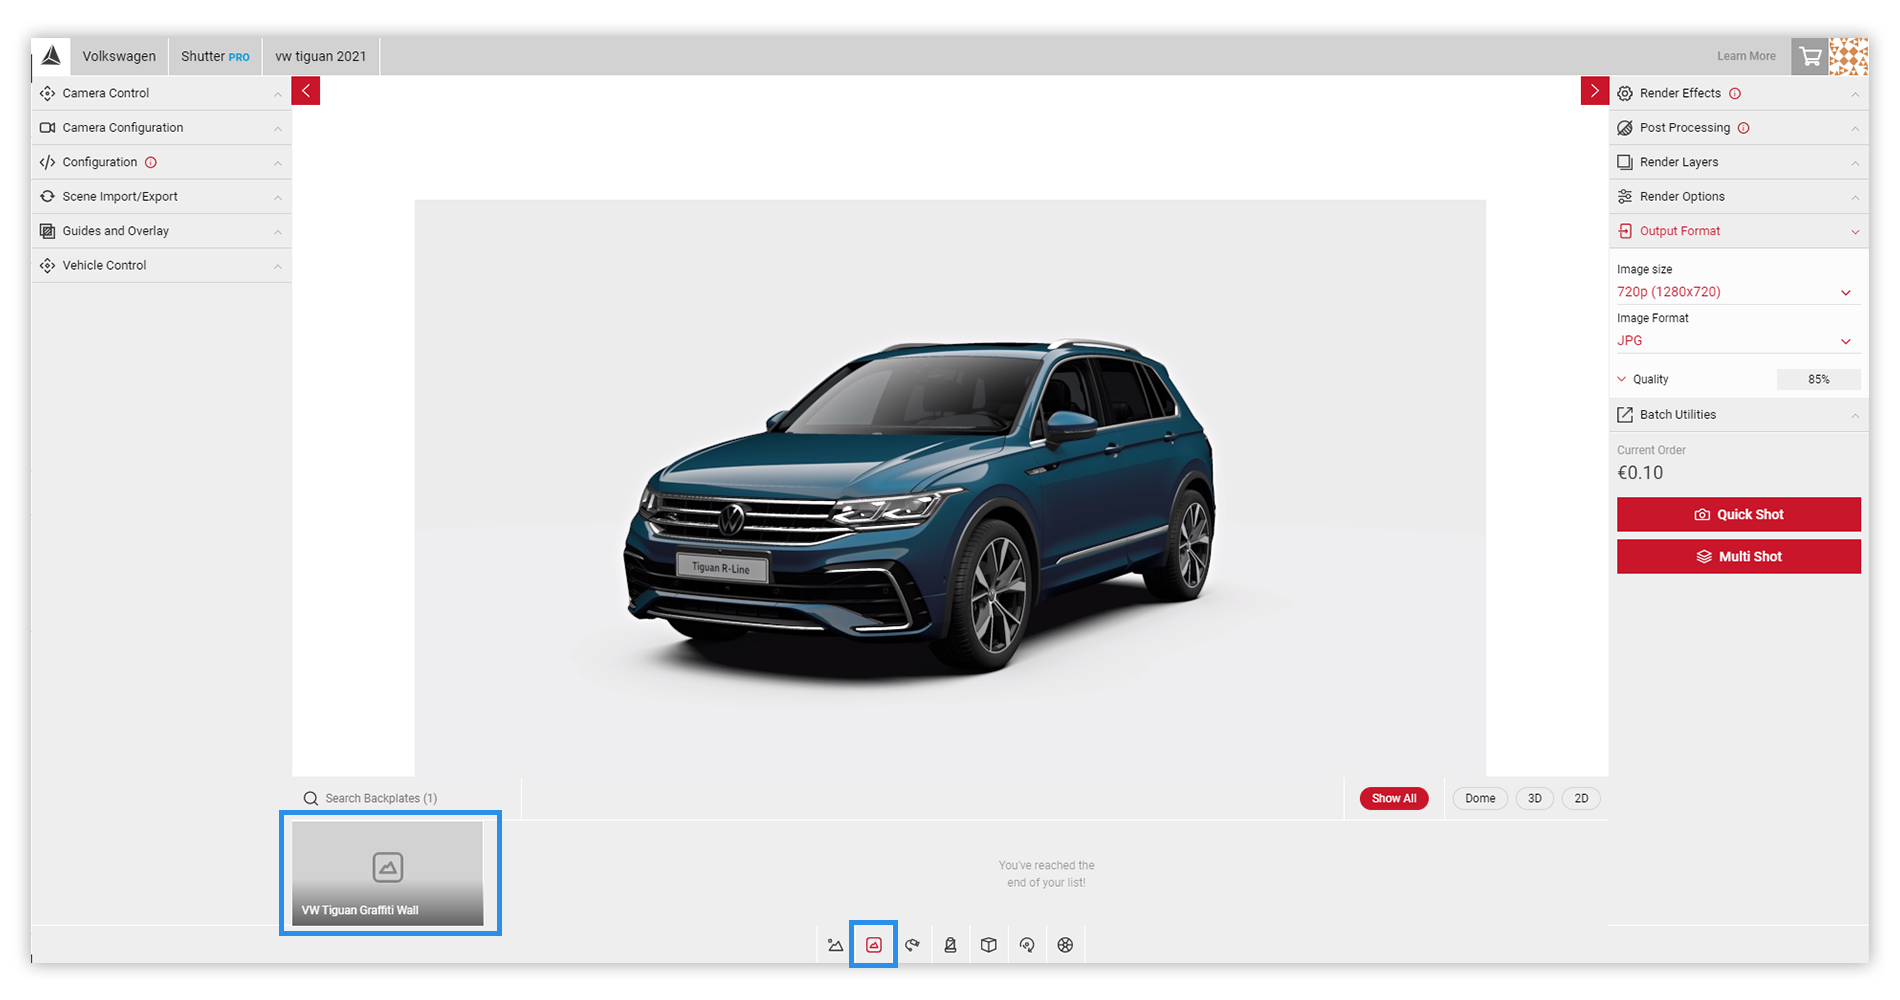
First let's create our Backplate. Within the Open Projects menu, select the Create New tab. Under Scene Type, make sure Backplate is selected. Give the Backplate an appropriate name and click the Create New button. In this example, the scene will be named VW Tiguan Graffiti Wall.
The new named Backplate will appear in the Saved Scene menu.

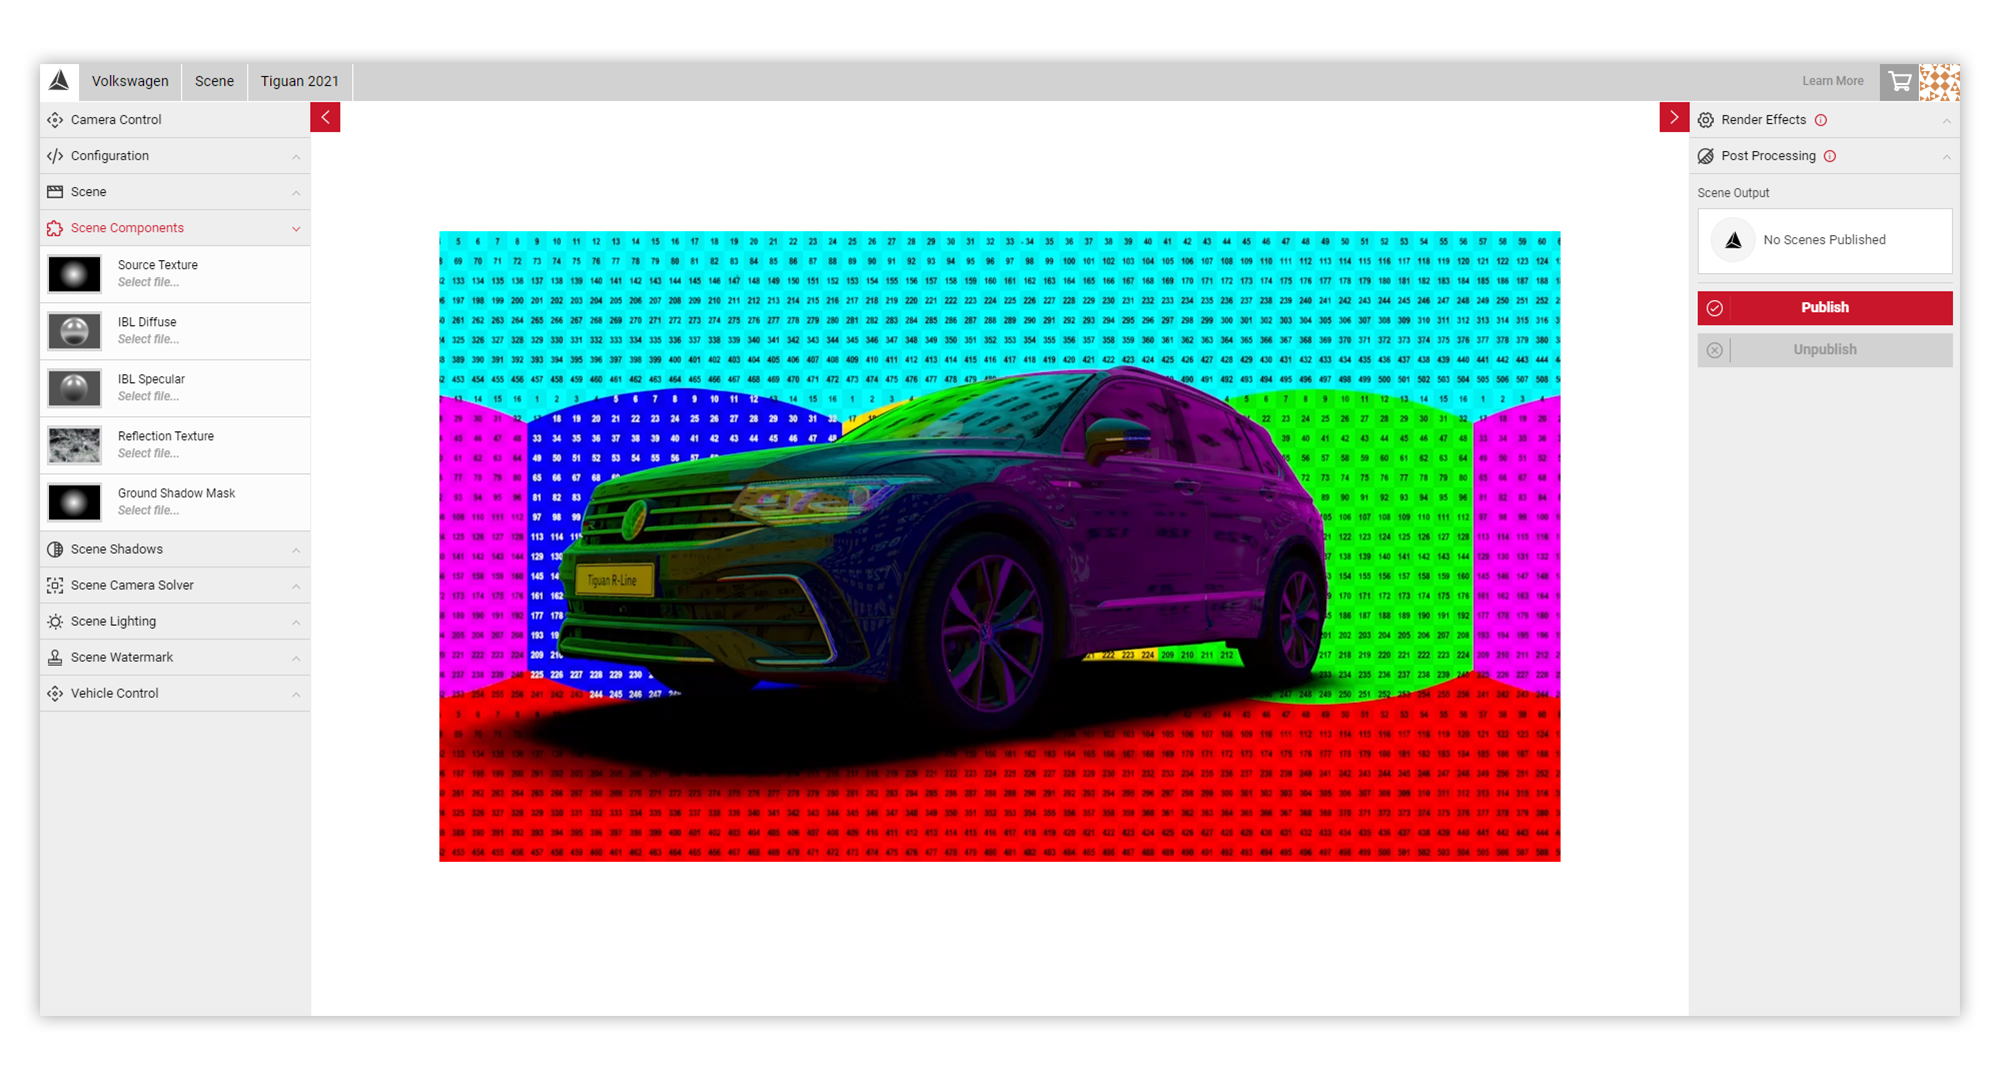
2 In the Scene Components menu, you will see the asset slots to upload your files. This is where we will begin to build our Backplate environment and upload our assets to each component slot. For the source texture, we will upload a tonemapped image, and non-tonemapped HDR for the lighting and reflection slots.
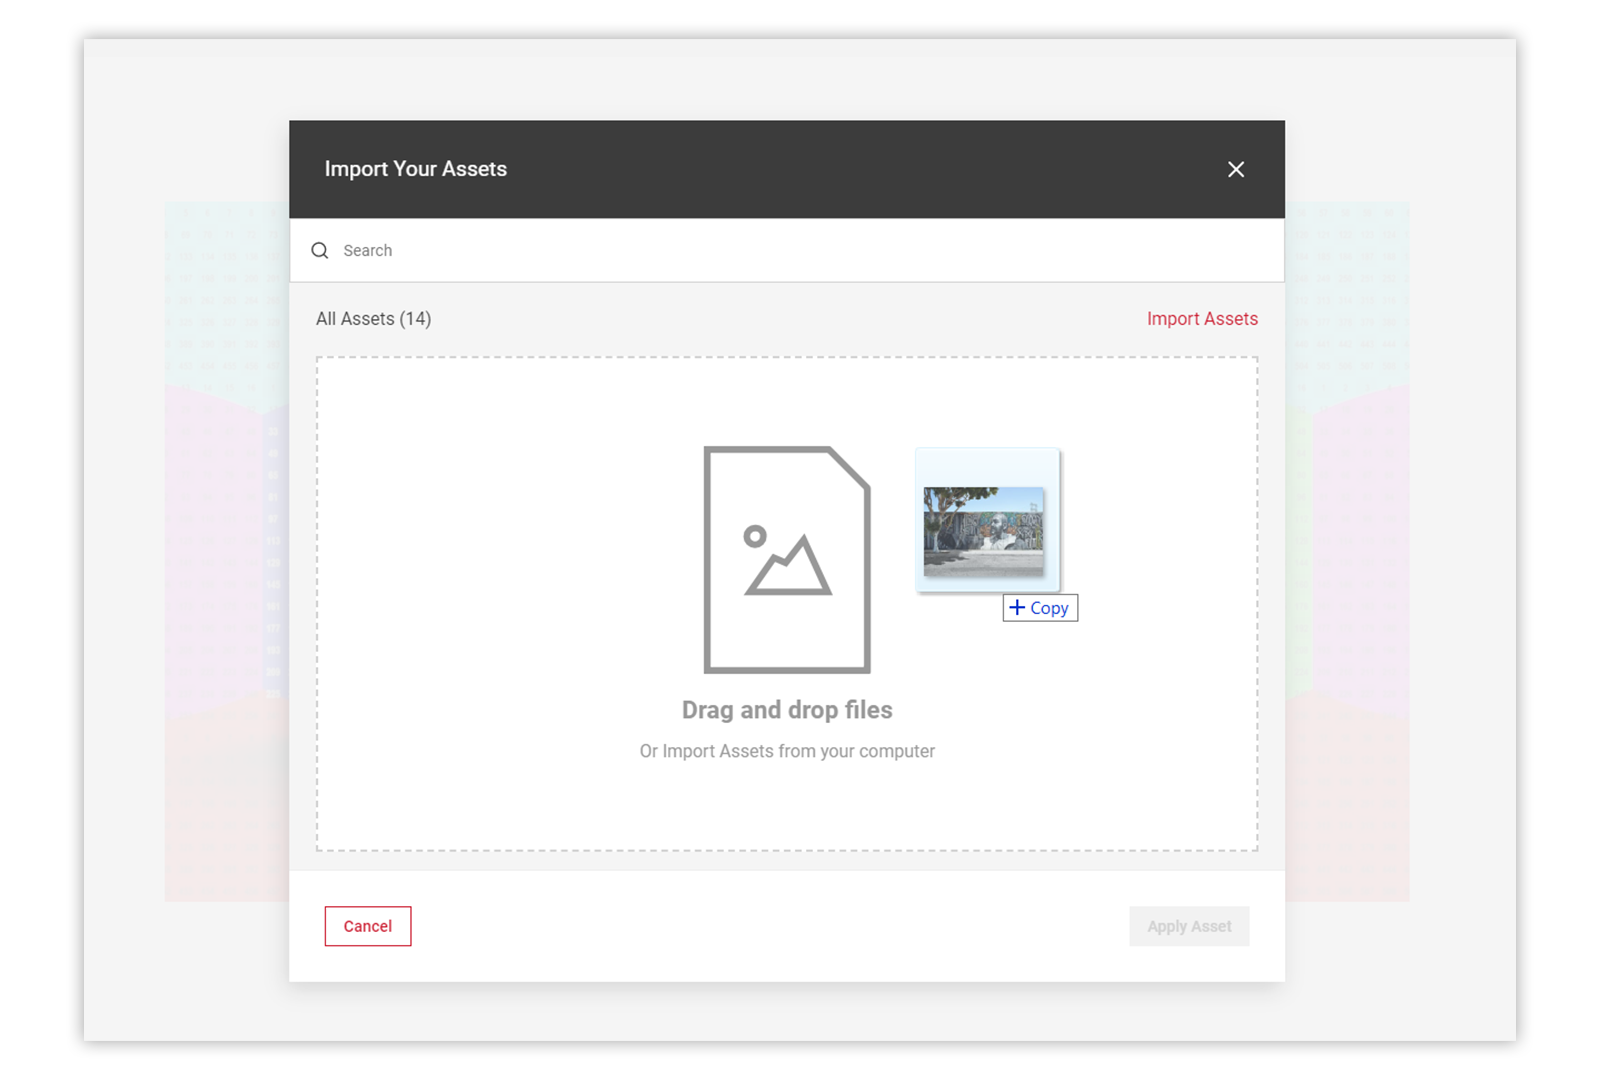
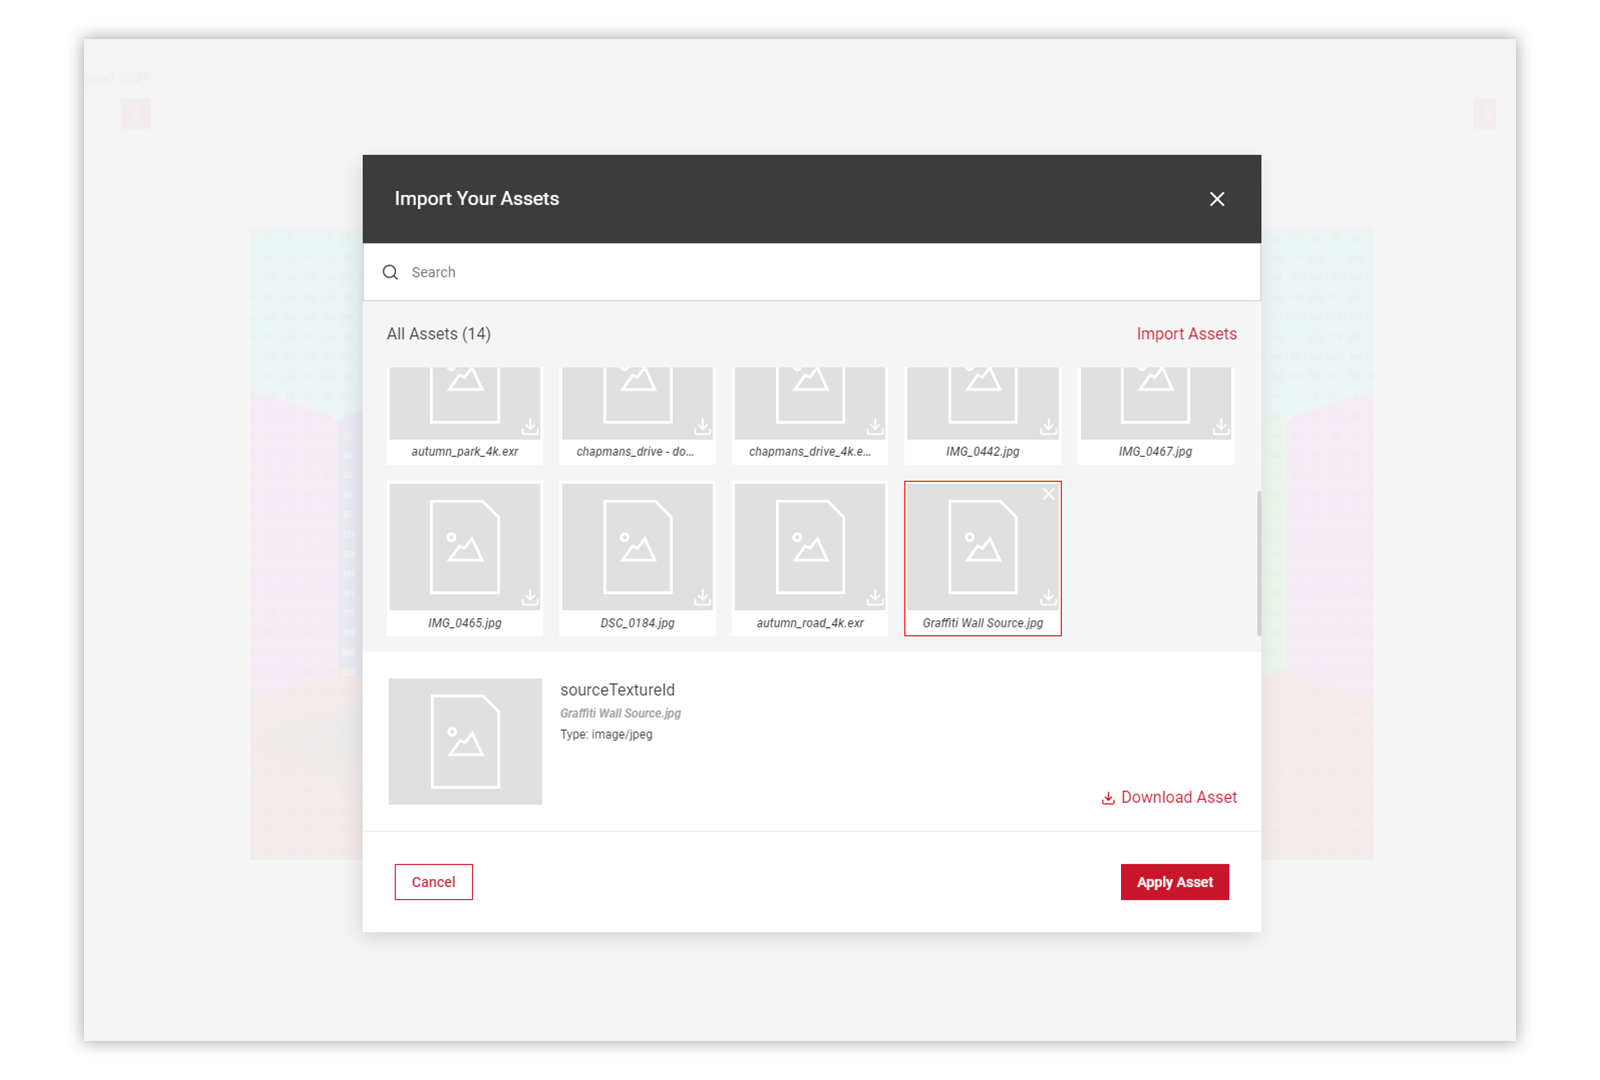
3 Click the Source Texture image slot. This brings up the Import your Assets modal dialog, you will also see all of your previously uploaded assets (if applicable). Drag and drop your files anywhere within the asset upload area, or click Import Assets to locate the HDRi on your local system.
* It is important to use a tonemapped image for the background, not doing may result in a dull looking environment .
4 Once the HDRi has loaded, click the asset and select the Apply Asset button.
5
Next, click on the IBL Diffuse slot. In the Import Assets dialog, add your HDR file. This asset should be a non-tonemapped HDR. The Viewport will begin to update & reflect the HDR as it fills the slots. Repeat the process to add assets to the other component slots.

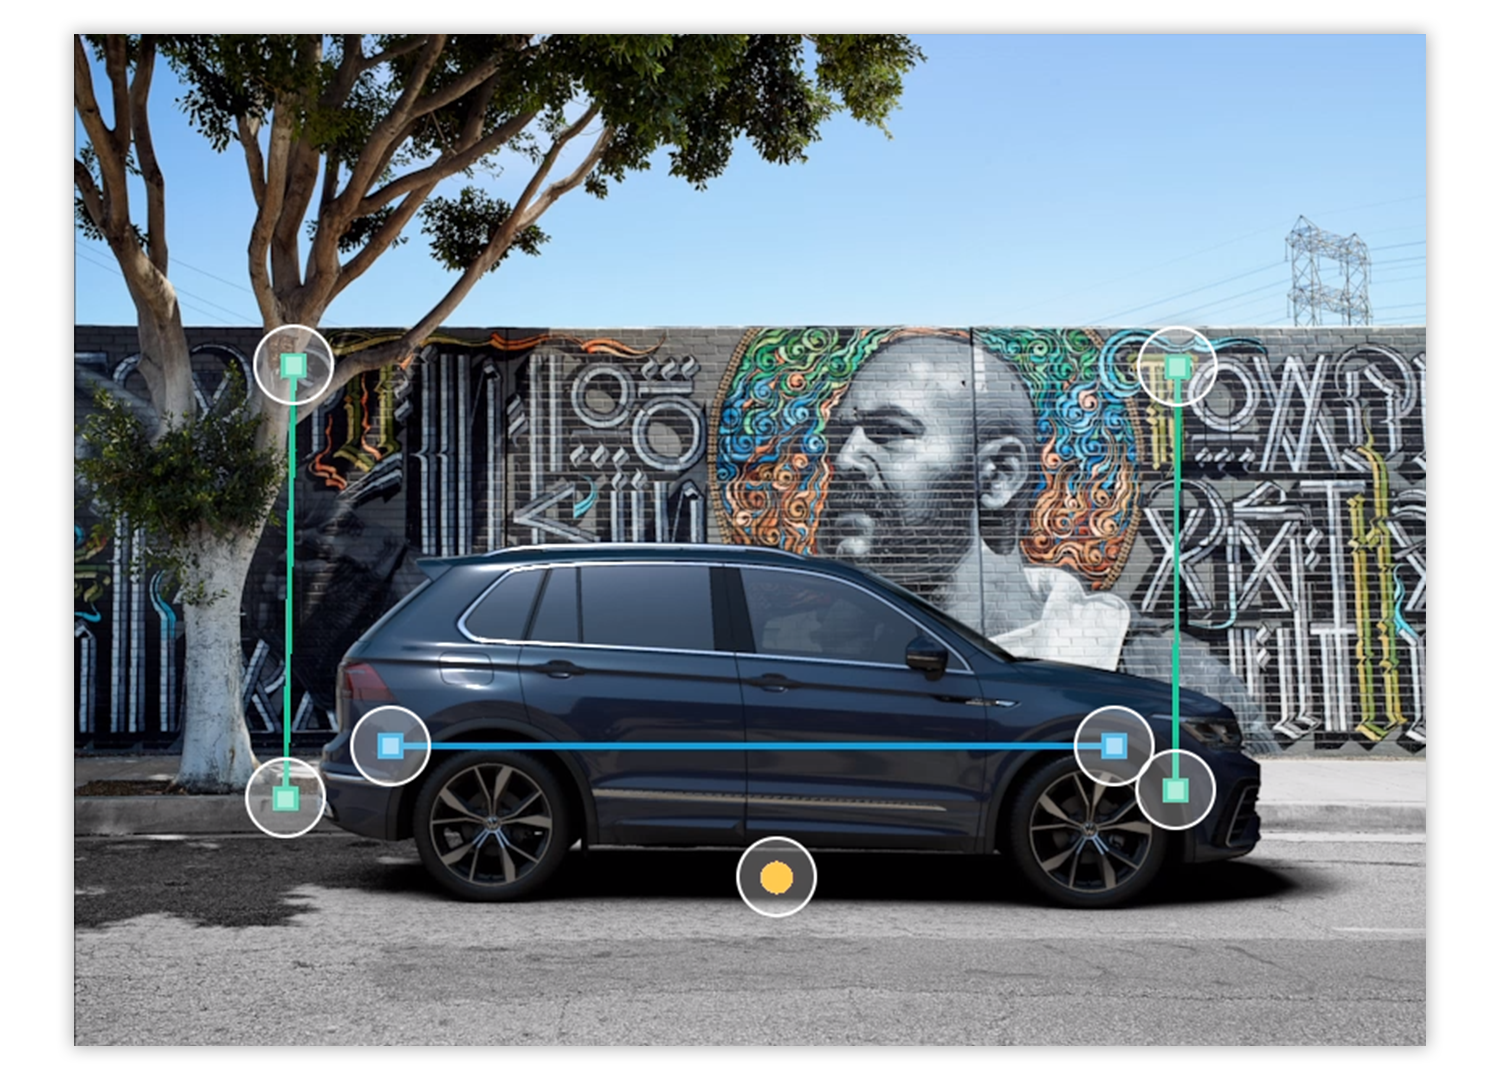
6 With the HDRi's loaded into the Components menu and the Viewport reflecting this, we can use the built in Camera Solver tools to set the camera projection lines so the car sits correctly in the scene. In the Camera Solver menu, enable the Show Camera Guides slider. The projection lines will then appear in the Viewport to be re-positioned, you can then set the number of vanishing points to use.
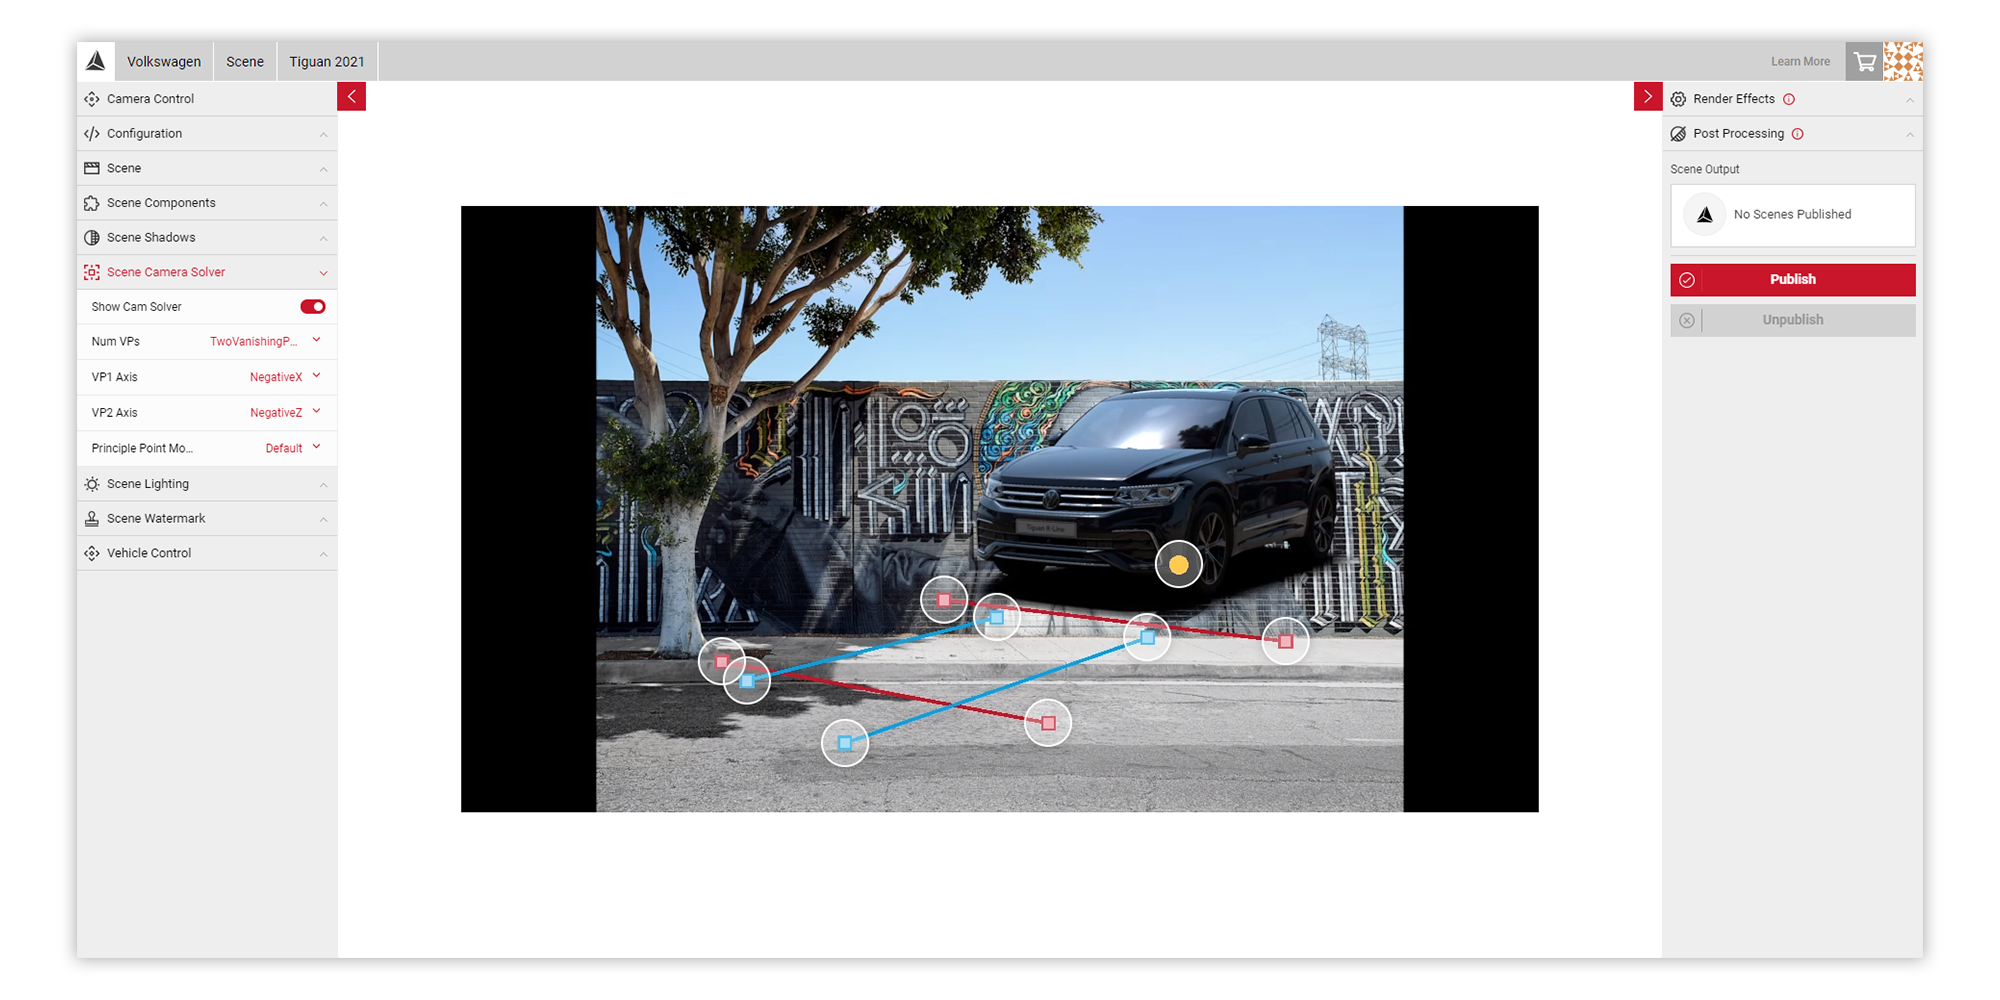
7 In this example, we have selected One vanishing point, with the axis set to Positive Y. Move the blue line (representing the X axis) to a suitable position. Move the green lines (representing the Y axis) to set the position of the car correctly in the scene.
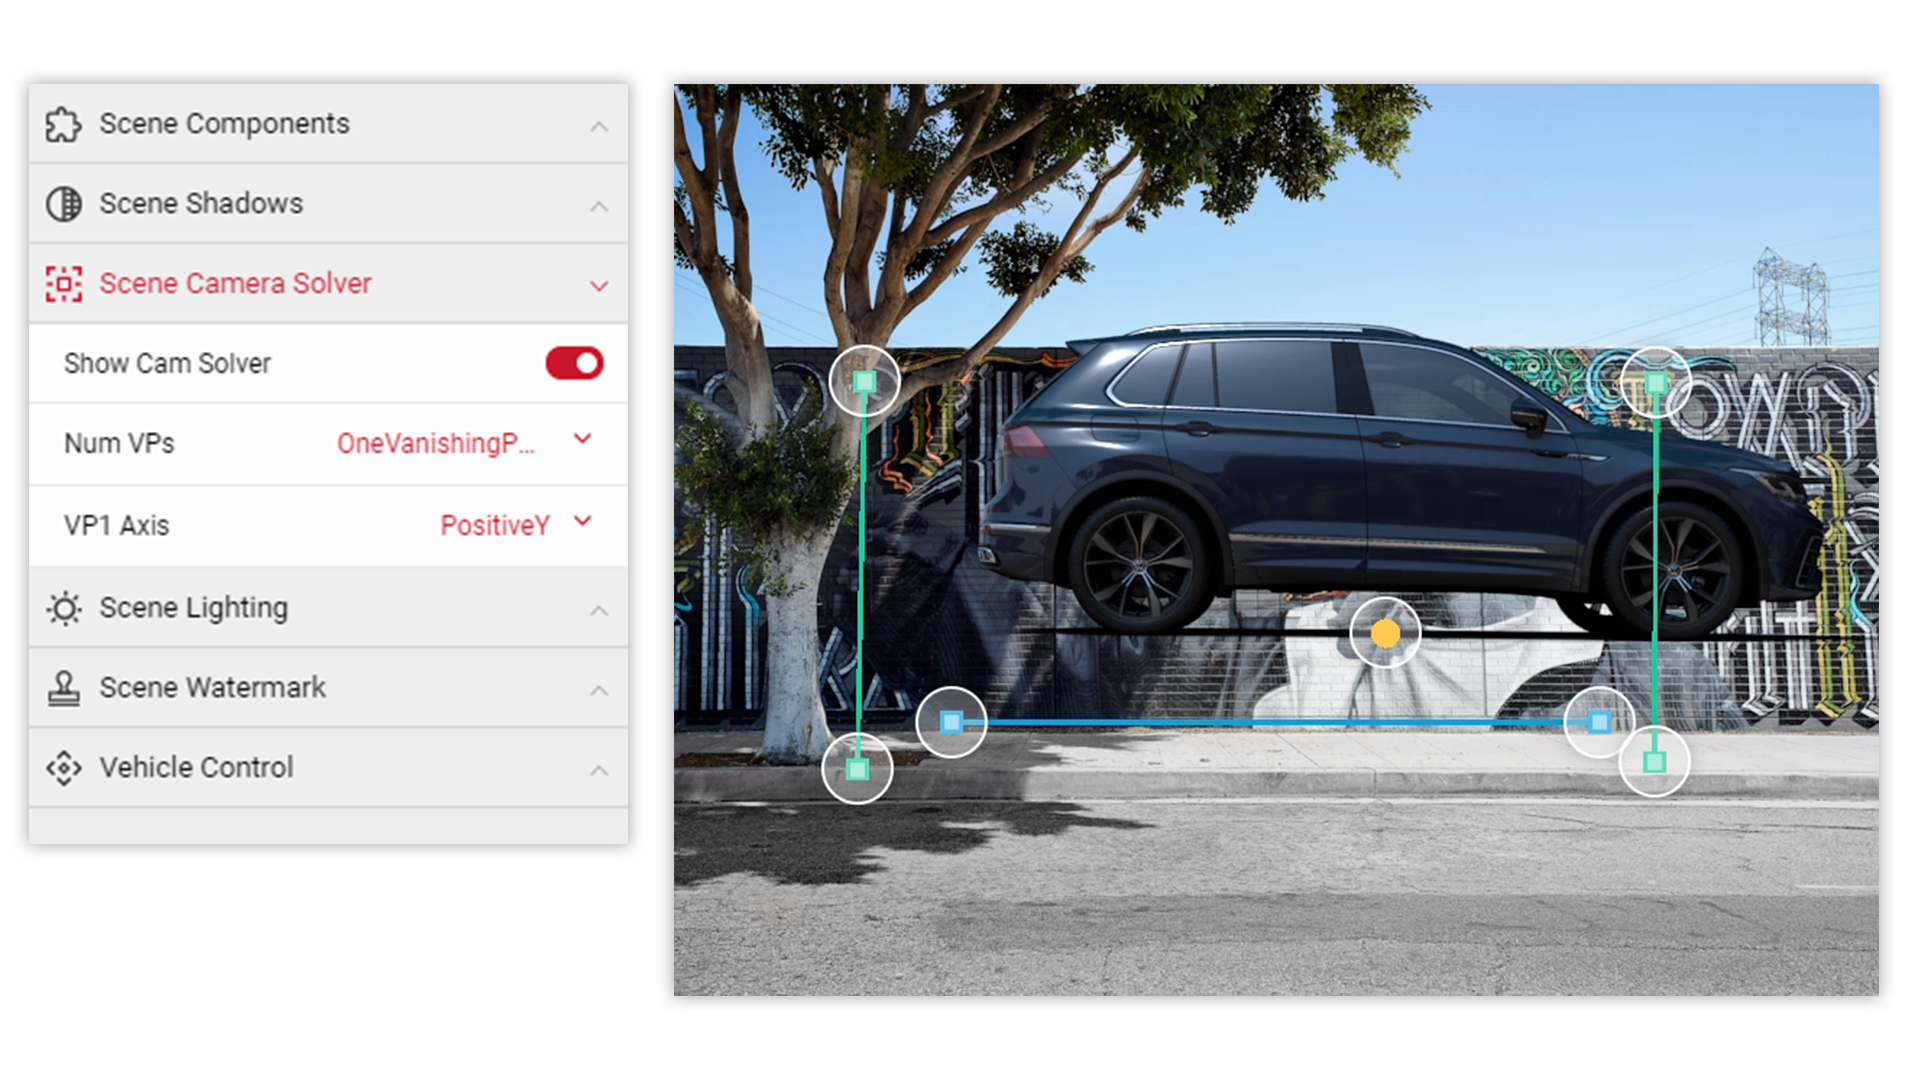
8 Once you have the correct orientation, drag the world origin point (yellow dot) to a suitable position so the car is placed correctly in the scene. Now the car is in a suitable position, we can start to edit our lighting and shadow settings.
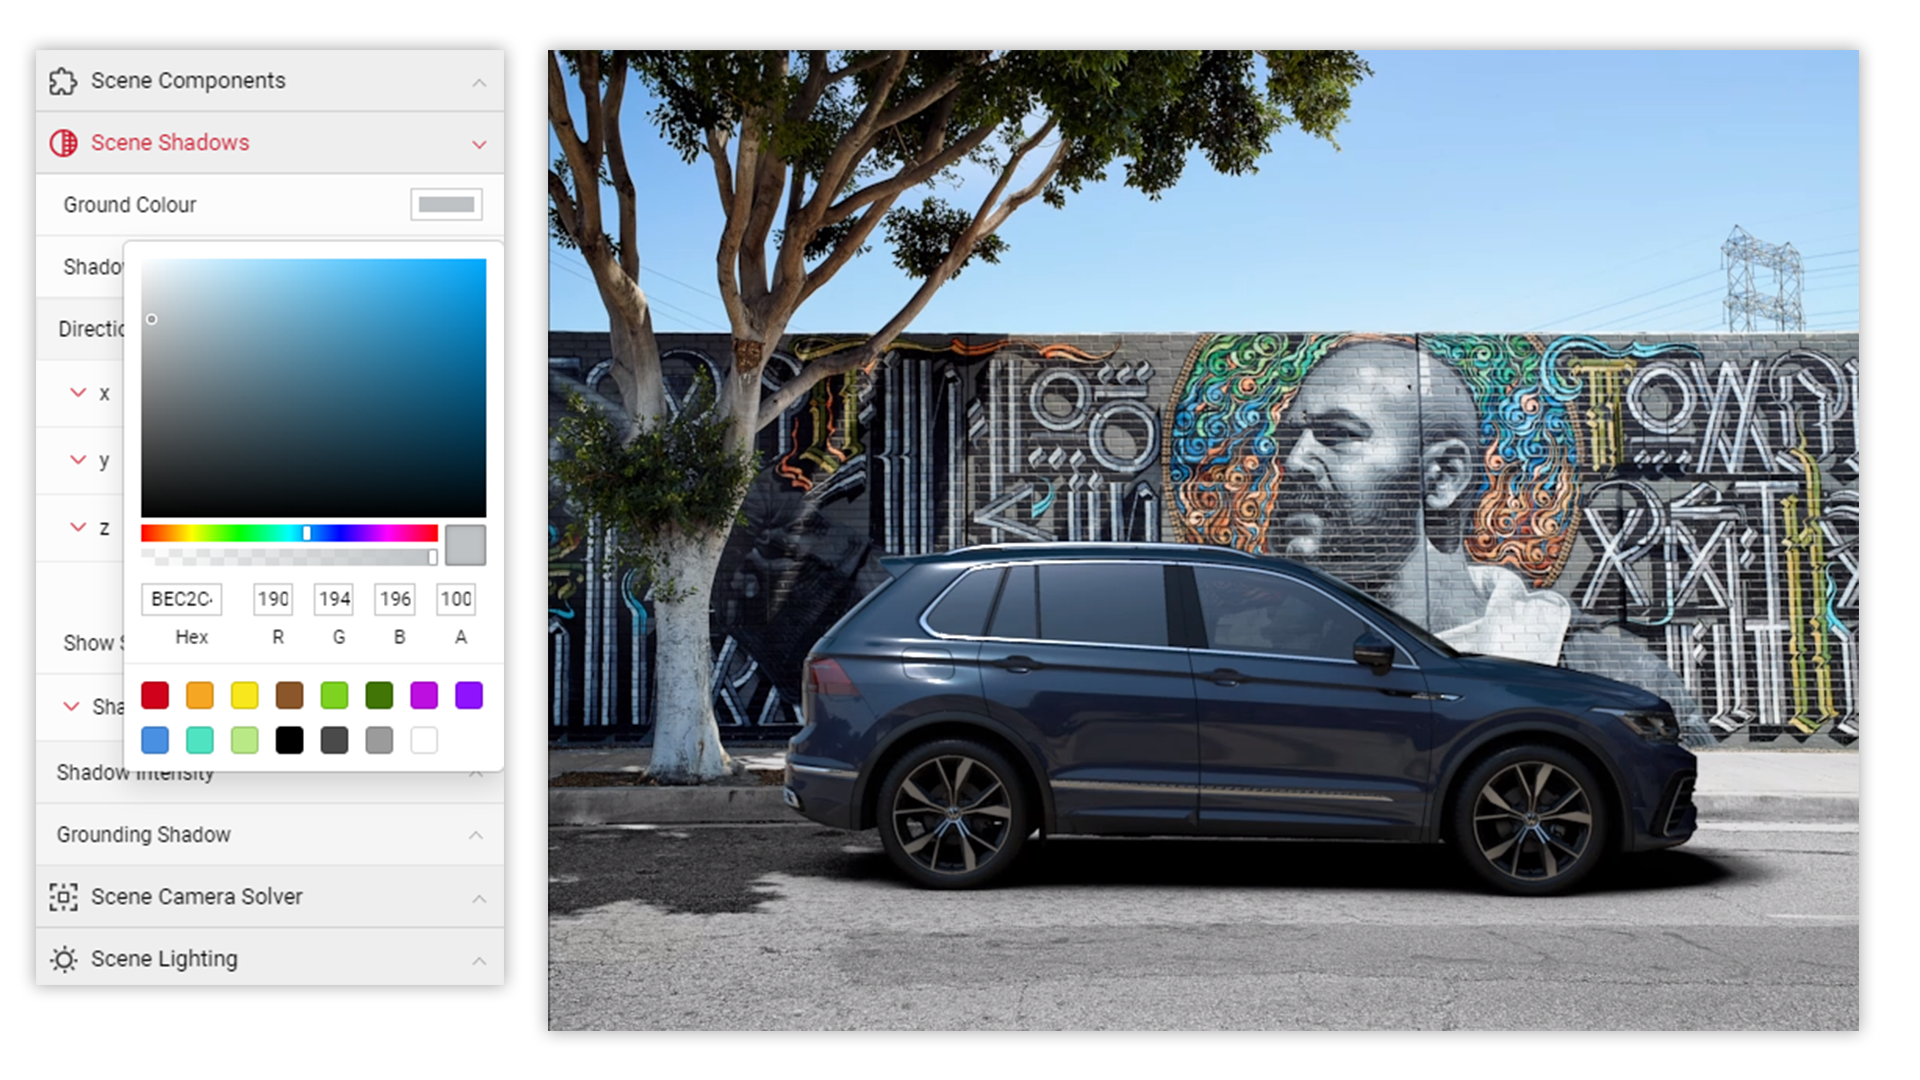
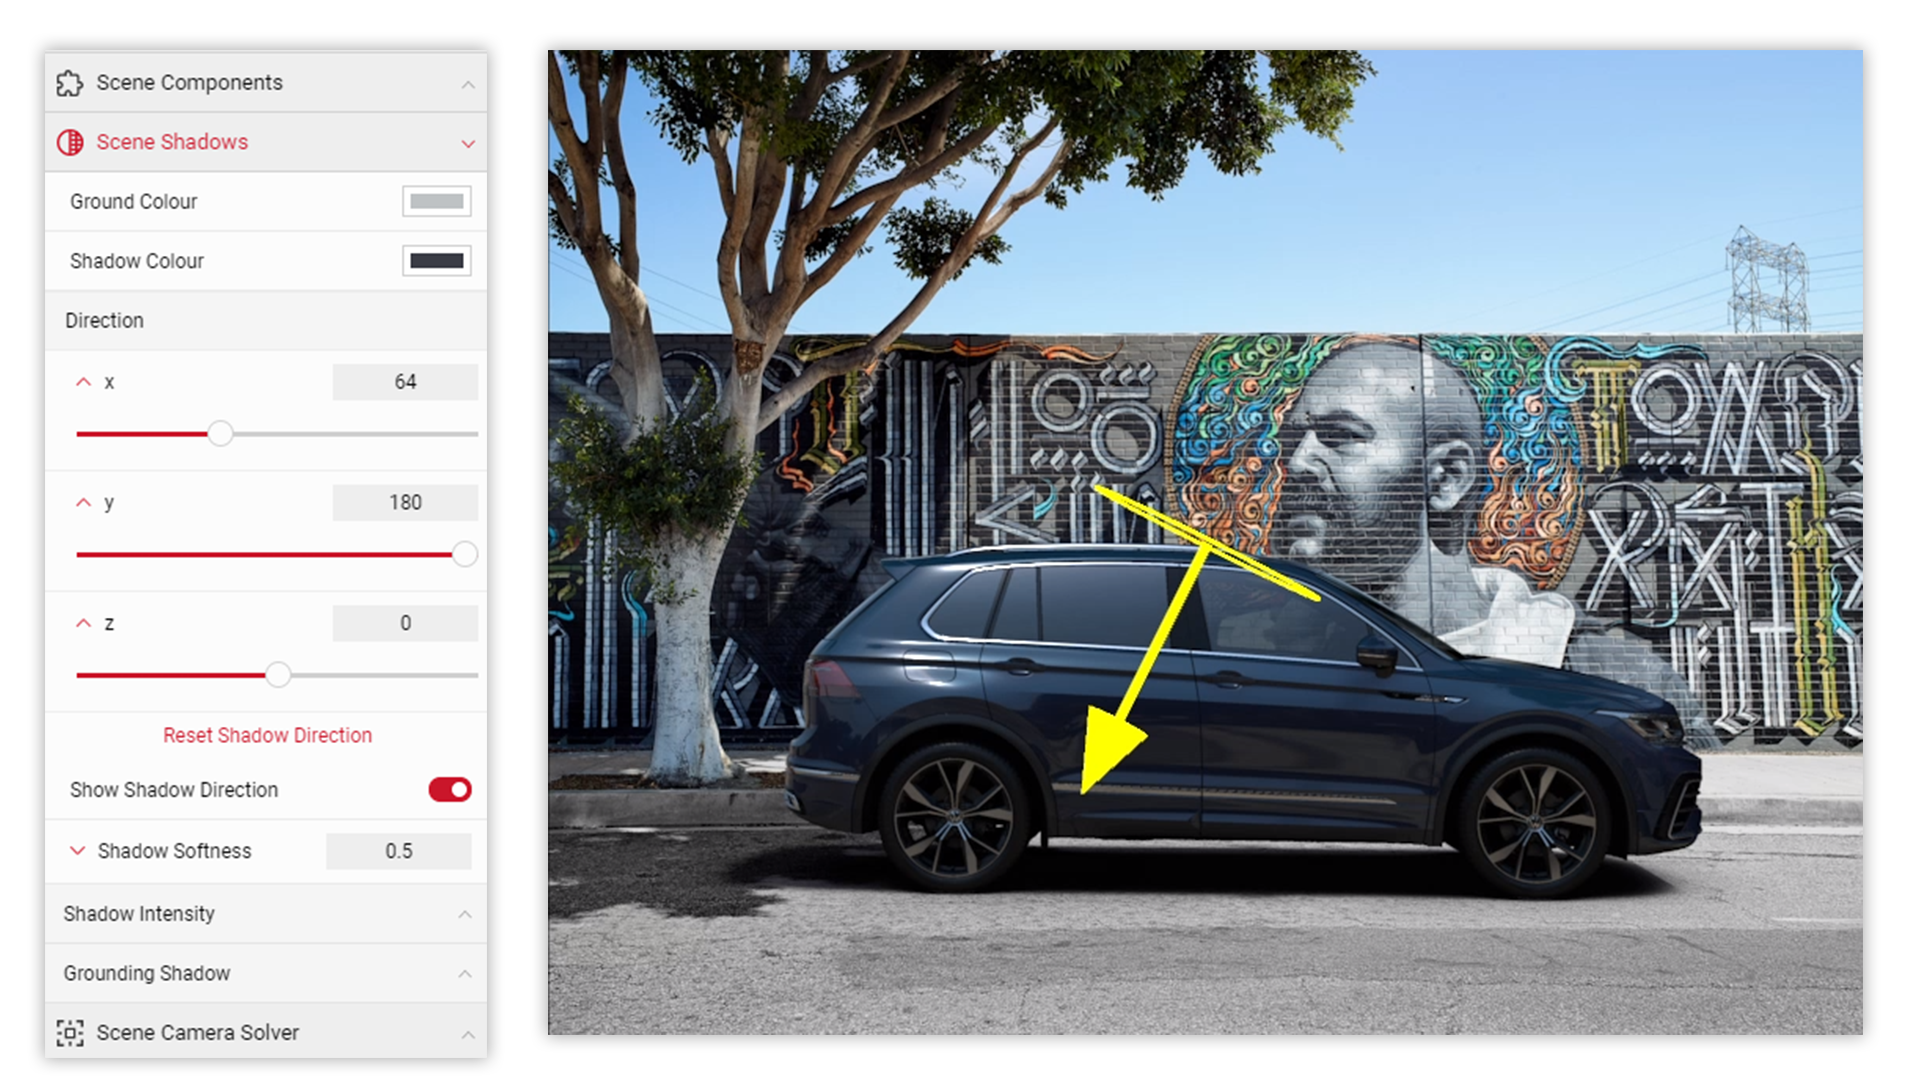
9 Firstly, we will select the Shadows menu. Here, we can see a variety of sliders to adjust the shadow cast by the vehicle. The Ground Colour resembles the area in which the car shadow is being cast. Change the colour to a light grey (BEC2C4) to match the colour of the road in this example.
10 Next, we will set the Shadow Colour. This is usually a light grey, although in this example we will add a hint of blue to match other colours in the scene. Set the colour to 3A3C45. Now we have defined the shadow colours, we can correctly align the shadow to match where the sun in the scene should be.
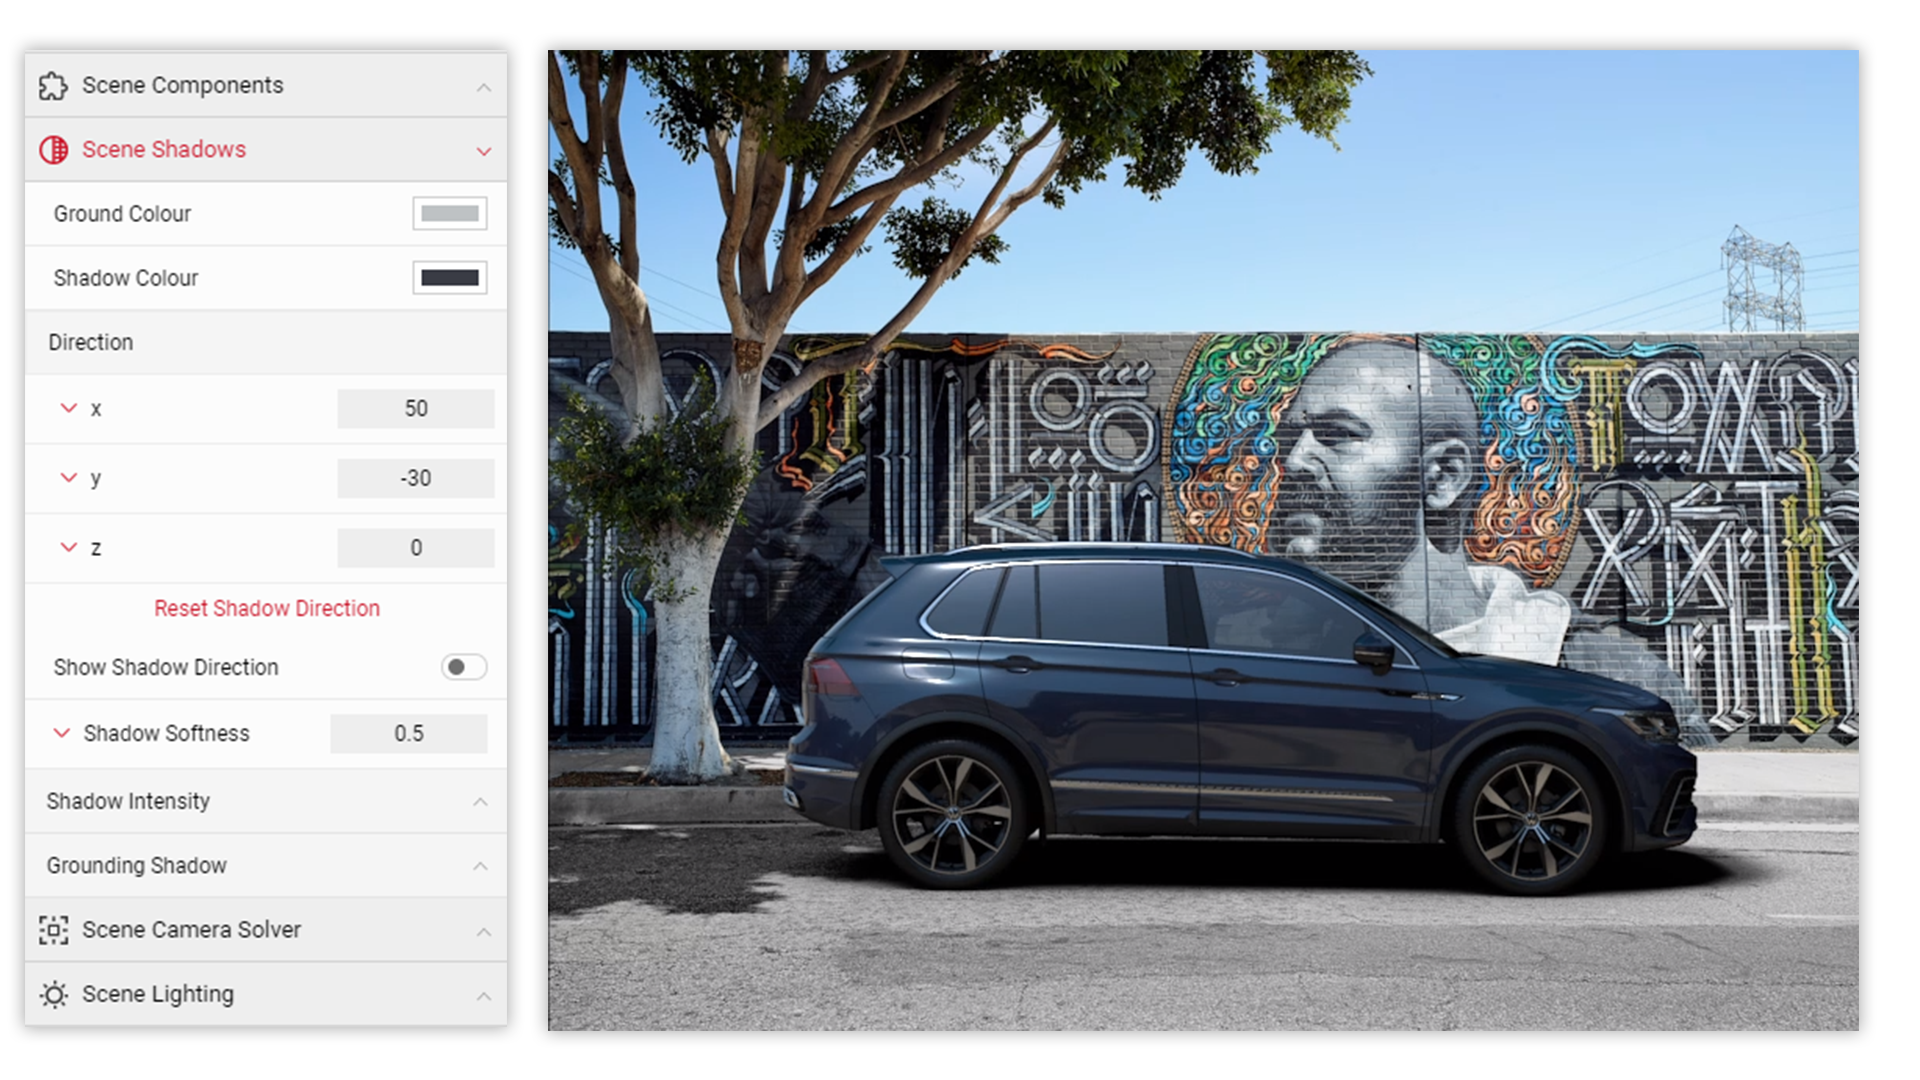
11 Looking at the shadows from the trees and the rest of the scene, the sun appears to be quite high, almost directly above the car but slightly to the right. We can adjust the Shadow Direction so the shadow appears to be cast from the right direction. In this example, we've changed the direction values on the Y axis to 180 and 64 on the X axis.
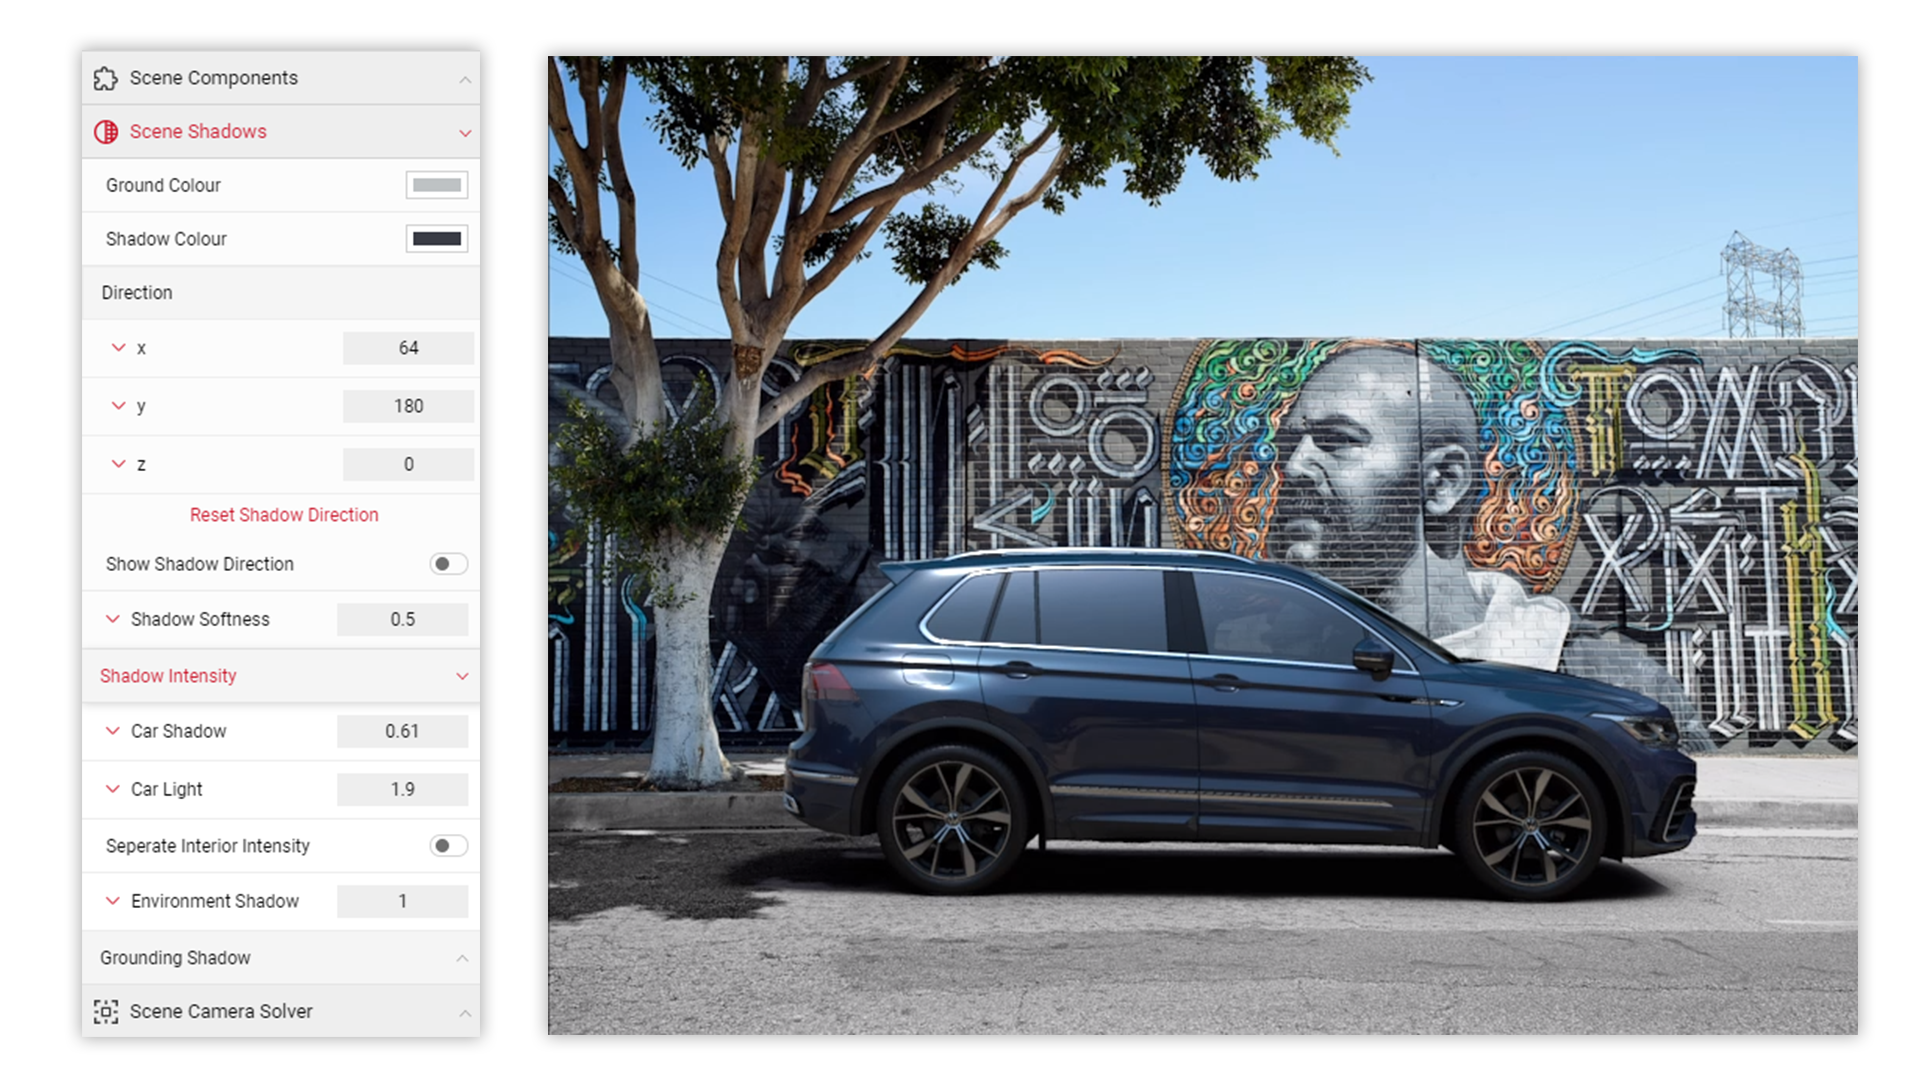
12 Next, we can expand the Shadow Intensity menu to adjust the level of light being cast on the vehicle. Car Light adjusts the sunlit areas on the car, and Car Shadow adjusts the shadowed areas on the car. As this environment is a bright sunny day, we can adjust the Car Light values to 1.9, and the Car Shadow values to 0.6 to make the shadows more realistic.
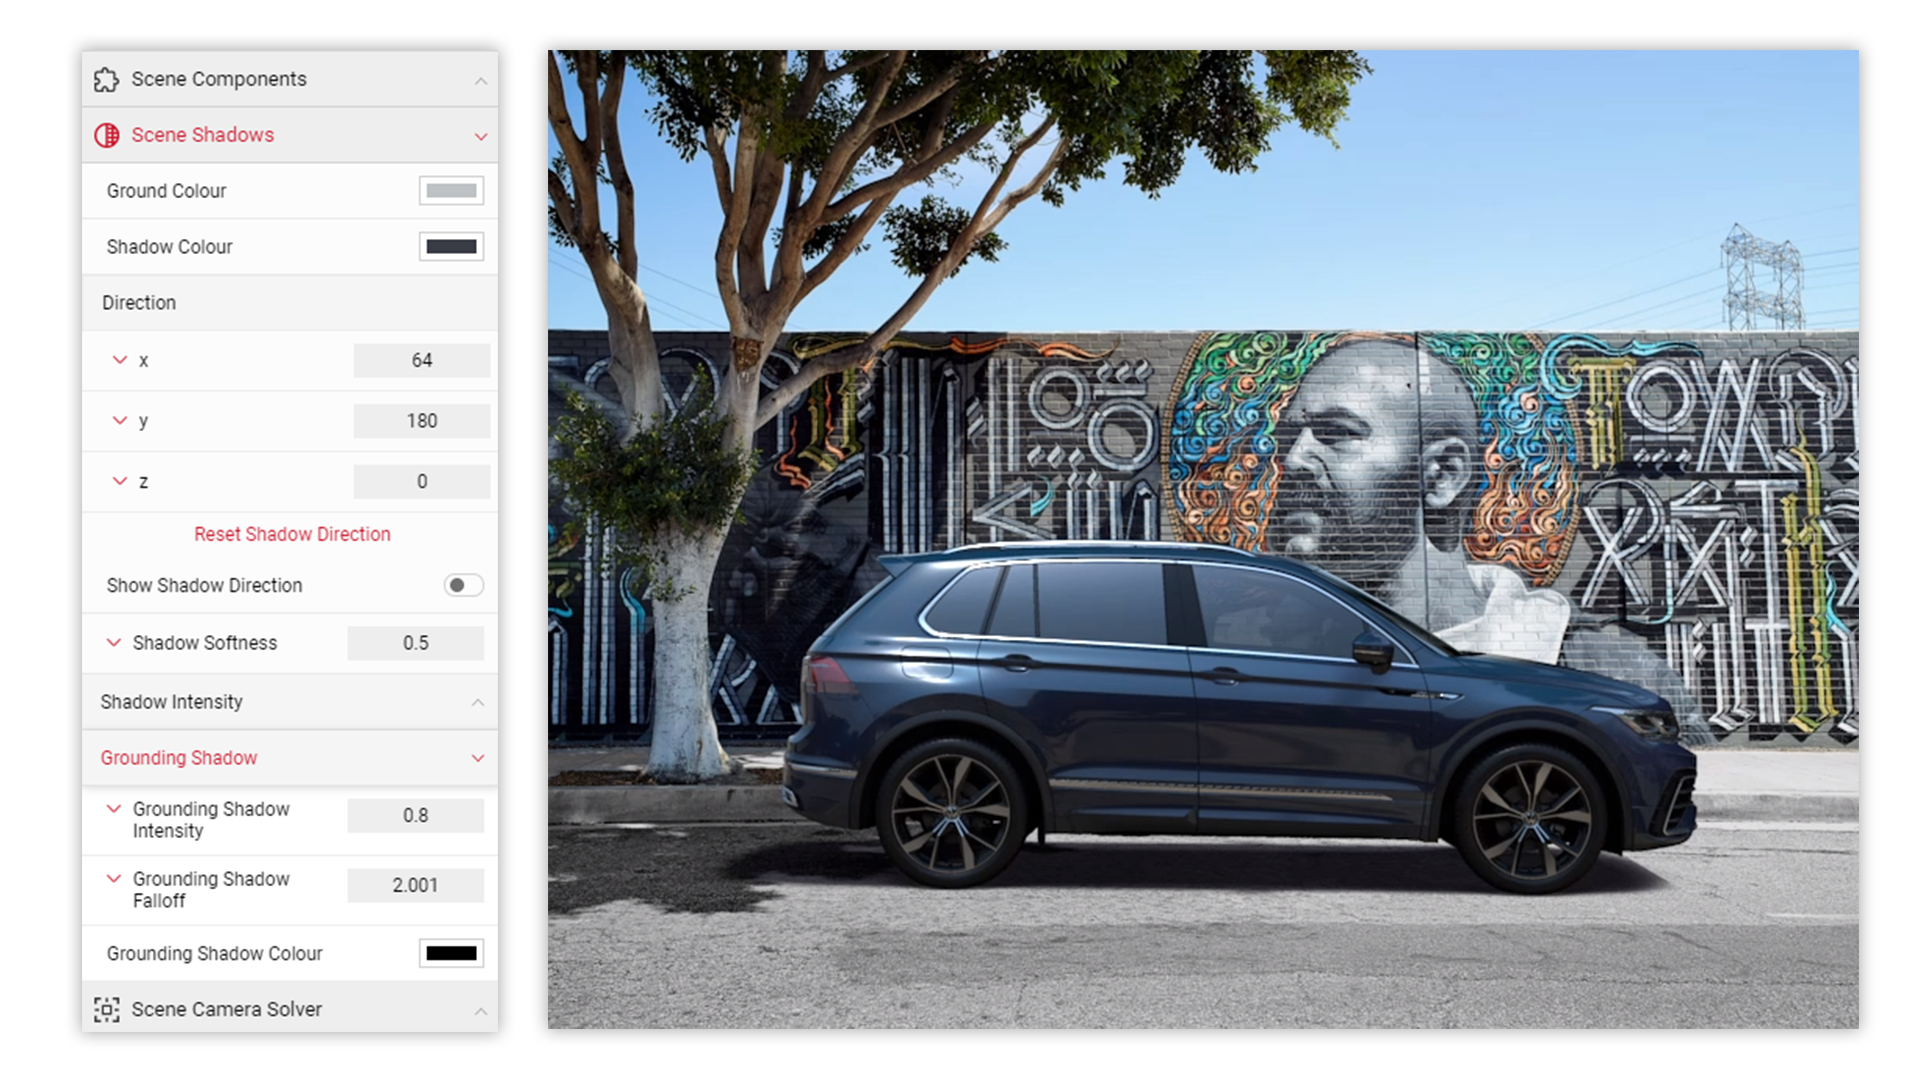
13 Next, we can adjust the Grounding Shadow settings. The grounding shadow is the natural darkness underneath the car, as this environment is quite bright, we can reduce the shadow intensity and falloff to reflect this. In this example, we can change the Intensity value to 0.8 and the falloff value to 2.
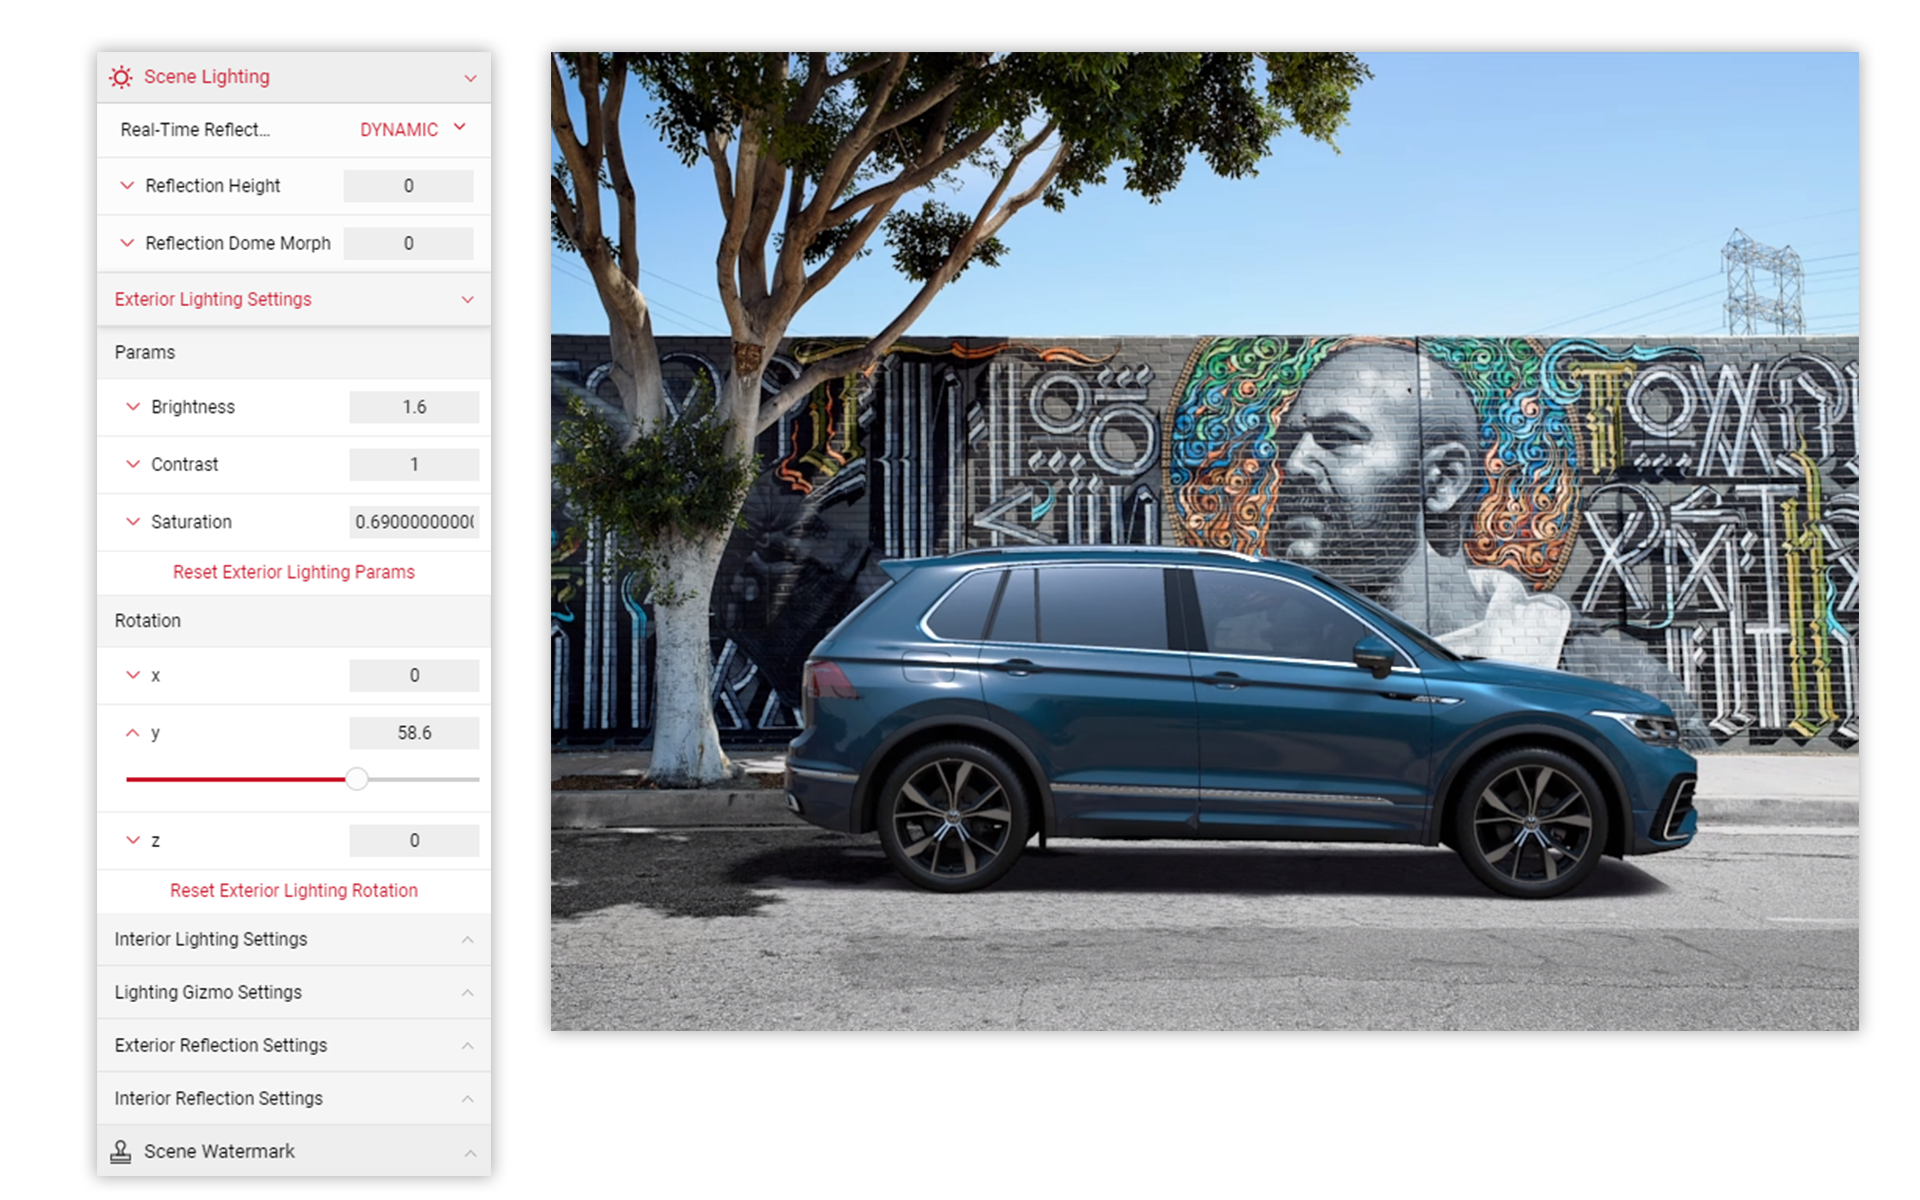
14 Now we have adjusted our shadow settings, we can begin to create our lighting for the scene. For this example, we will only be changing the Exterior Lighting as this will be an exterior shot. Firstly, select the Lighting menu, and expand the Exterior sub menu. Here, we can adjust the Brightness to reflect the correct lighting, as the sun is almost directly above the car, we can increase the values to 1.6.
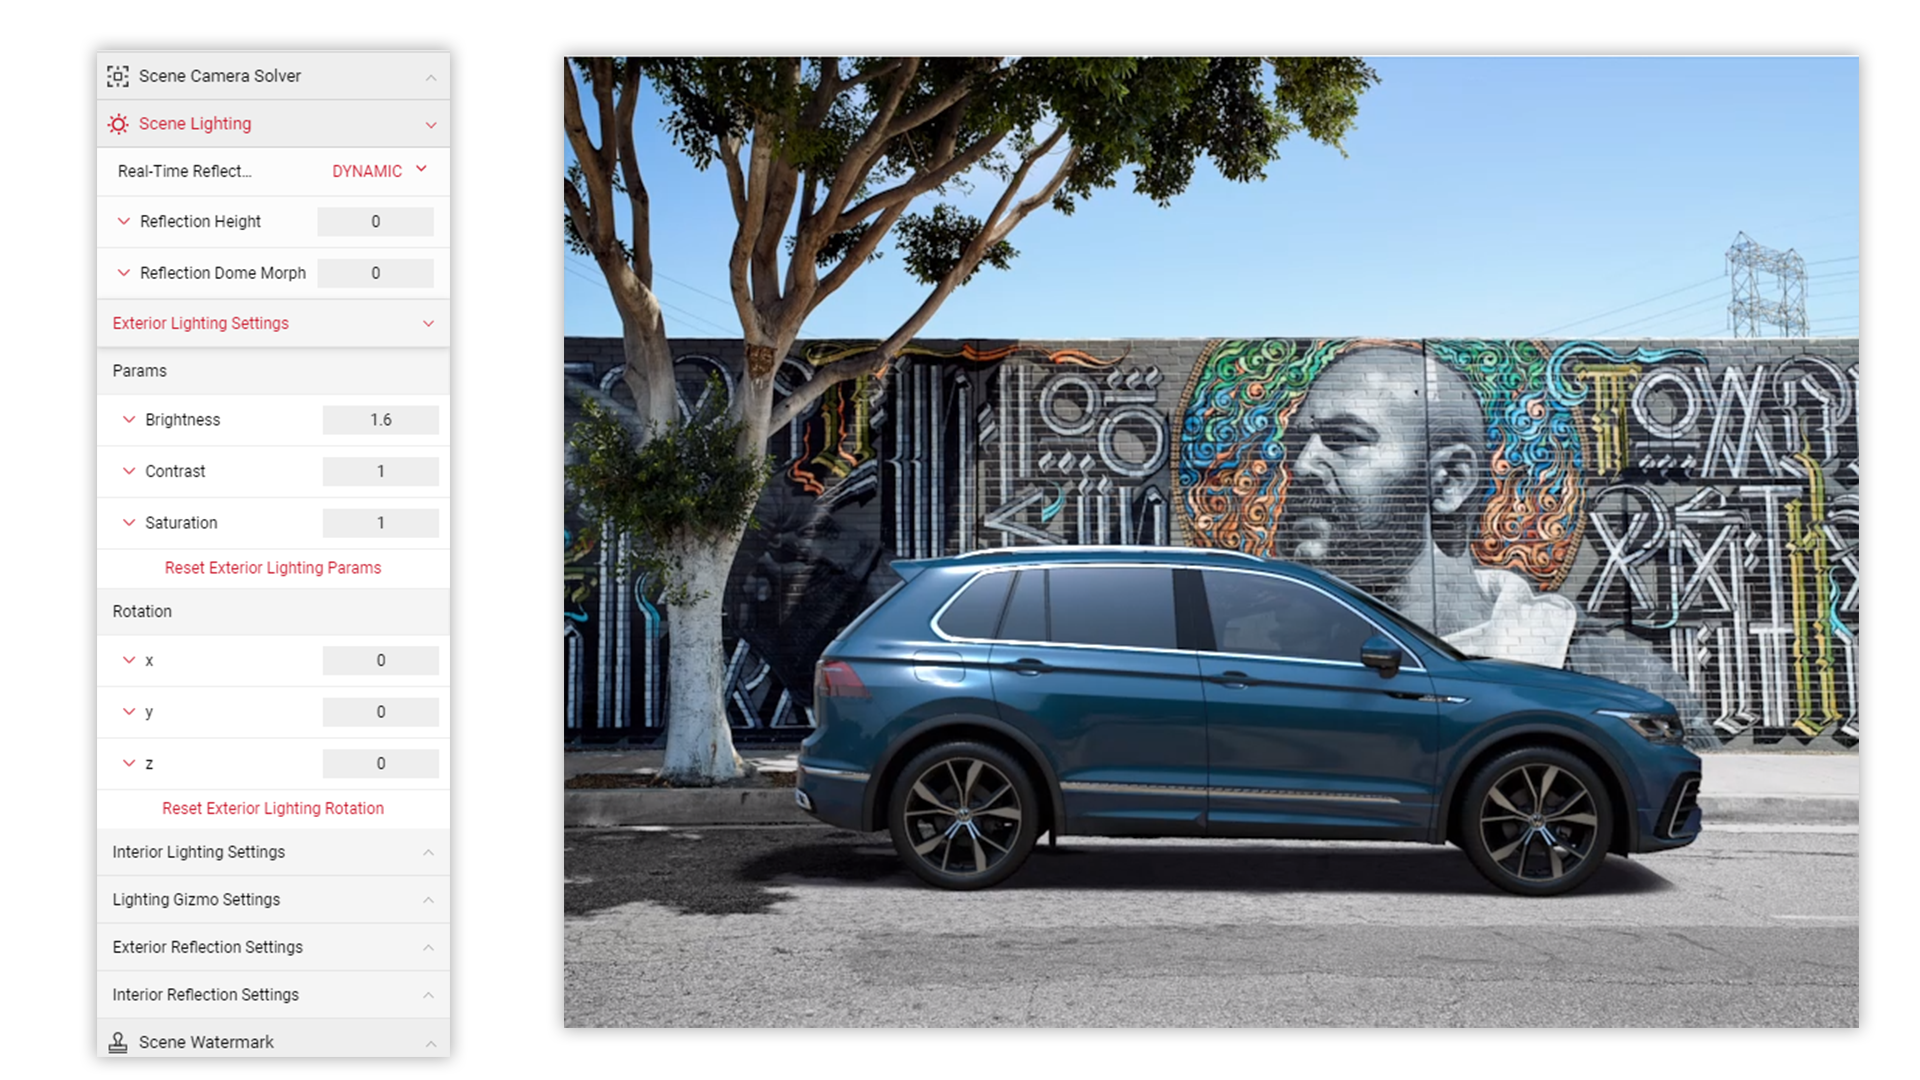
15 Next, we will adjust the lighting rotation to line up correctly with the shadows we've already created. Under the Rotation sub menu, we can adjust the lighting values on the Y axis to make the light appear on the front upper part of the car, where the sunlight would be the strongest.
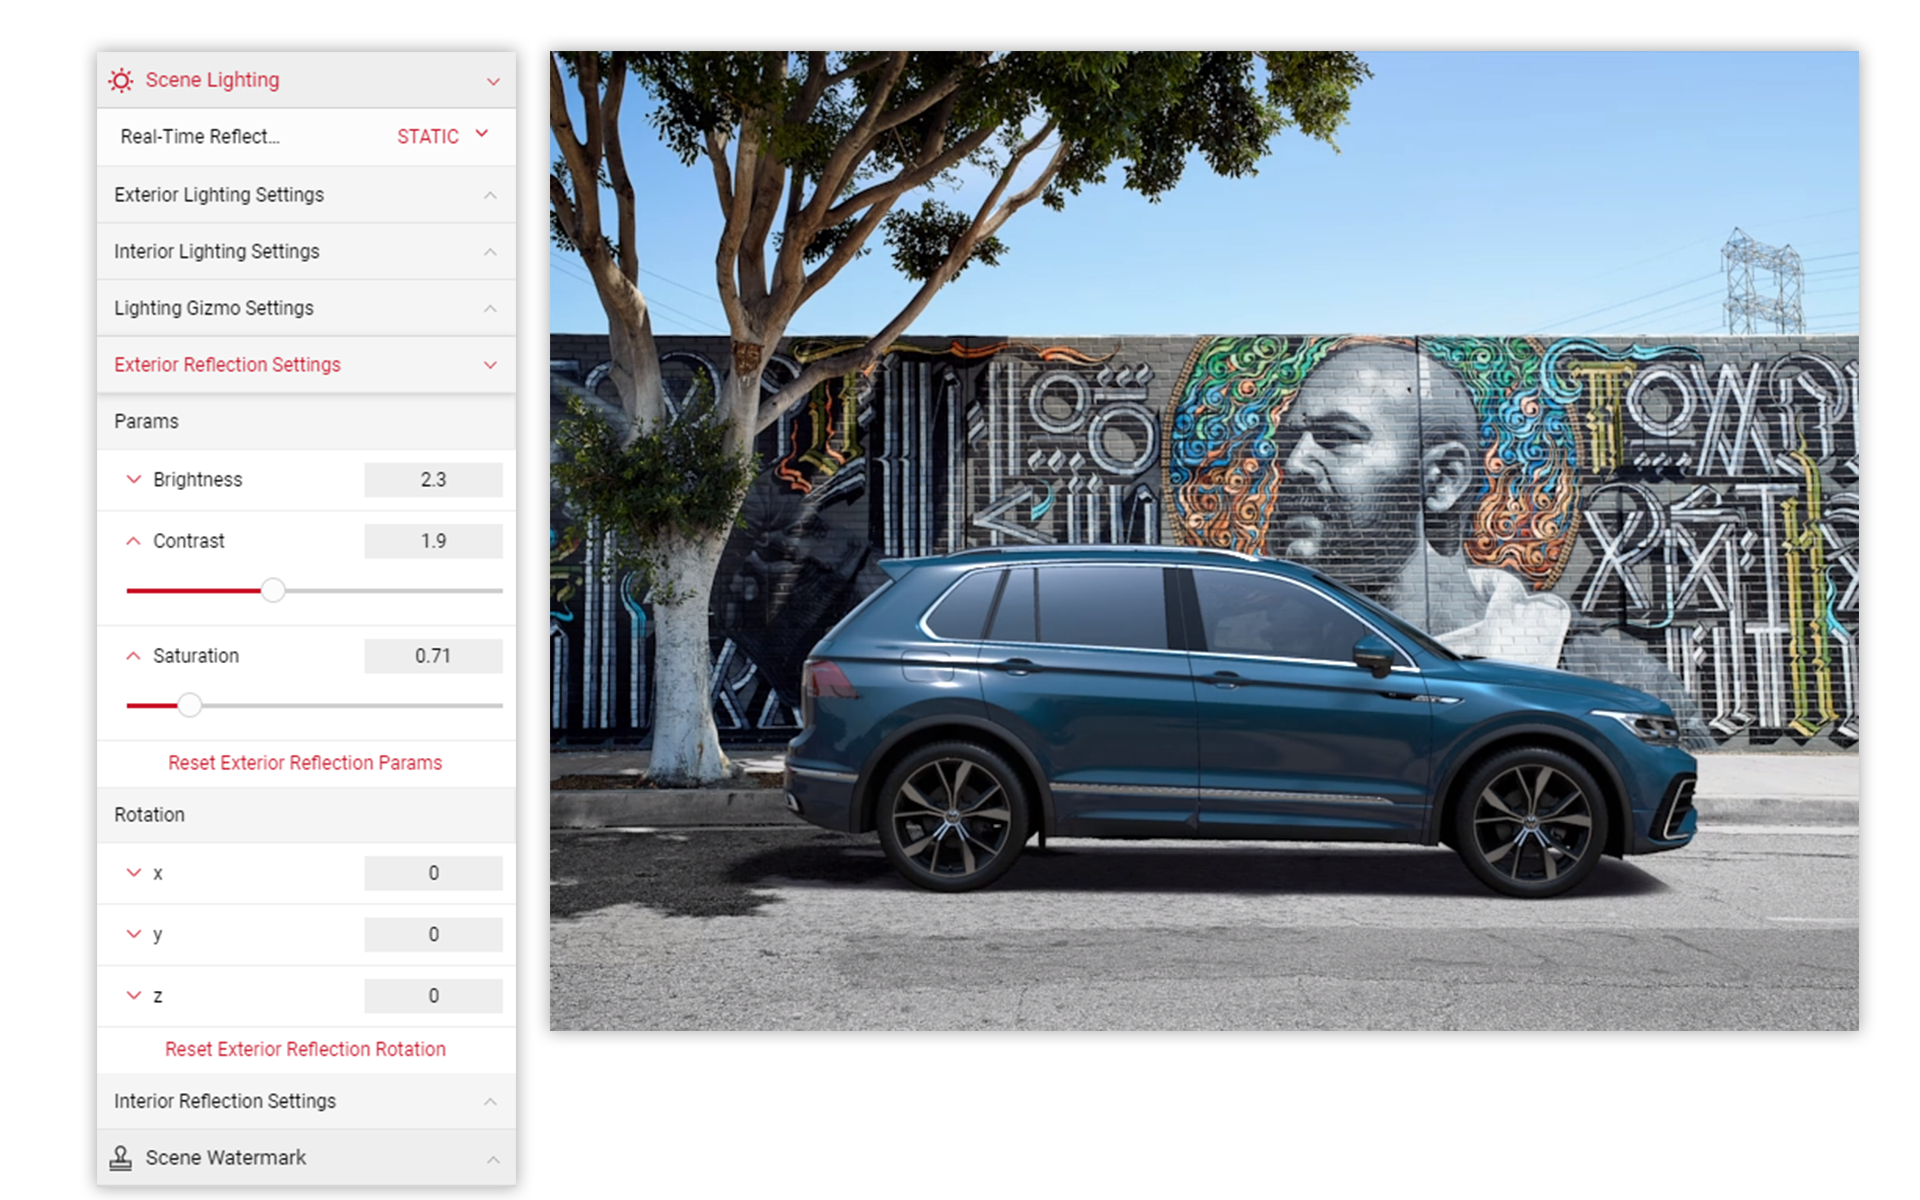
16 Next, set the Real-Time Reflections to Static, as this is a static image rather than a moving one, the static reflections will give a better result. We can also adust the Reflection brightness as the reflections would be a lot brighter in real life. The Contrast and Saturation sliders can also be adjusted to highlight the shape, and give the car more depth. In this example the contrast was increased, and the saturation decreased slightly to balance out the lighting.
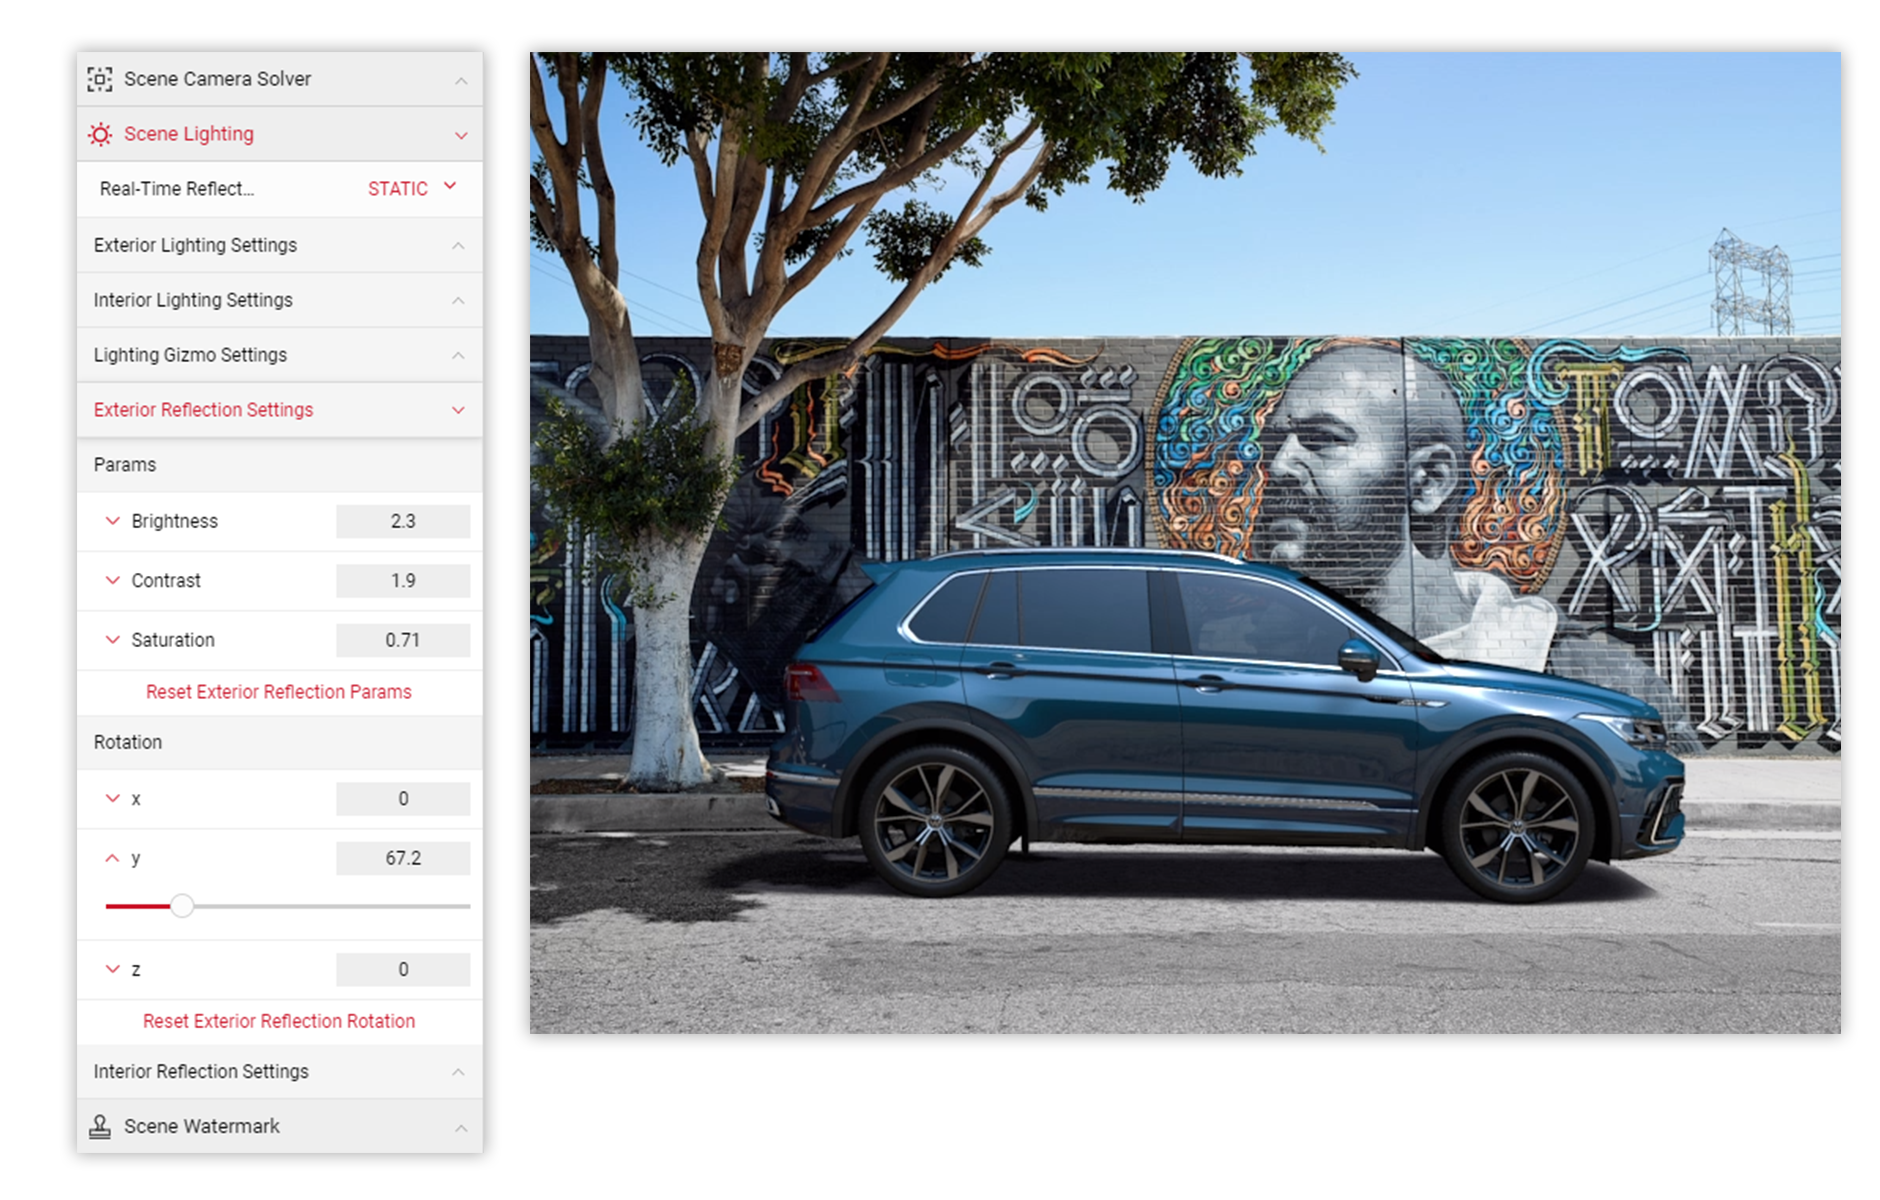
17 Next, we will adjust the Reflection Rotation on the Y axis to move any highlighted areas to the front of the car, matching our other lighting settings.
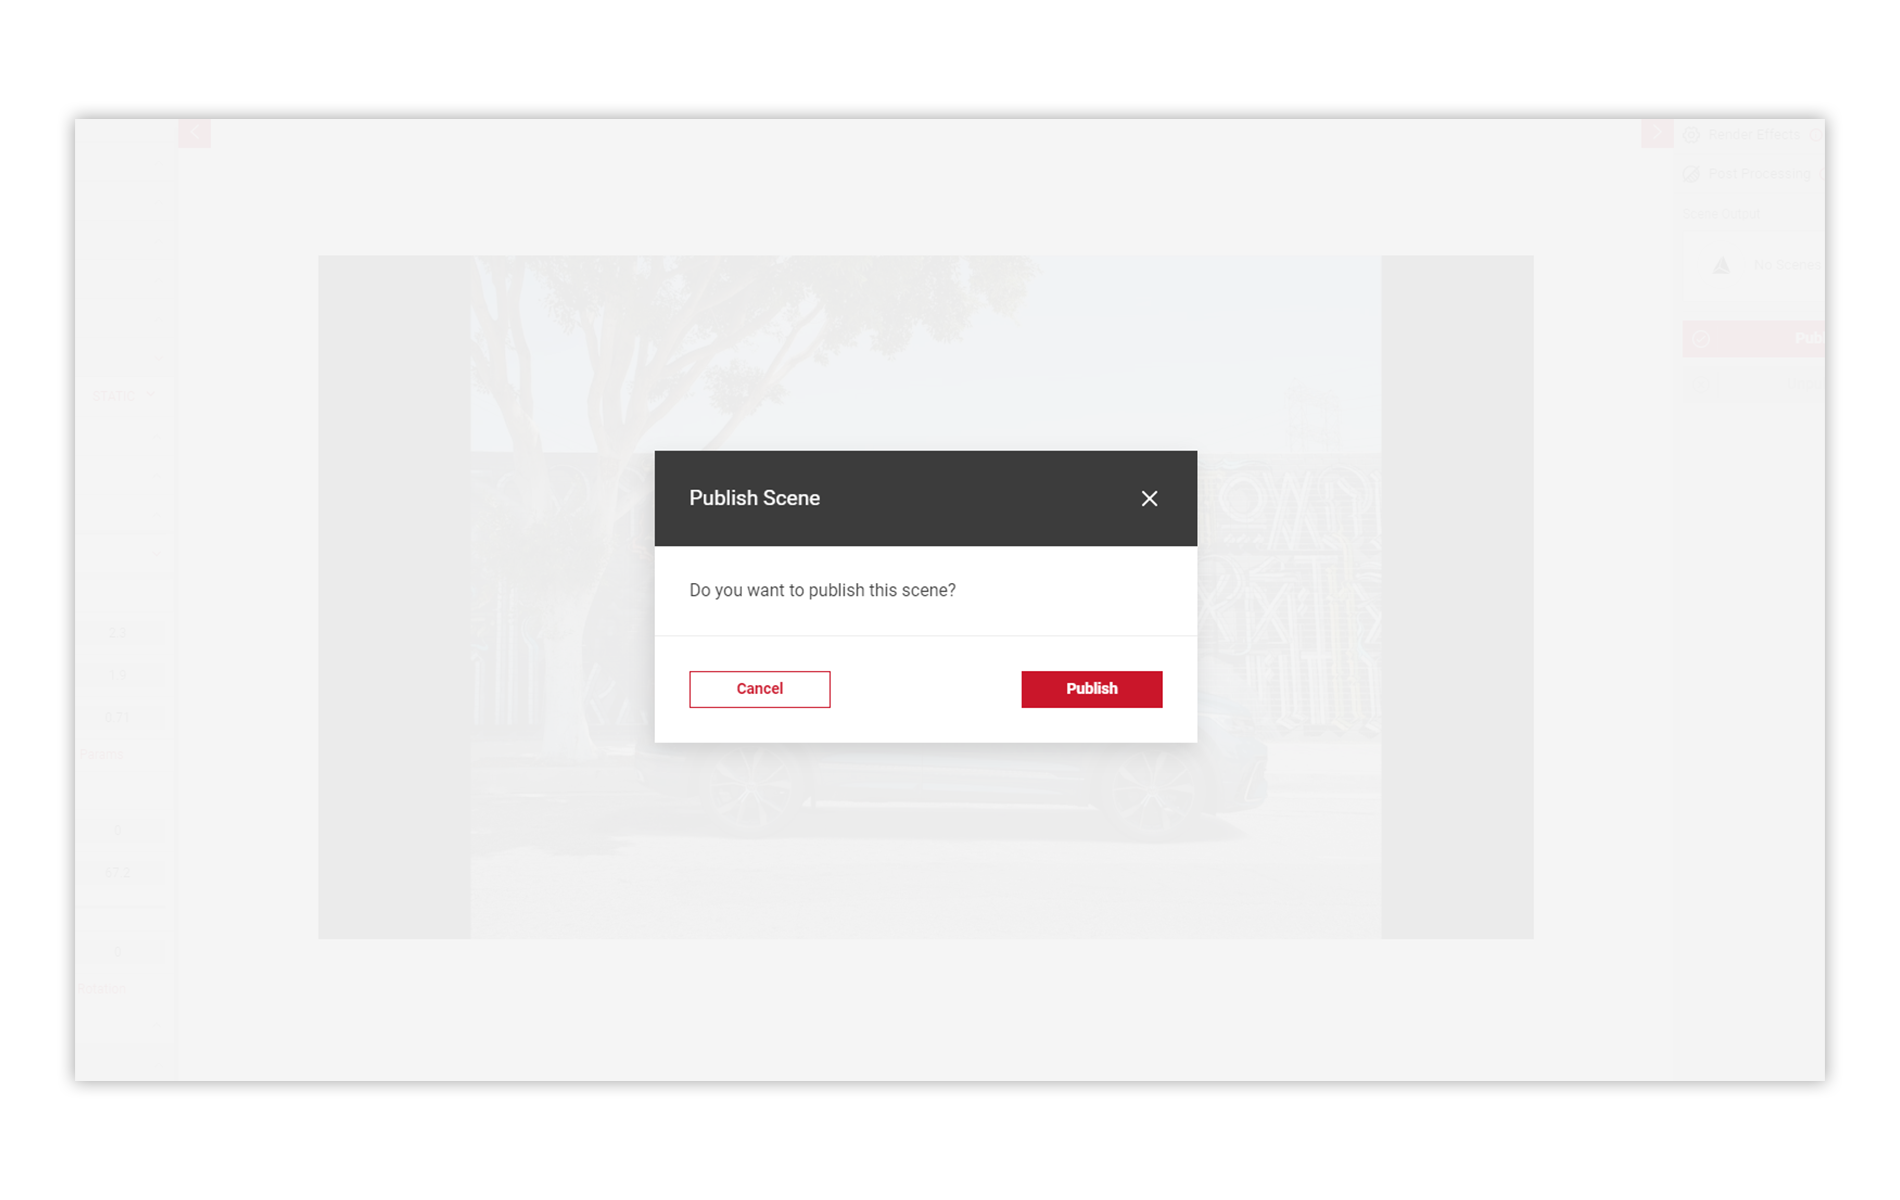
18 Finally, we can now Publish our scene for use in Shutter Pro to generate our images. In the Output Menu click the Publish button, the Publish Scene modal dialog will appear. Click the Publish button again to confirm.
19 Load the Shutter Pro app. In the Controls Menu, select the Backplates menu icon. In the pop up menu, select the published Scene environment name.
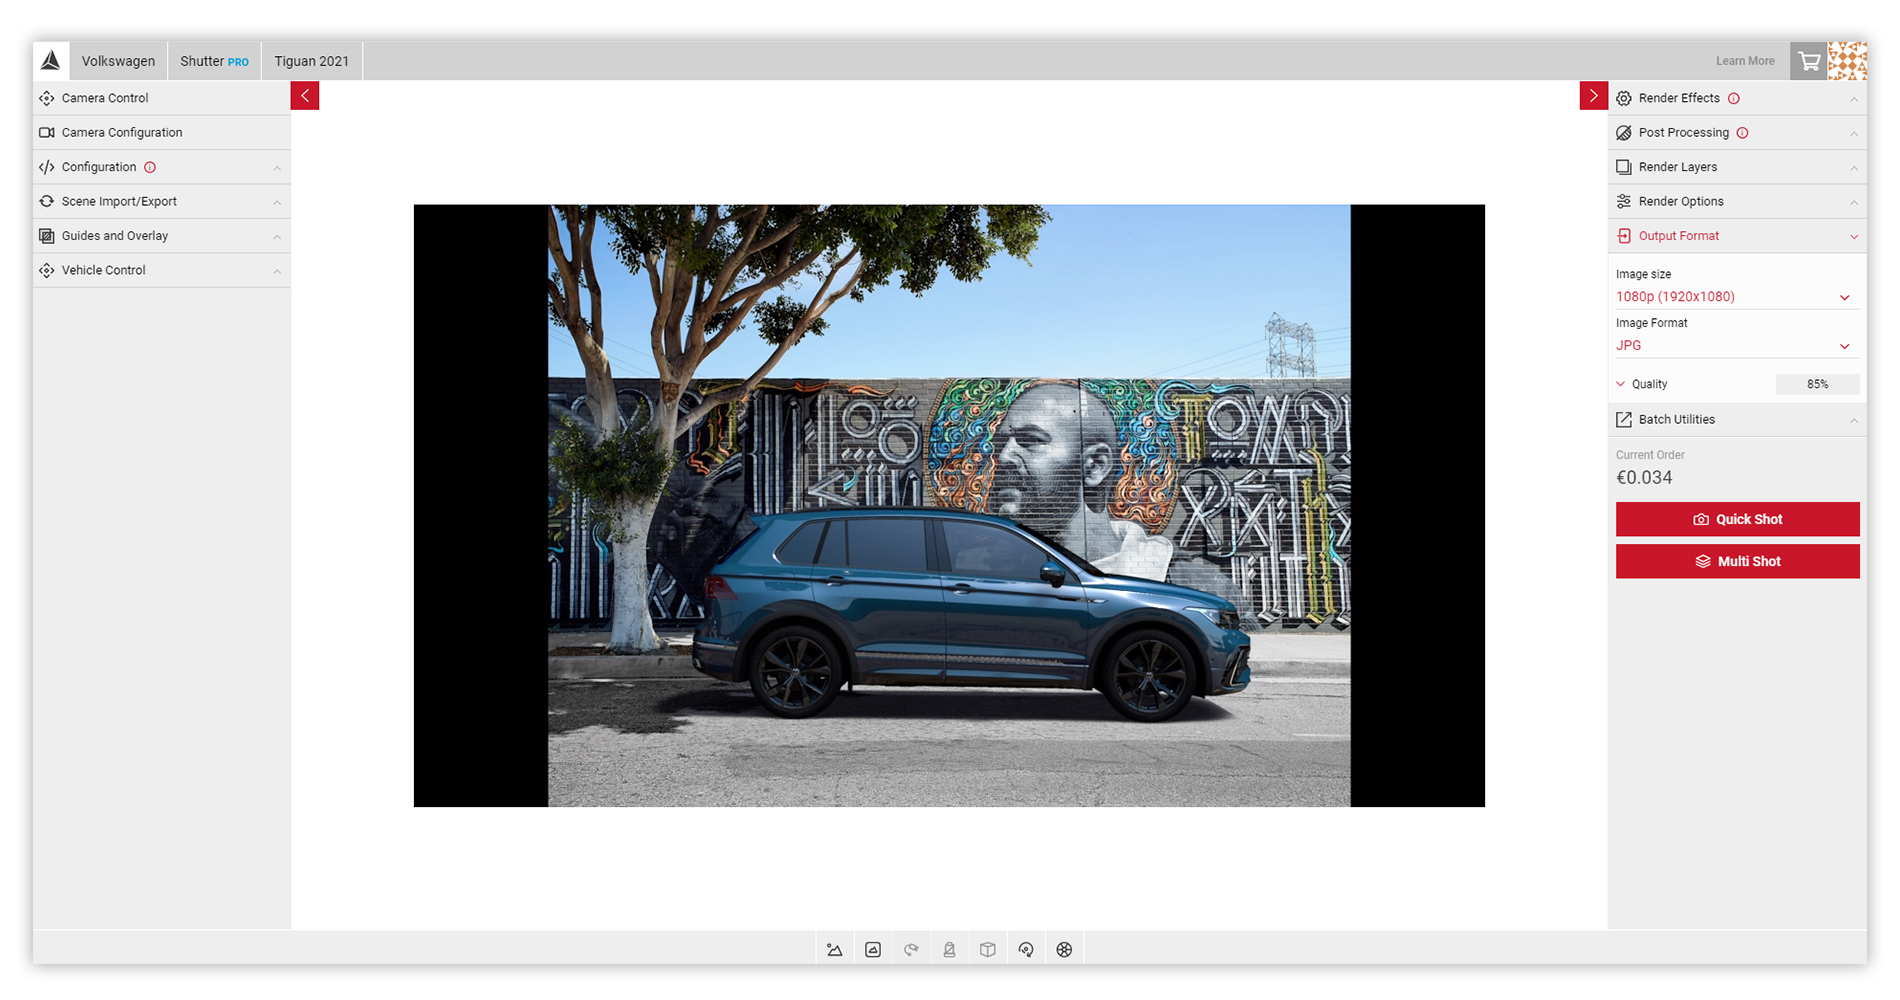
20 With the Scene environment loaded in the Viewport, you can re-position the car and begin to create your content using Shutter Pro's tools to create cameras and make custom sized campaign content.
To make adjustments to the existing Scene environment, return to the Scene App. Load the Backplate via the Saved Scene menu. In the Output Menu, click the Unpublish button. This allows you to then make any changes. When you are ready, click the Republish button to reuse in Shutter Pro.