Tutorial Time: 10 mins

- Using PrCodes
- Using Turntable
- Multiple Configurations
- Using Background Options
- Using Output Format
What You Will Learn
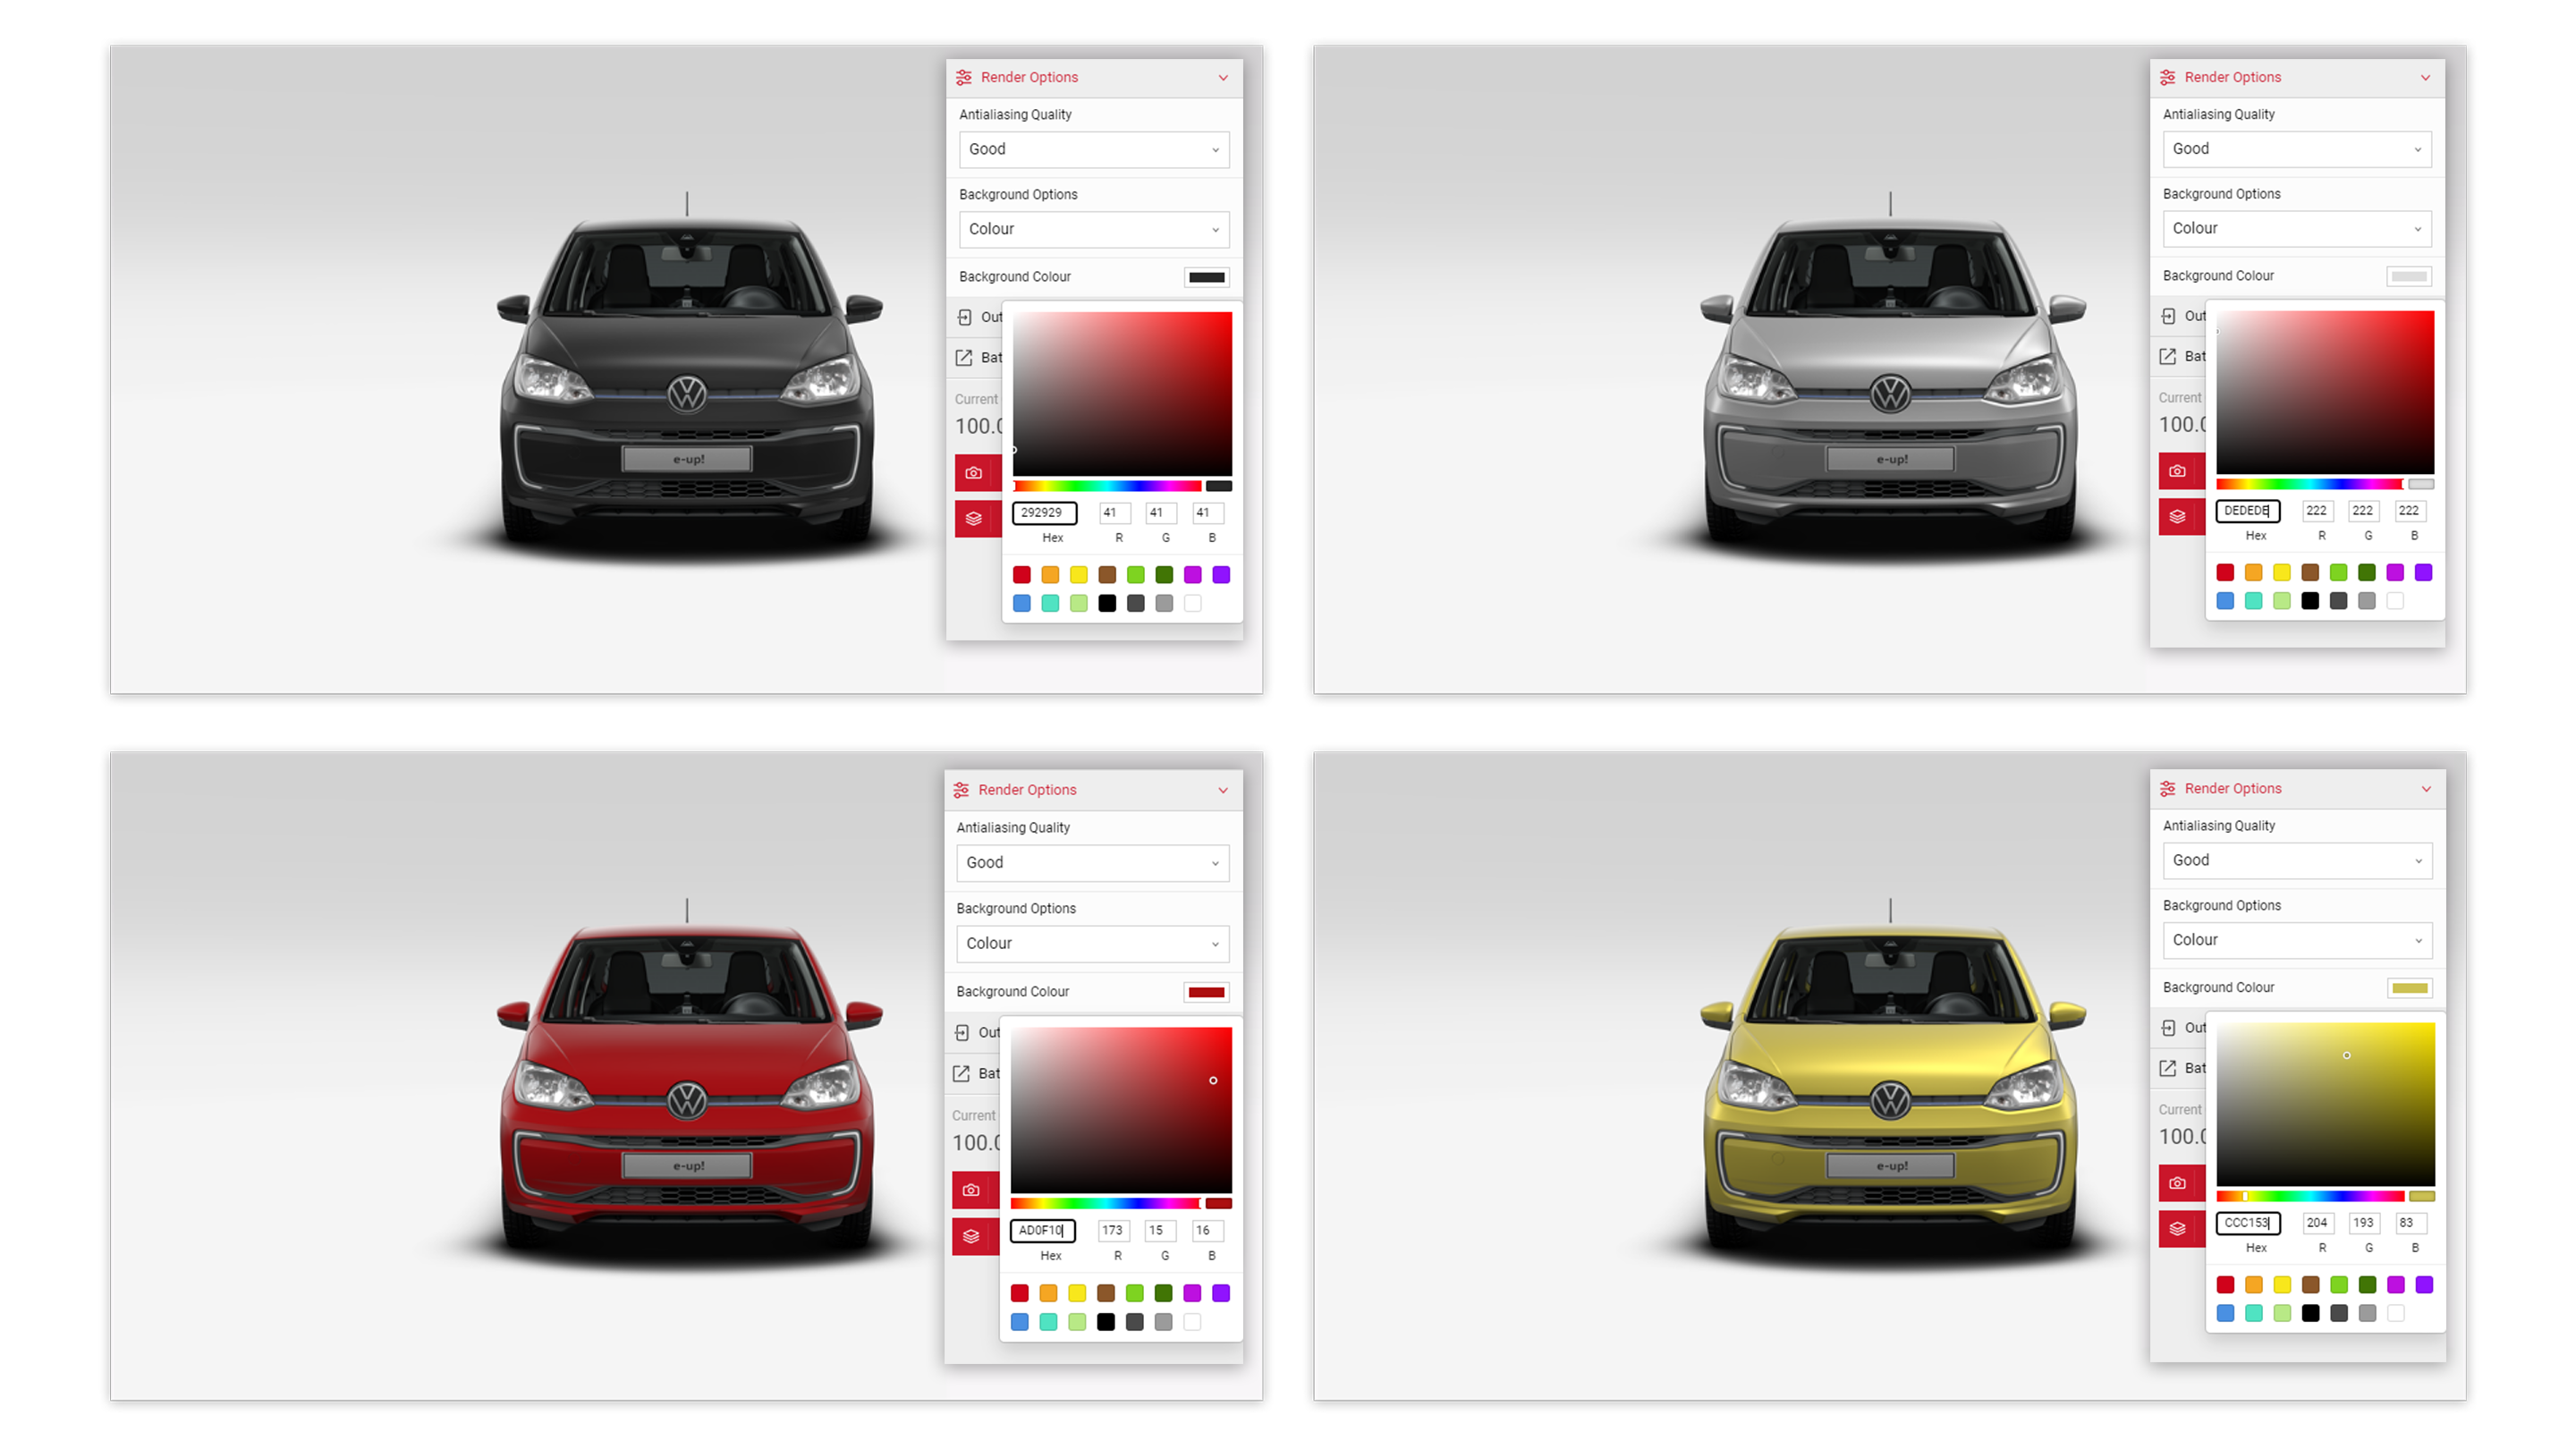
Using Shutter Pro we will learn how to build an engaging marketing campaign for the release of the Volkswagen ‘e up!’ car. We will use a selection of car configurations along with the ‘colour’ background options setting, so we can match closely the paint colour of the car to that of the pictures background.
Method
1
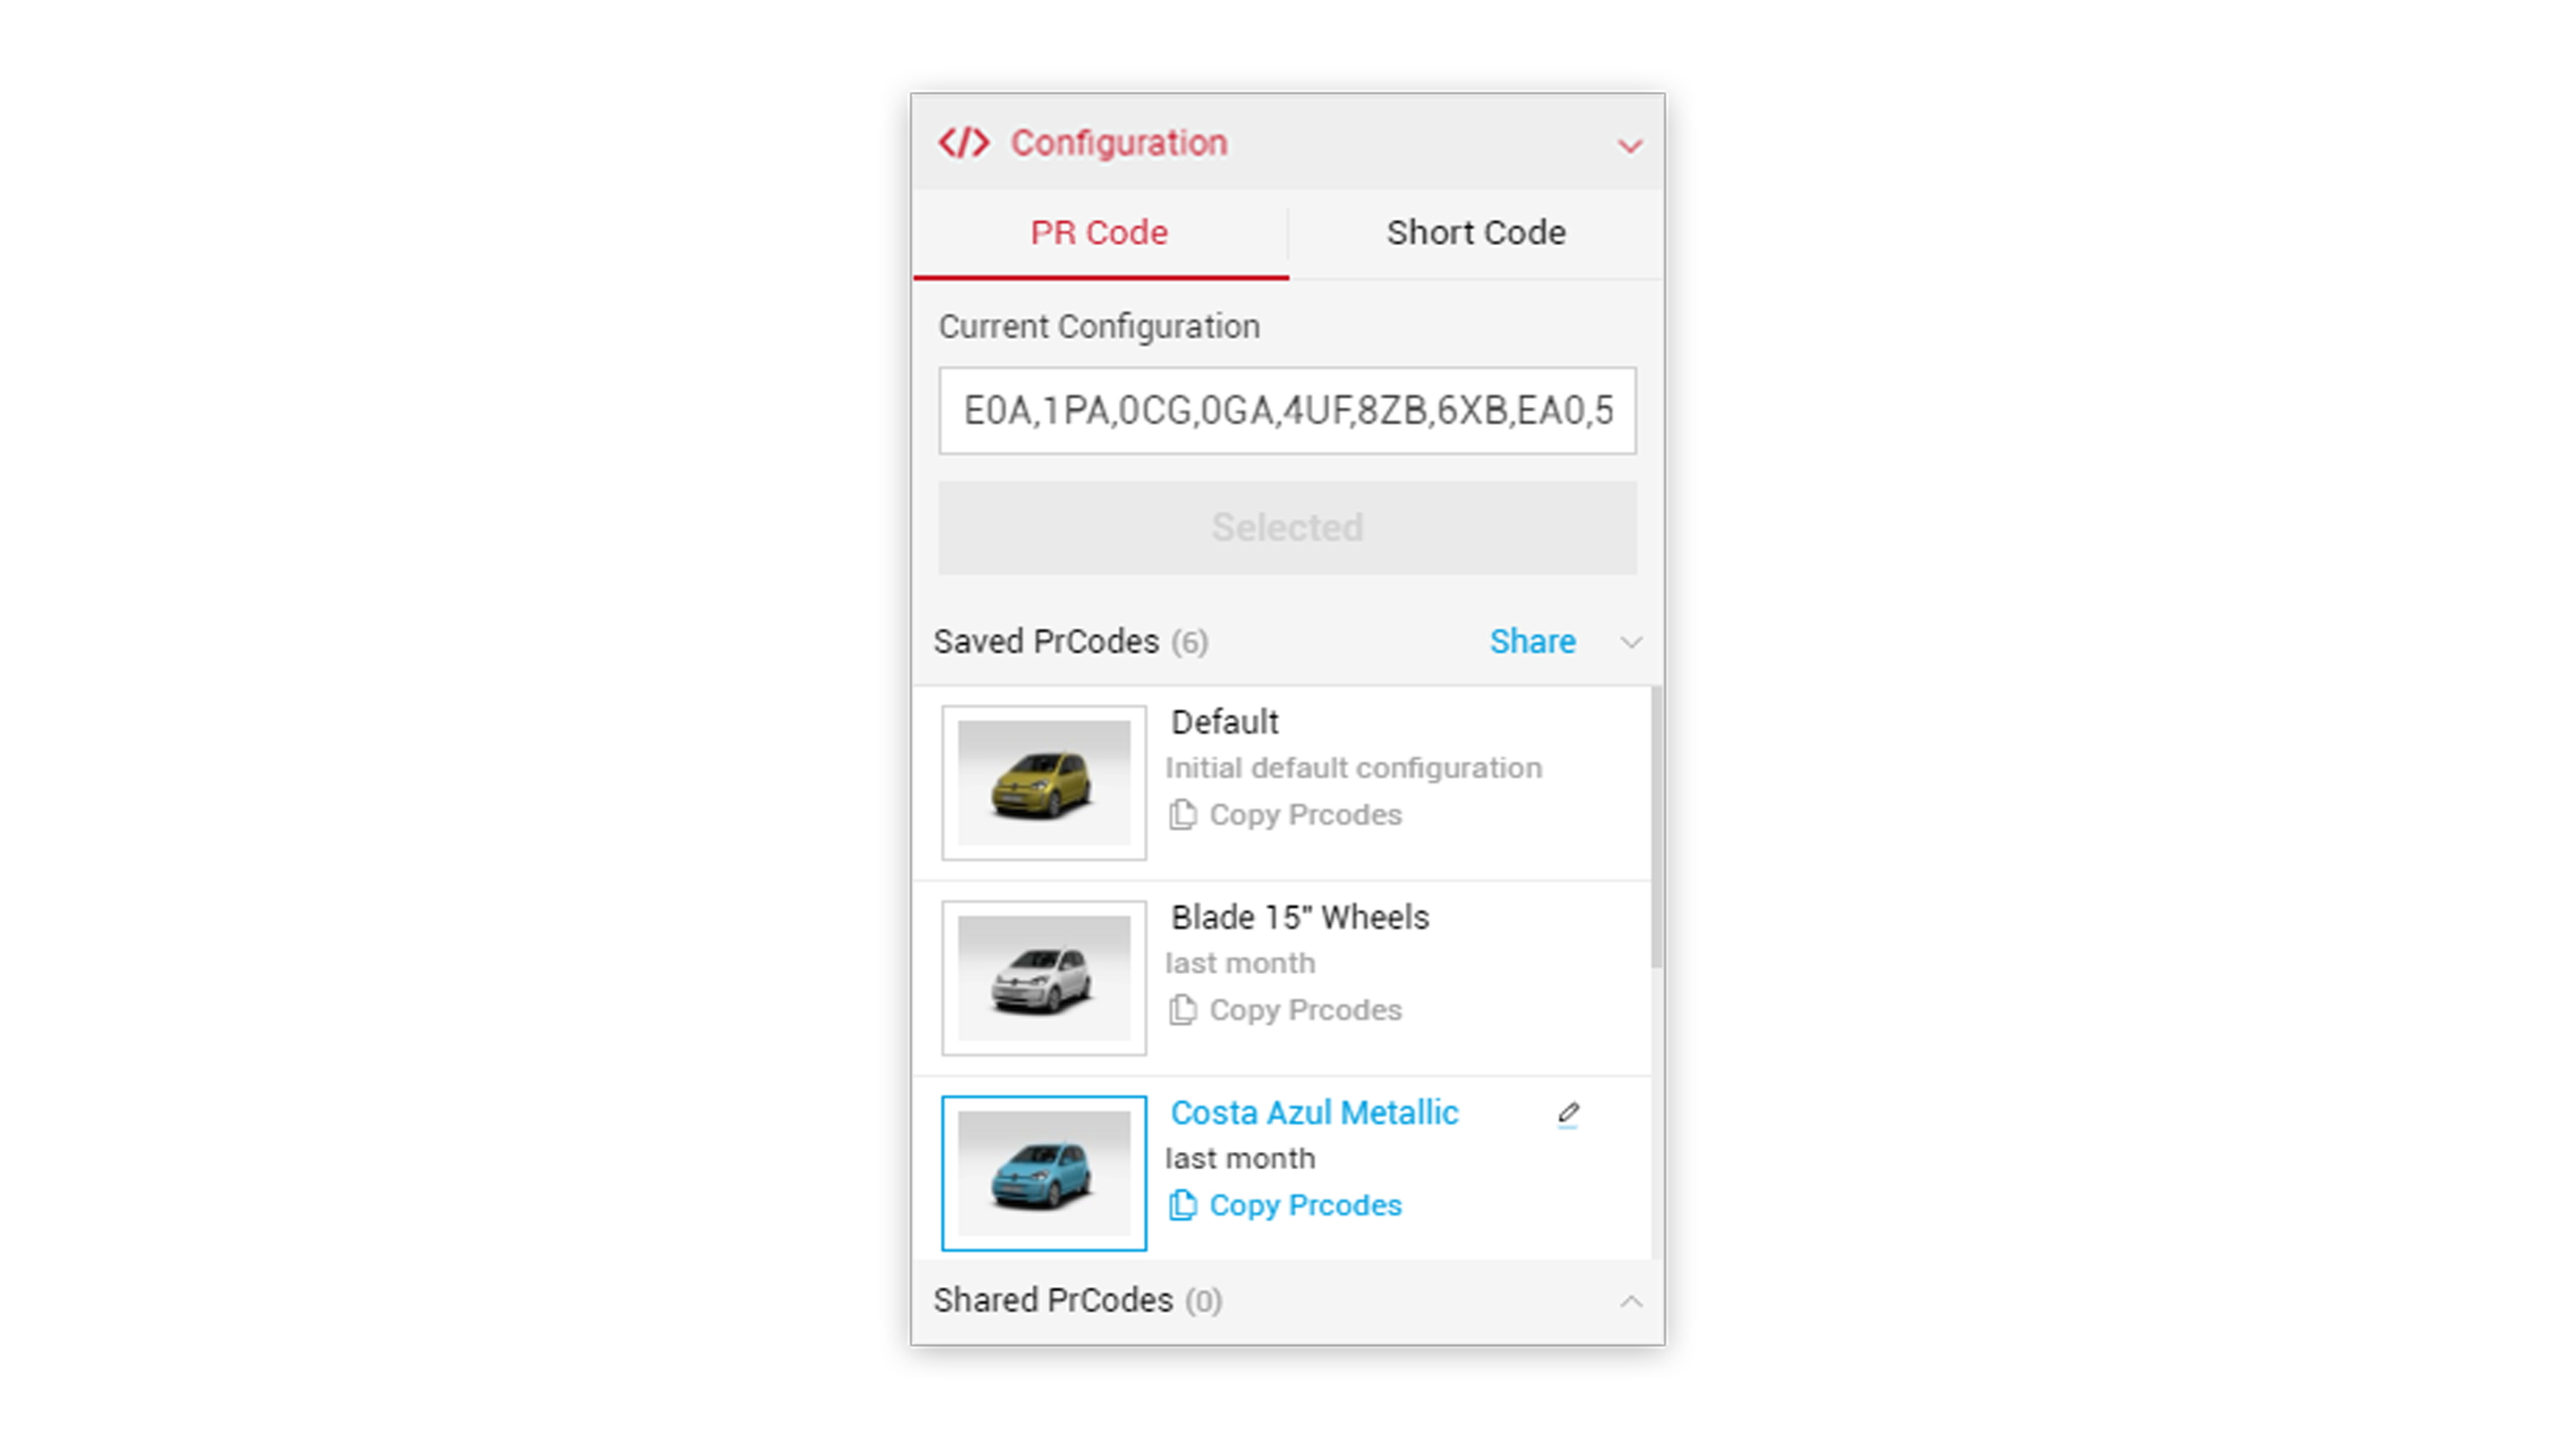
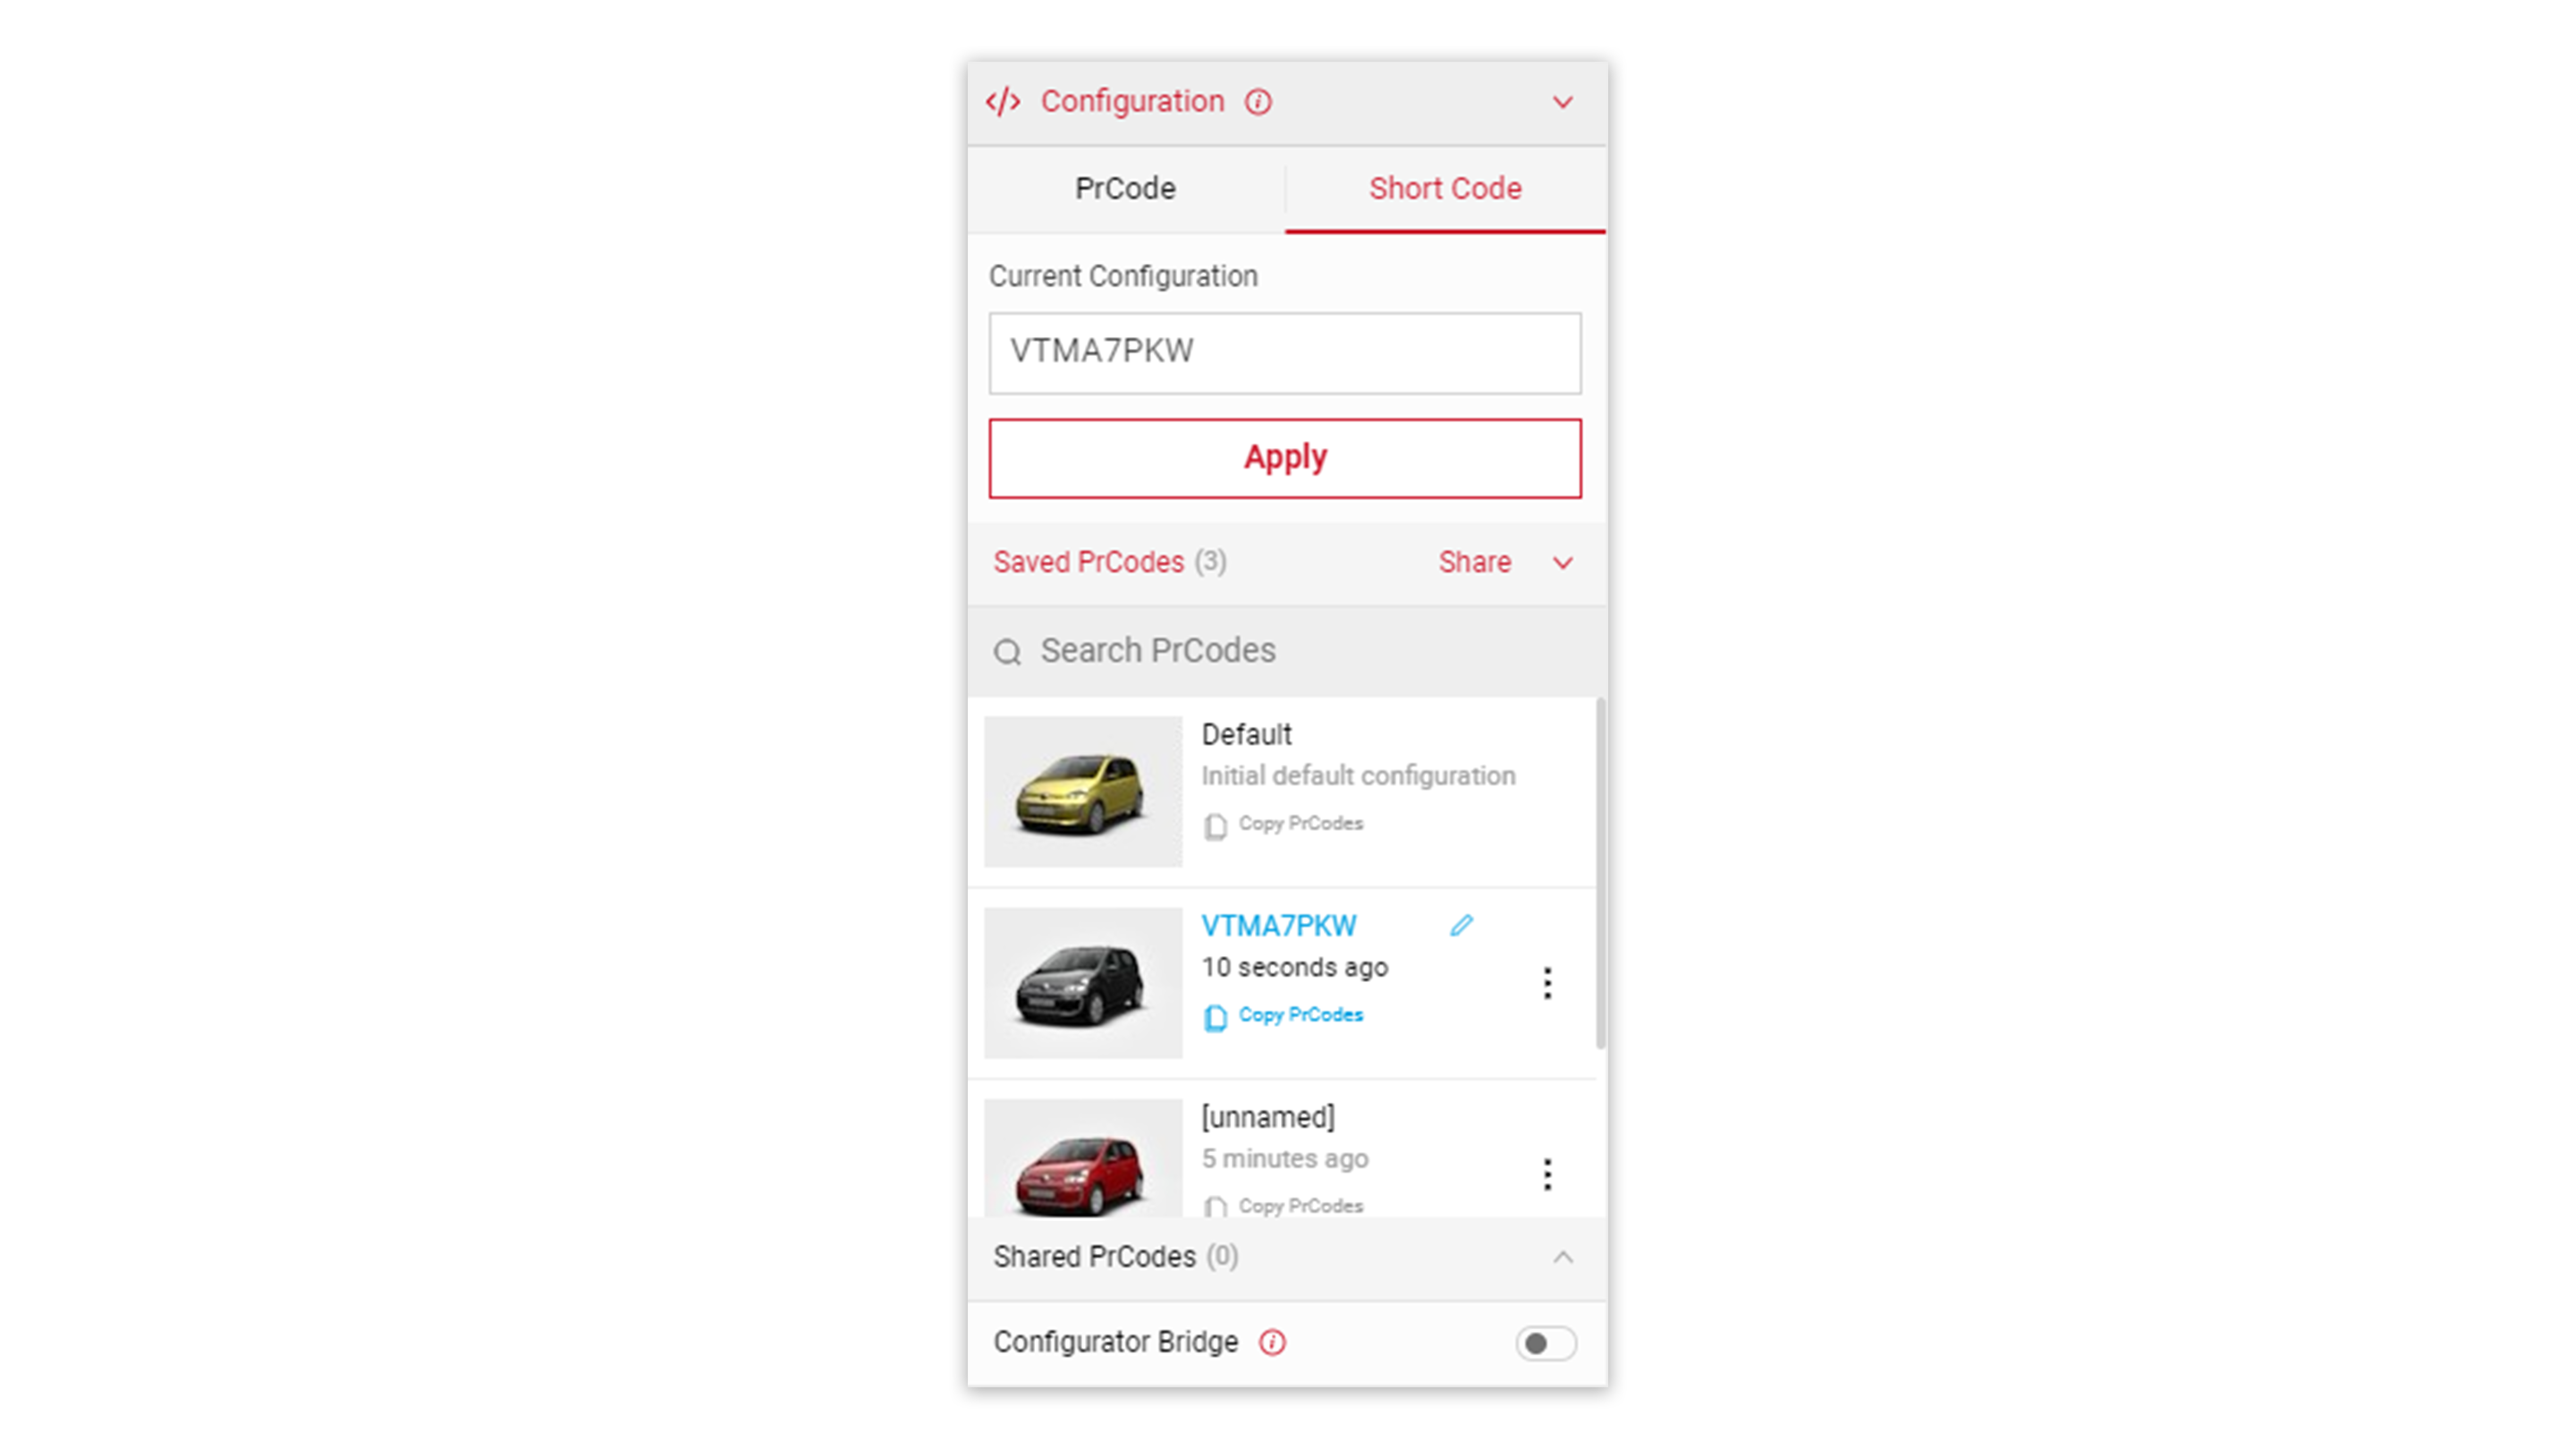
Copy and paste your PRCodes into the PrCode Configuration tab. Click on Apply and the car will change to your own configuration.
Make sure to click the Save Configuration button so you have it stored in the Saved PrCodes menu.
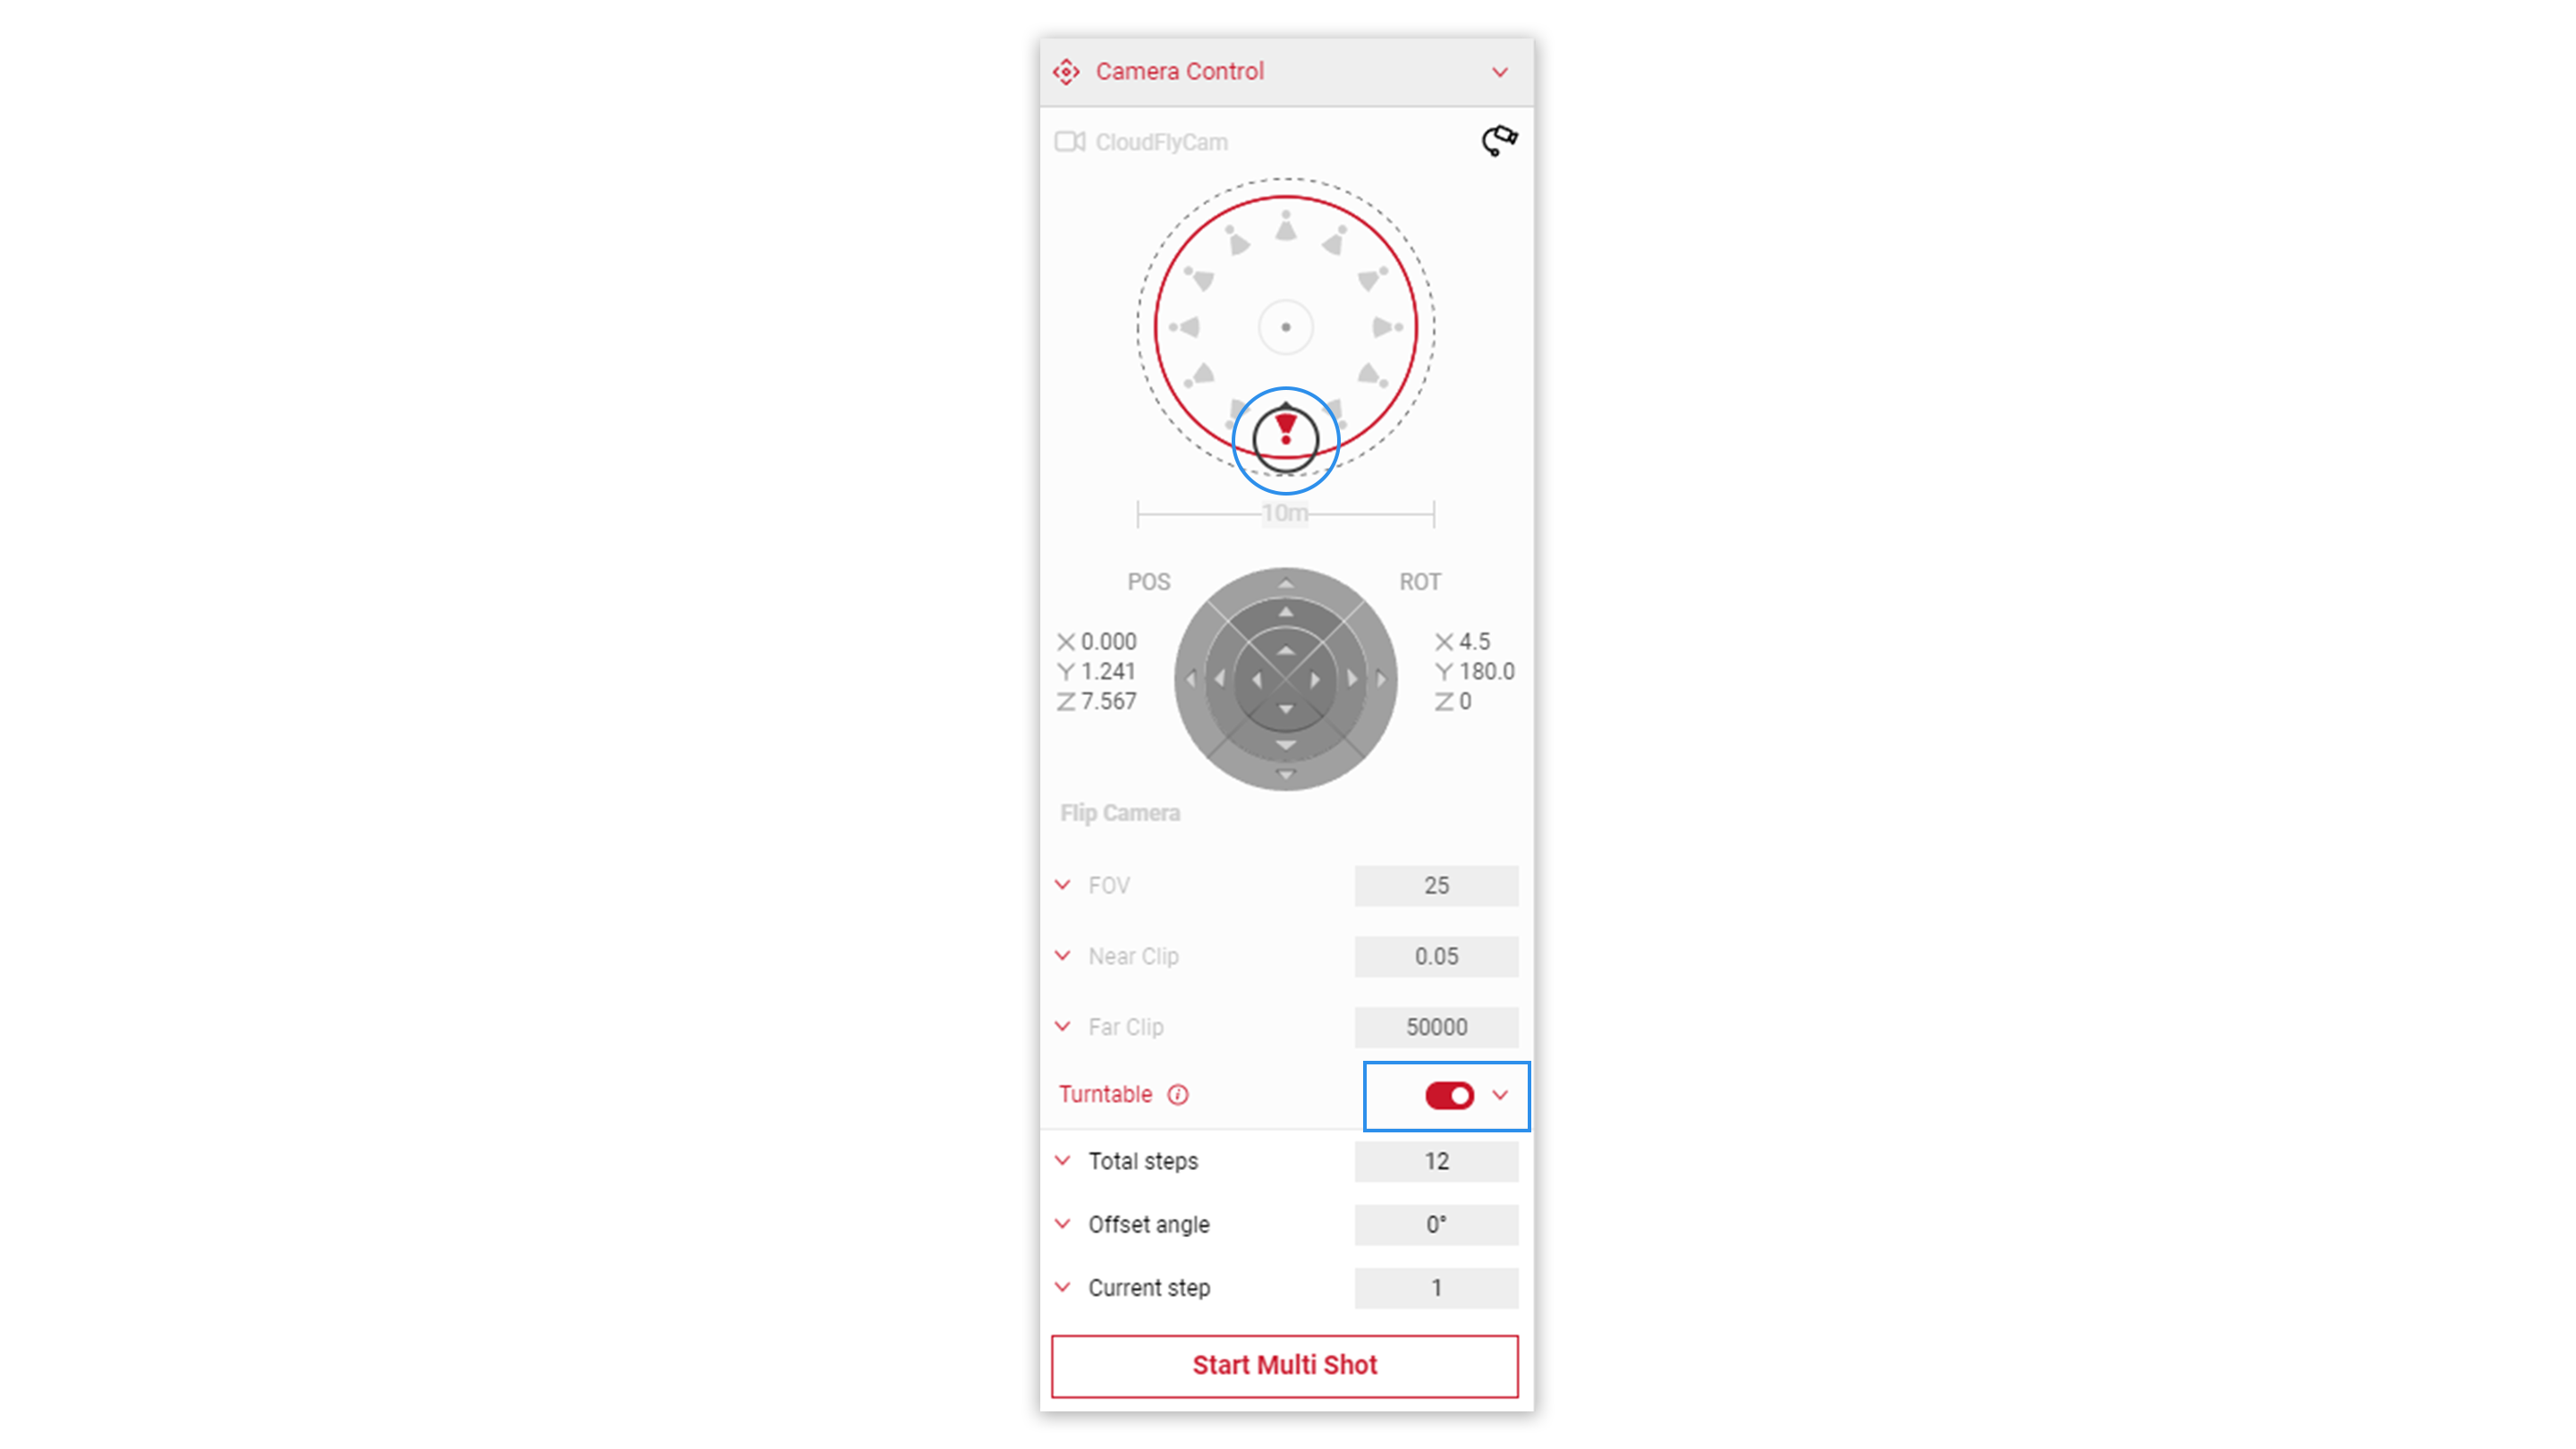
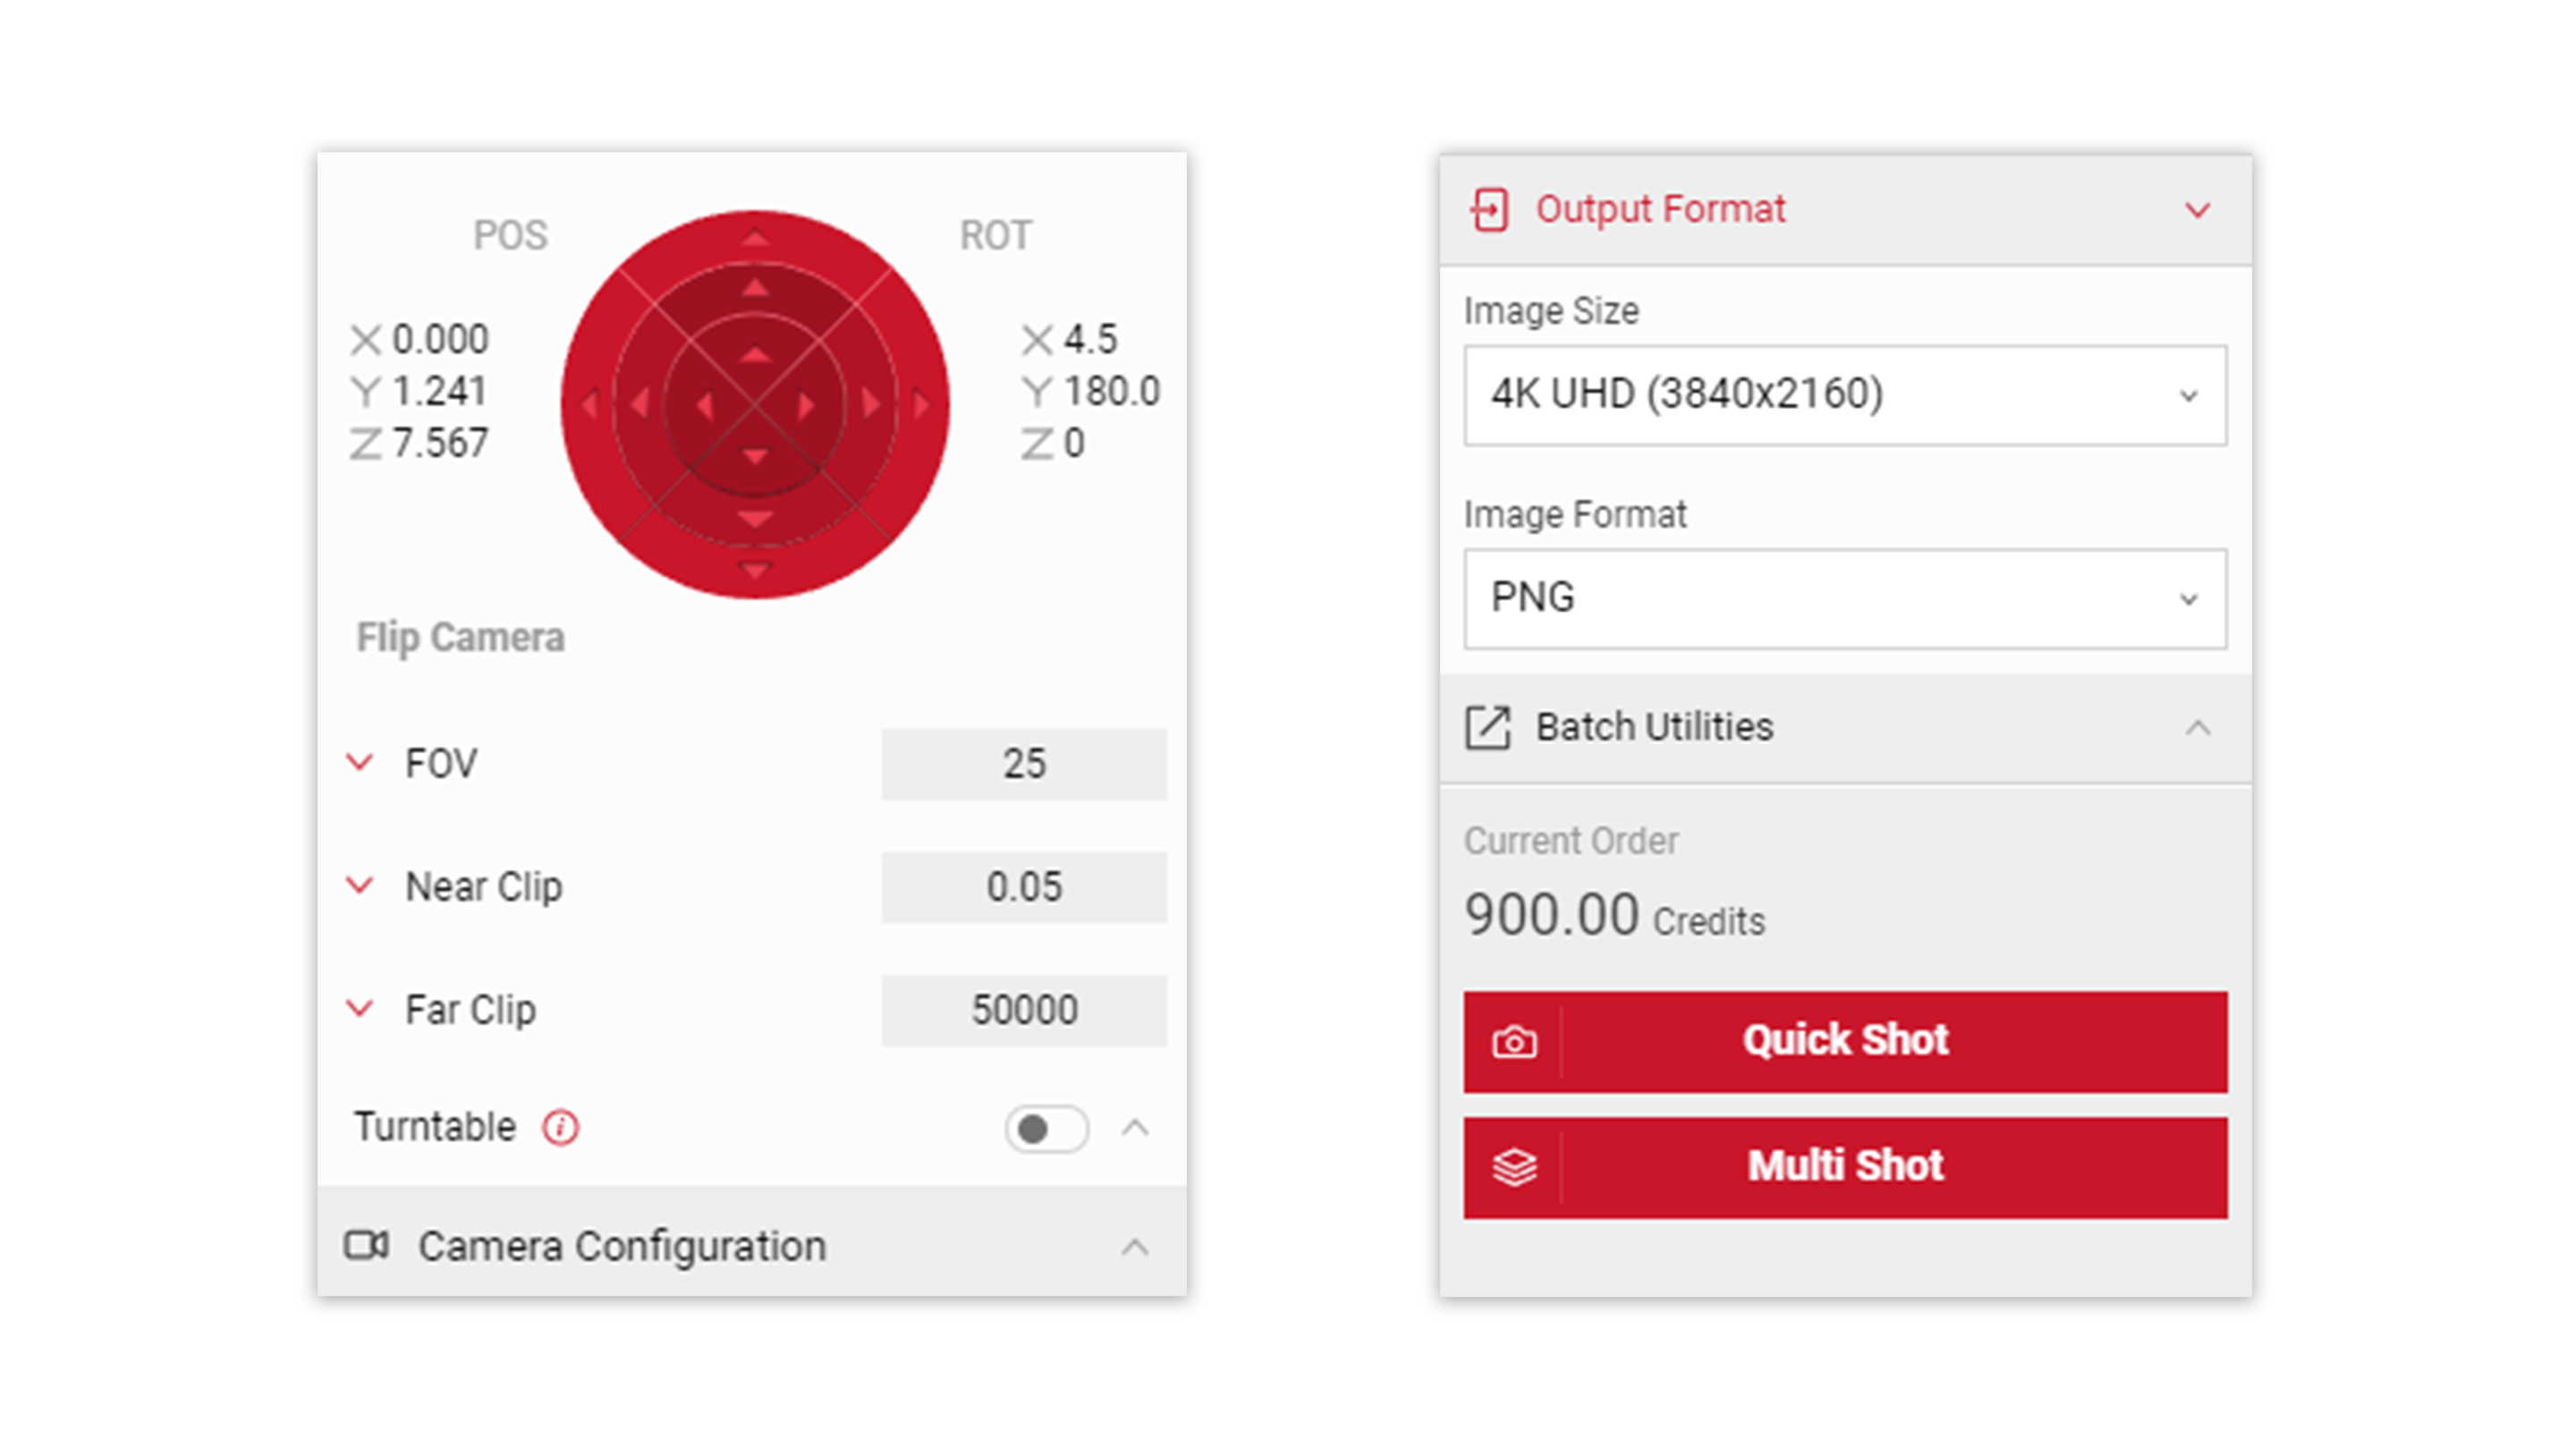
2 To set the position of the car, enter the FlyCam mode via the icon in the Controls menu or within the Input menu select the Camera Control. Scroll down to the Turntable feature and turn on the slider so it is green (active). We will use the default position to set the car angle.
3
In the Output menu, select Render Options and in the Background Options dropdown select Transparent. In the Background Colour swatch select the colour that best matches or compliments the car colour.
*The transparent feature is not visible in the Viewport, only visible when the picture is processed as an order.
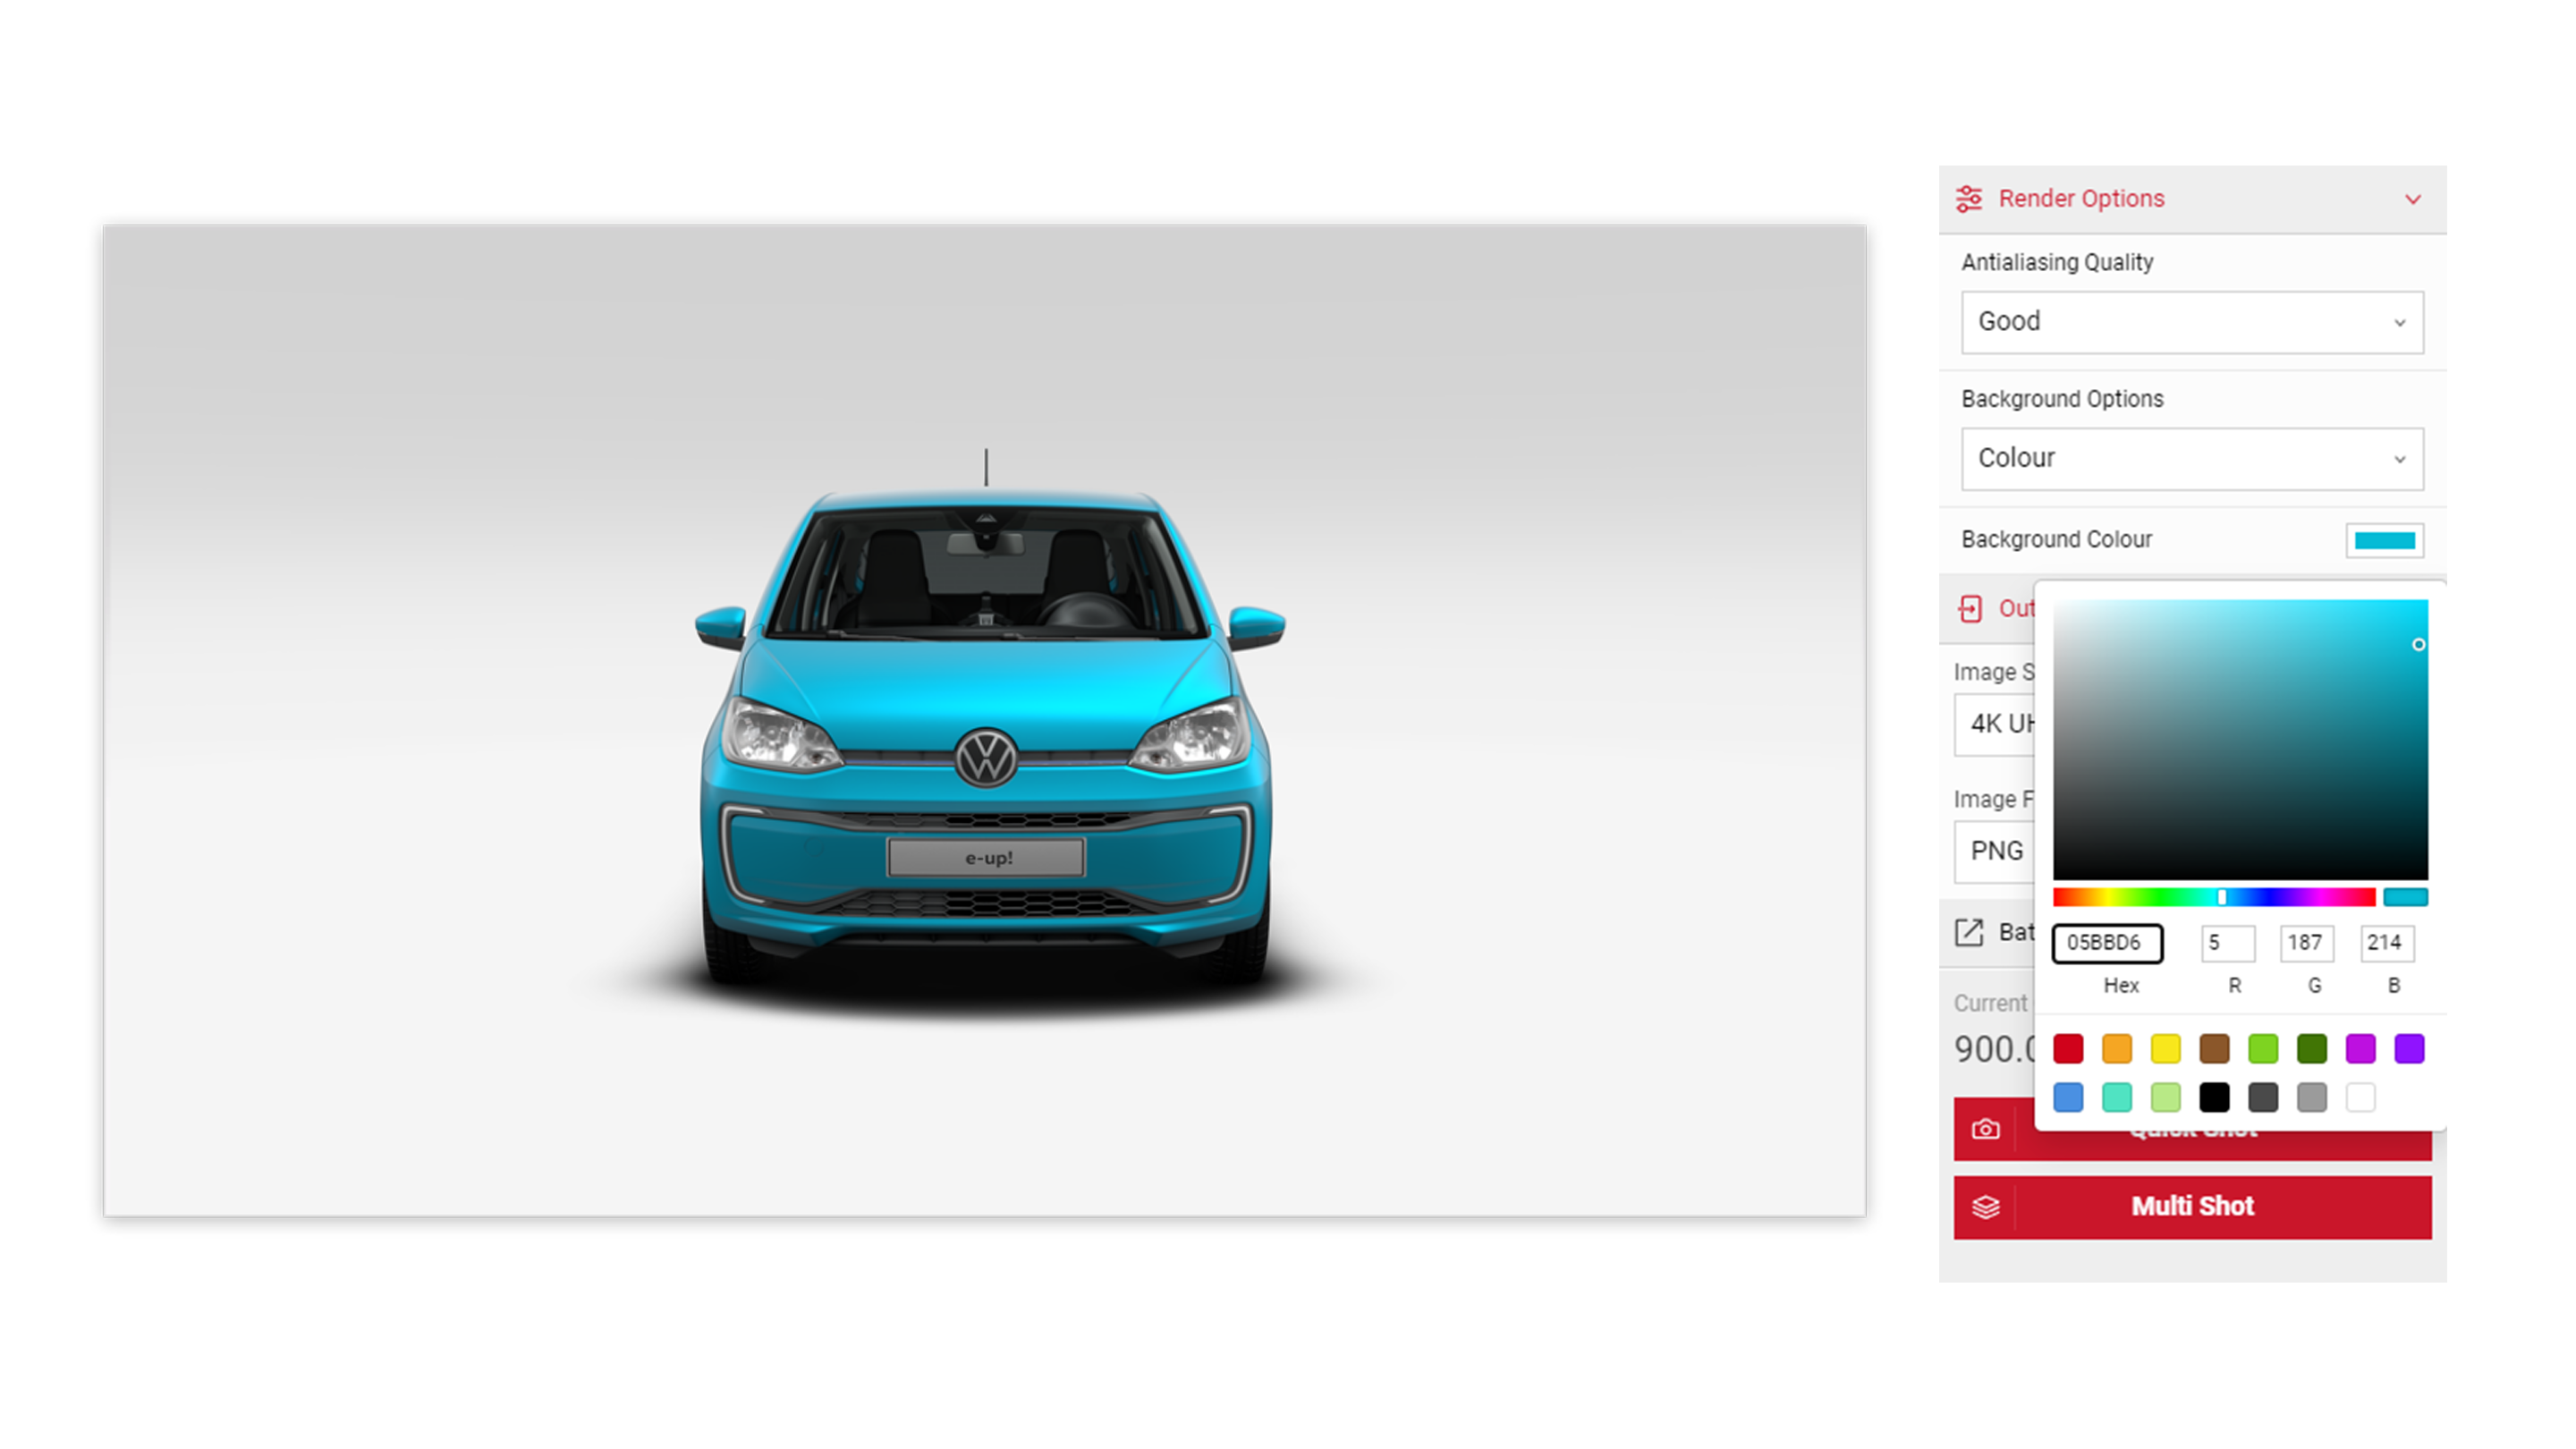
4 Return to the Camera Control menu and in the Turntable feature, turn off the slider so it is grey (inactive). Now we will take a quick shot picture via the Output Format within the Output Menu. Select the 4K and PNG formats.
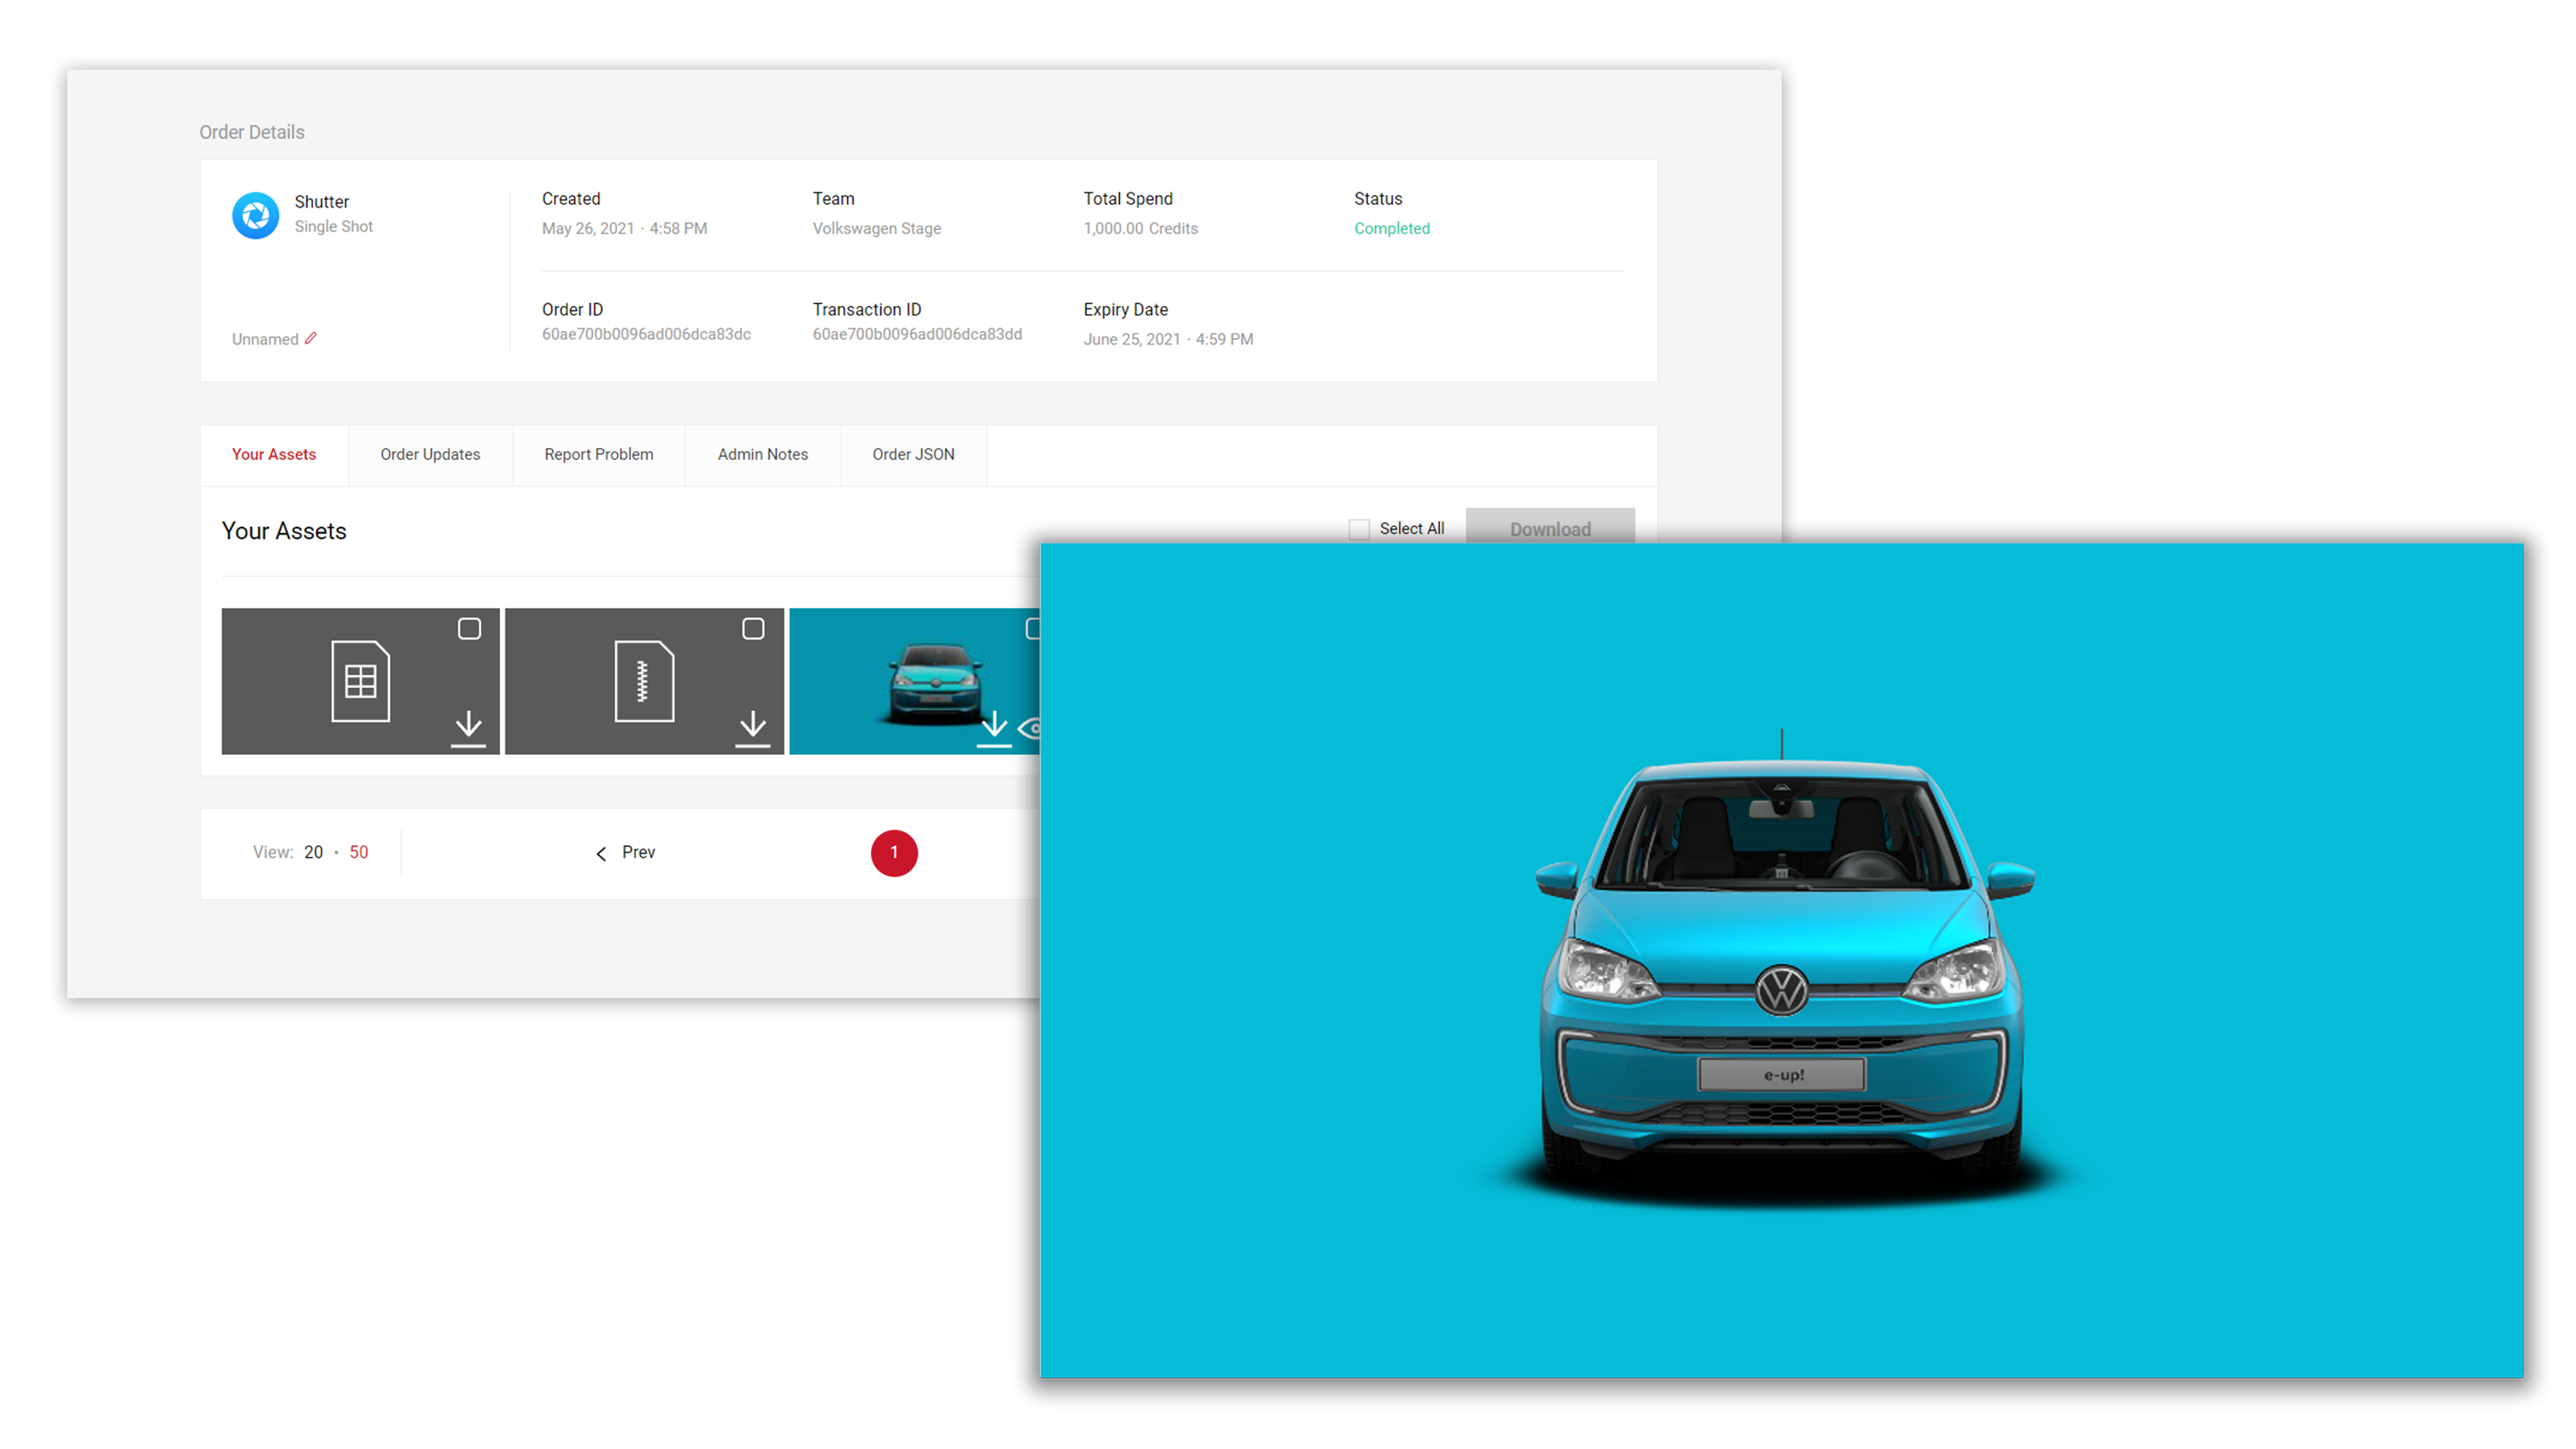
5 When the content has processed we can view the picture by clicking the eye icon or download the picture by clicking the arrow icon. CSV and ZIP files are also available.
6 Now we will change the car Configuration using the Short Code feature and begin adding the different cars to create our campaign content. Always remember to Save Configuration.
7 Now we have the other car configurations set up. Follow the steps 1-4, to create the pictures and output them to complete the content creation.