Tutorial Time: 5 mins

- Using PrCodes
- Changing Environment
- Using an Interior Camera
- Using Render Effects
- Taking a Quick Shot
What you will learn
Using the Shutter Pro app we will learn how to create a stylised interior shot of the car’s Steering Wheel. We will learn how to use the interior camera options and manipulate the camera control to set up our picture. Using post process Render Effects such as depth of field we will learn how to isolate and bring more focus to the Steering Wheel to enhance the picture.
Method
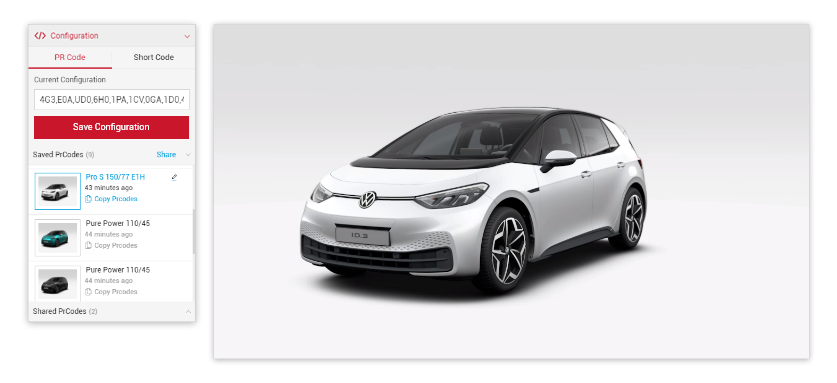
1 Copy and Paste your PrCodes into the Configuration tab. Click on Apply and the car will change to your own configuration. Make sure to the click the Save Configuration button so you have it stored in the Saved PrCodes menu.
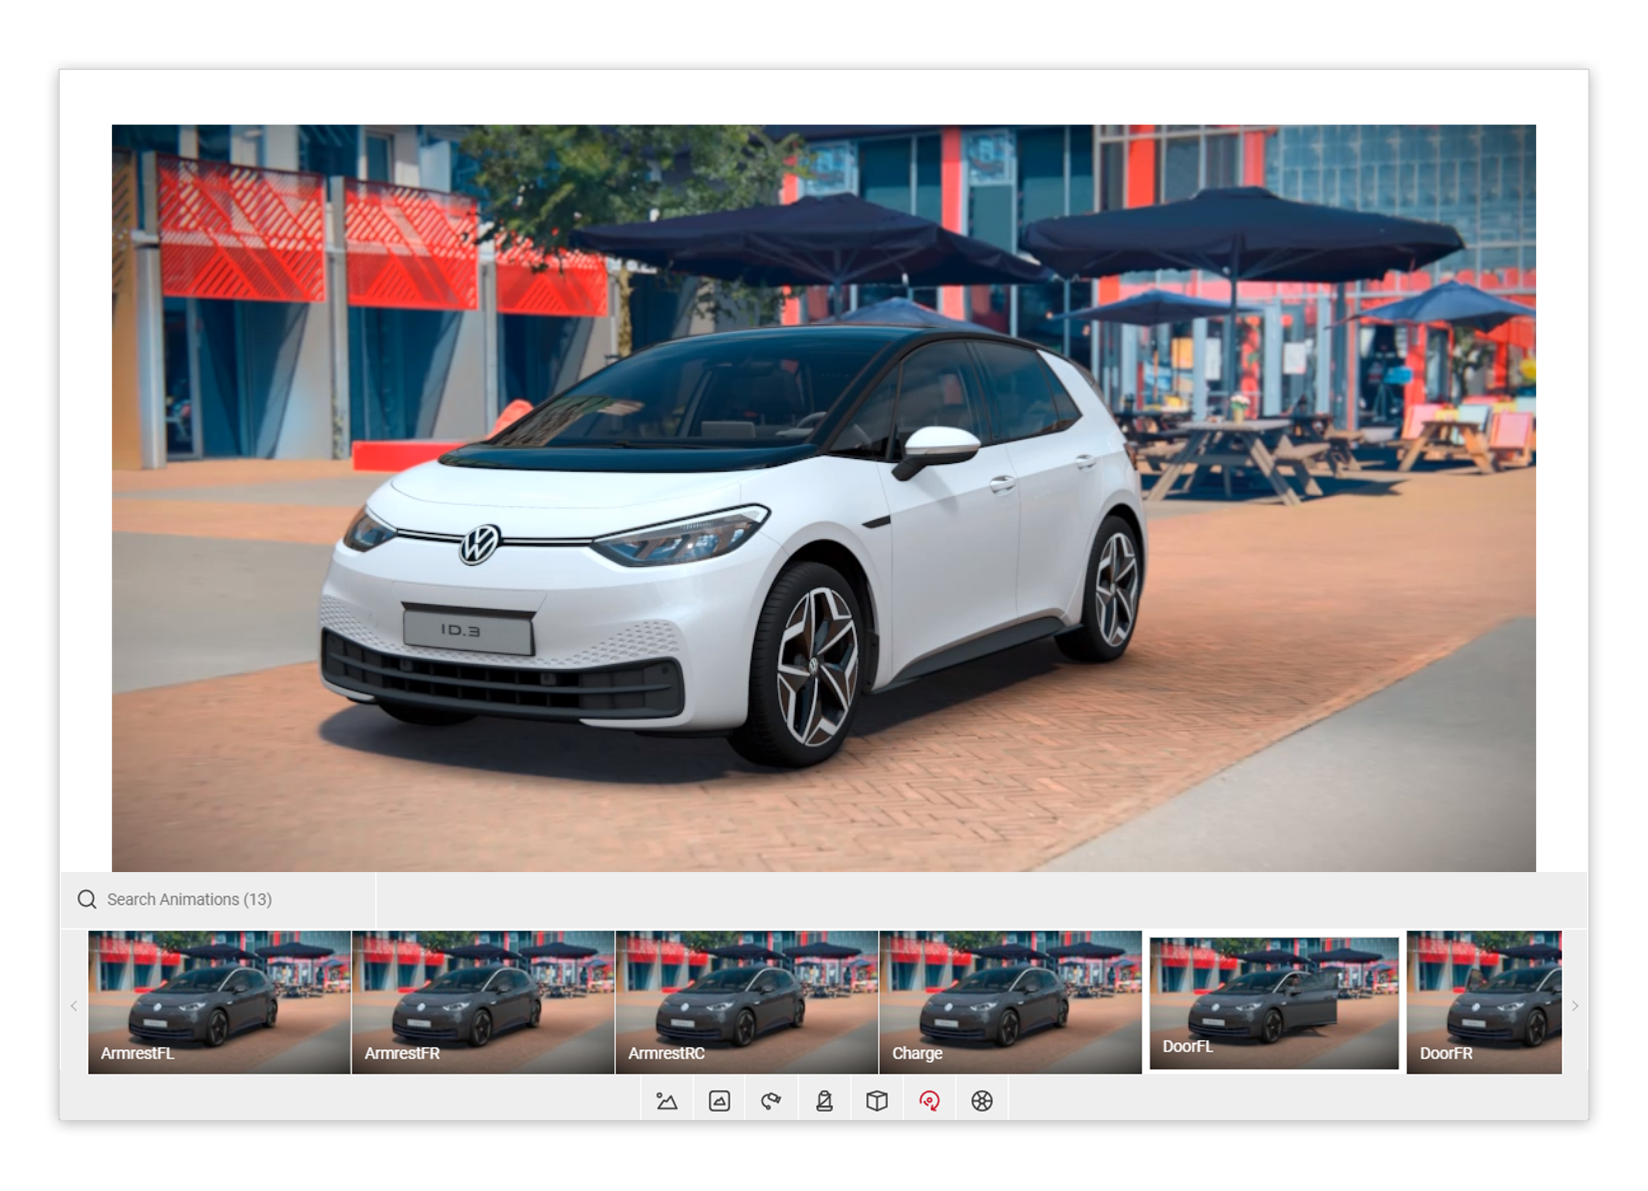
2 Click on the Environment icon within the Controls menu and select the 3D ID.3 Uilenstade environment.
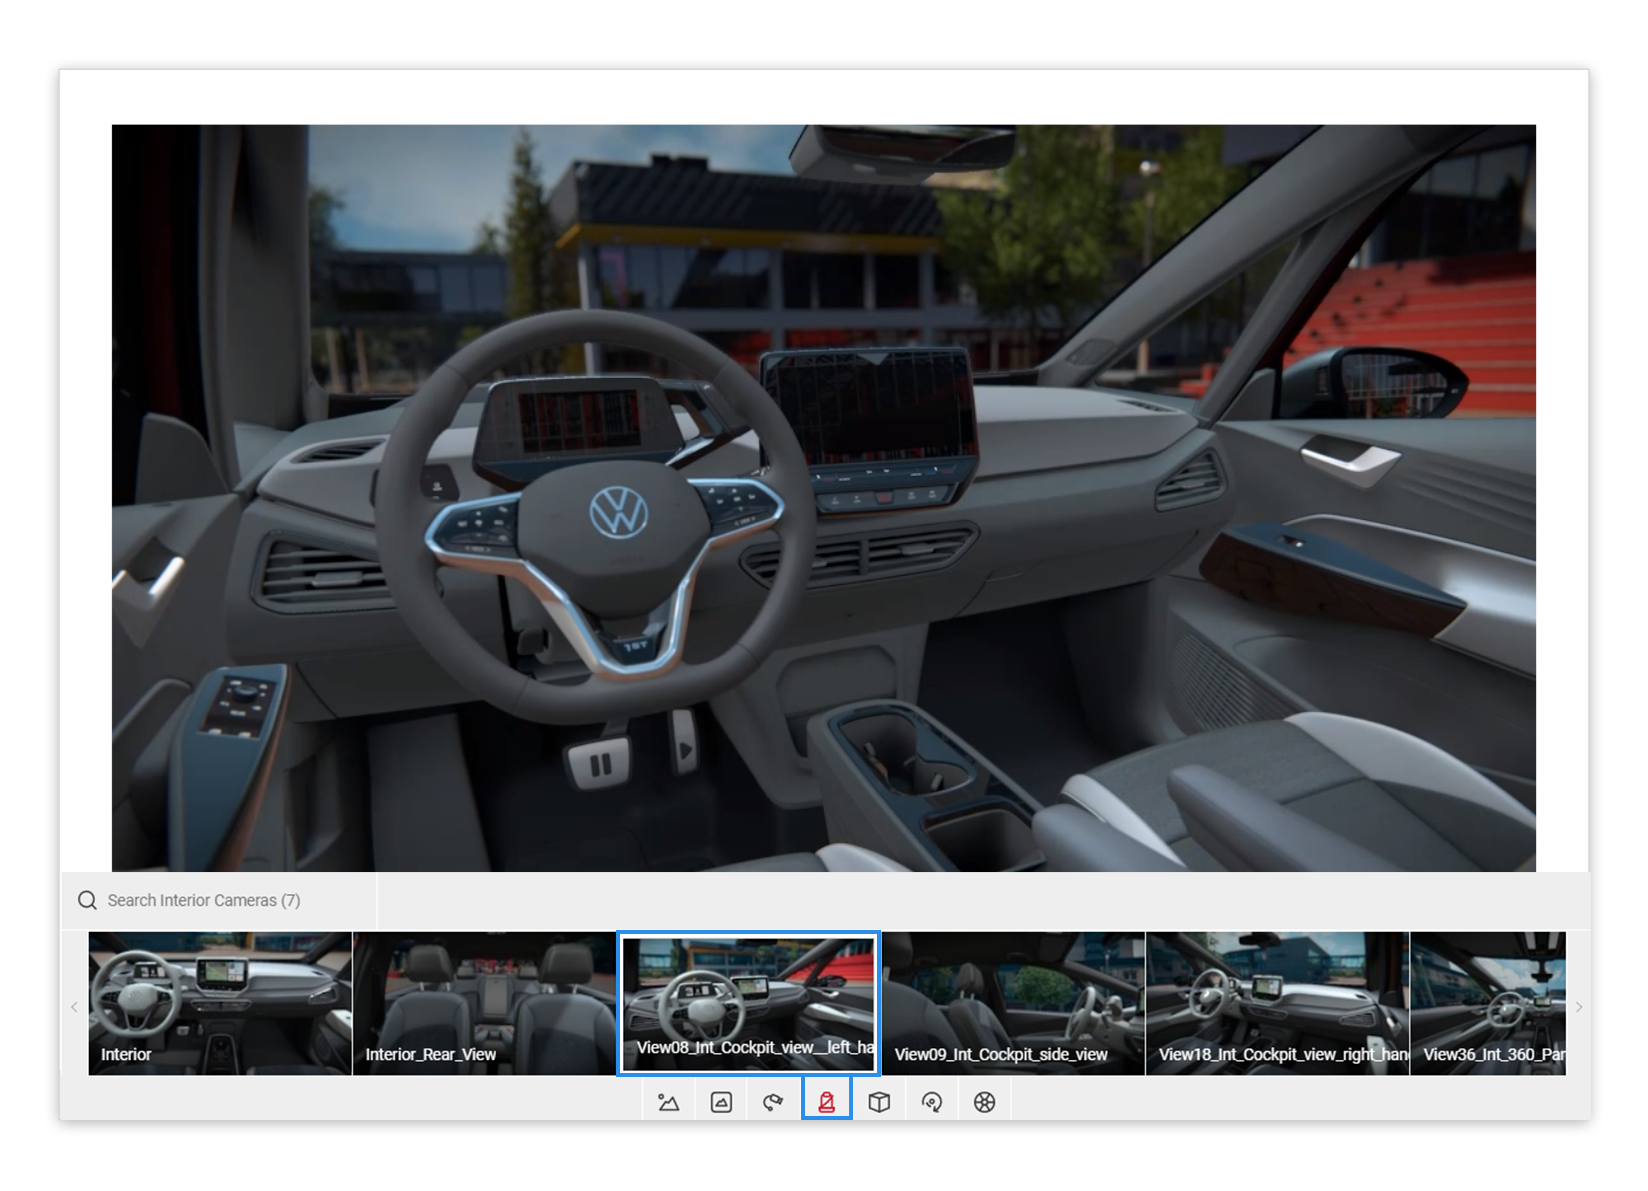
3 Click on the Interior Camera icon within the Controls menu and select the interior camera that best matches the below angle.
4 Click on the Camera Control icon in the input menu, or the Flycam icon within the Controls menu to start creating your picture. Using your mouse, manipulate the camera in the Viewport and set up the picture. You can also use the following keyboard keys to manipulate the camera position:
W, A, S, D - Translating the camera position L, J, K, I - Rotating the camera position
E - Translates camera Up Q - Translates camera Down U - Tilts camera Left O - Tilts camera Right

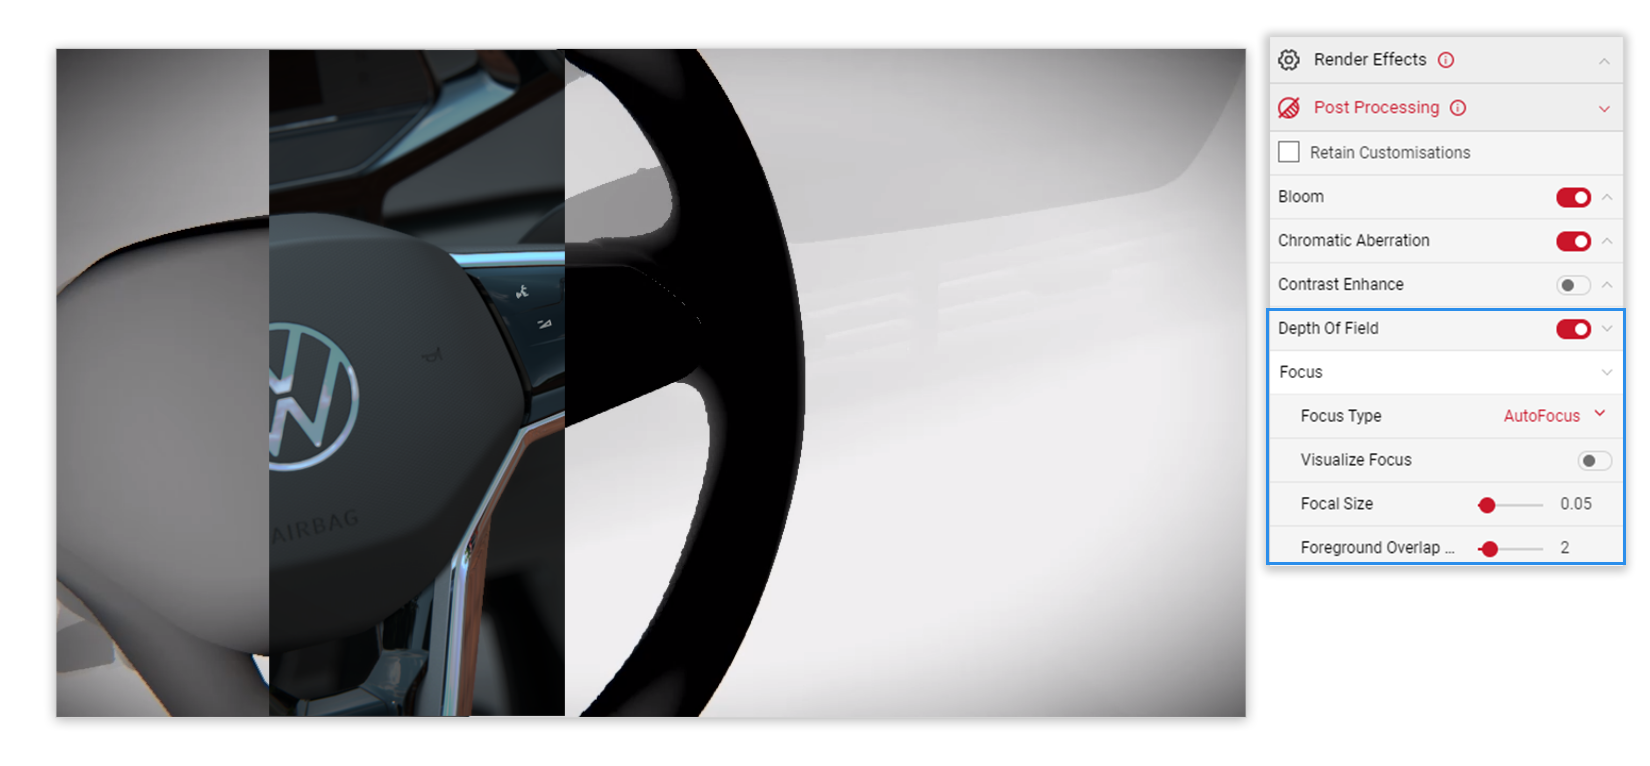
5 Click on the Post Processing icon in the output menu. Apply the correct amount of Depth Of Field to enhance the picture and bring the focus onto the Steering Wheel. When the Visualize Focus button is enabled the black sections of the image show the sections that will be in focus when the image is exported. The white sections show the out of focus points of the image. That's it! When you are happy with your picture, you can take a Quick Shot.