Tutorial Time: 10 mins


- Creating an HDRi Dome
- Using Scene Components
- Using Infinite Sphere
- Scene Lighting & Shadows
- Publishing a Dome
What you will learn
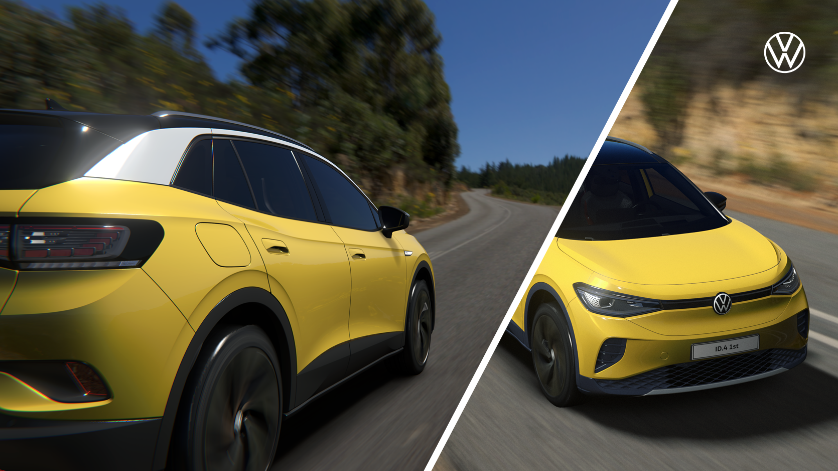
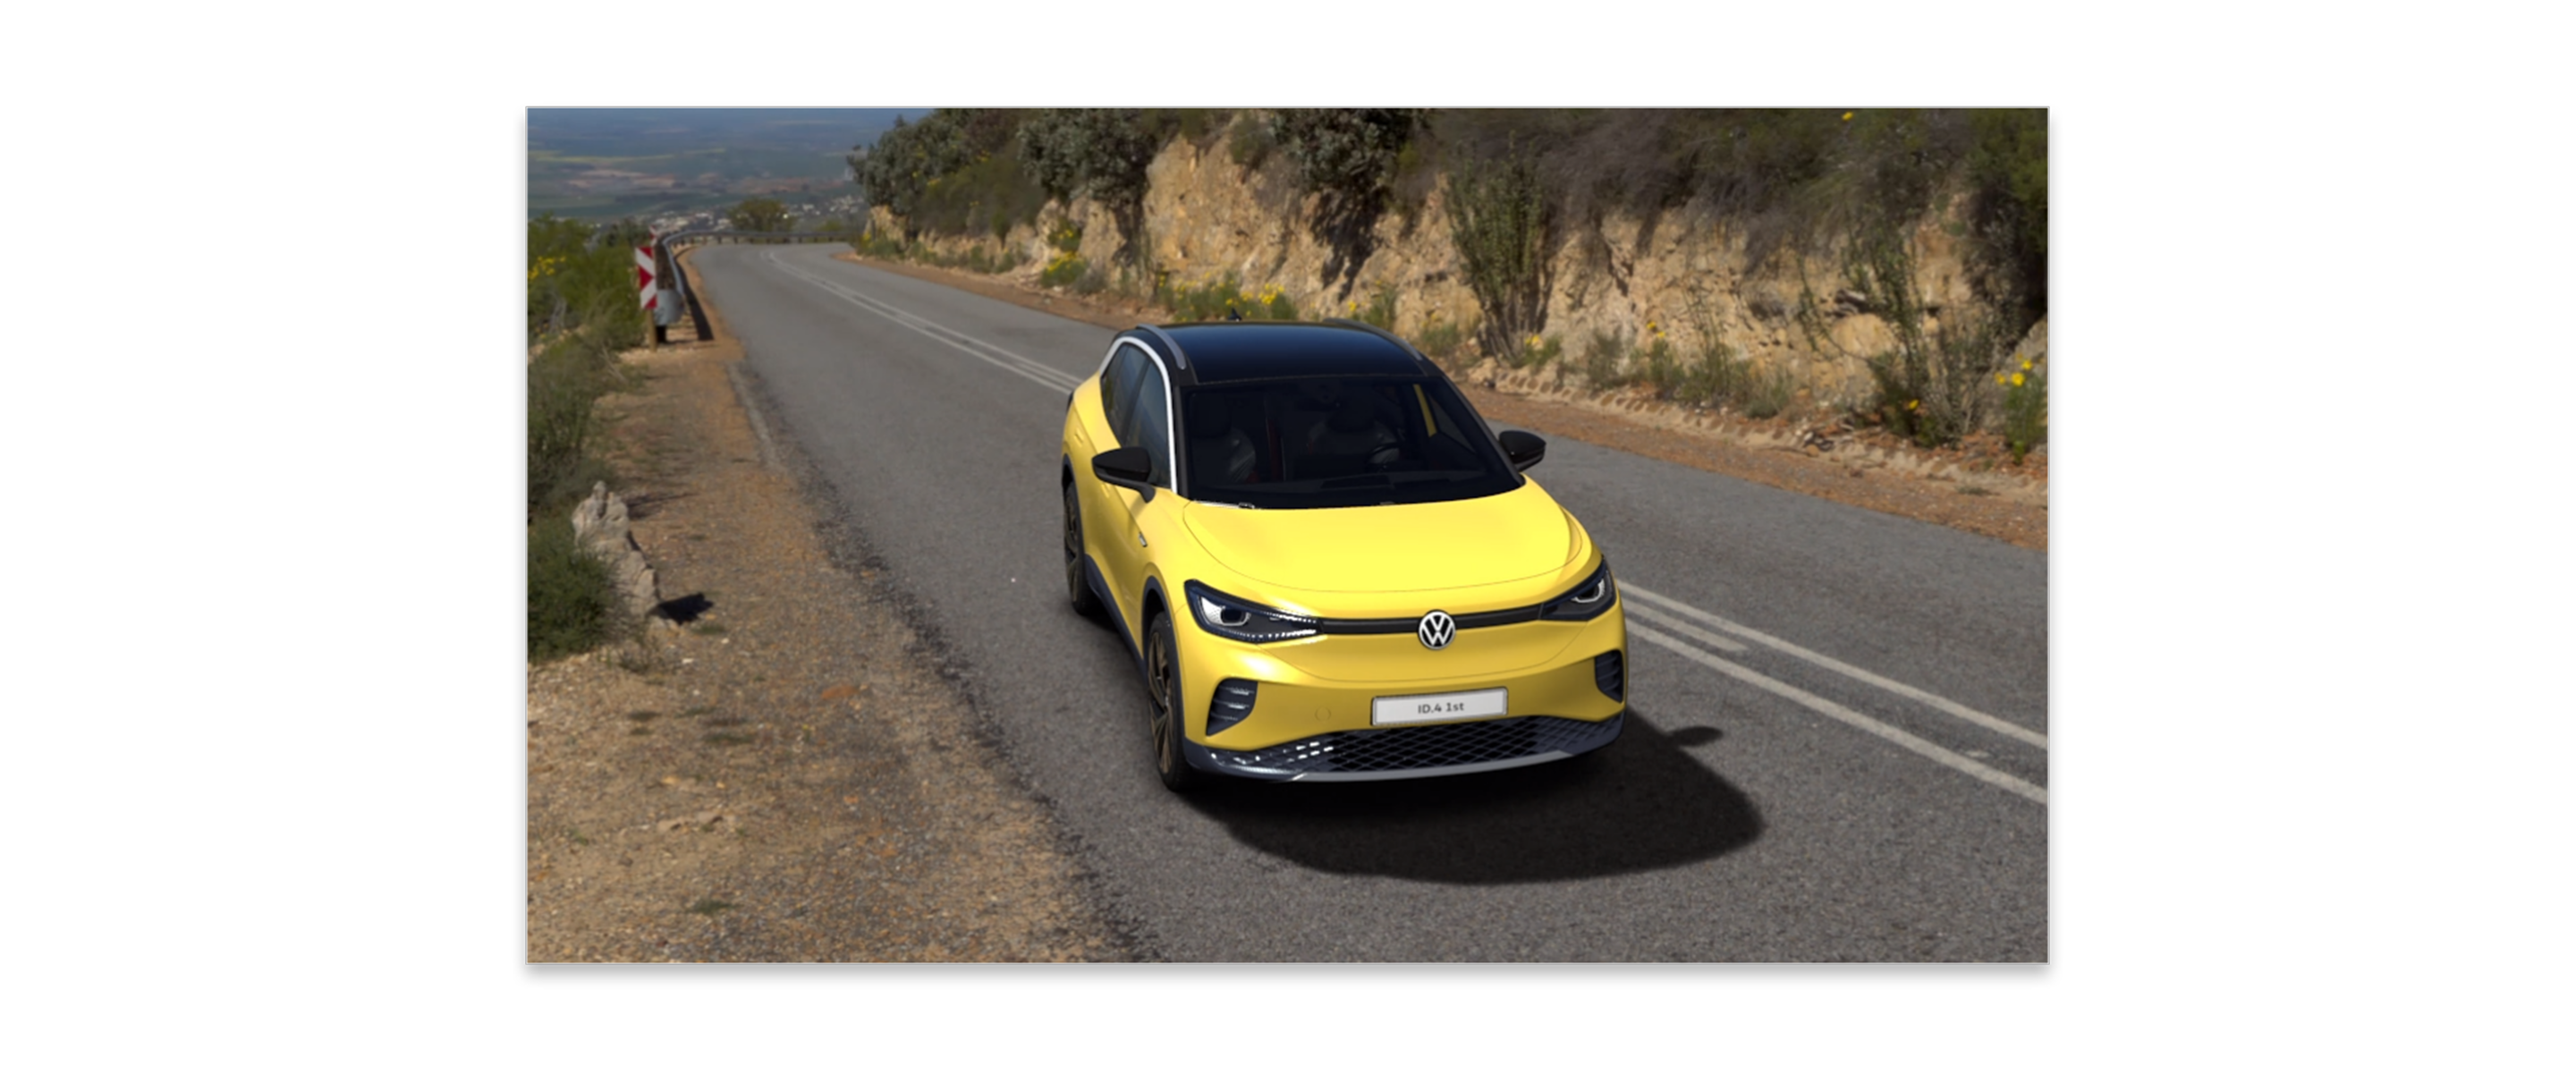
Using the Scene app we will learn how to create an environment Dome we can publish in Shutter Pro and create picture content for usage across a global campaign for the Volkswagen ID.4. We will learn how to use the Infinite Sphere Dome feature and work with the lighting and shadow menu options to help setup the ID.4 within the Scene. We can publish this in Shutter Pro and begin creating our campaign content.
Method
1 First let's create our Dome. When you launch the app, you will see the Open Projects modal appear. Here you can open previous projects and create a new scene. Click the Create New tab, select the Dome type and give the Dome an appropriate name. Select the Create New button to create your scene.
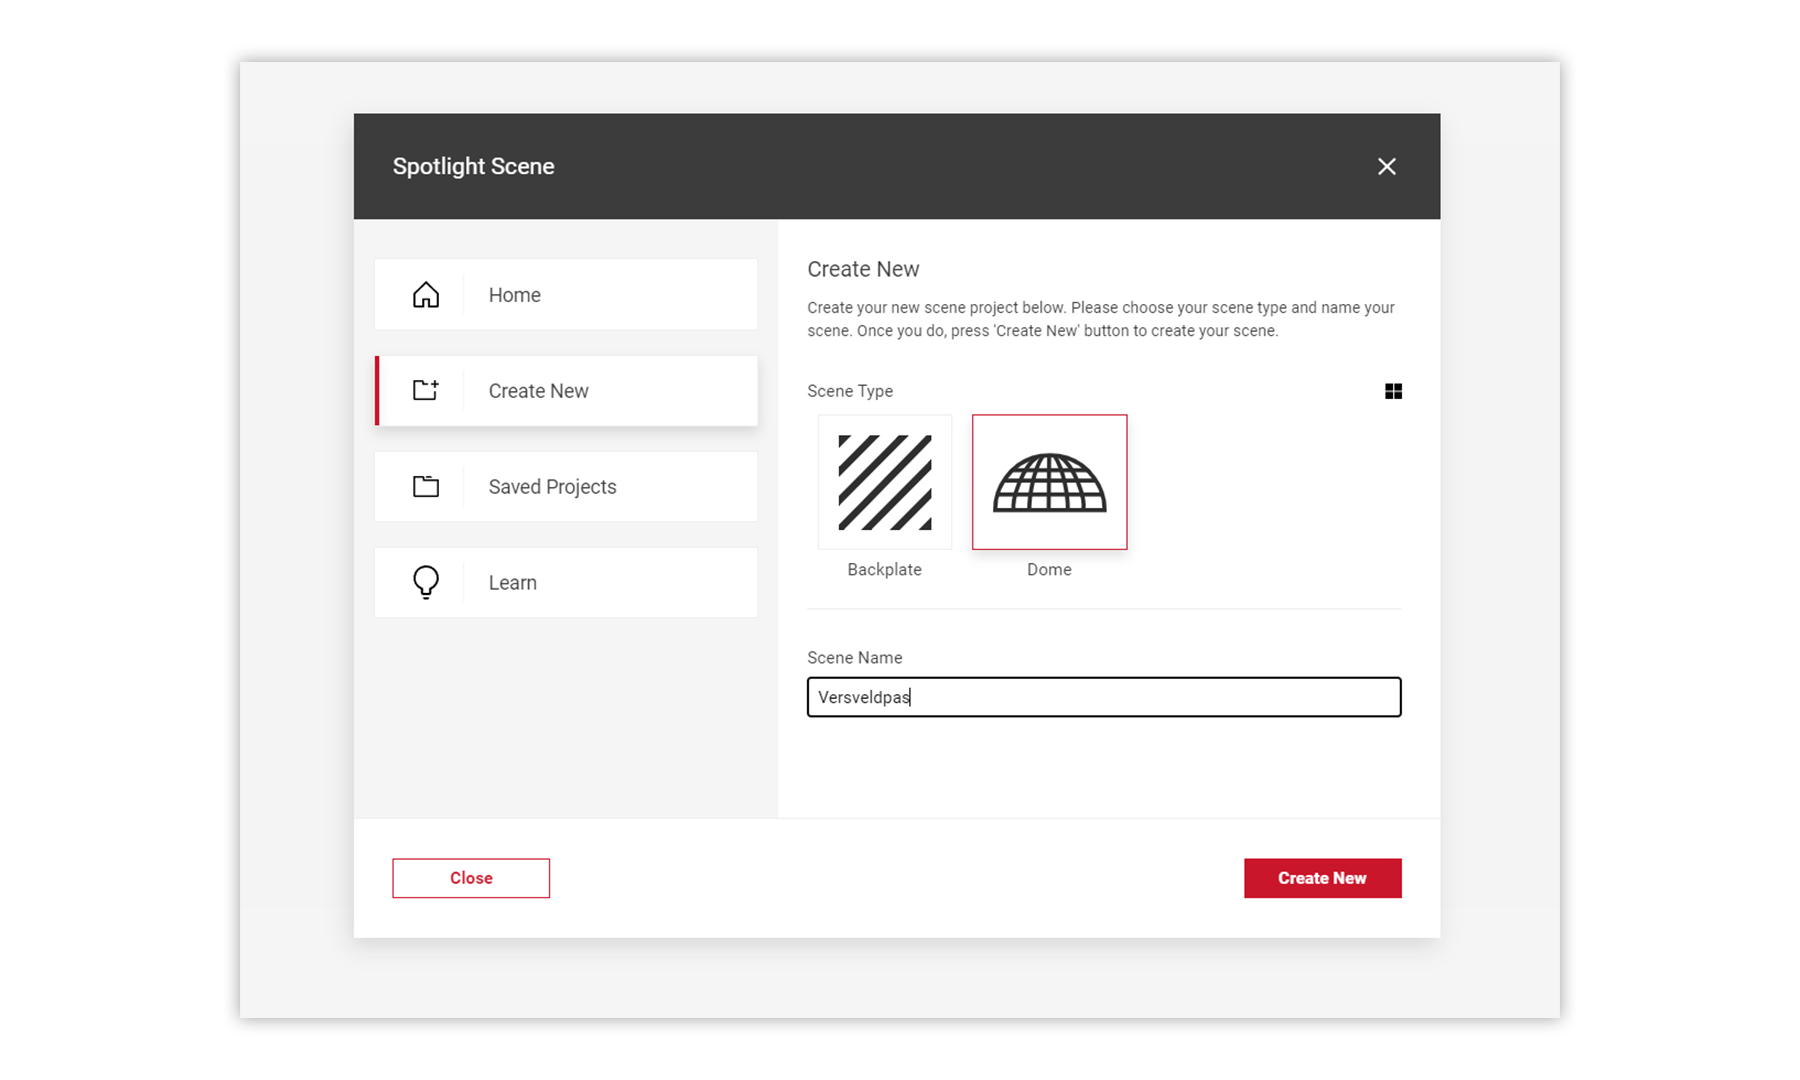
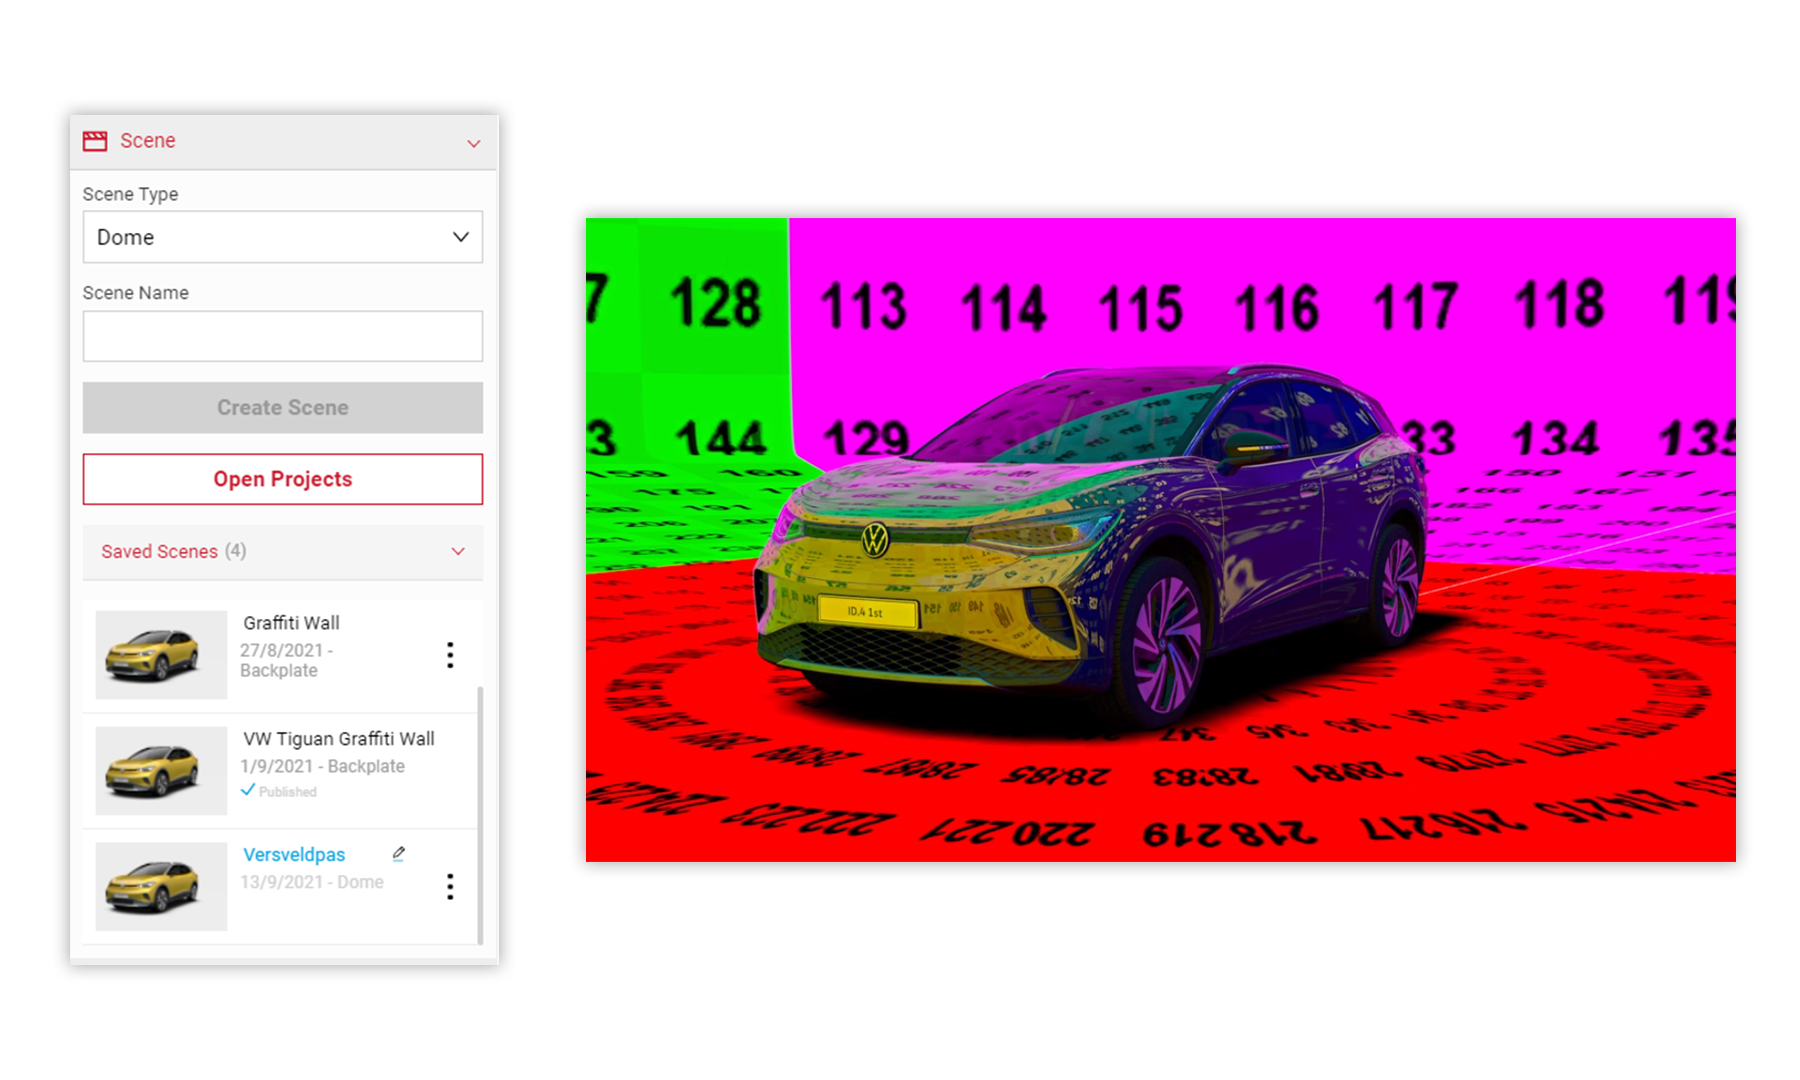
The new named Dome will appear in your Saved Scene menu.
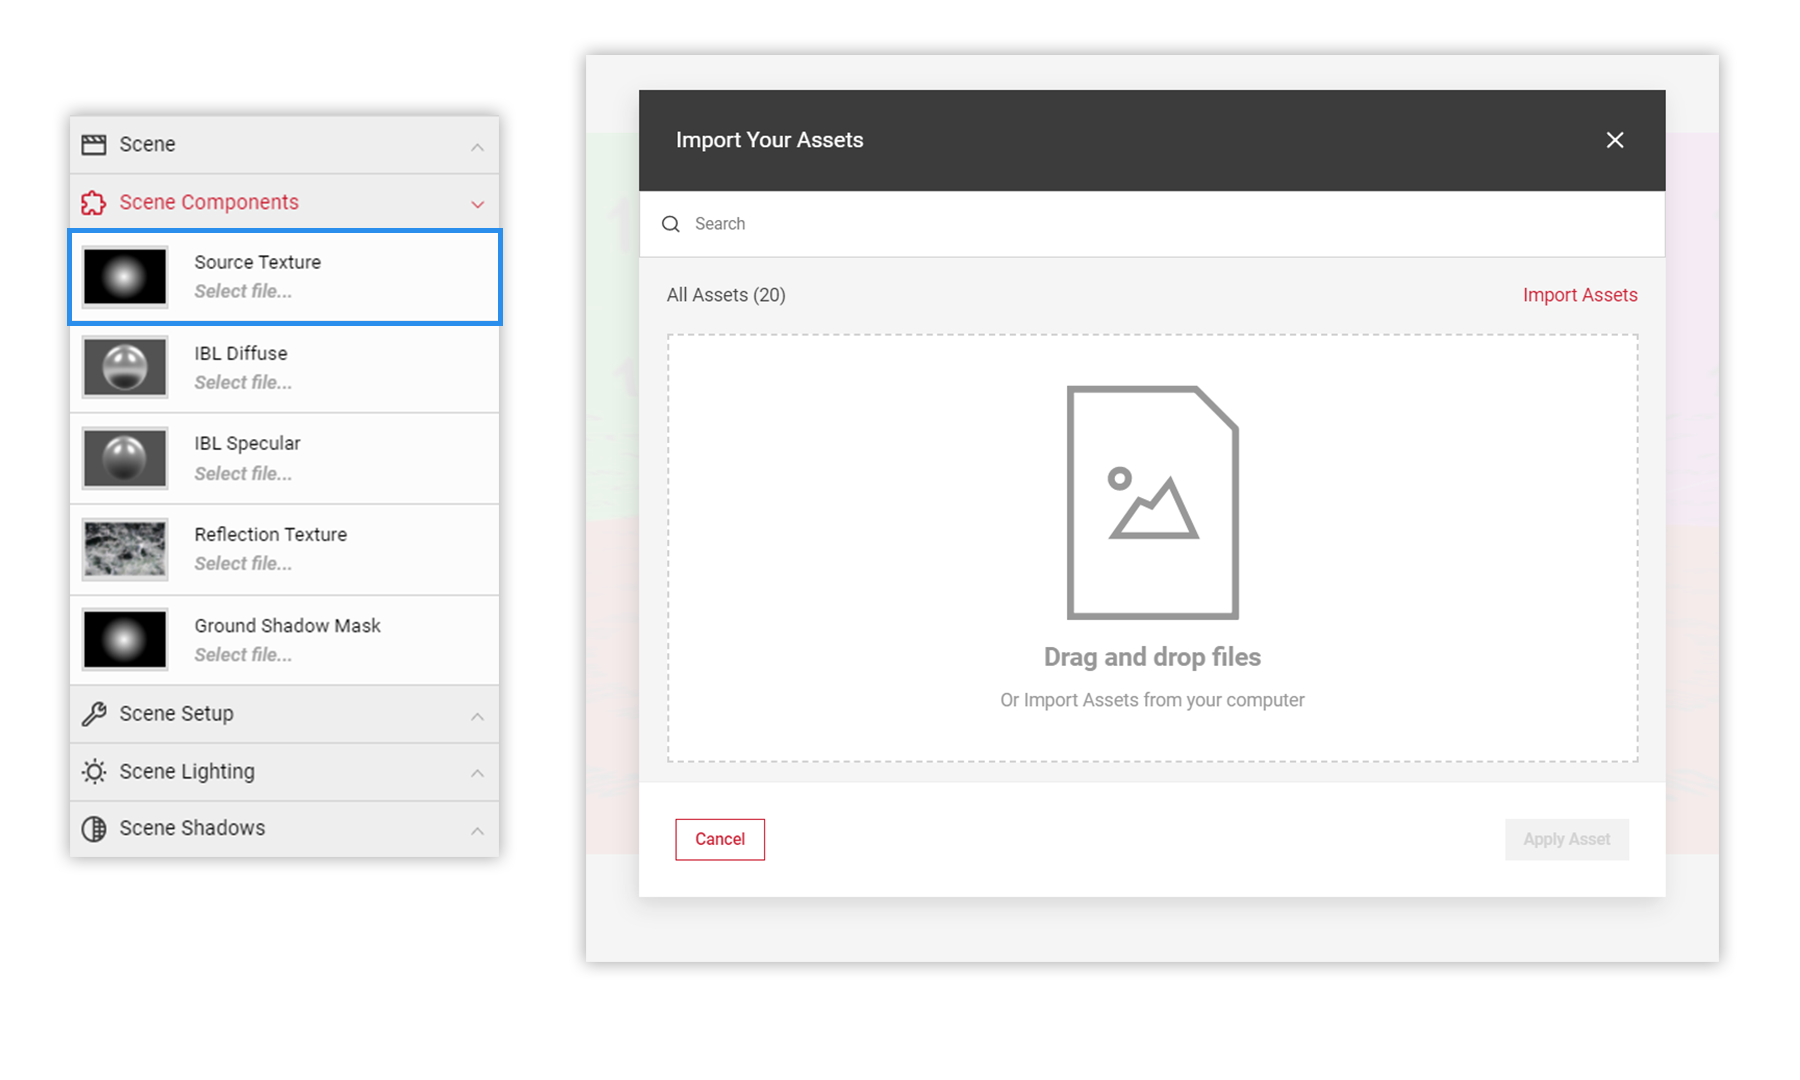
2 In the Scene Components menu there are 5 labelled slots. This is where we begin to build our Dome environment by filling the slots with the HDRi image. The Viewport window displays an untextured Scene.
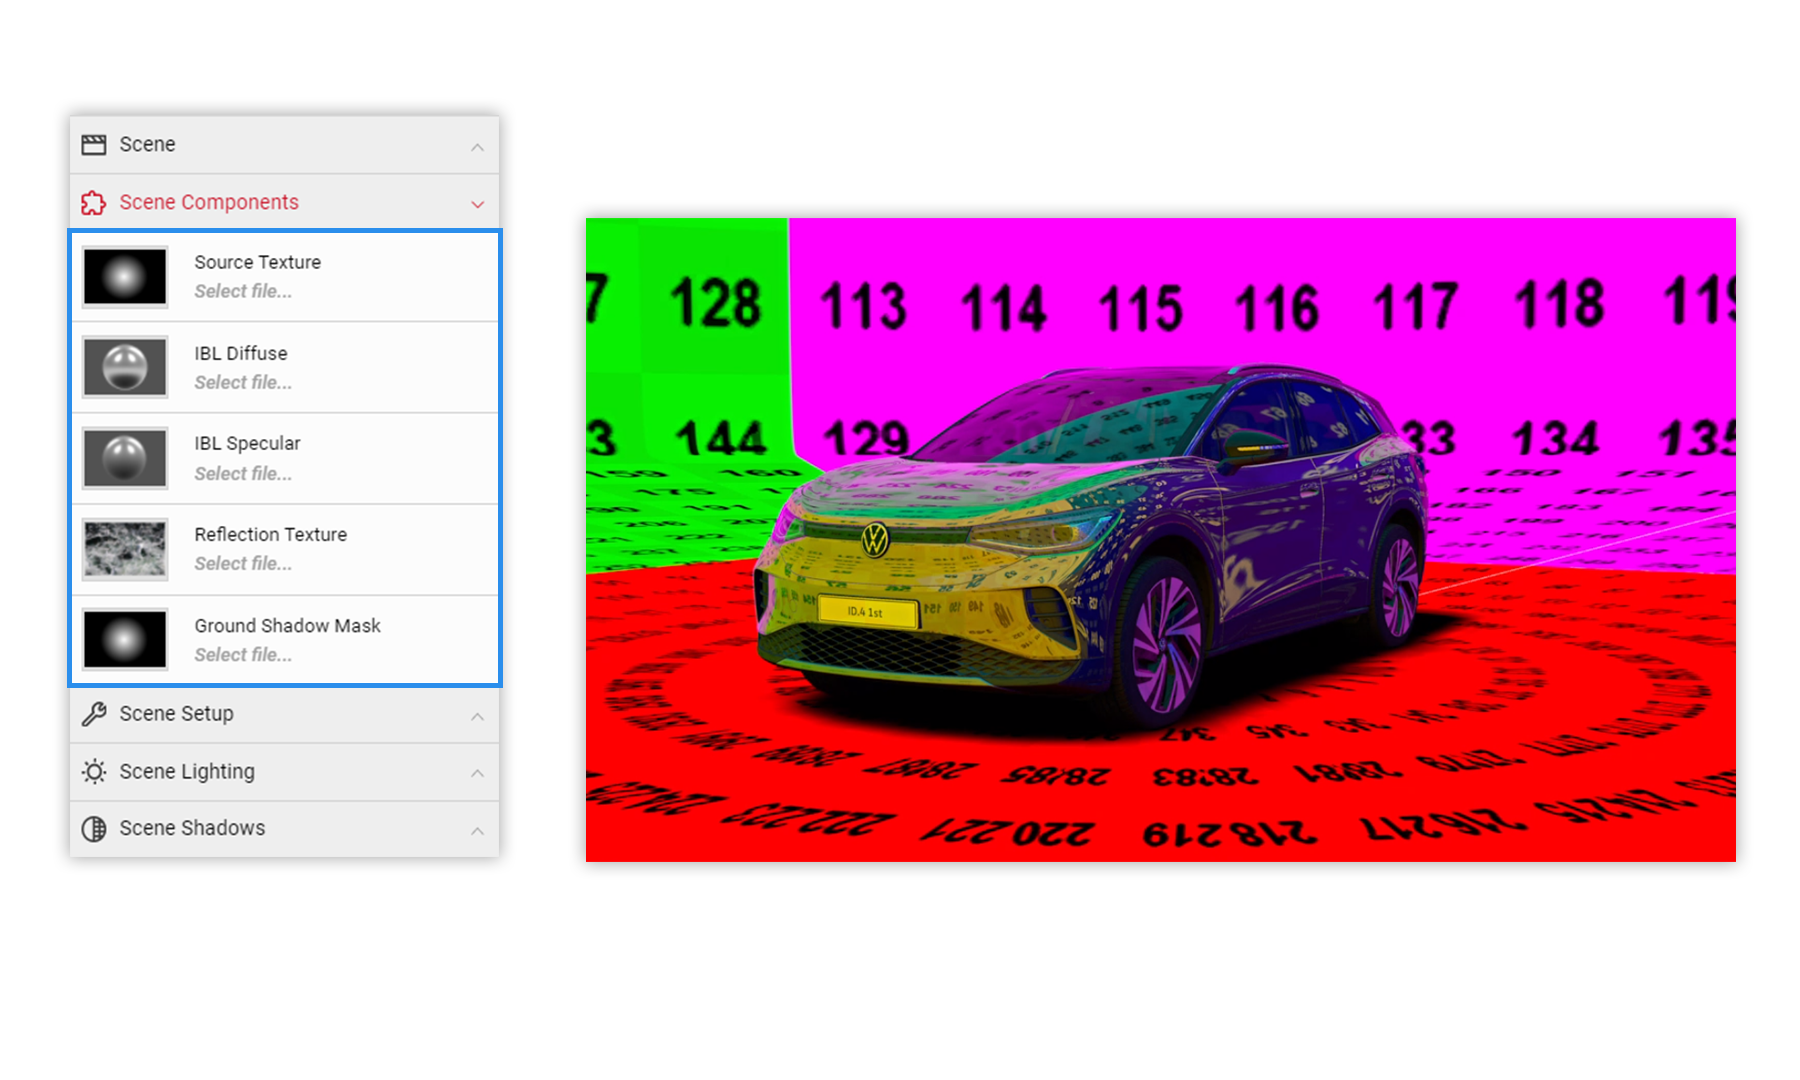
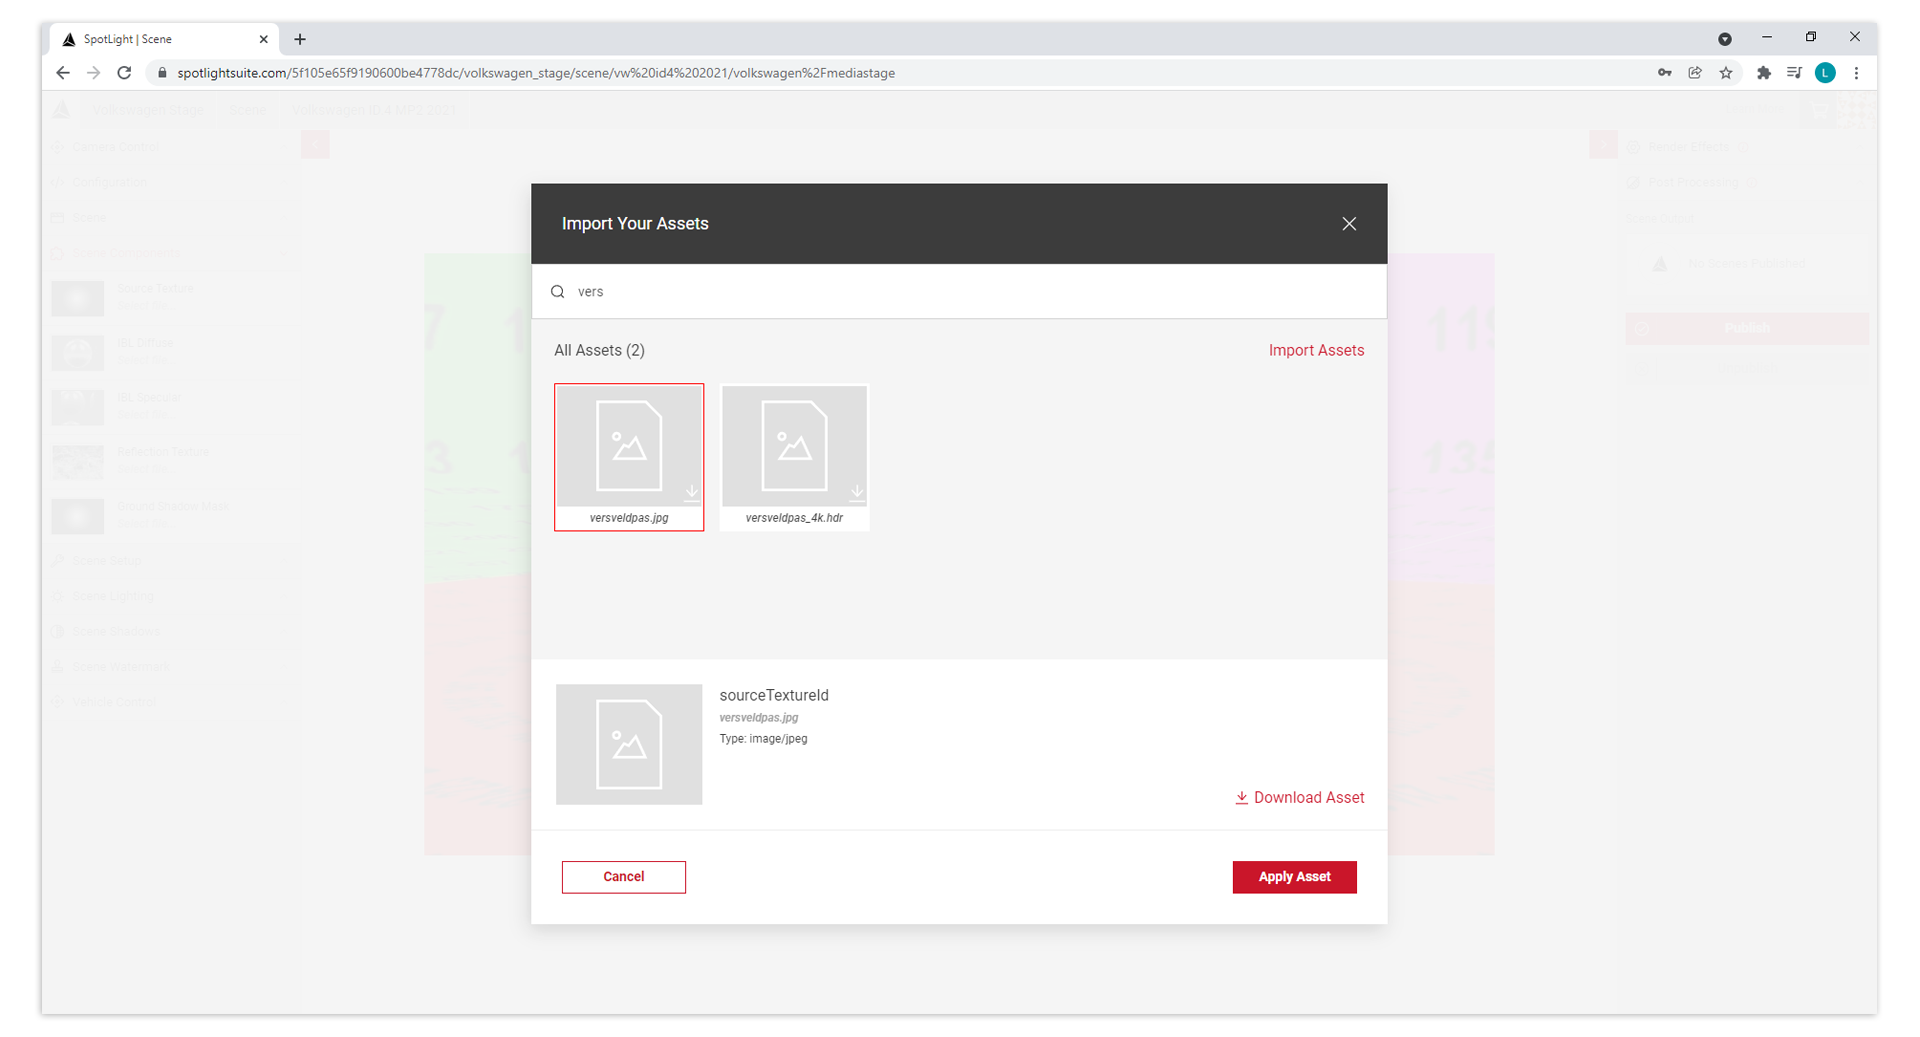
3 Click the Source texture slot. This brings up the Import your Assets modal dialog. Click anywhere within the Drag and drop files area and locate the HDRi on your local system. Click Apply Asset.
* It is important to use a tonemapped image for the background, not doing may result in a dull looking environment.
4 Once the HDRi has loaded, click the Apply Asset button.
5
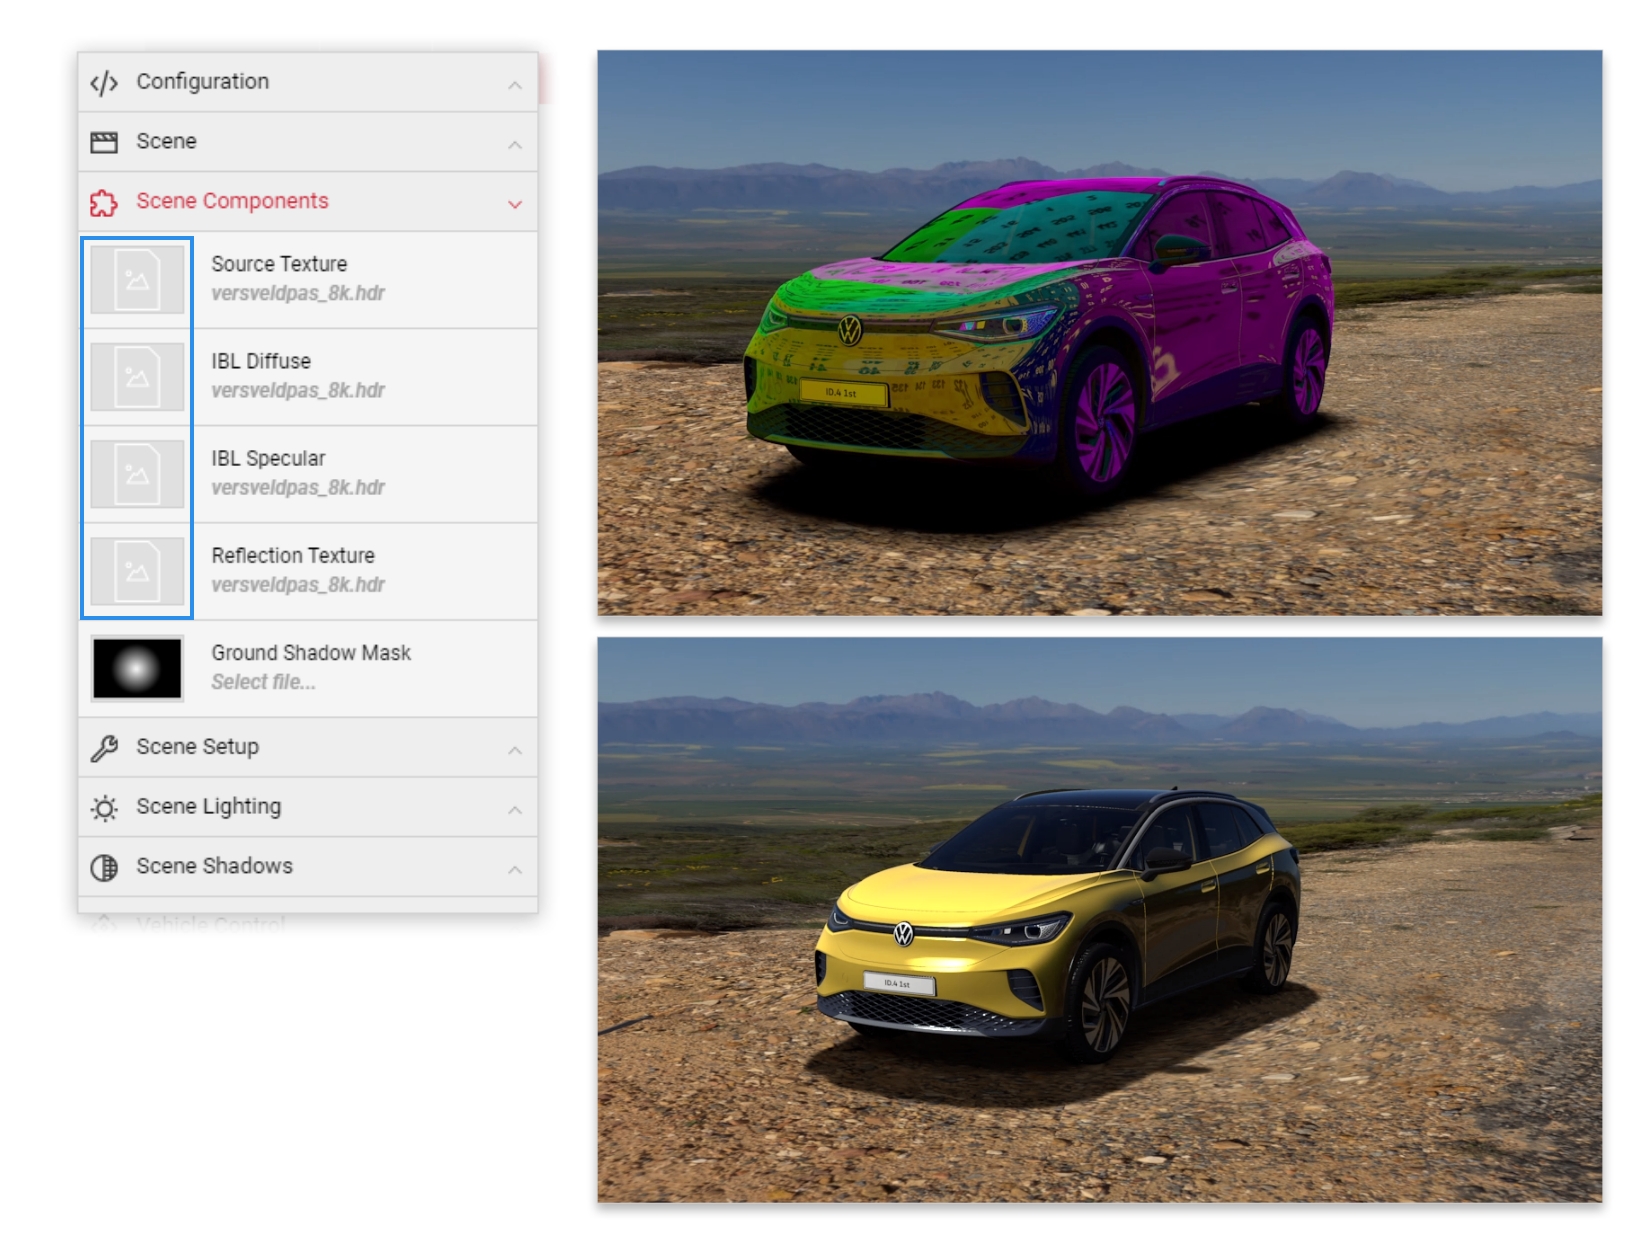
Next, click on the IBL Diffuse slot. In the Import Assets dialog, add your HDR file. This asset should be a non-tonemapped HDRi. The Viewport will begin to update & reflect the HDR as it fills the slots. Repeat the process to add assets to the other component slots.
*Ground Shadow Mask slot can remain the same. The HDRi does not need added here.
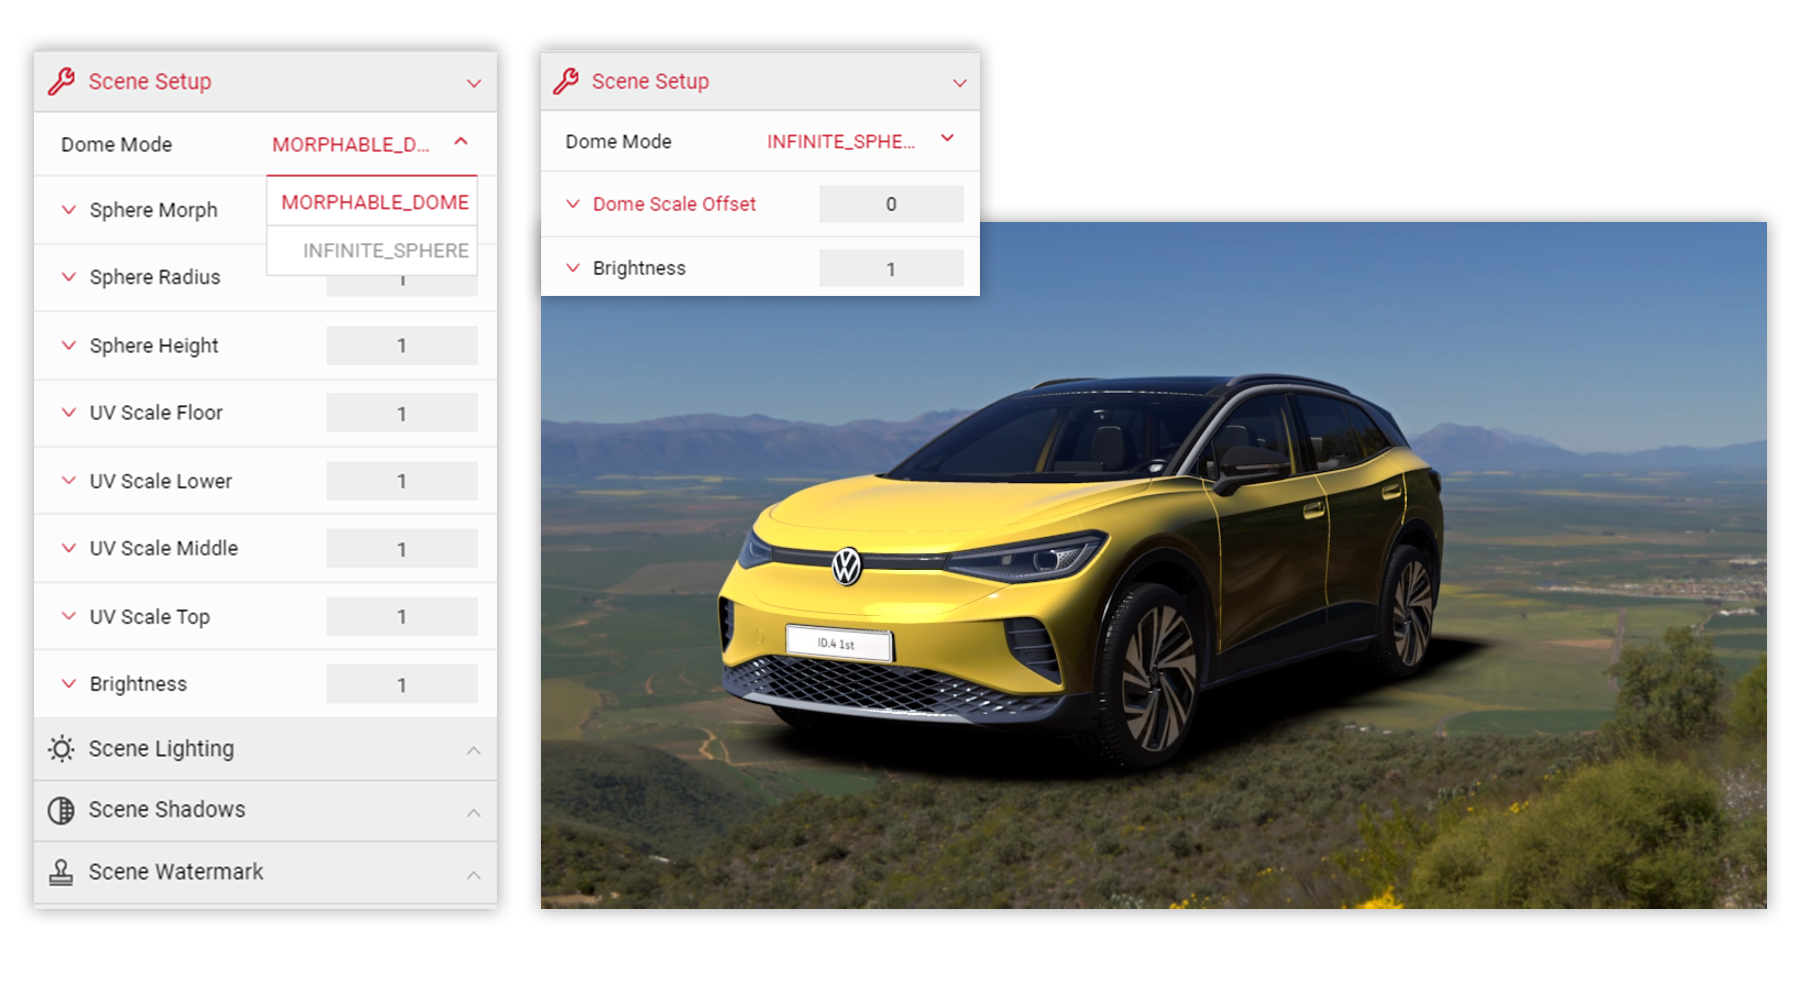
6 With the HDRi's loaded into the Components menu and the Viewport reflecting this, in the Scene Setup menu select the Dome Mode: Infinite Sphere option. Infinite Spheres allow you to move freely around the 3D space with the vehicle in no fixed position. Morphable Domes give you additional controls to alter the shape and size of the dome and the vehicle remains fixed to the floor. Explore the options available in this mode using the Dome Scale Offset and Brightness.
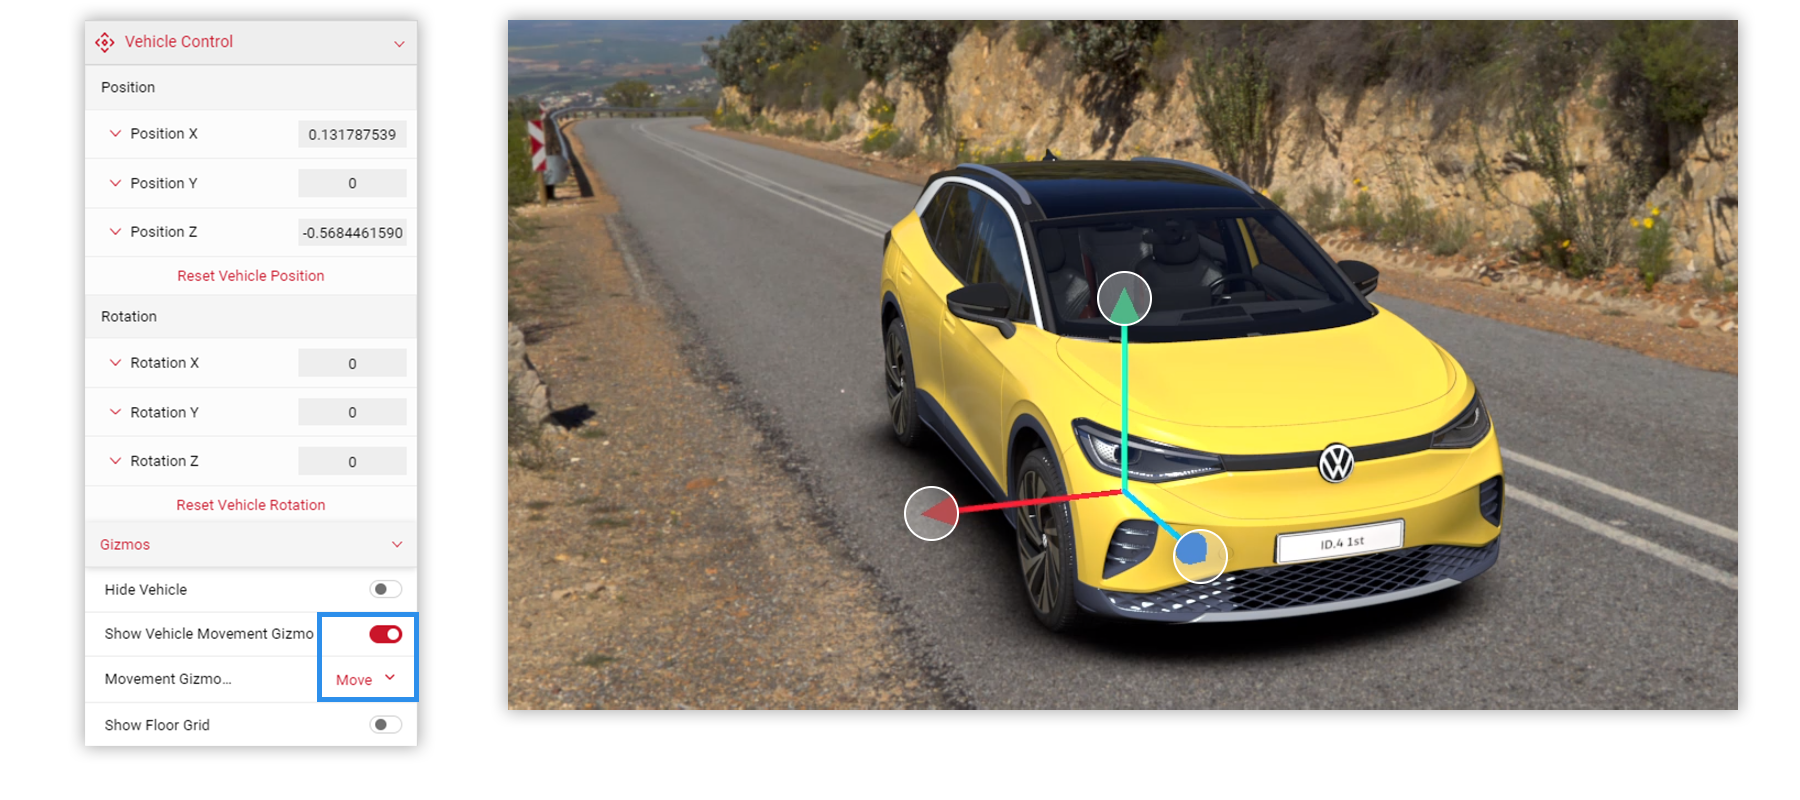
7 With the vehicle being in no fixed position in Infinite Sphere projects, experiment with moving the car around within the Viewport to get an understanding of the control you have.
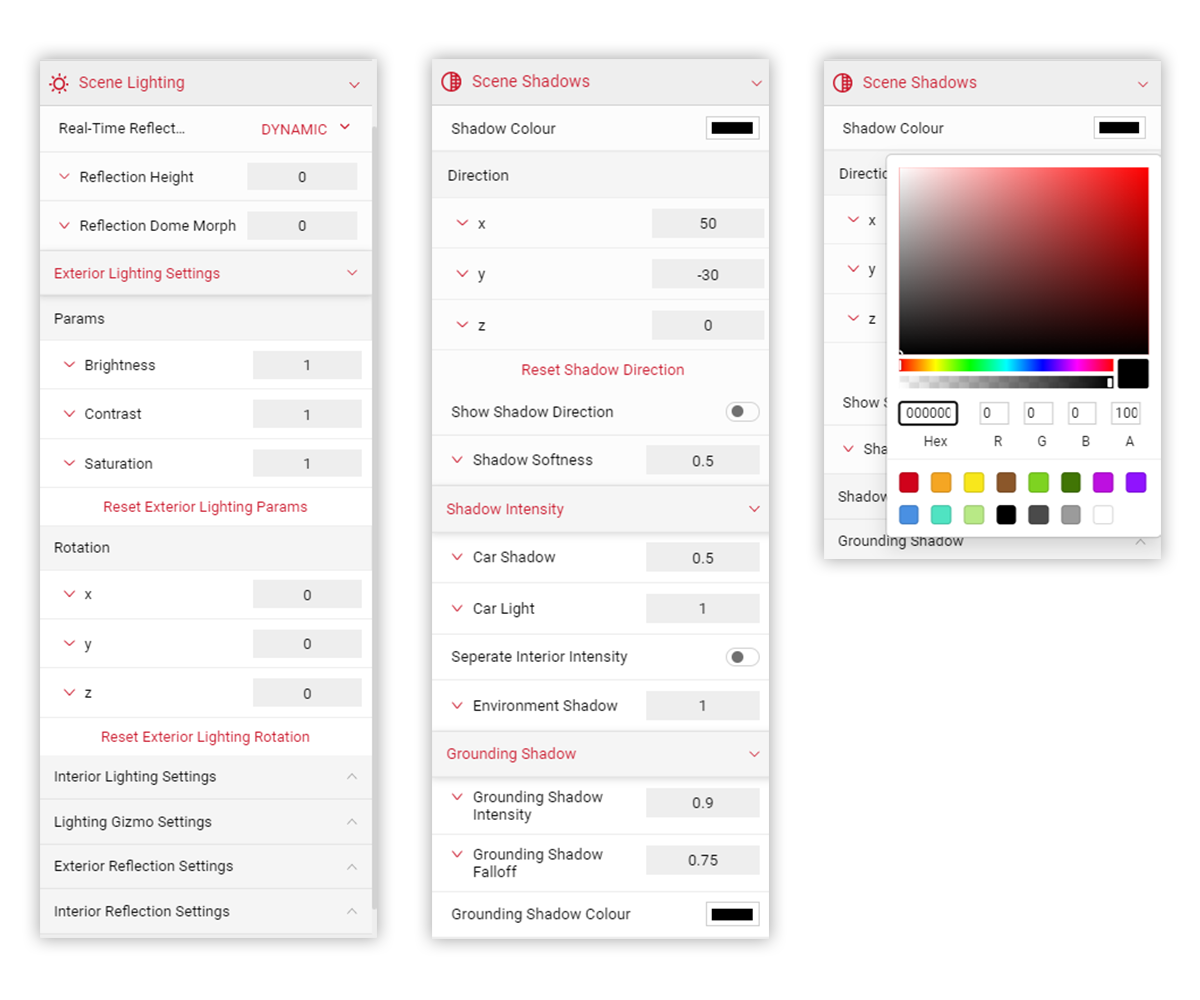
8 Using the Scene Lighting & Scene Shadows menus, explore the parameters and start setting and making any adjustments to the exterior, interior lighting to enhance the car within the Dome. Adjust the Grounding Shadow and Colour feature to create your Scene.
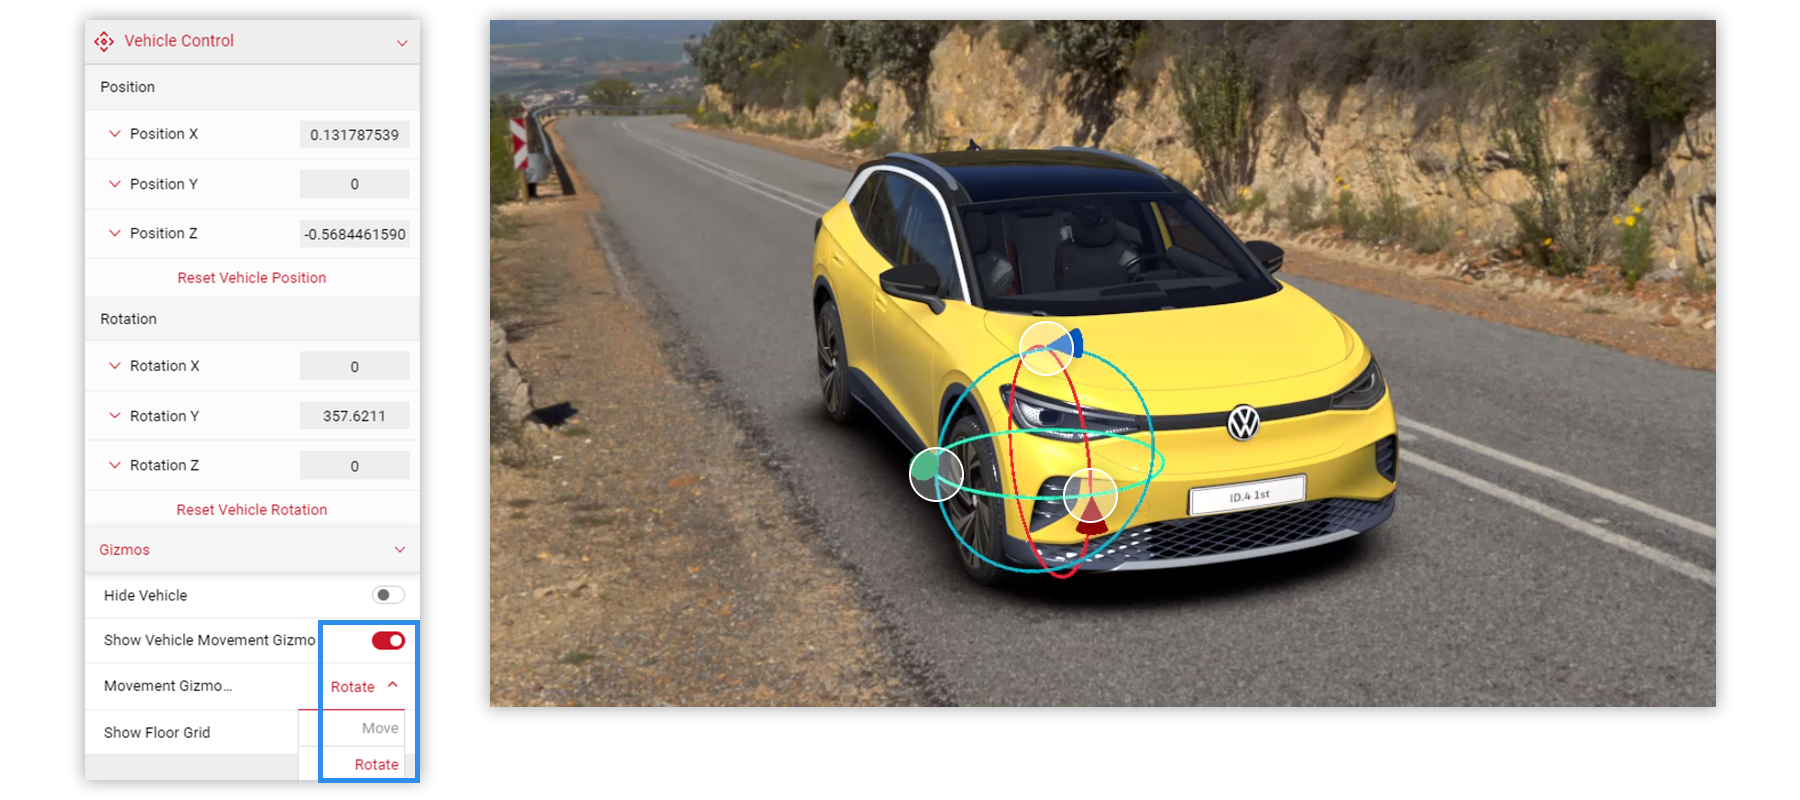
9 In the Vehicle Control menu choose the Show Vehicle Movement Gizmo, and select the Rotate & Move options. In the Viewport you can use the Gizmo to adjust the rotation and position of the car.
10
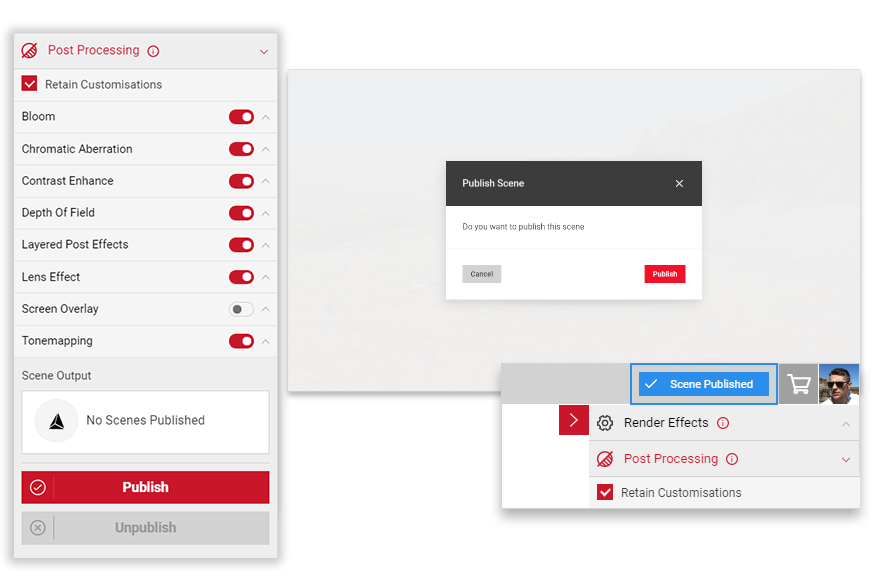
When you have made all the adjustments within the Input menu, in the Output menu apply any Render Effects & Post Processing to enhance the Scene (these will be visible in Shutter Pro when published)
Click the Publish button. The Publish Scene modal dialog will appear. Click the Publish button. You will then receive the notification informing you that the Scene has been Published.
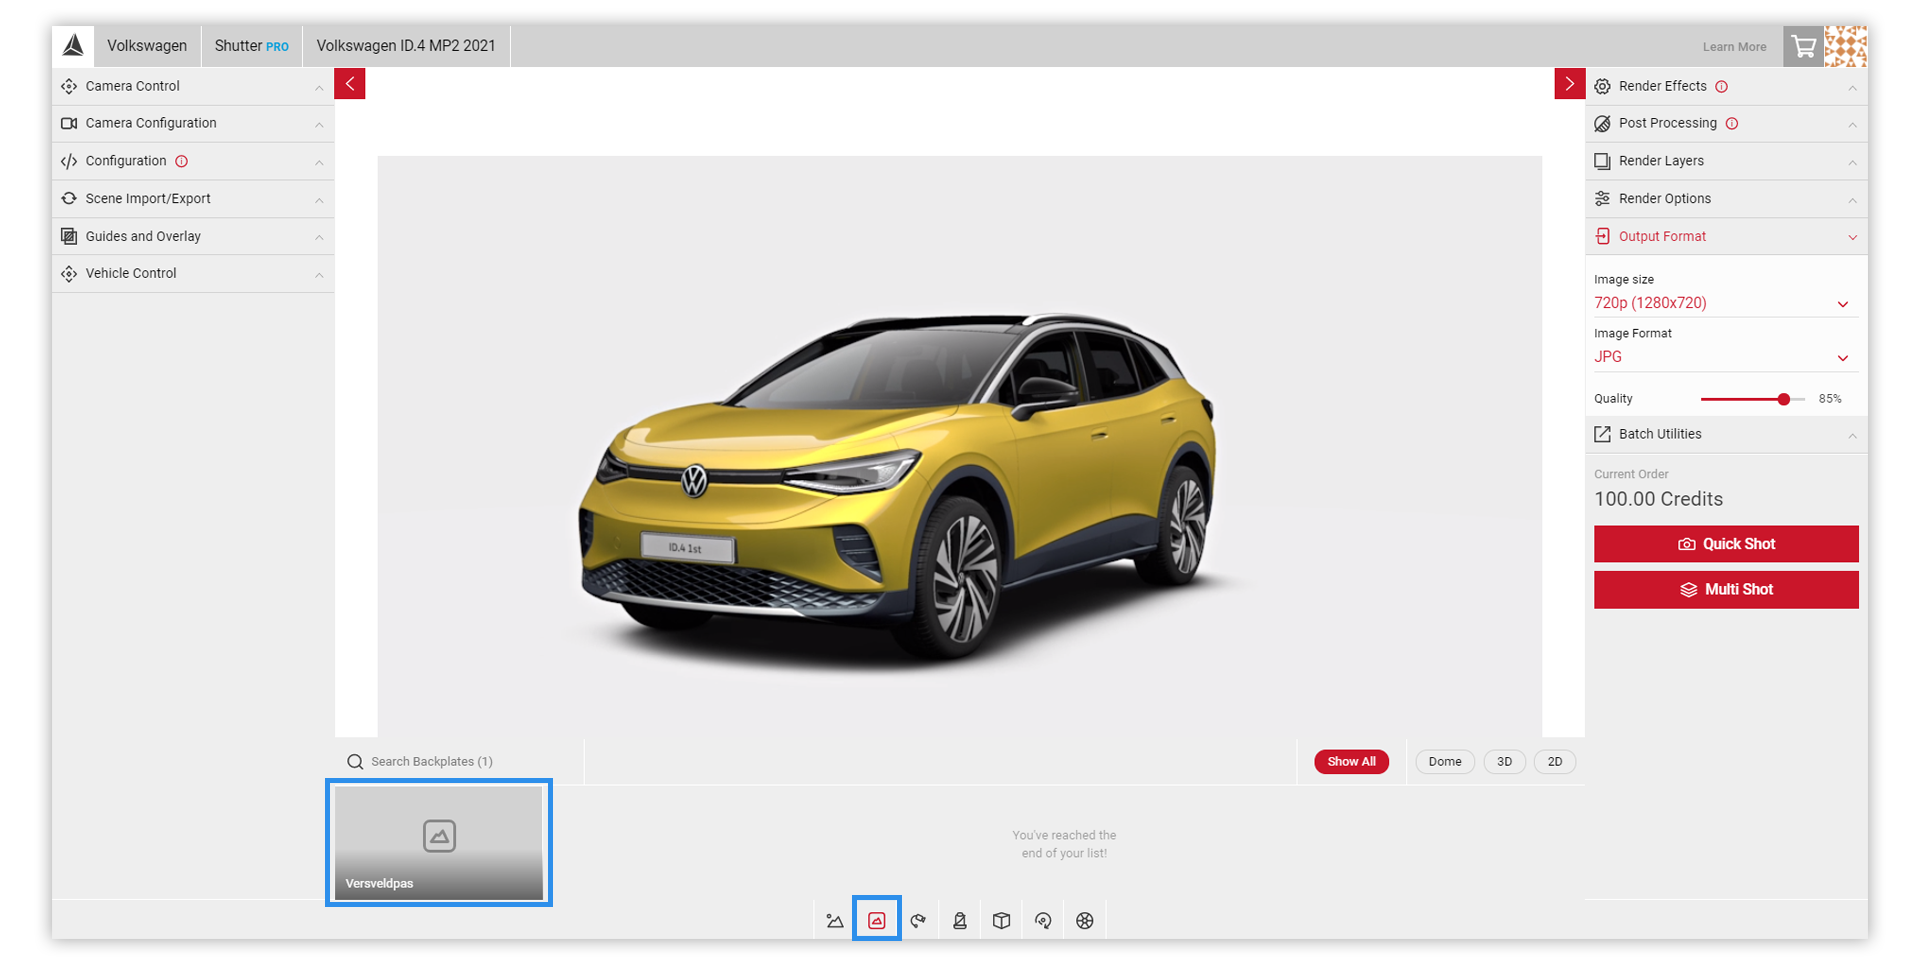
11 Load the Shutter Pro app. In the Controls Menu, select the Backplates menu icon. In the pop up menu, select the published Scene environment name (e.g Versveldpas)
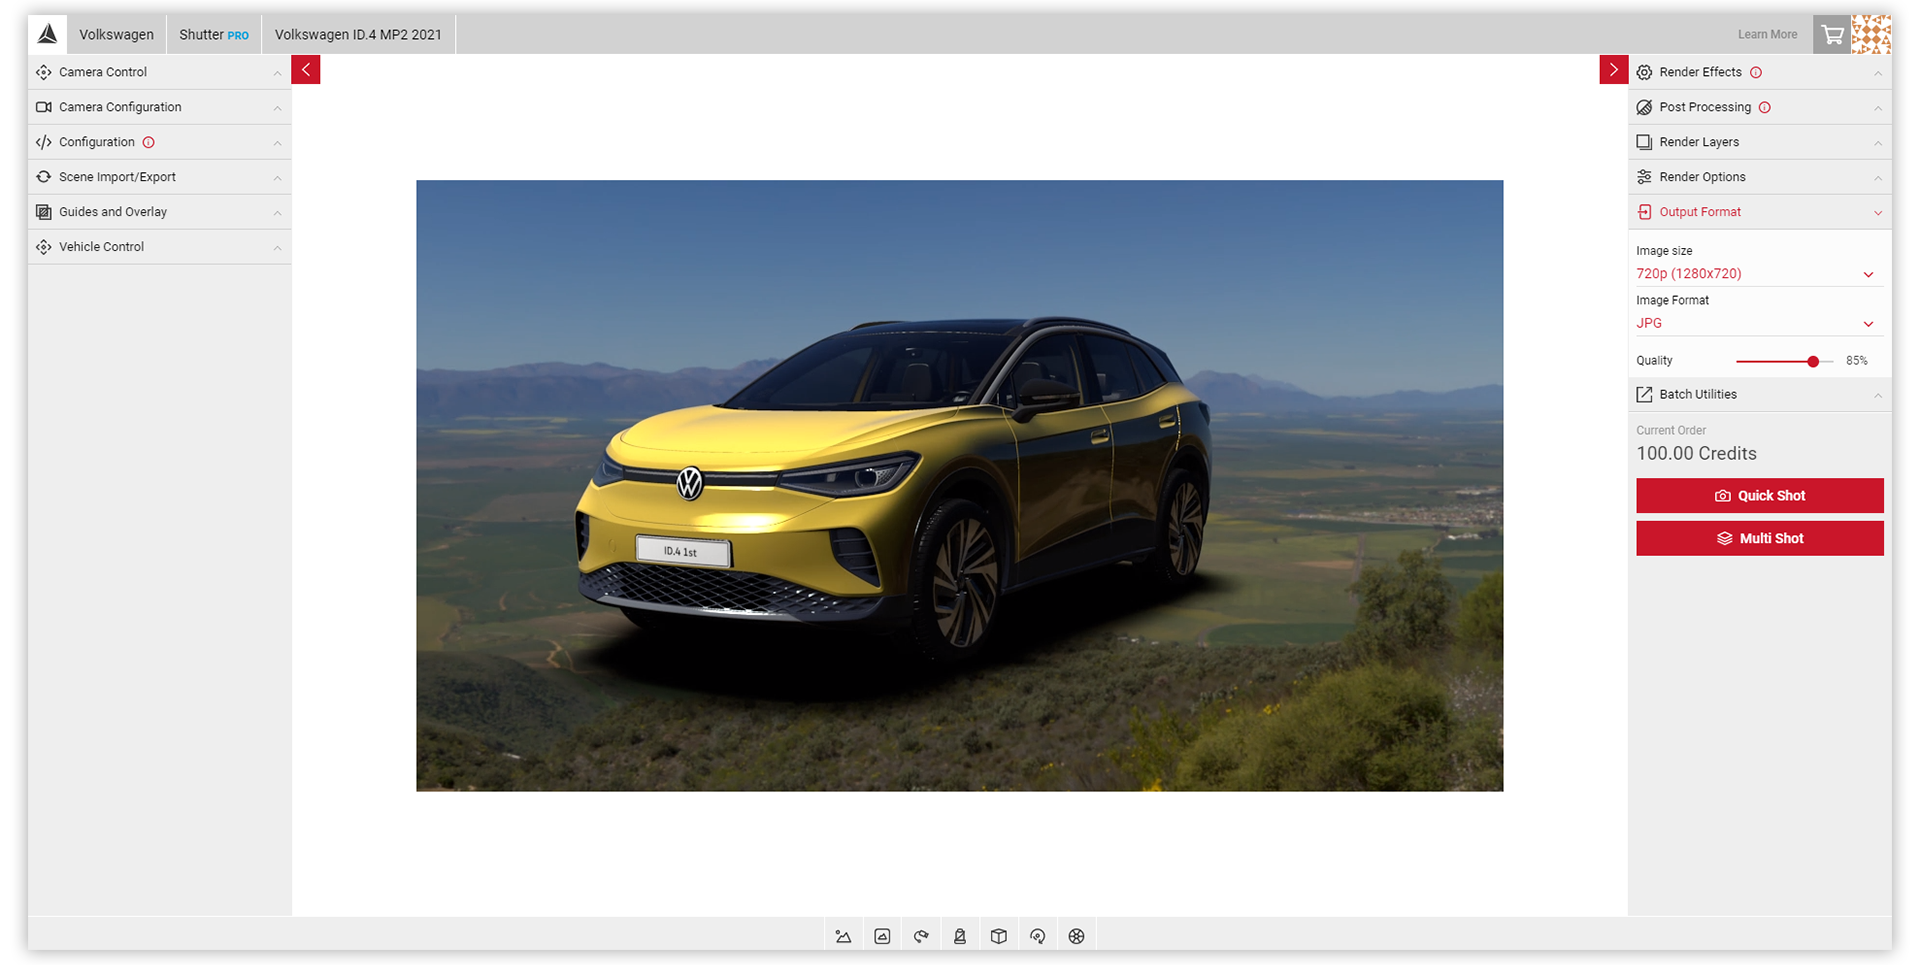
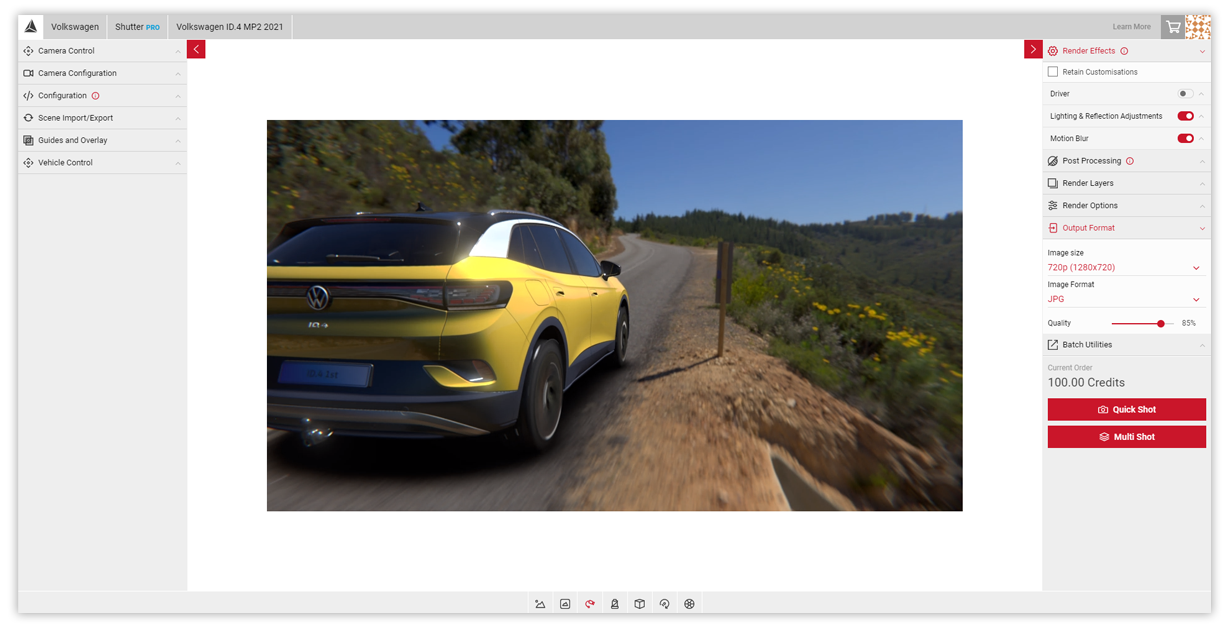
12 With the Scene environment loaded in the Viewport, you can re-position the car and begin to create your content using Shutter Pro's tools to create cameras and make custom sized campaign content.
To make adjustments to the existing Scene environment. Return to Scene App. Load the Dome via the Saved Scene menu. In the Output Menu, click the Unpublish button. This allows you to then make any changes. When you are ready, click the Republish button to reuse in Shutter Pro.