Tutorial Time: 5 mins

- Using PrCodes
- Changing Environment
- Changing Car colour
- Using Output Format
- Using Multi Shot Batch
What you will learn
Using the Shutter Pro app we will learn how to create a 4K image using the ID.3. We will add post process effects such as motion blur from the Render Effects menu to create an exciting dynamic picture which will be used by the agency in an online marketing campaign.
Method
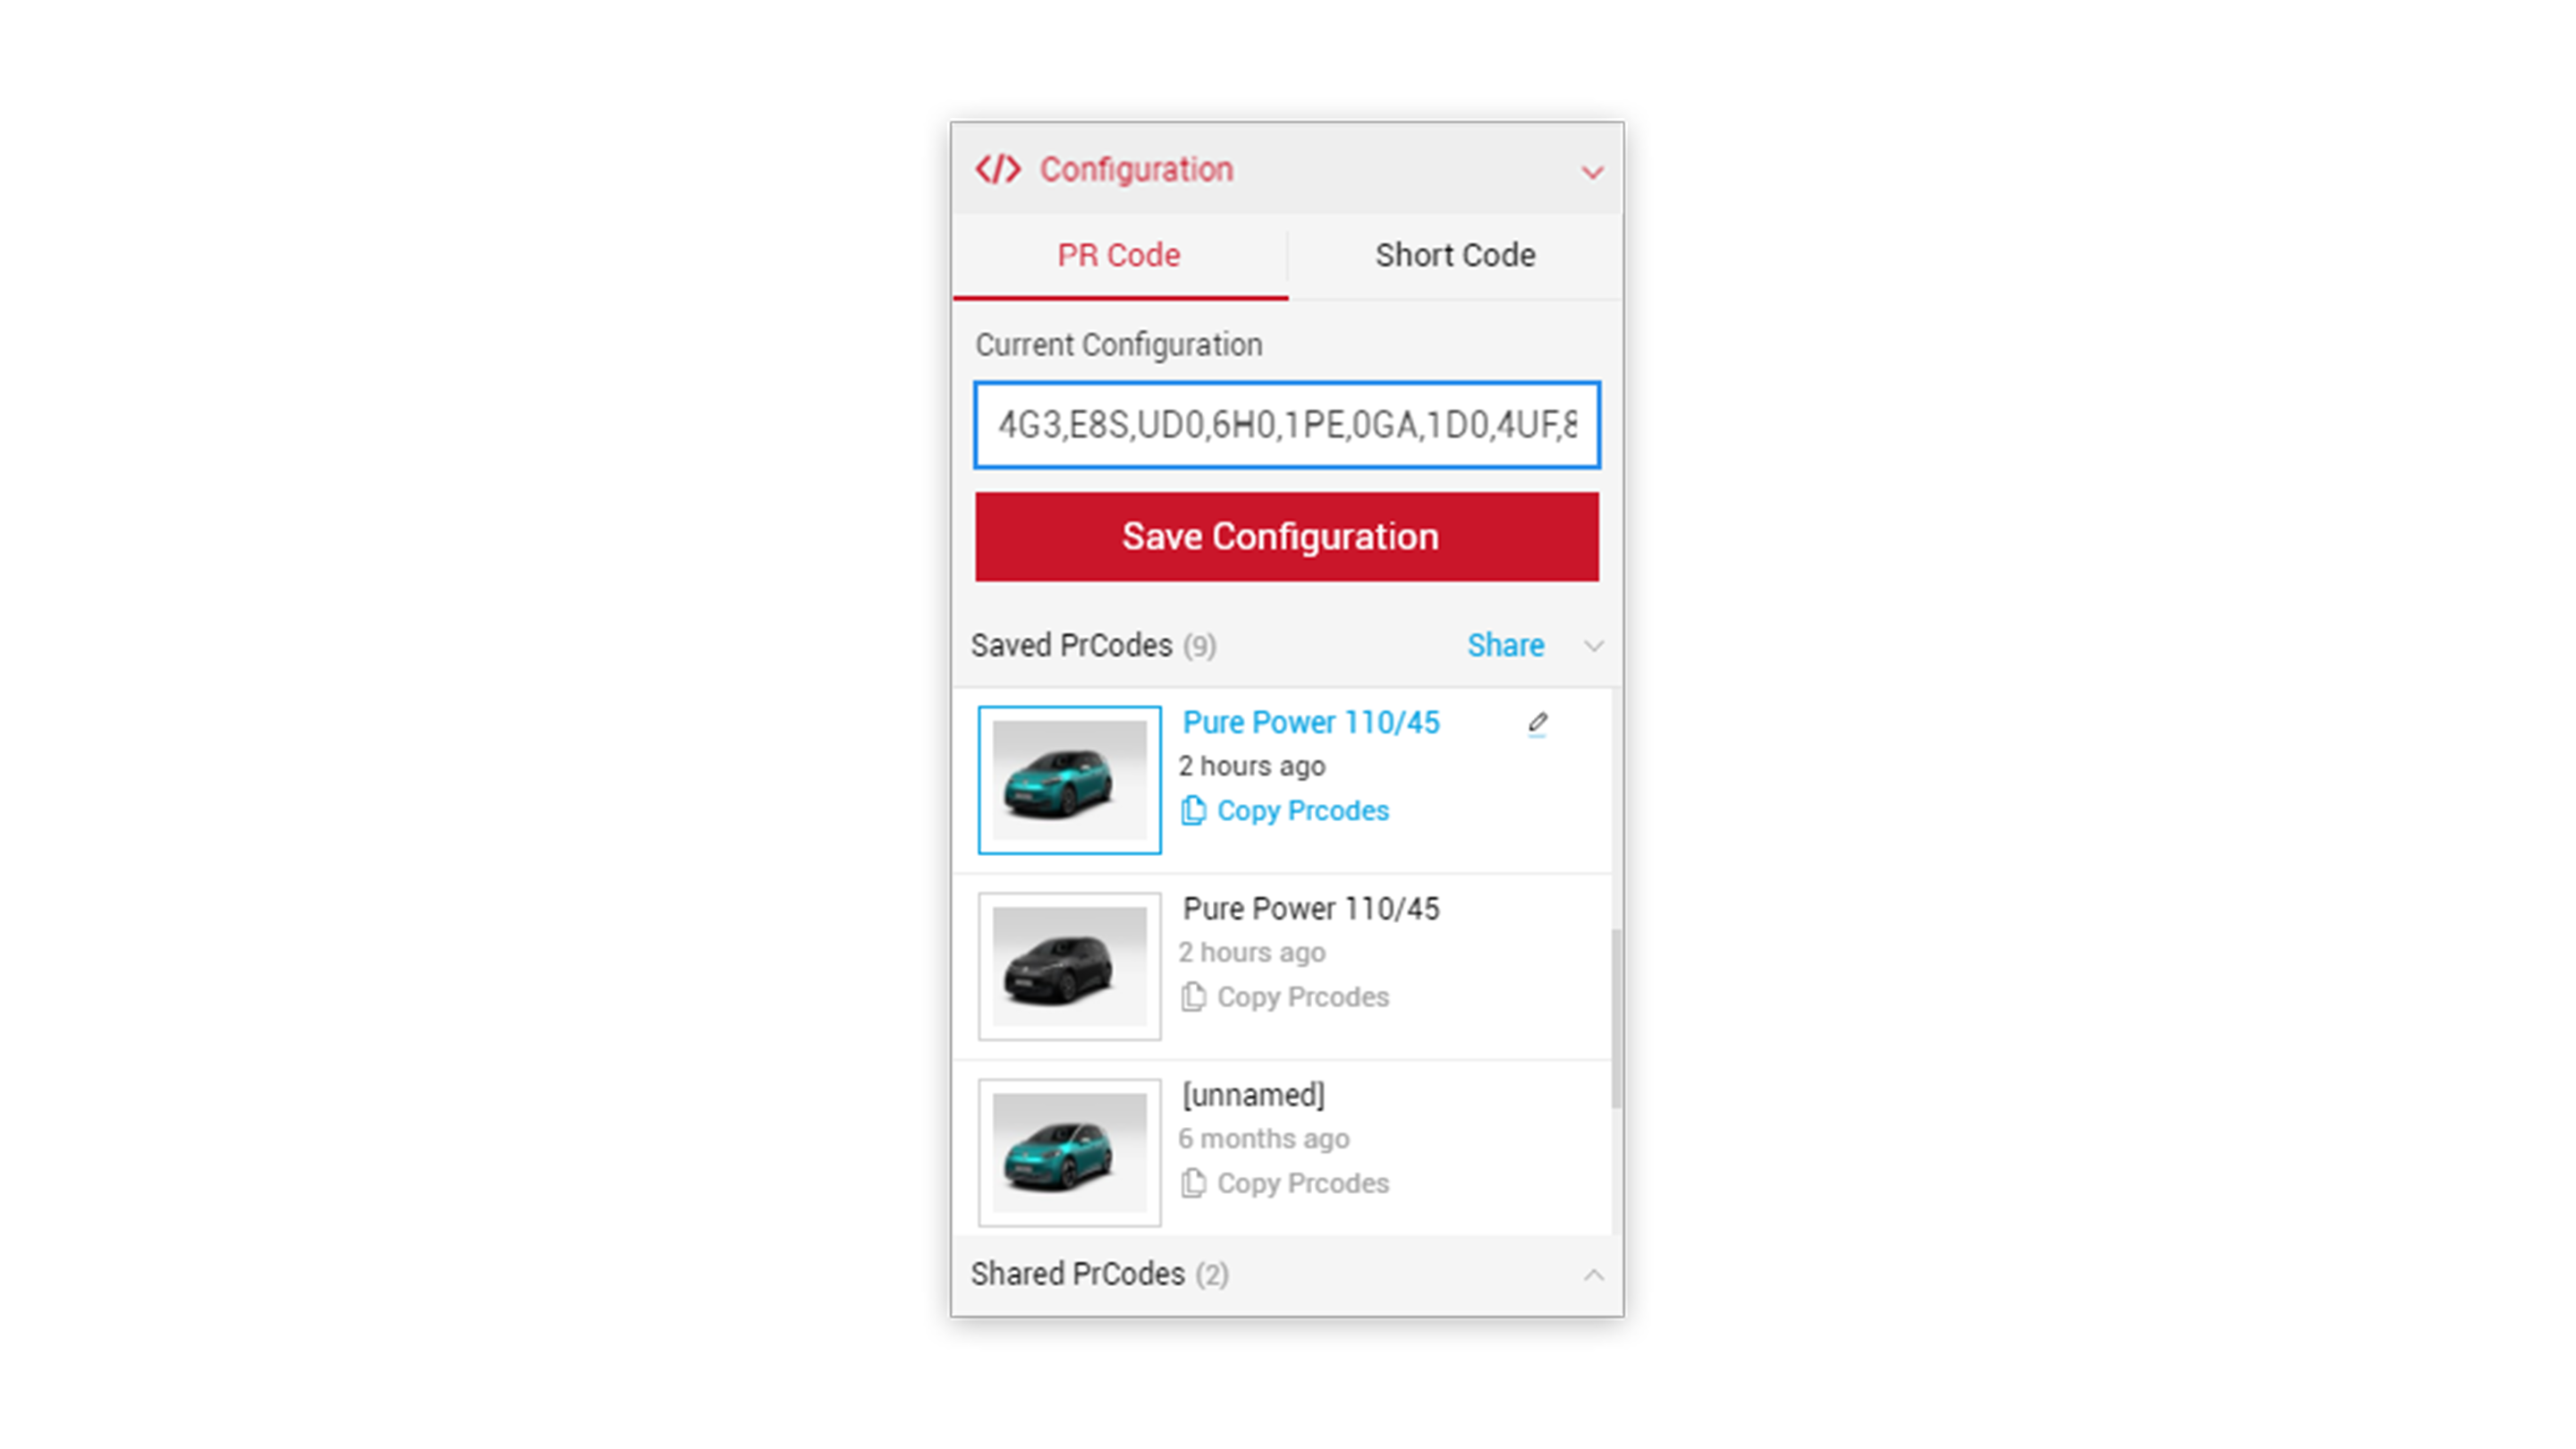
1 Copy and Paste your PrCodes into the PrCode Configuration tab. Click on Apply and the car will change to your own configuration. Make sure to the click the Save Configuration button so you have it stored in the Saved PrCodes menu.
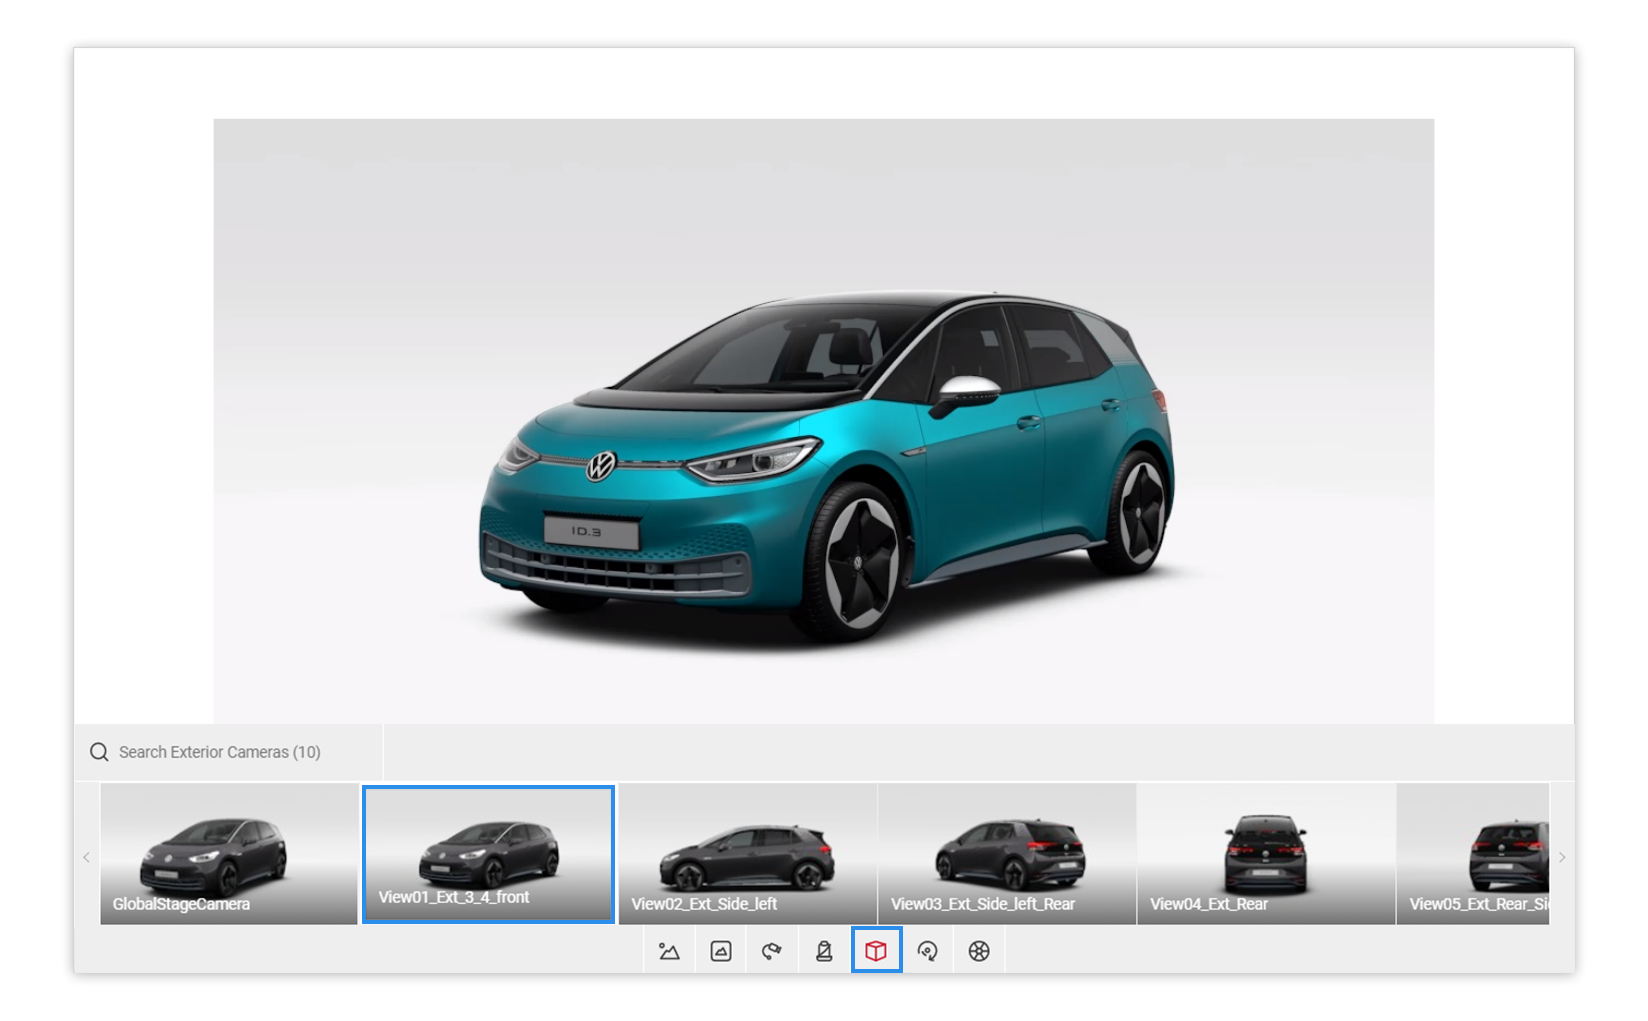
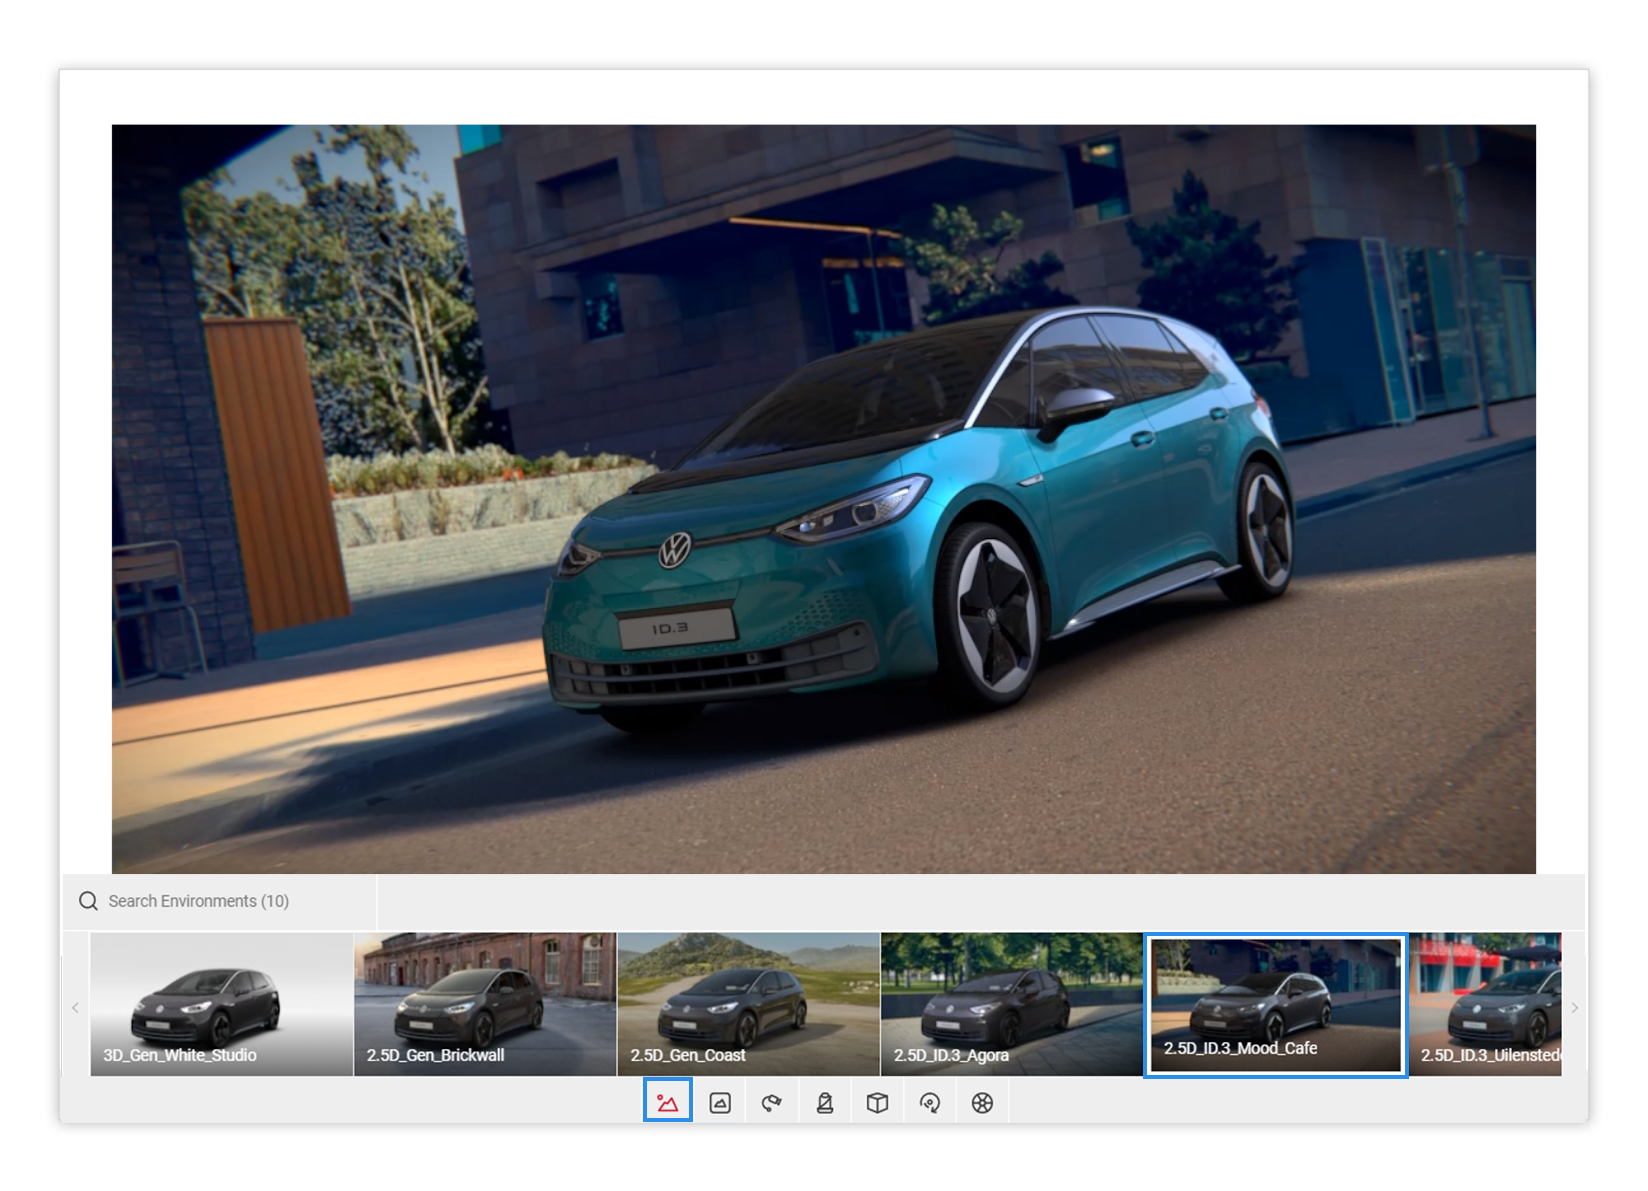
2 Click on the Exterior Camera icon within the Controls menu and select the Exterior 3/4 View Camera to get started.
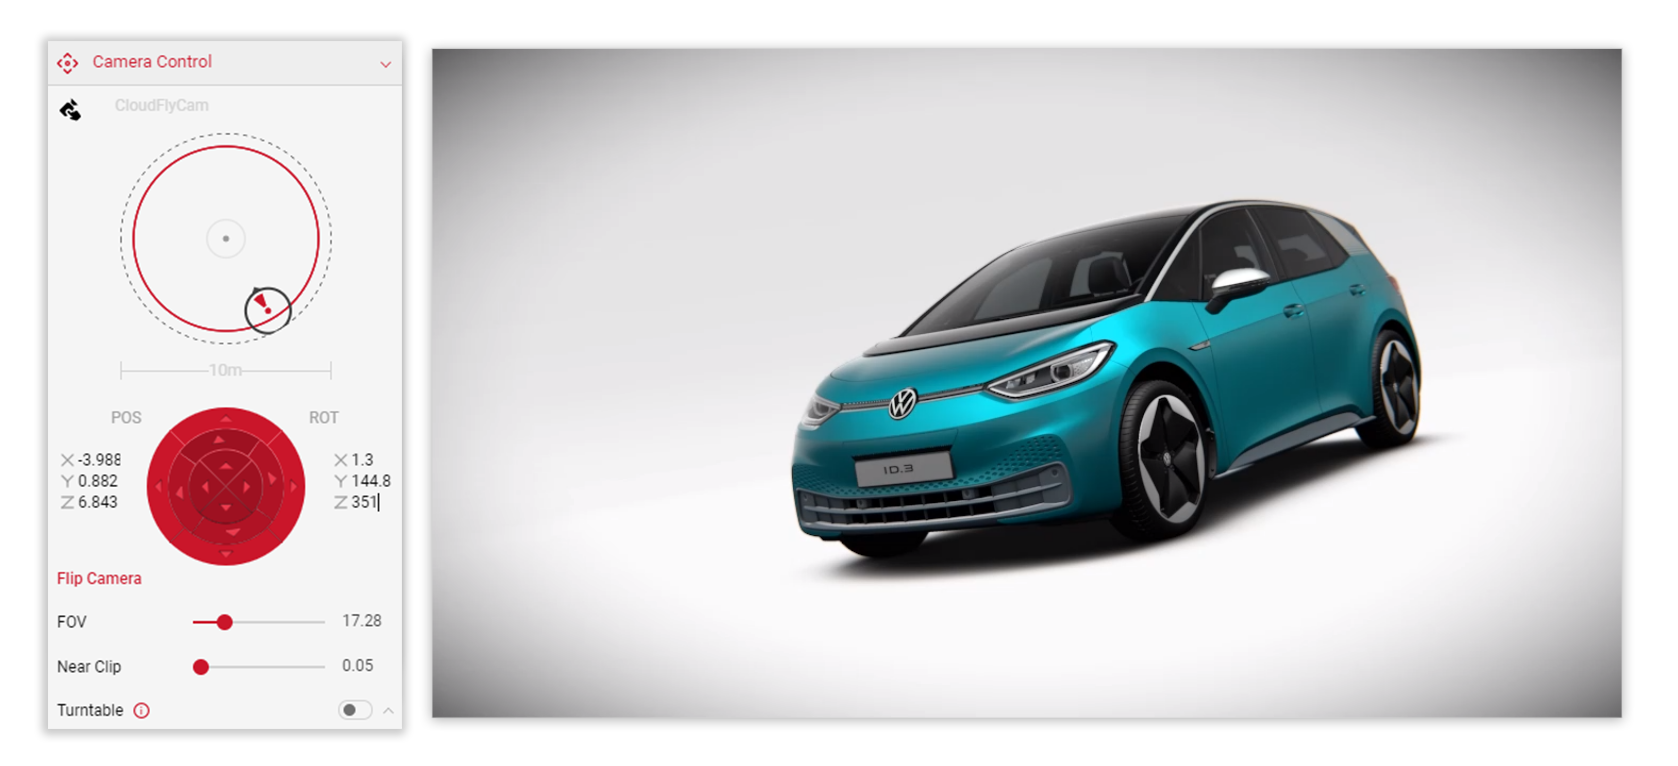
3
Using the base camera angle to work from, click the Flycam icon and start creating the dynamic shot using the Camera Control menu. Using your mouse, manipulate the camera in the Viewport and set up the picture.
You can also use the following keyboard keys to manipulate the camera position:
W, A, S, D - Translating the camera position L, J, K, I - Rotating the camera position
E - Translates camera Up Q - Translates camera Down U - Tilts camera Left O - Tilts camera Right
Tutorial Tip
Always remember to save your camera. In the Camera Configurations dropdown add a name for the camera and click the Save Camera button. Should you change anything in the Viewport, you can save your changes to the camera at anytime.
[bullet:4] In the Controls menu, we will now select the environment icon and choose the appropriate environment for the picture creation (Mood Cafe in example).
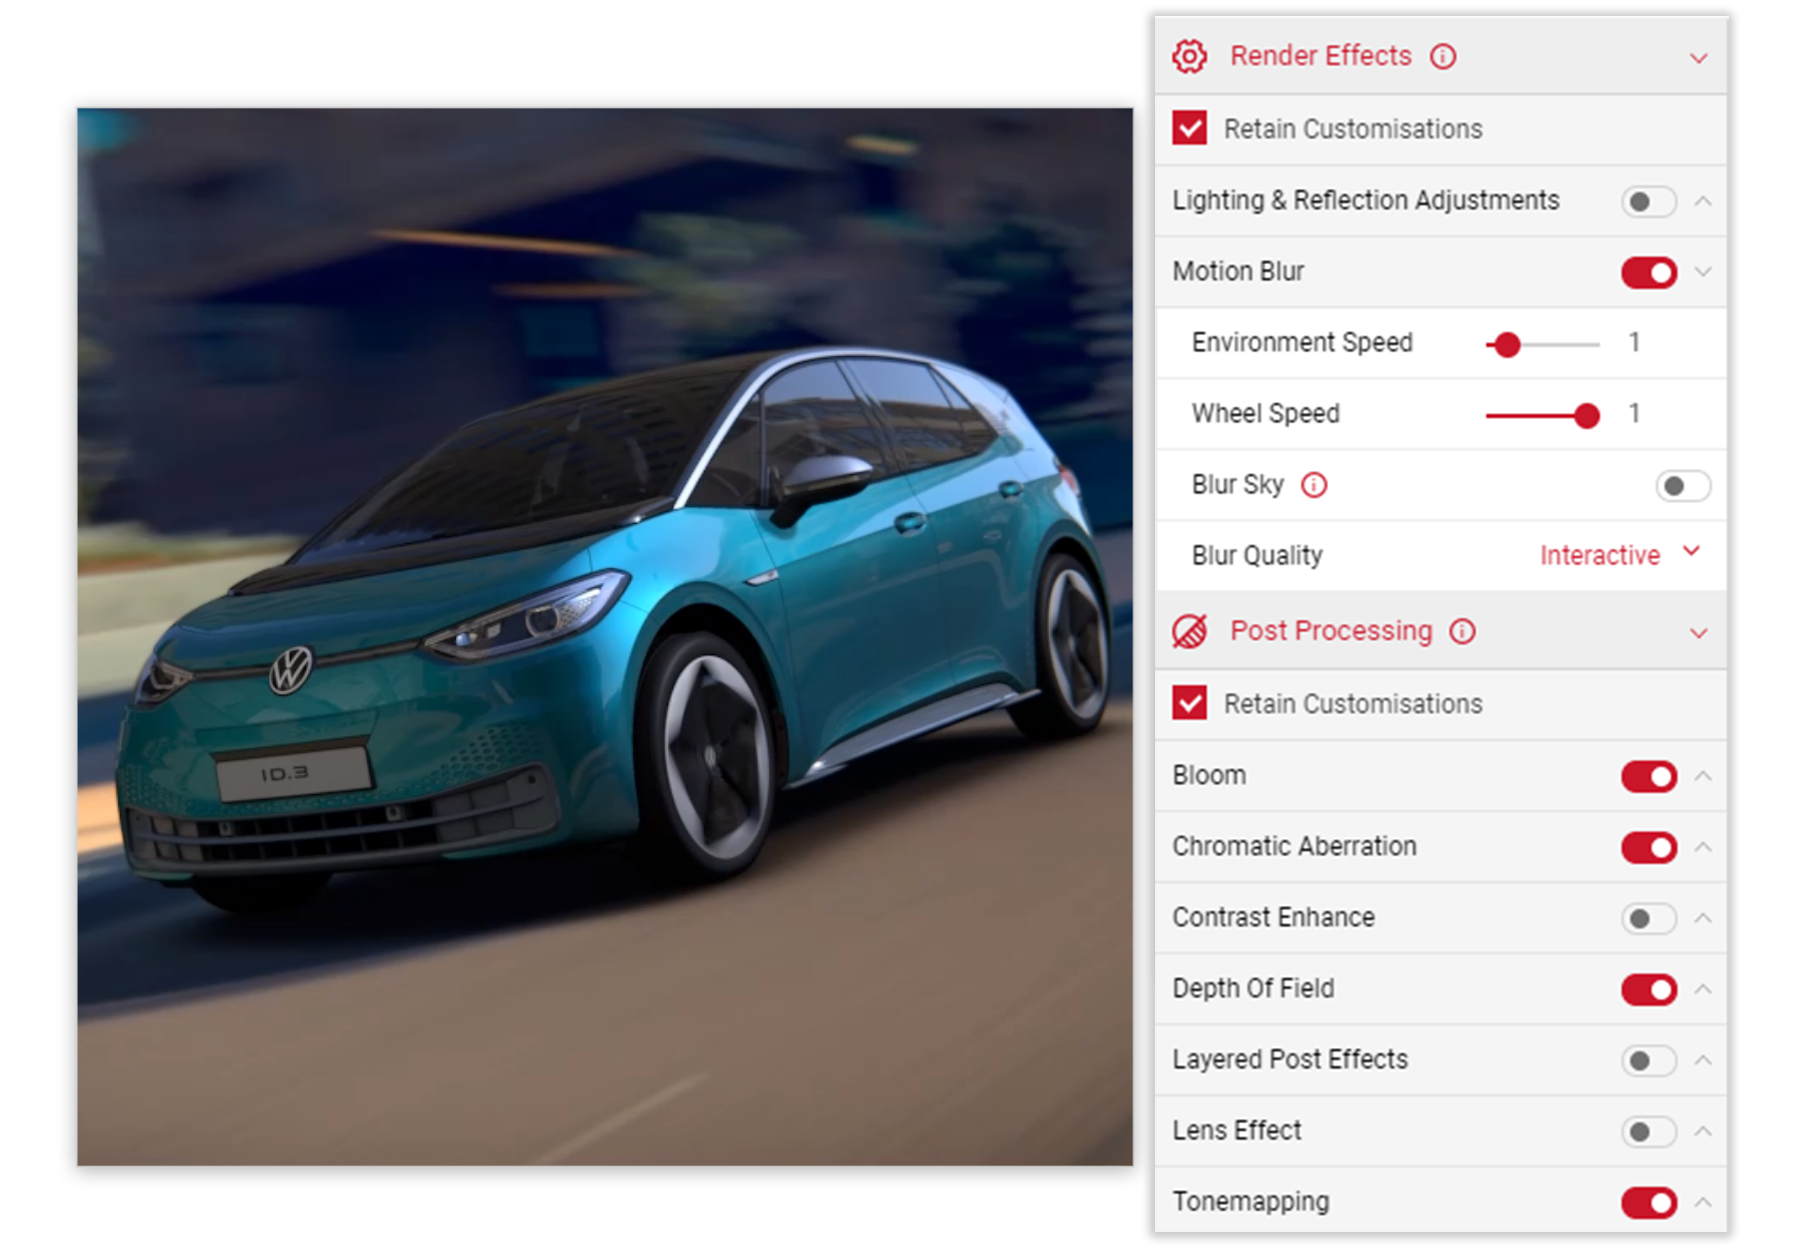
5 Click the Render Effects tab in the Output menu and select the Motion Blur feature. Experiment with the right settings to create the motion blur effect on the car (wheel speed) and environment (environment speed).
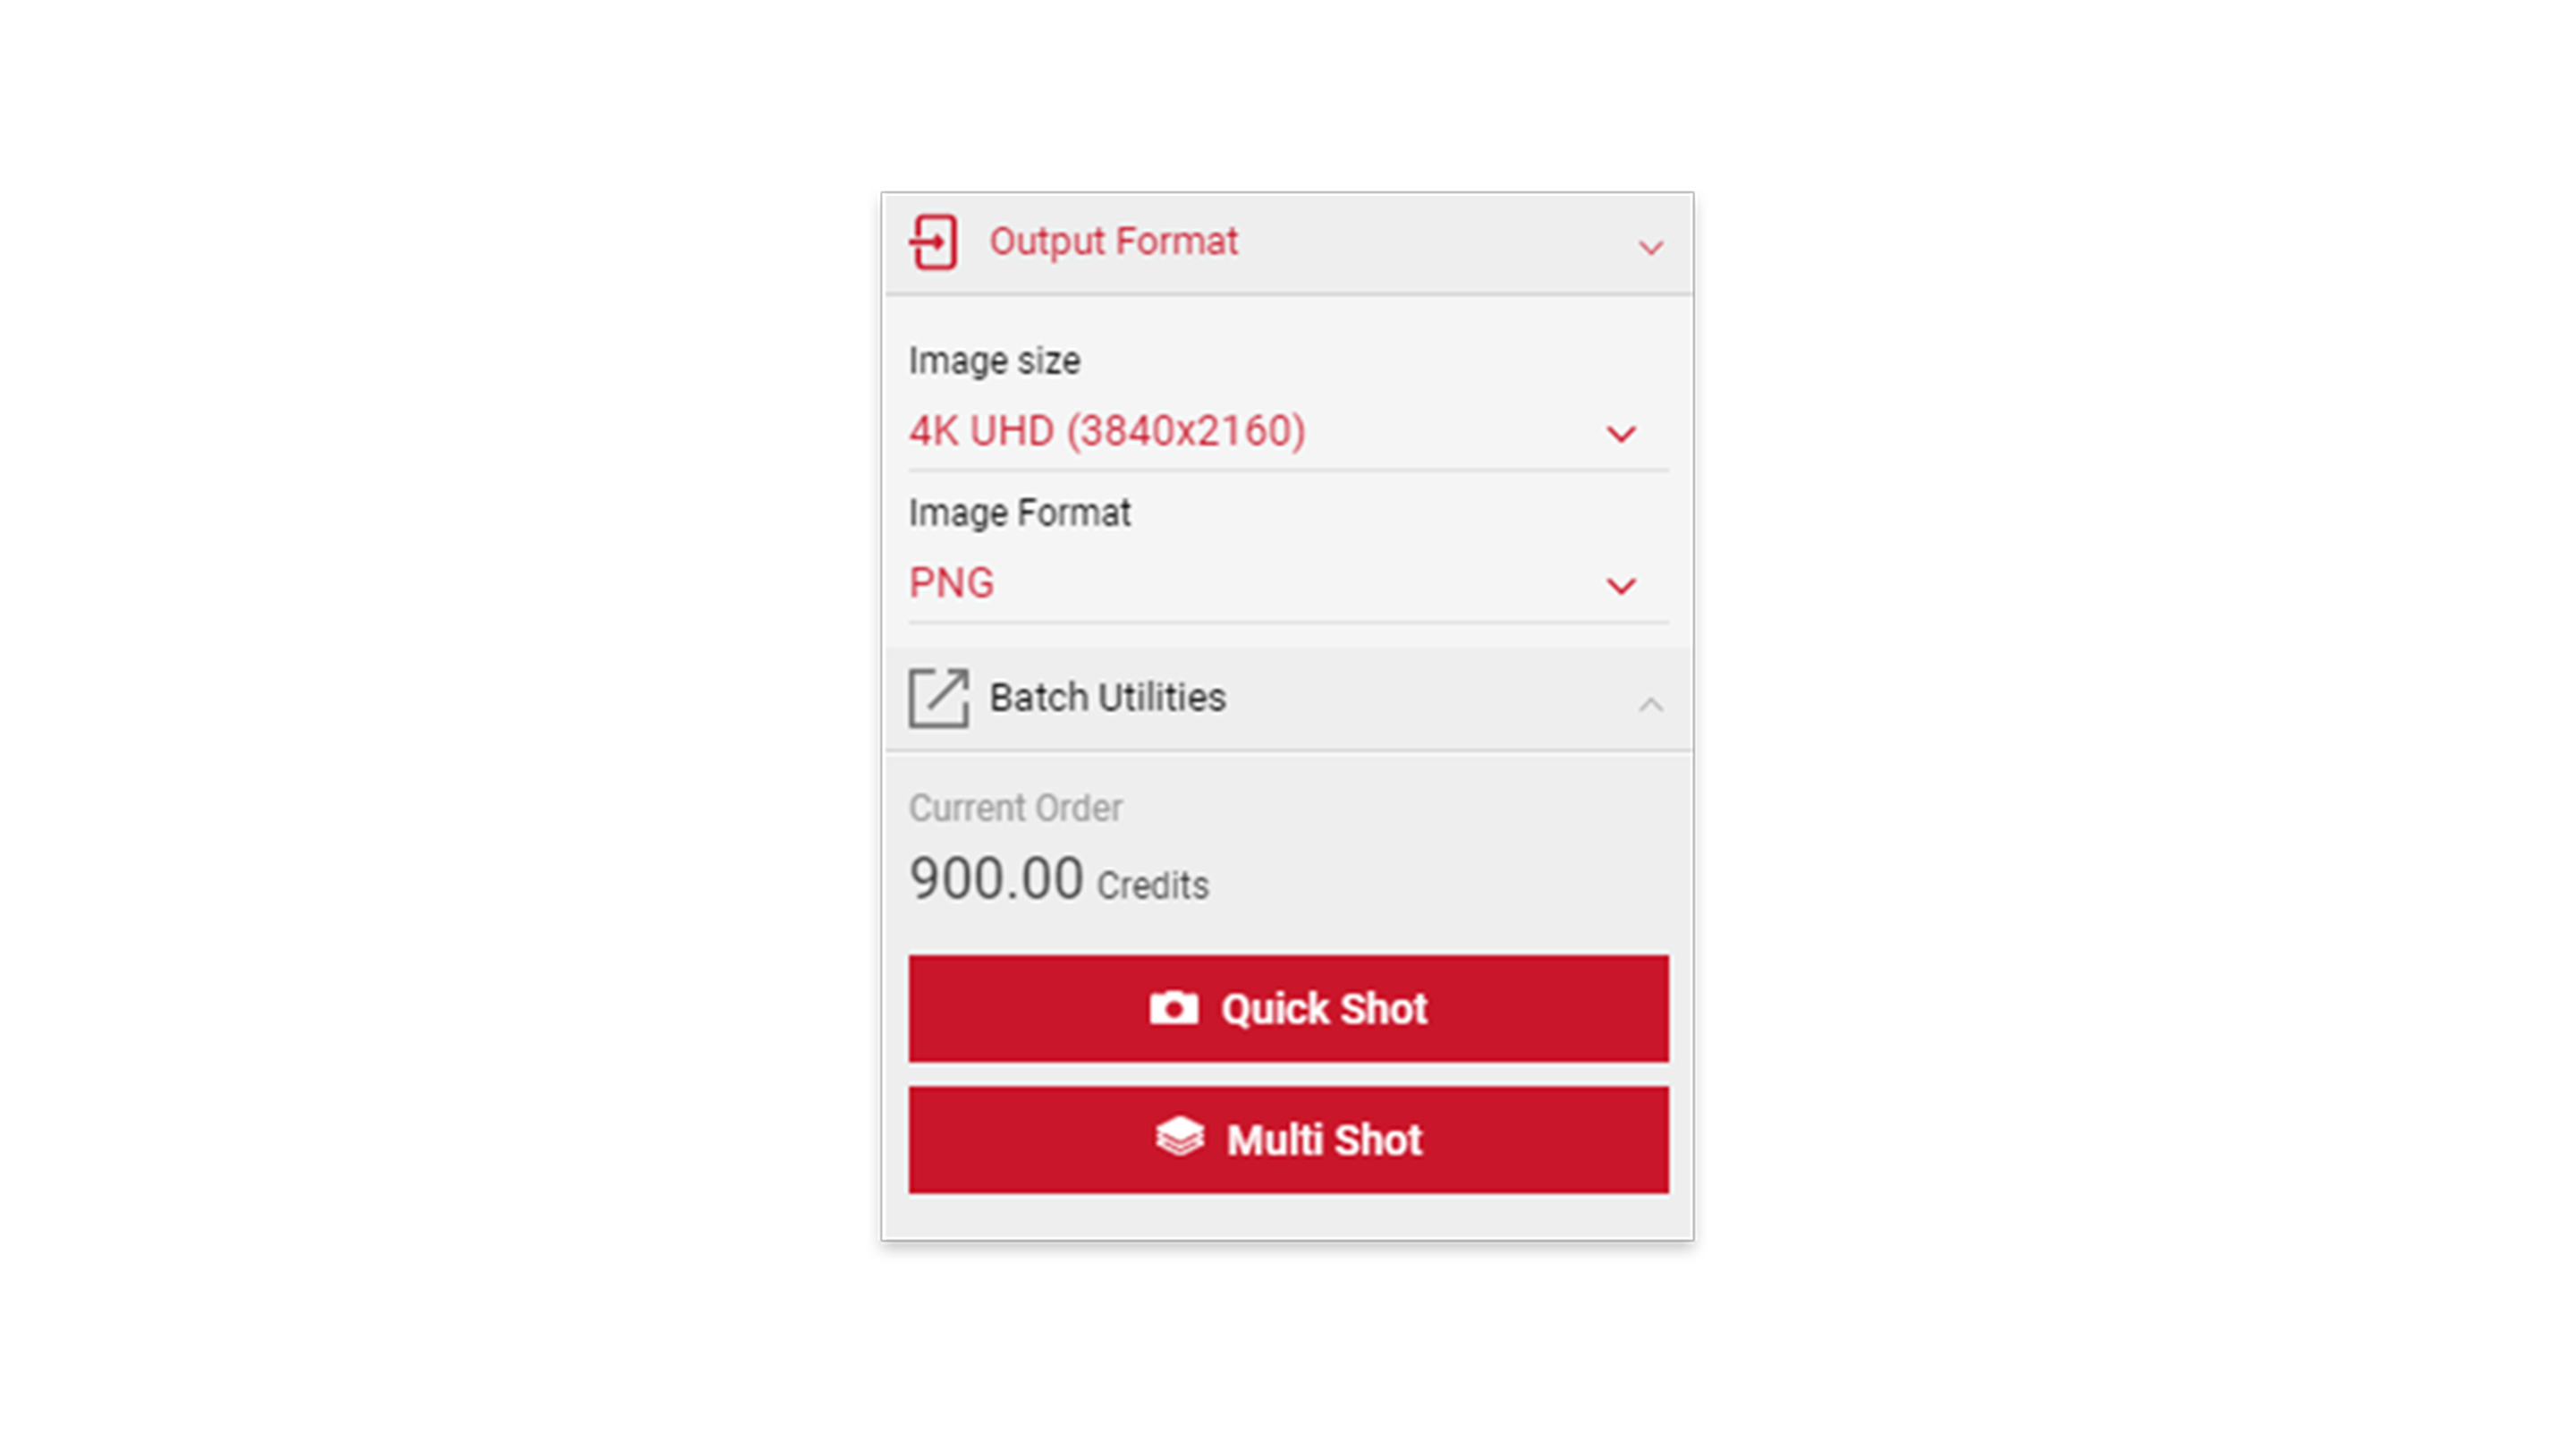
6 When the picture is ready to be ordered. Set the Output Format menu to 4K and PNG image format, then click the Quick Shot button for it to be processed.